
Once we have the metadata ready in the repository, the next step is to add what you have set up in Fielo as well. For this example, we will create a library with the following configurations:
- 1 Behavior (Case behavior)
- 1 Action (Close Case action)
- 1 Program model (Callcenter program)
- 3 incentive models
- Close High Priority Cases on time (promotion model)
- Close Low Priority Cases on time (promotion model)
- Close Medium Priority Cases on time (promotion model)
- 3 incentive templates
- Close High Priority Cases on time (each time incentive template)
- Close Low Priority Cases on time (each time incentive template)
- Close Medium Priority Cases on time (each time incentive template)
Save Your Program as a Model
To add the program into the package, we save it as a model and add it inside the library that we are going to create. For that, follow the steps below:
- Navigate to the Fielo Platform and, in the Programs tab, click on the desired program.
- On the program details, click on the Save as Model button.
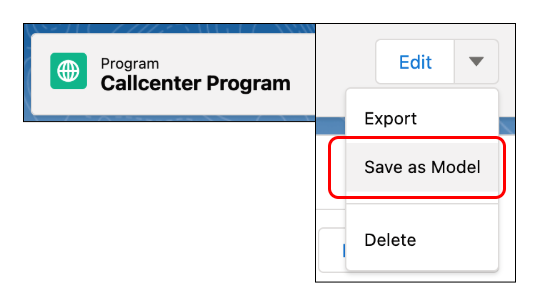
Save as Model button in Programs
- A form will appear asking for Name, Description, and Category. Set as the following:
| Field | Value |
|---|---|
| Name | Callcenter Program model |
| Description | Callcenter Program model |
| Category | Miscellaneous |
- Hit Save.
- After you receive the confirmation, go to the Tools tab, access the Libraries section, and the FieloLocal library.
- Within the library, you are able to check that now there is a model named "Callcenter Program model".
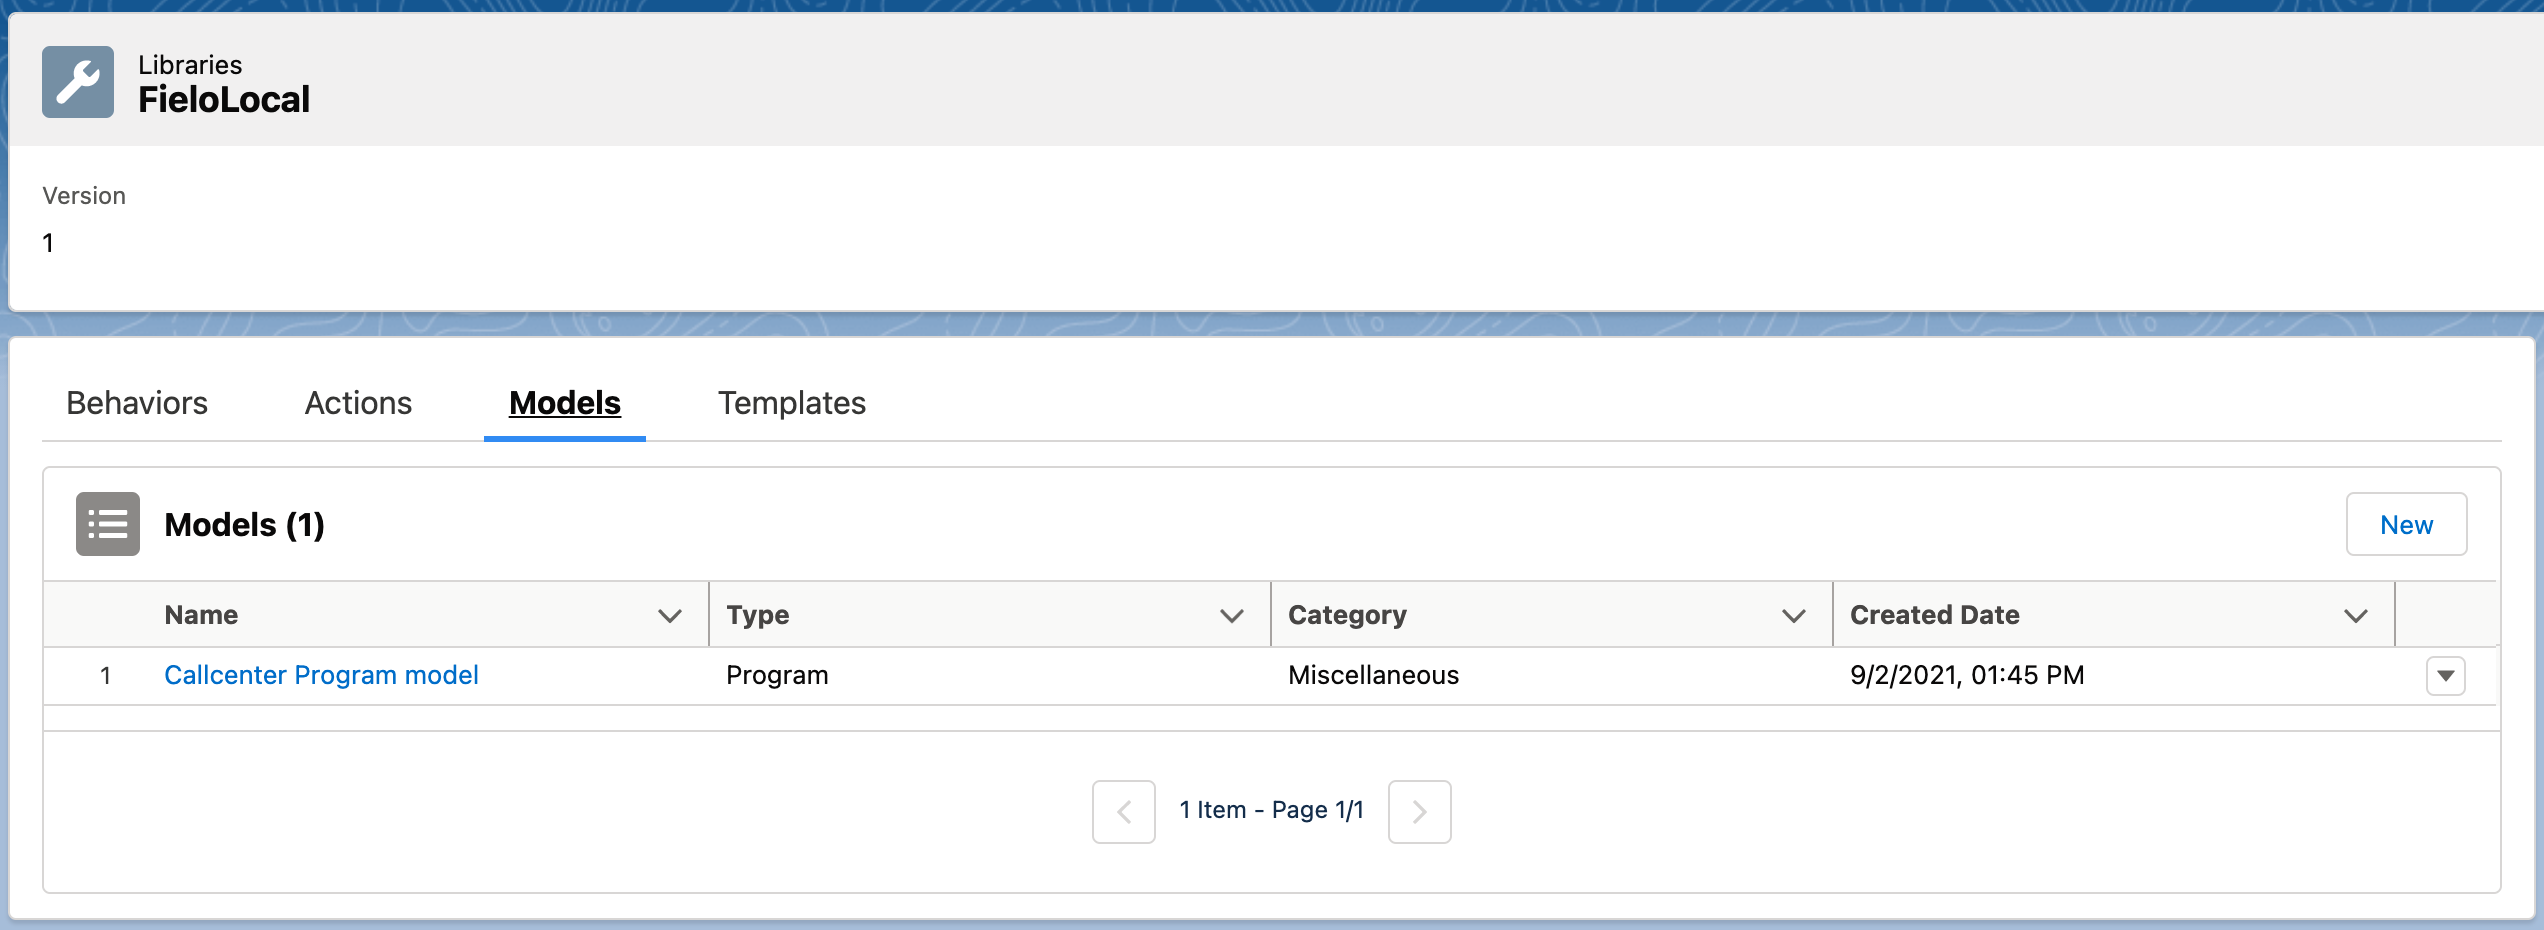
Accessing the FieloLocal library
Save Your Incentives to Export
In order to add the incentives that you have in your program to the external package you are creating, there are two options:
- Incentive Template: this option leverages the Quickstart Incentive, a tool that makes it easier for you to create incentives within Fielo. When using the Incentive Template, you can edit whatever you want in it before inserting it into your program.
- Incentive Model: when using the Incentive Model, you can only edit the incentive's name before inserting it and all its dependencies into your program.
Incentives template is a new Fielo Winter '22 release feature, and supports a limited number of Fielo features. If you need to add complex incentives to the library, we recommend you use incentive models instead.
Let's see how to save the incentives as both types.
Save Your Incentives as Models
- To save an incentive as a model, navigate to the Incentives tab and access the incentive previously created through the standard Incentives feature.
- Within the dropdown menu, click on Save as Model.

Save as Model button in Incentives
To simplify, we are using the same name and description for the 3 incentives that we have. We end up with 3 new models in the Fielo Local library:
| Name | Category | Description |
|---|---|---|
| Close High Priority Cases on time | Miscellaneous | Close High Priority Cases on time |
| Close Low Priority Cases on time | Miscellaneous | Close Low Priority Cases on time |
| Close Medium Priority Cases on time | Miscellaneous | Close Medium Priority Cases on time |
- After you save all incentives as models go to the Tools tab and once again access the FieloLocal library. Check there that now you have 3 new models:
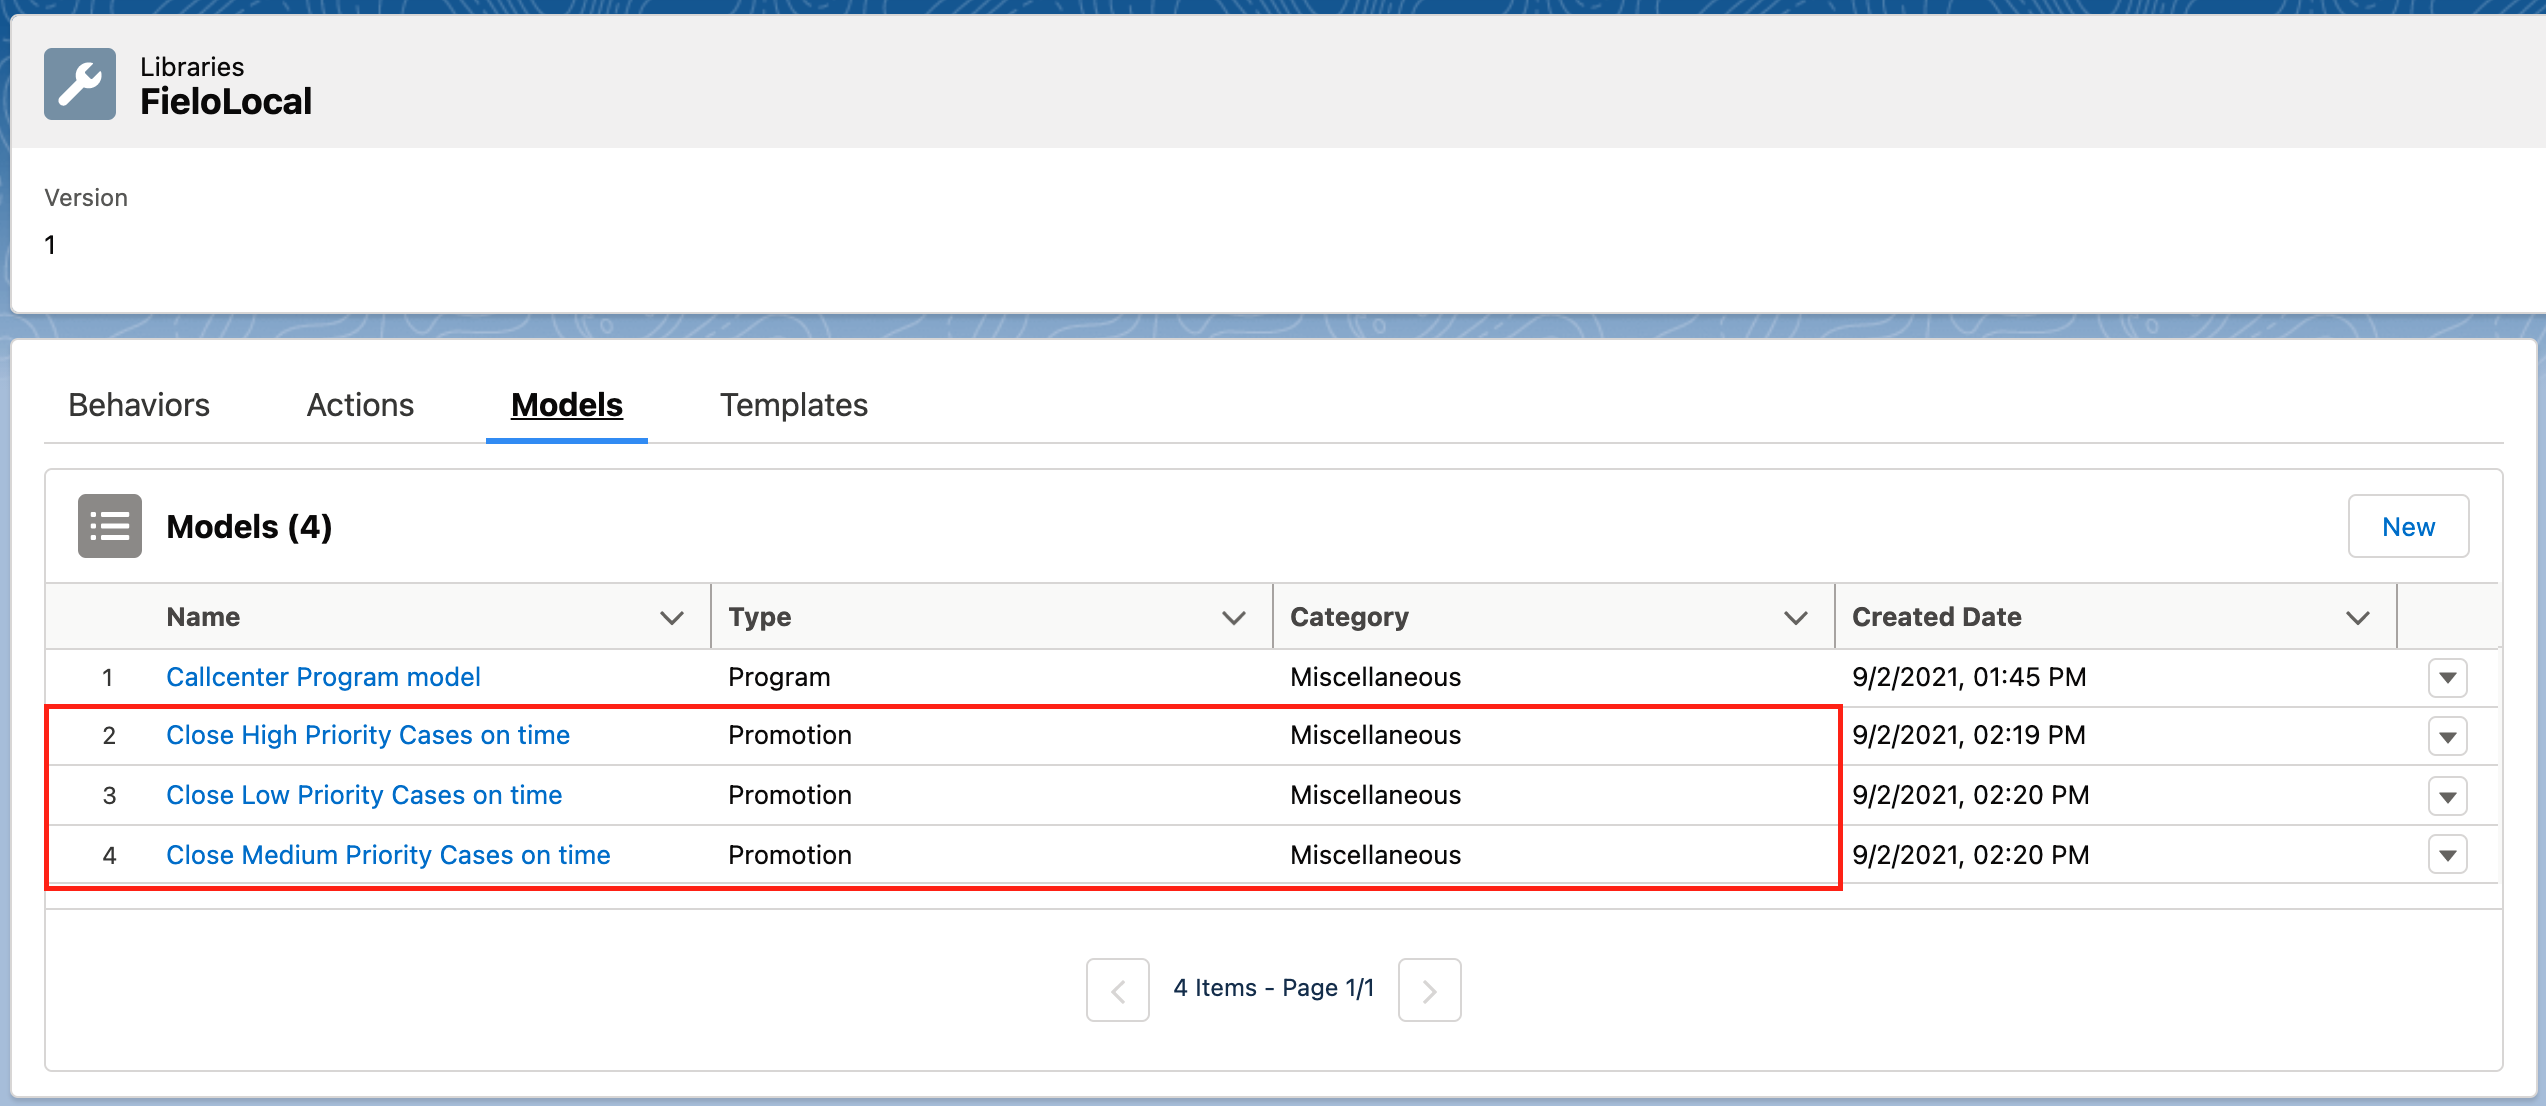
Models in the FieloLocal library
Save Your Incentives as New Behavior
To save your incentives as a new behavior template, you will first need to create it on the platform, which can be done through the standard Incentives feature or through the Quickstart. From there you can choose which actions to incentivize, conditions, segments, and rewards.
Note: saving an incentive as a new behavior also means that the next time you open the Quickstart, this incentive will appear as a template option. If you change the original incentive, it doesn't affect the existing template.
Creating from Incentives
- Go to the Incentives tab.
- Click on New to create a new incentive (promotion or challenge).
- Follow the steps to create the incentive.
- To save an incentive as a template, navigate to the Incentives tab and access the promotion or challenge.
- From the incentive's page, click on the and, next, on Save as New Behavior. Enter a name for it and click on Save.

- After you save all the desired incentives as templates, go back to the FieloLocal library in the Tools tab. Over there, you can check that now you have 3 new templates:
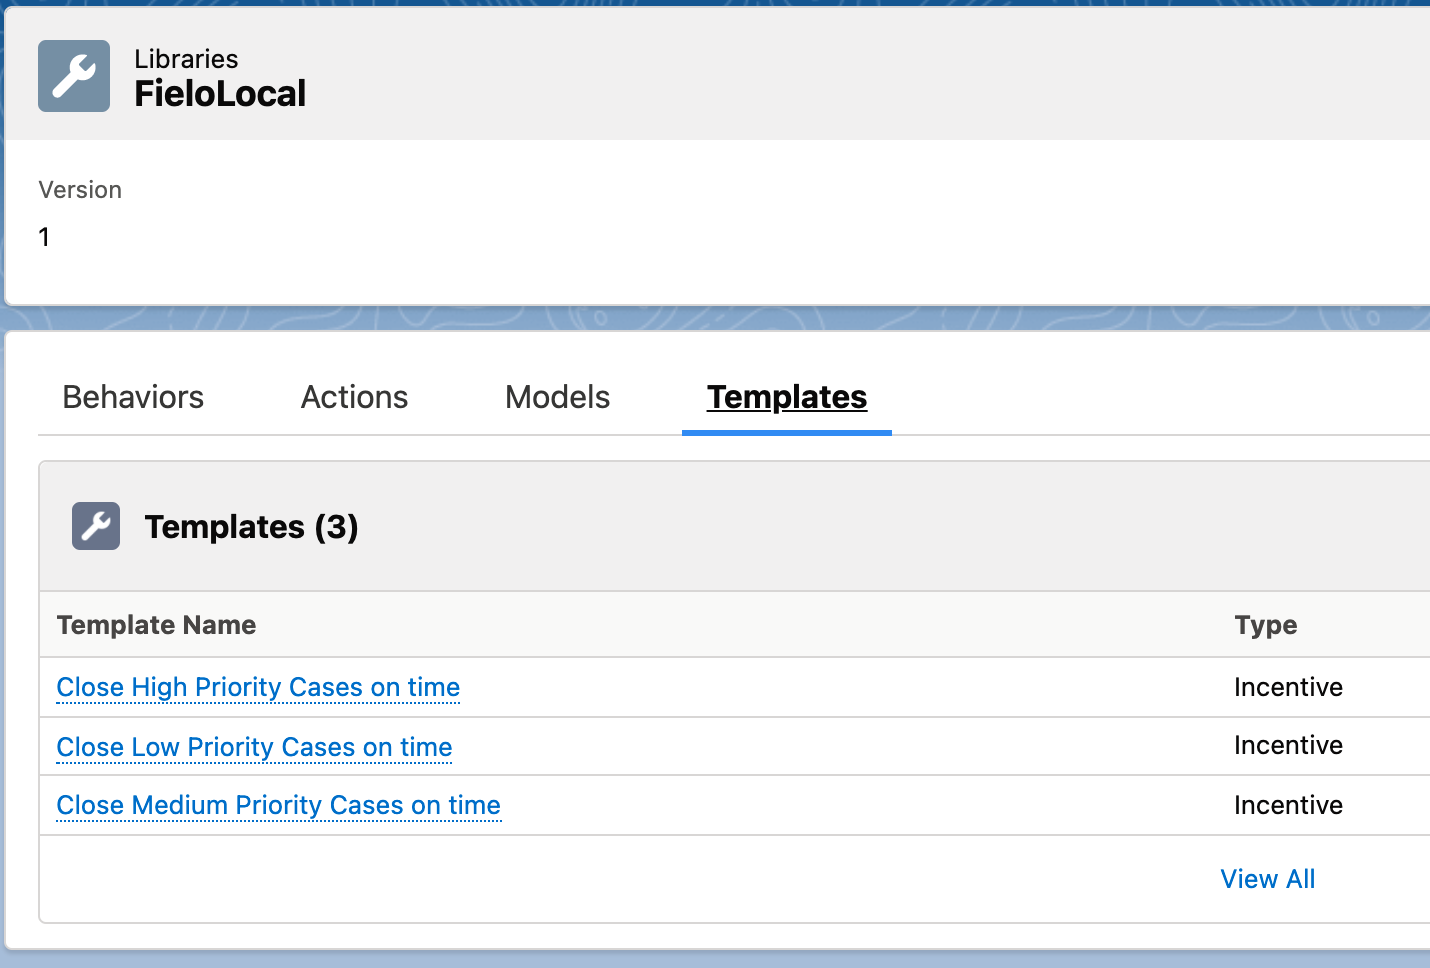
Templates within the FieloLocal library
Save as New Behavior RestrictionsTo save an incentive as a behavior, pay attention to these details:
- Rules must reward Always and all the rules in the same promotion must have the same configuration (same incentivized action, criteria, and rewards).
- Missions must be Based on a fixed metric, use the Just one reward, one or more times rewarding scheme, and all missions in the same challenge must use the same criteria. Missions cannot use the leaderboard.
- Missions and rules criteria must use the All conditions are true option and cannot be based on Lookup fields.
- Missions must have the Start and End date empty or the same dates as the Challenge.
- Challenges must have a Global subscription mode.
- Challenge rewarding cannot be used.
Creating from Quickstart
- Go to the Home tab.
- From the Command Center, enter the Incentives section and click on the ➕ sign to create a new incentive using the Quickstart tool.
- Follow the steps to create the incentive.
- To save an incentive as a template, click on the drop-down menu in the Command Center and click on Save as New Behavior.

- After you save all the desired incentives as templates, go back to the FieloLocal library in the Tools tab. The templates will be saved there.
An advantage of creating the incentives through the Quickstart tool is that they are completely ready to be saved as templates. You don't need to worry about possible constraints as it happens when they are created from the standard Incentives feature.
Save Your Levels and Segments as Templates
In order to add any custom level or segment that you have in your program to the external package you are going to export, you just need to use the Program Setup tool.
- Go to the Home tab and click on the ➕ sign to create a new program, or on Edit Program to edit an existing one.
- Navigate to the Levels or Segments step.
- Click on New to create a new level/segment or Edit to edit an existing one.
- Check the Save this level/segment to use on other programs option.
- Click on Save.
Done! Your segment or level will be saved as a template in your FieloLocal library, which you are going to export later.
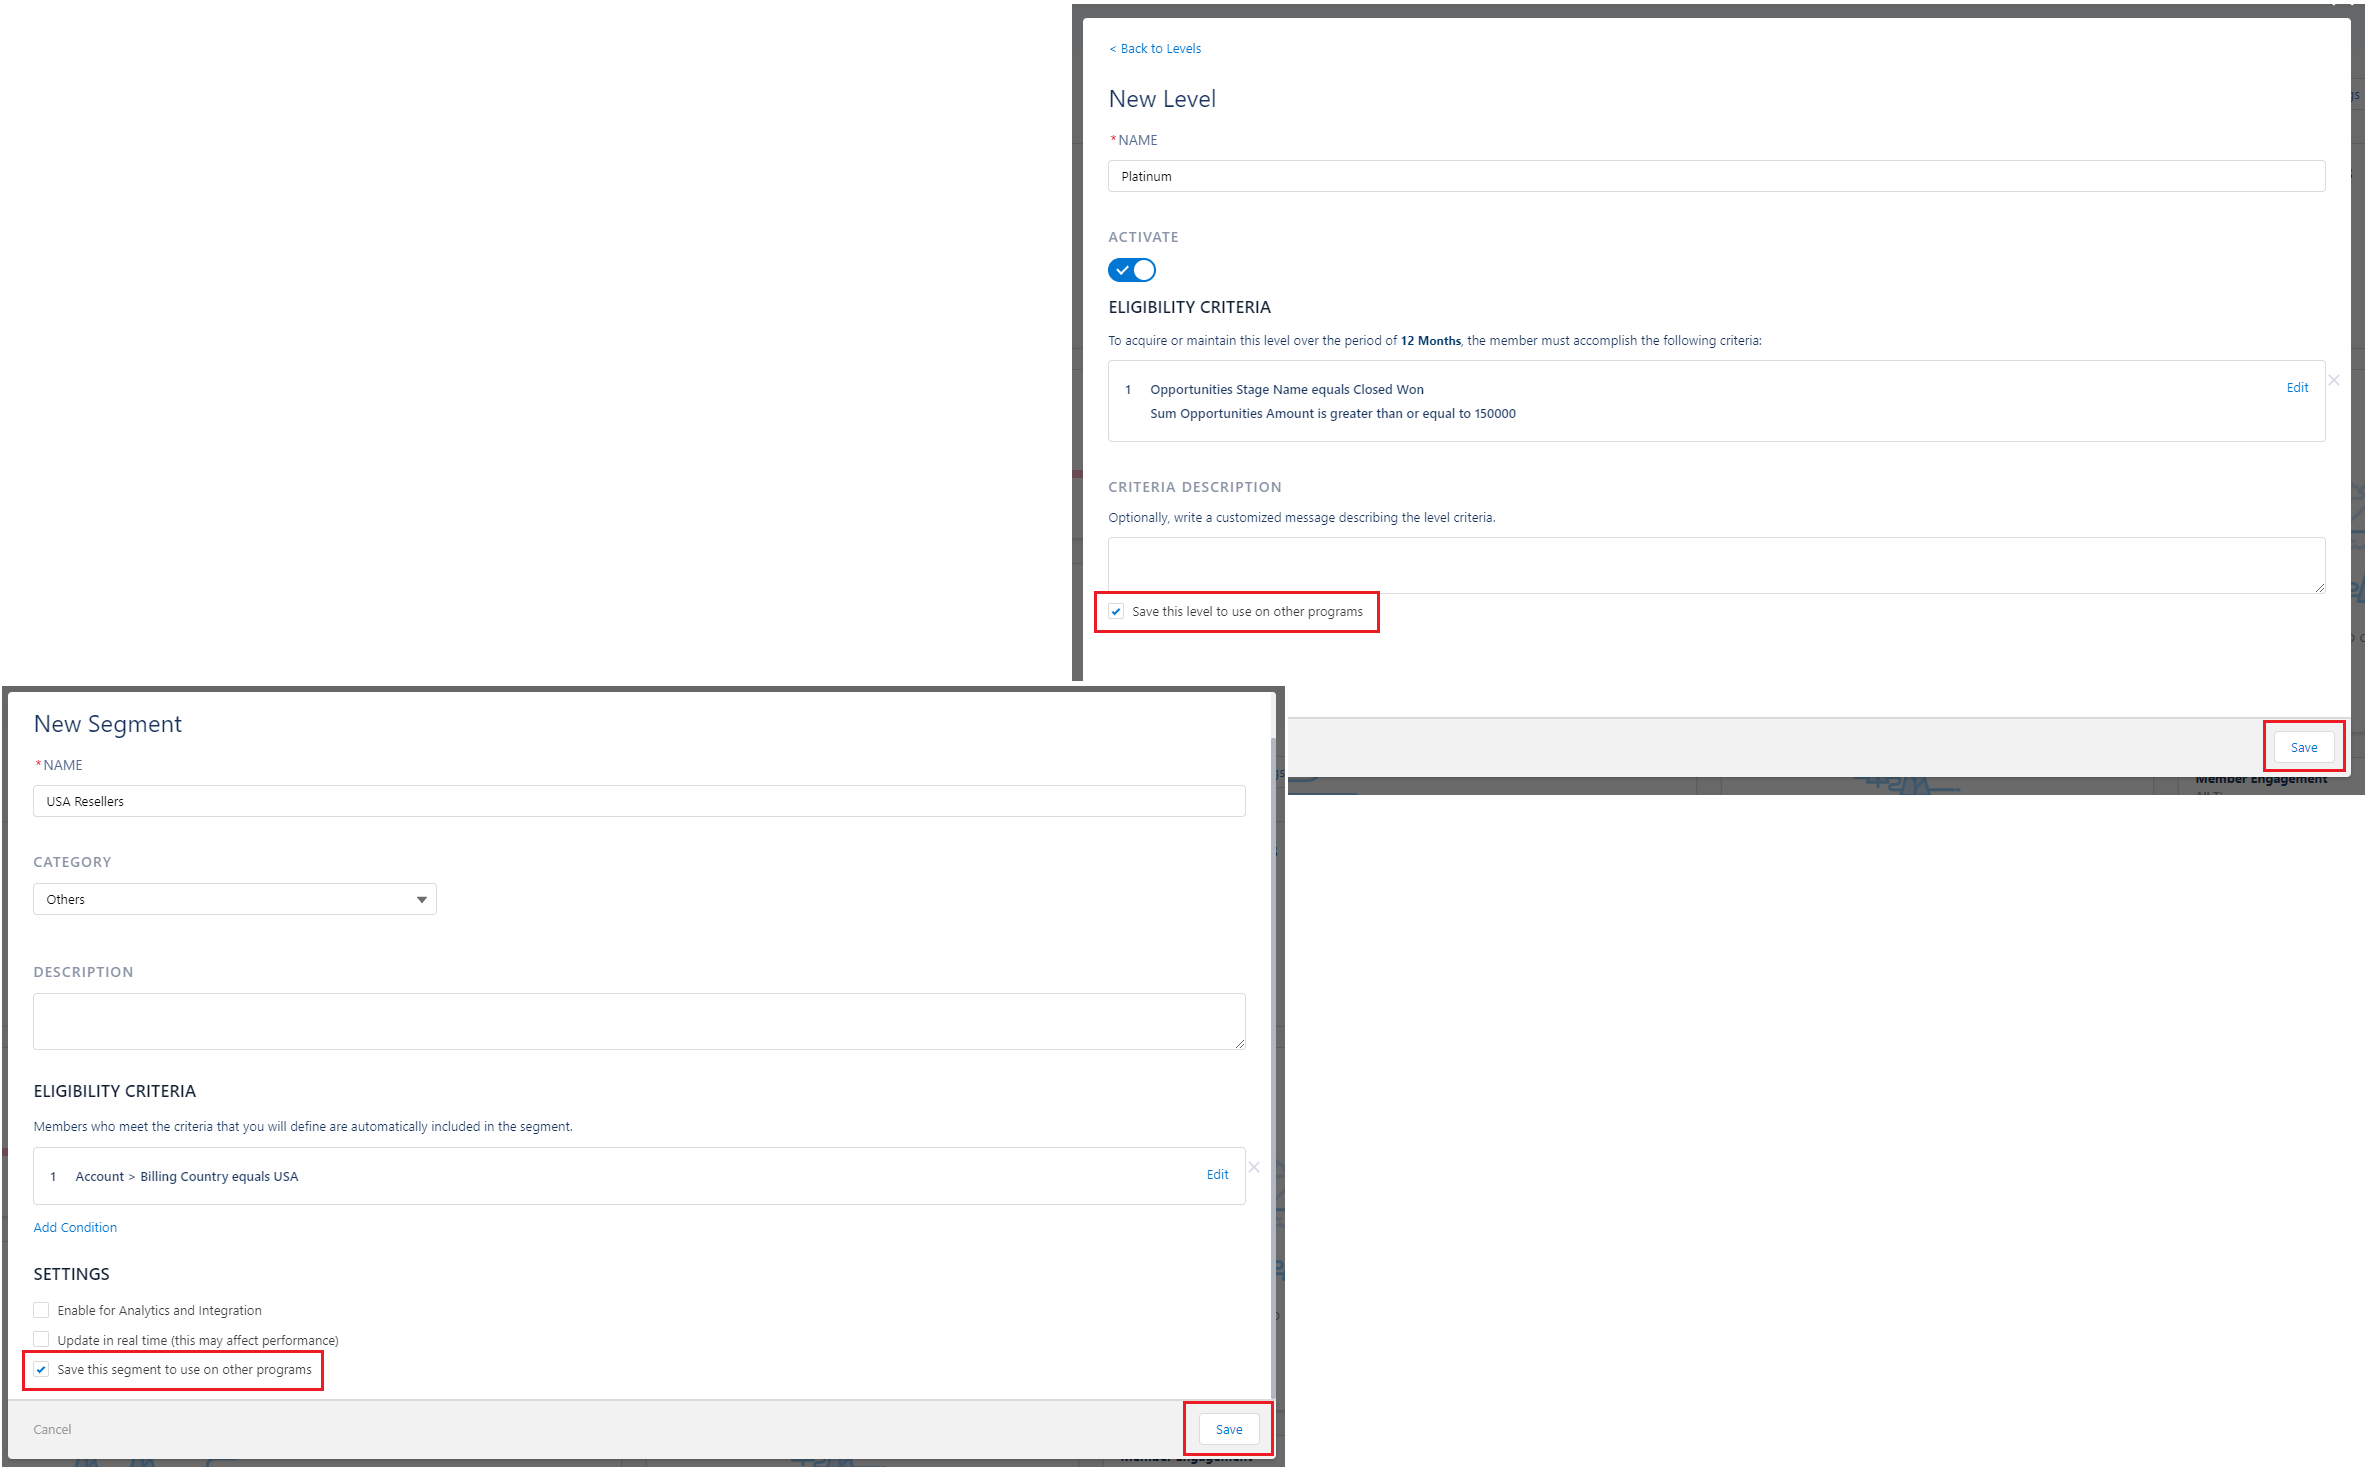
Save segment/level as a template
Export Your Library
Now we are almost ready to create our own Fielo Library. However, before that, we suggest you check that there isn't any configuration that is not required by our app in the entire Library.
For instance, since this Case App was created using the FieloPLT Winter 22, it automatically added the behavior and actions related to the Lead Object into the FieloLocal library. Once we are not using them, we may delete them.
- After you delete those configurations that are not needed, just click on Export.
- Name the library. In this tutorial, we will name this library "CaseLibrary".
- After you click Export, a JSON file will be downloaded. Save that for later, we will use it in the next step.
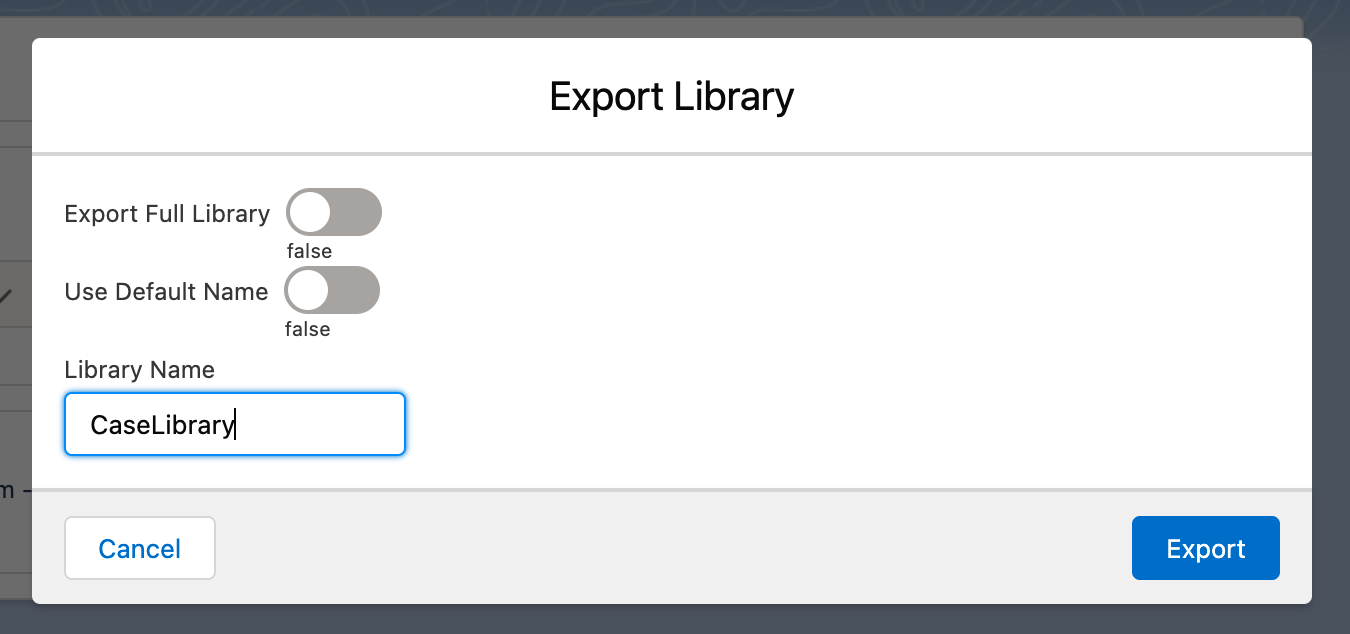
Exporting the library
Create a StaticResource and Add it to the Repository
With the exported file from the previous step, we are going to create a StaticResourse for your library. Follow these steps:
- Go to Setup > Static Resources in your Org.
- Click on New.
- Provide the values:
| Field | Value |
|---|---|
| Name | CaseLibrary |
| Description | FieloPLT-Library |
| File | JSON File exported in previous step |
| Cache Control | Public |
If you go back to the Tools tab in the Fielo Platform after you save it, you will see that it will appear as a Library. Do not activate it: it will conflict with the FieloLocal Library.
- Go back to your VSCode and run the following command line. This will retrieve the static resource and we will be able to add it to the GitHub repository using VSCode + Git.
sfdx force:source:retrieve -m StaticResource:CaseLibrary
Before moving on to the next steps, it might be interesting for you to check how you can enable the developer mode.