
Incentives: Challenges
Create and configure Challenges
Challenges are a way of encouraging Members to perform particular behaviors and drive engagement. Challenges can be addressed to different audiences (depending on Segmentation) within a specific time period and may go through a range of statuses along the way.
Challenges include one or more Missions, which may include Objectives.
Creating a Challenge
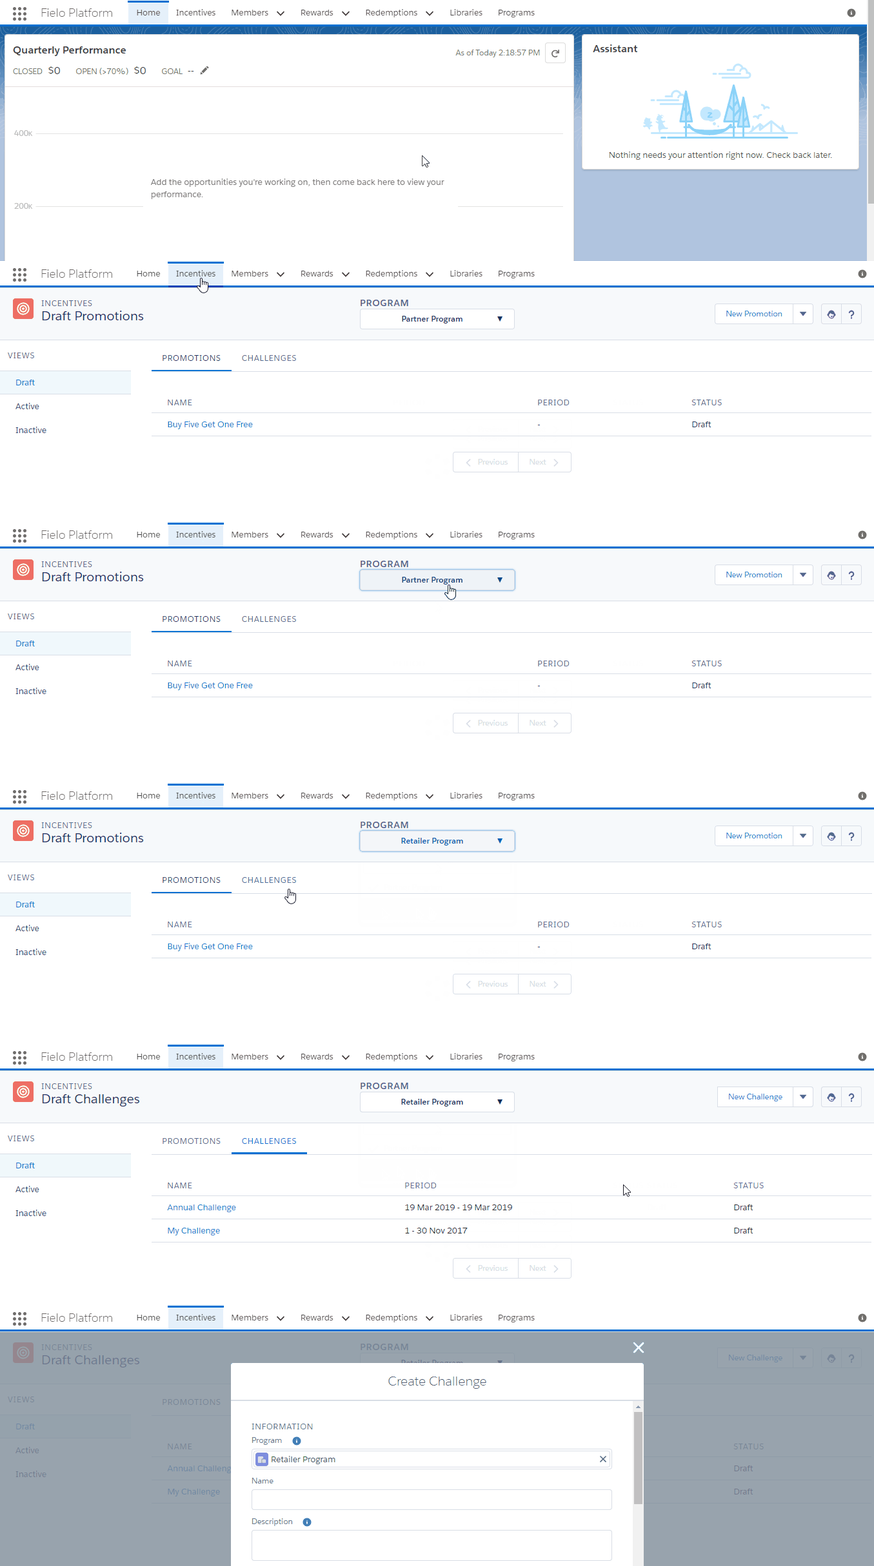
From Incentives, choose the Program you want to create a Challenge for from the menu. Then, select the Challenges subtab and click New Challenge.
Enter a Name and Description
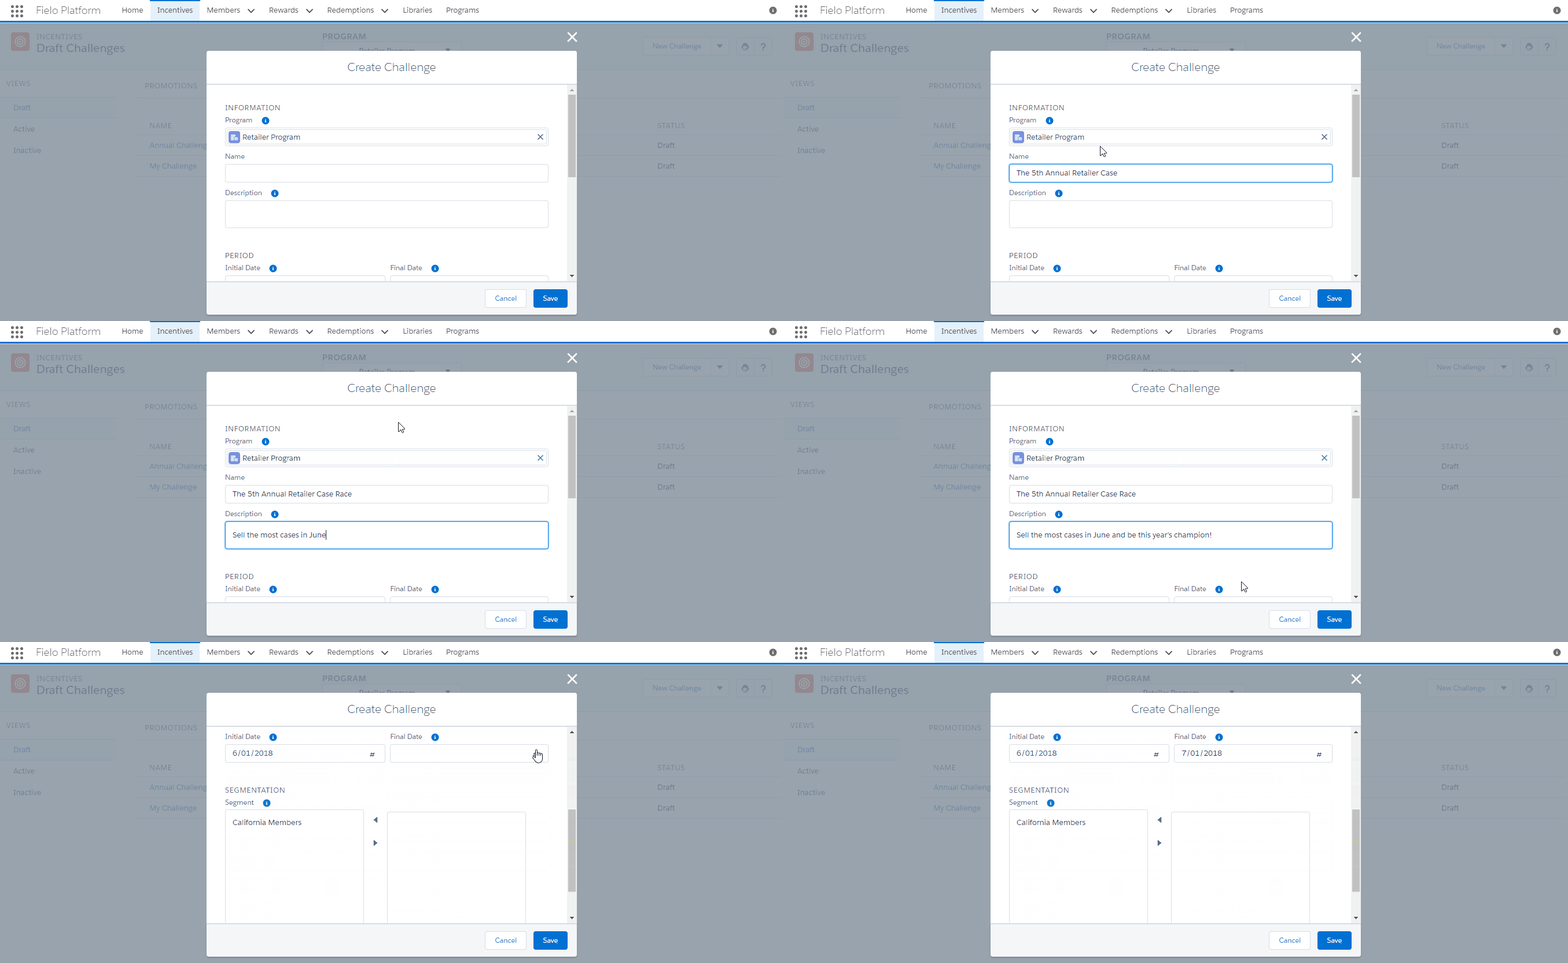
First, enter a name and description for your Challenge. Your Members will see these, so make them exciting!
Set a Period
Next, choose start and end dates for your Challenge. Challenges must always have a Start Date and are automatically made Active on that day. They don't always need an end date; if one is not provided, the Challenge will last indefinitely.
End DateChallenges that have one or more Missions without Objective, however, do require an end date. In this case, the snapshot of Member performance on the end date is what's used for rewarding.
If your Challenge will use the Mission Table for rewarding, it will need an end date, as the Mission Table only assigns Challenge Rewards when a Challenge has finished.
Select a Model (Optional)
If you or a colleague has created a Challenge Model, you can use it to automatically configure your Challenge with the Missions, Rewards, etc. contained in the model. This section is optional and appears only when one or more Models are available for use.
You can only apply a Model when first creating a Challenge. This option is not available when editing a Challenge later on.
Choose Segments (Optional)
Optionally, you can target your Challenge to one or more Segments you've defined in your Program. To add a Segment, select it on the list to the left and click . To remove one, select it on the lift to the right and click .You can leave your Challenge open to all segments by leaving the list on the right empty.
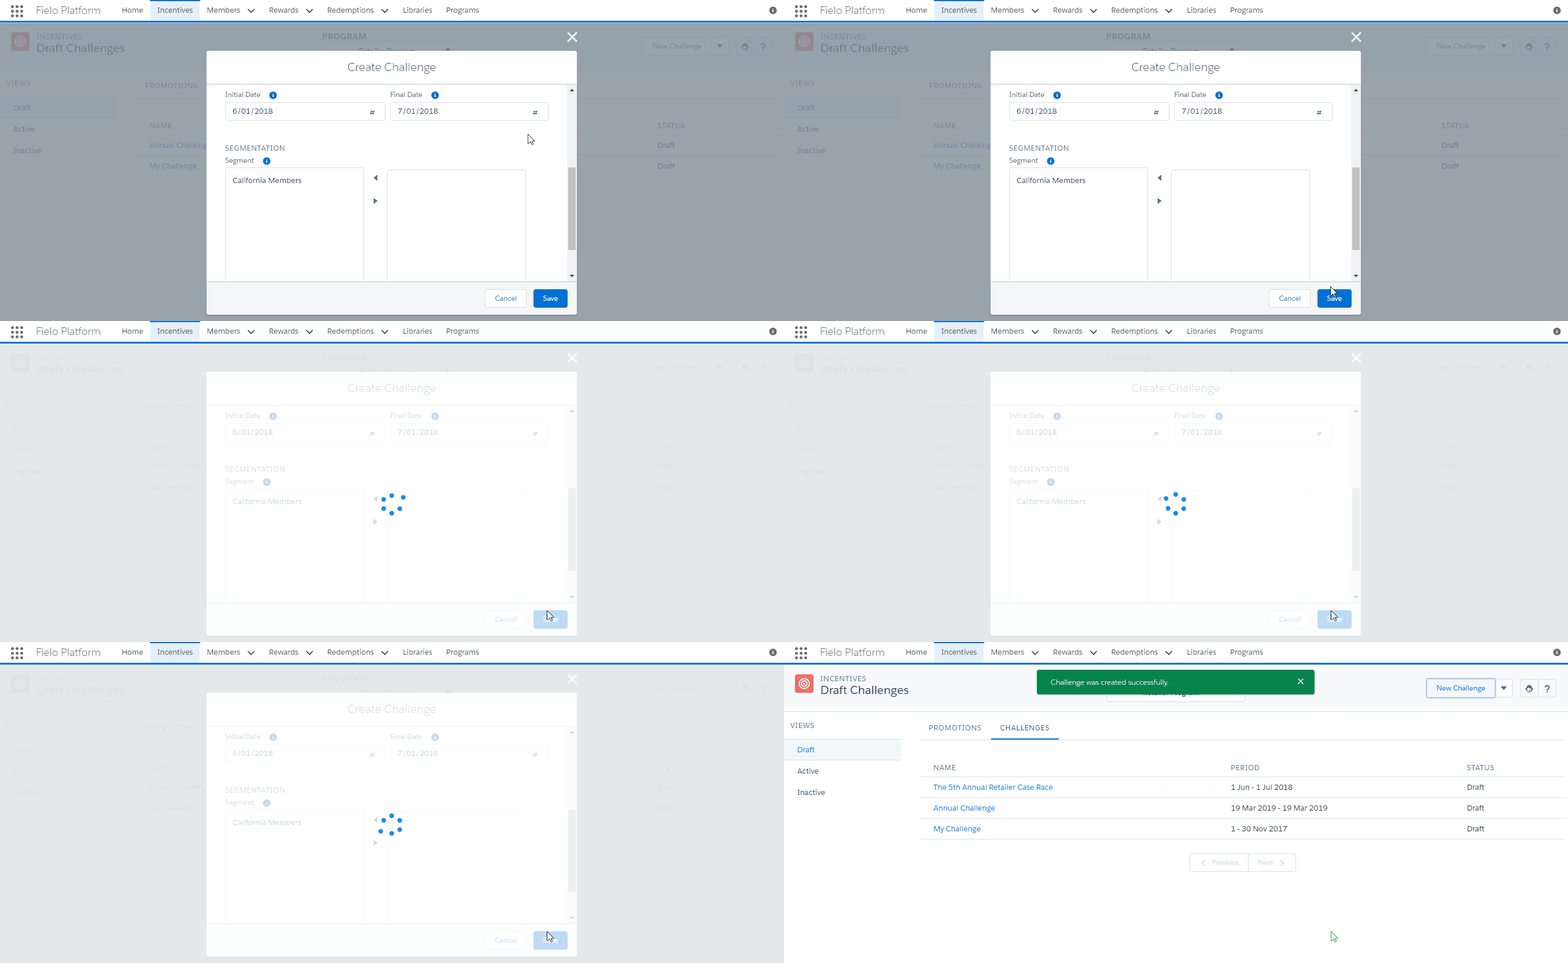
When you're ready, click Save.
Editing a Challenge
Upon saving, your Challenge will be created with the status Draft. This is so that you can fully configure your challenge by creating Missions, assigning Rewards and more.
Apart from that, you can also specify the Subscription Mode, which determines how Members will take part in your Challenge:
- Closed: You must manually subscribe Members to your Challenge.
- Global: Eligible Members are automatically subscribed to your Challenge when performing a behavior (Action) incentivized by any of its Missions.
- Open: Members will be able to view and subscribe to Challenges for which they're eligible from their loyalty portal.
Note that, if using segmentation, only Members in your targeted Segment(s) will be able to participate in your Challenge, regardless of Subscription Mode.
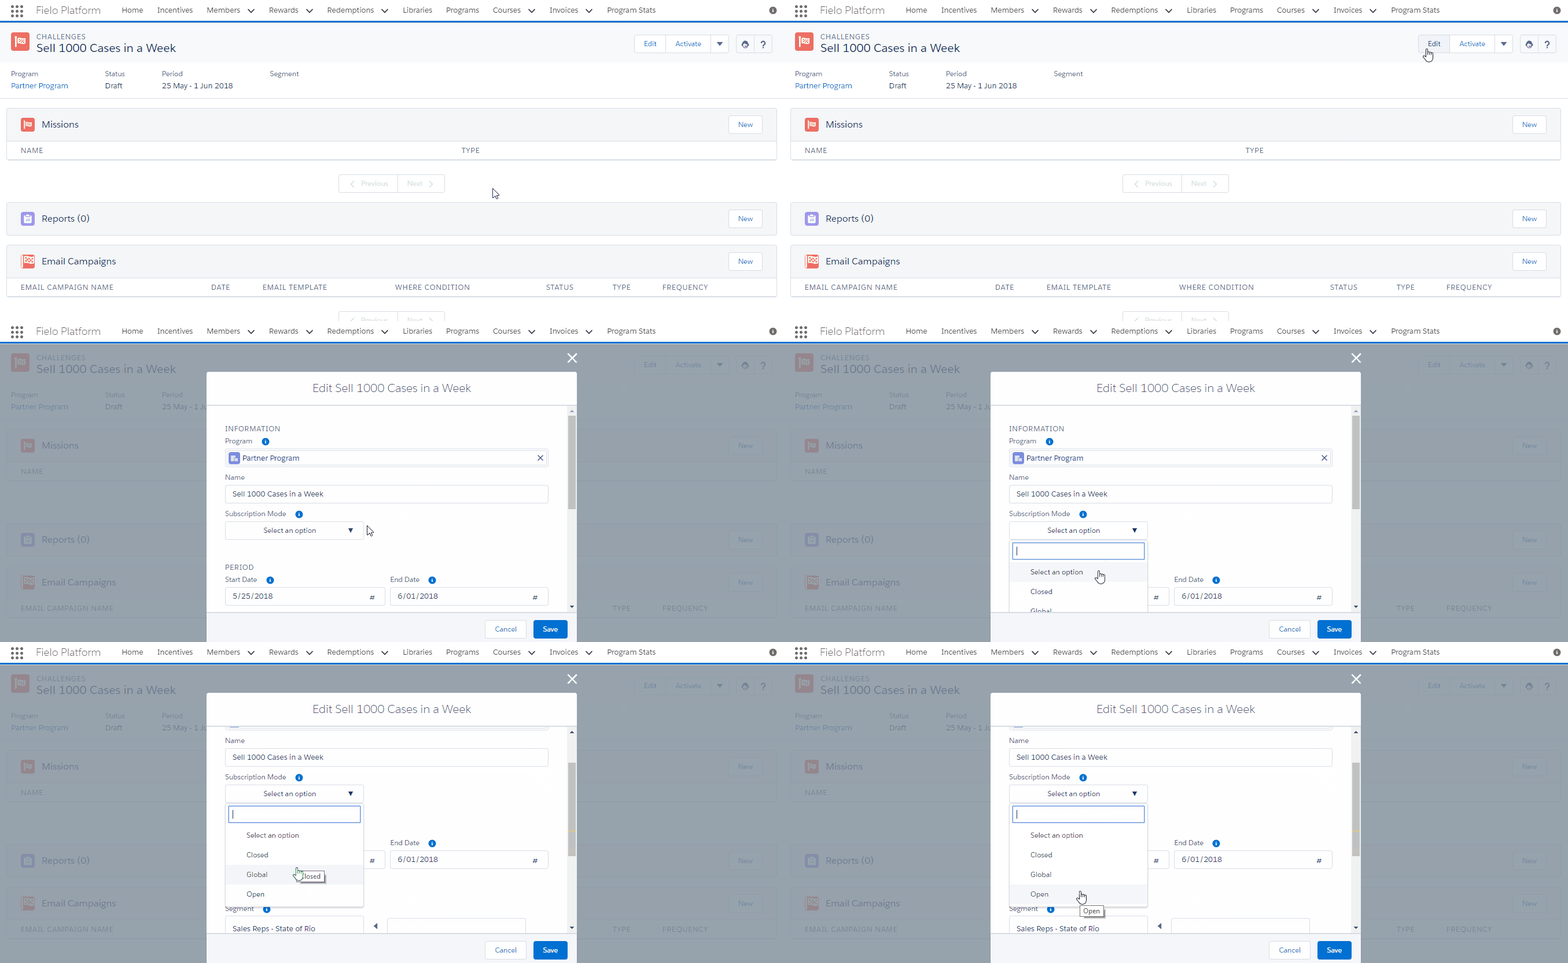
Missions, Rewarding and MoreNow that you've created your Challenge, it's time to start building out the behavior(s) you want to incentivize by creating your first Mission!
Activating a Challenge
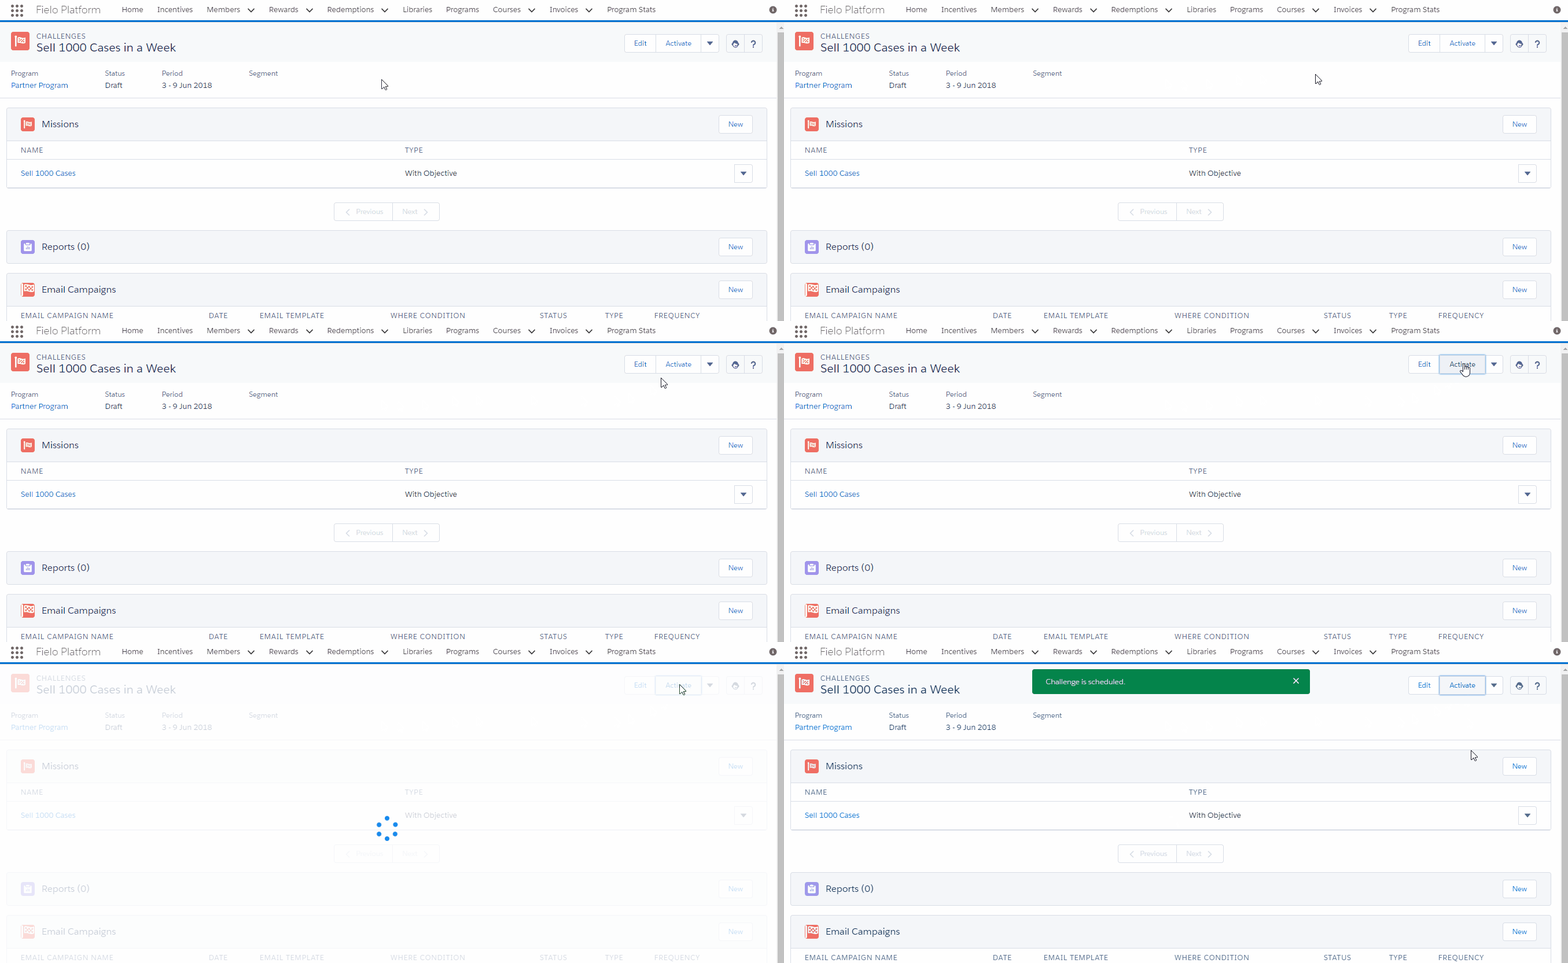
You must activate your Challenge before Members can participate in it.
Before activating your Challenge, it must have at least one Mission and one Challenge Reward.
To activate a Challenge, click Activate on the Challenge page.
Challenge Management Tools
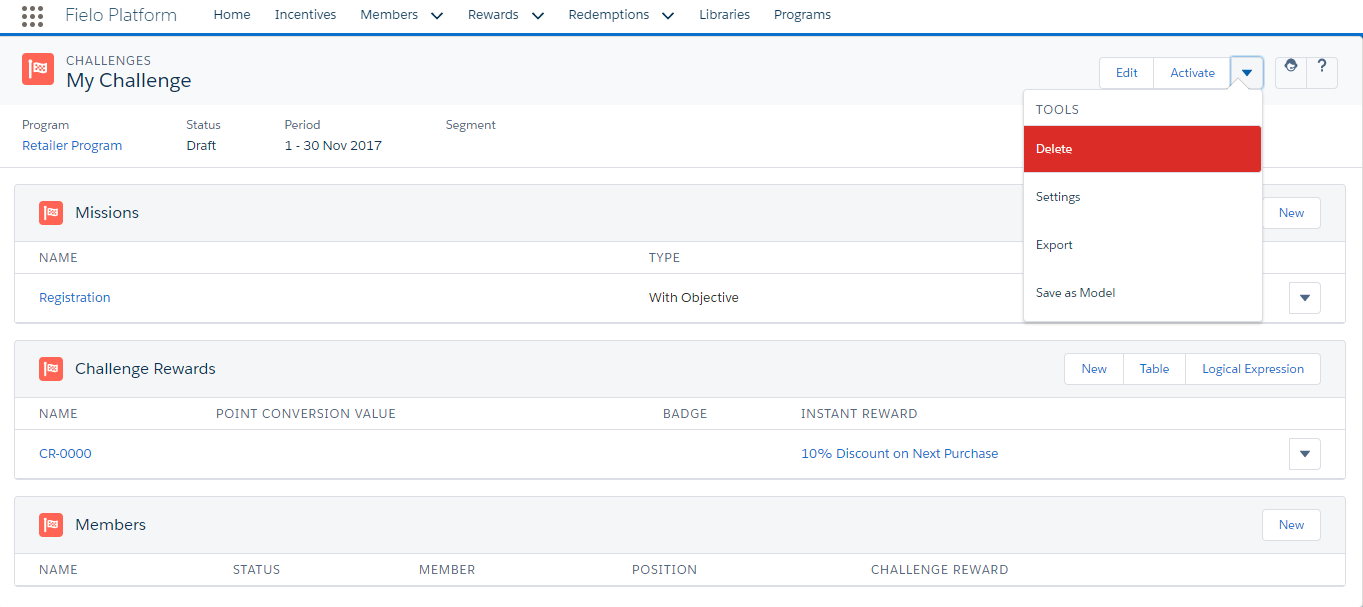
There are several Tools that let you manage your Challenge. You can access these Tools by clicking on the Challenge detail page.
Challenge Tools
Delete
Select Delete to delete this Challenge.
Page Settings Management
Select Page Settings Management to configure the Page Settings for the Challenge page.
Export
The Export tool allow you to export all data stored in Challenges, which can include their Missions and Challenge Rewards from the chosen Program. Upon exporting, you'll get access to a JSON file in the following format:
Challenges (FieloPLT__Challenge__c)
FieloPLT__Challenge__cFieloPLT__ChallengeReward__cFieloPLT__Mission__cFieloPLT__Criterion__cFieloPLT__ChallengeReward__c
FieloPLT__KPIDomain__cFieloPLT__EmailCampaign__c
Import
Select Import to import Challenges you or a colleague has previously exported.
Simply upload a JSON file containing all the data for the Challenges you wish to import. In most cases, this will be one that's been previously exported from another ORG, so you won't need to make any changes. We do, however, advise you to validate the JSON file before uploading.
Once you're ready, just hit Import.
If the Challenges you're importing use your own custom Actions, you must first import those Actions into your Local Development Library.
Save as Model
Save as Model allows you to save your Challenge for reuse as a Model when you create a new Challenge. This way, you don't have to configure everything from scratch if your new Challenge has many of the same characteristics as this one.
Updated over 1 year ago