
Installation and Setup
Install and configure Invoicing v1.37.1
Requirements
Be sure you've first installed and set up IAS.
1. Install the Invoicing Package
Click here to log in to your org and begin installation.
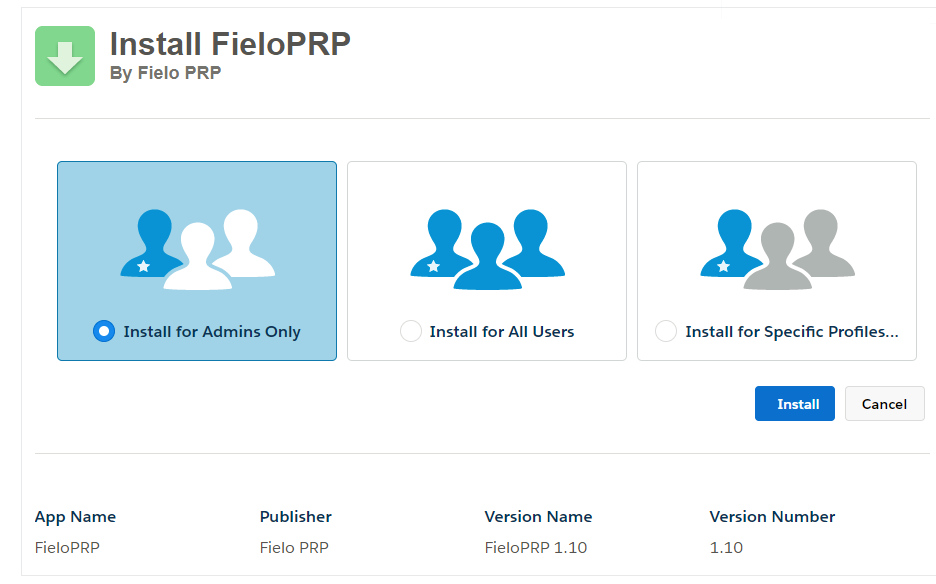
Choose which users in your org will be configuring. If it will be just you and/or other admins, select Install for Admins only and click Install. When the installation process ends, the org administrator will be notified by email.
2. Provide User Permissions
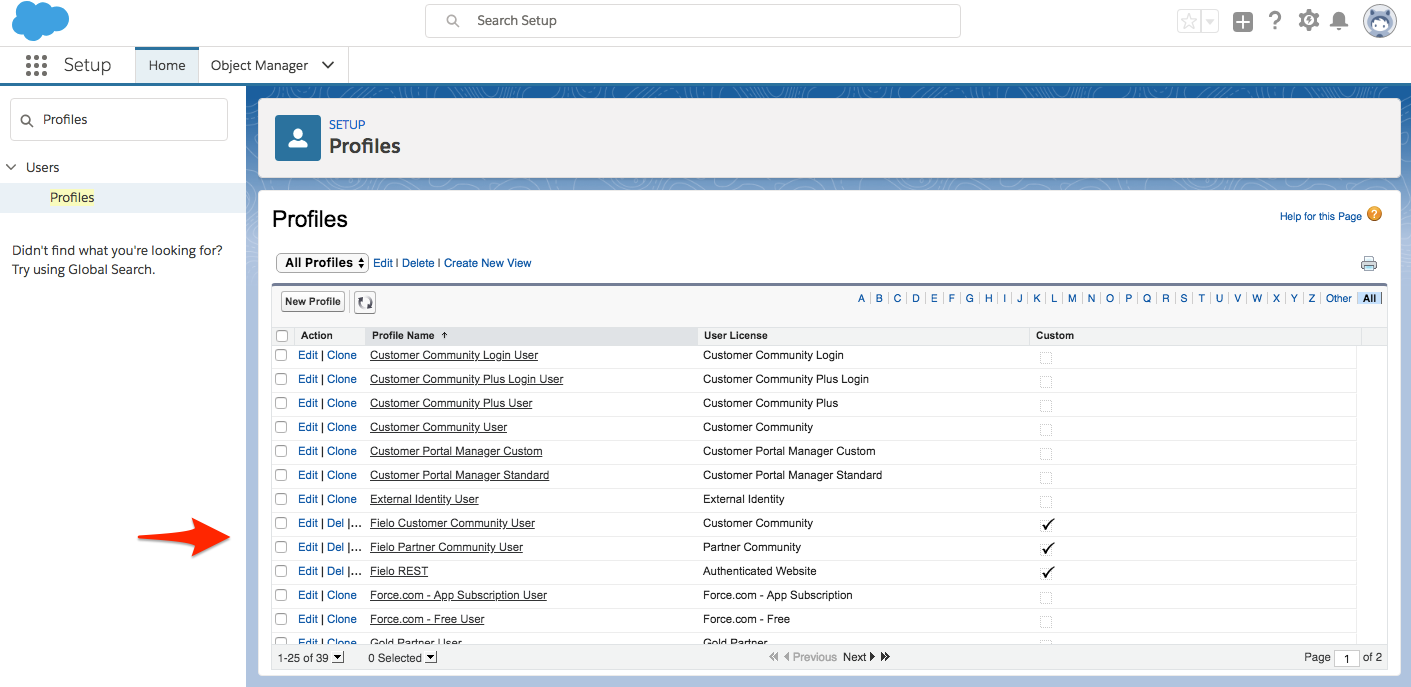
From Profiles, choose the profile assigned to your loyalty portal members.
For each of the objects below, enable the following Object Permissions:
| Object | Permission Name |
|---|---|
| Invoices | Read, Create and Edit. |
| Invoice Items | Read, Create and Edit. |
| Products* | Read, Create and Edit. |
*Depending on your implementation needs, you can use another object instead of Product.
In the Field Permissions for each of the objects listed above, tick all Read Access and Edit Access checkboxes (when available).
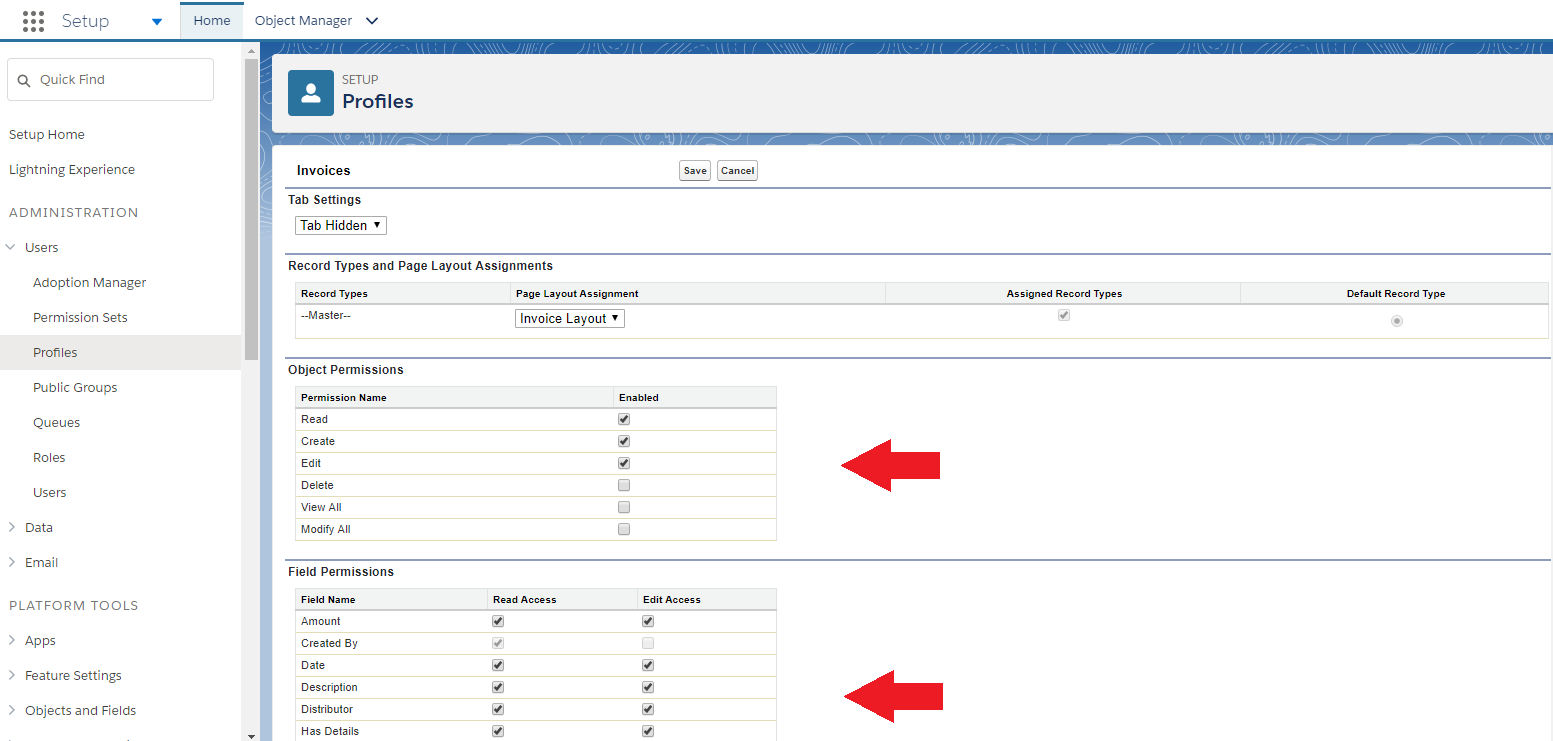
Object and Field Permissions for Fielo Invoicing
3. Enable the FieloPRP Library
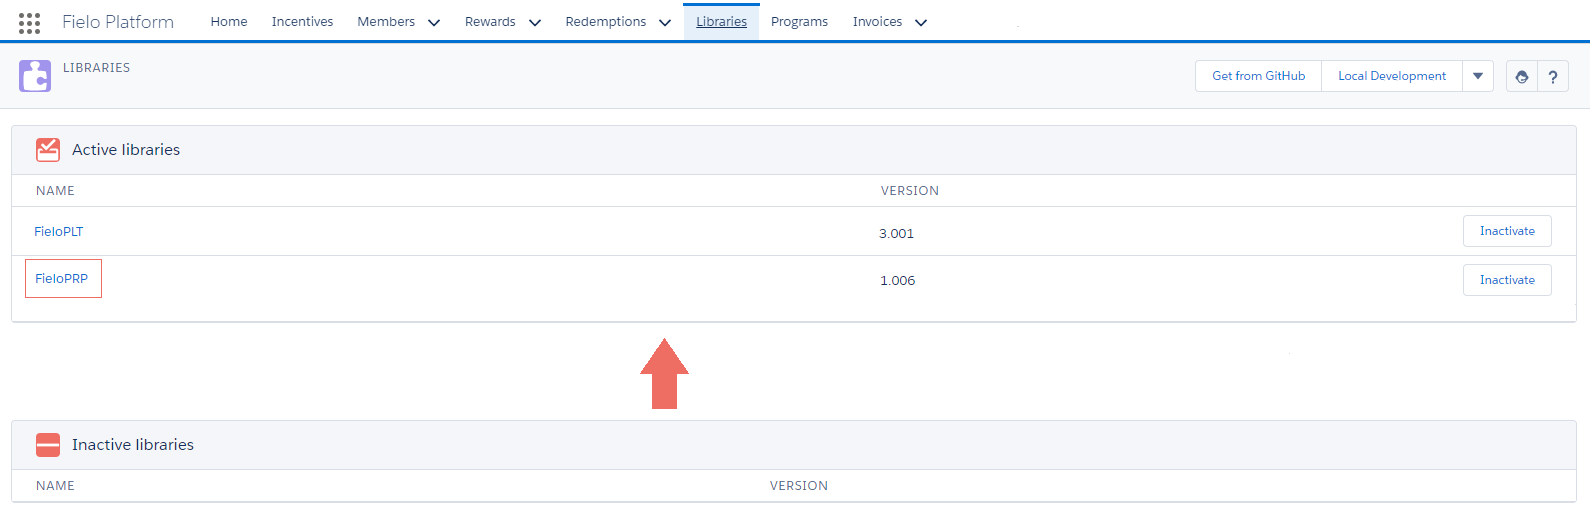
After installing Invoicing, you need to activate the FieloPRP Library so that Invoice incentives and page settings for Invoicing are enabled.
From the App Launcher () choose Fielo Platform. From Libraries, hit Activate for FieloPRP.
4. Add the Invoices Tab
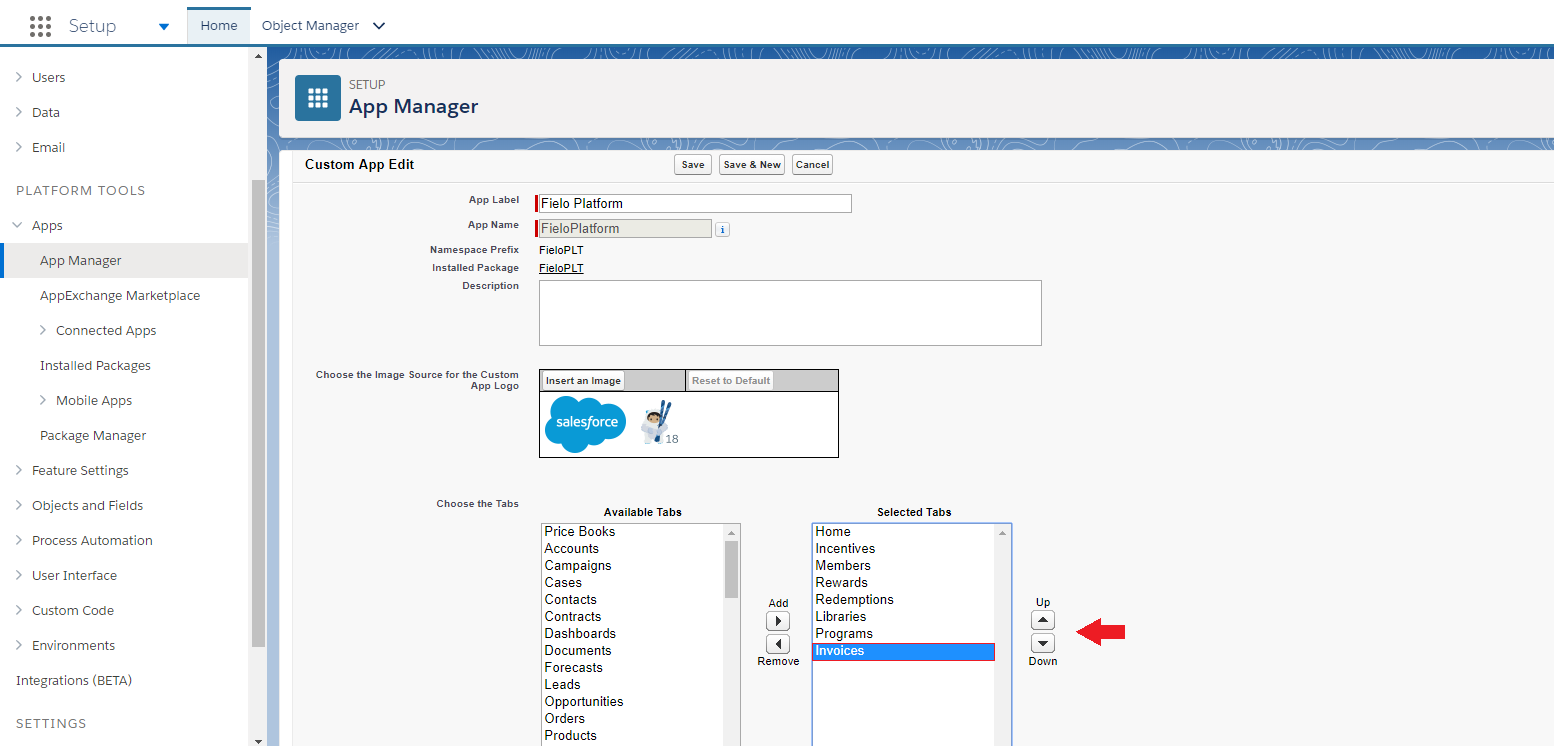
To access Invoicing, you'll need to add a new tab so that you can access it from IAS. (Note: This may have happened automatically in the previous step if you're using Lightning Experience.)
From Salesforce Setup, search for and selected App Manager. In the row corresponding to Fielo Platform, click and choose Edit. Then select Invoices from Available Tabs to add it to the Selected Tabs list.
You're ready to go!Now, you can prepare your program for Invoice incentivization.
Updated over 1 year ago