
Uploading Invoices
Upload invoices yourself from the Invoices tab
Once you have defined your Program Settings, you might want to start thinking about how Invoices will be uploaded to the system. On the whole, you would tend to configure the Invoicing so that your members upload the invoices themselves. You then only have to approve them.
To enable your members to upload invoices, you can leverage our My Invoices component for Community Cloud. Then, you will simply be in charge of processing invoices.
However, if you want to be in charge of uploading invoices yourself, you can upload them via IAS. It's a pretty straightforward process, but we're here to take you through each step.
Loading an Invoice
First, click on the Invoices tab, and select New.
How you fill information out from there depends on whether you decided to go for the Invoice including Products or Invoice not including Products option, as defined in Program Settings. Fill out the information as follows:
Choose Member
Here you need to select the Invoice owner Member. You can type part of the Member's name and the rest will appear for you to select.
Enter Invoice Number
This is the identification number of the invoice. This field has a maximum limit of 80 characters.
Enter a Date
This is a required field and refers to the past date that the Invoice was issued.
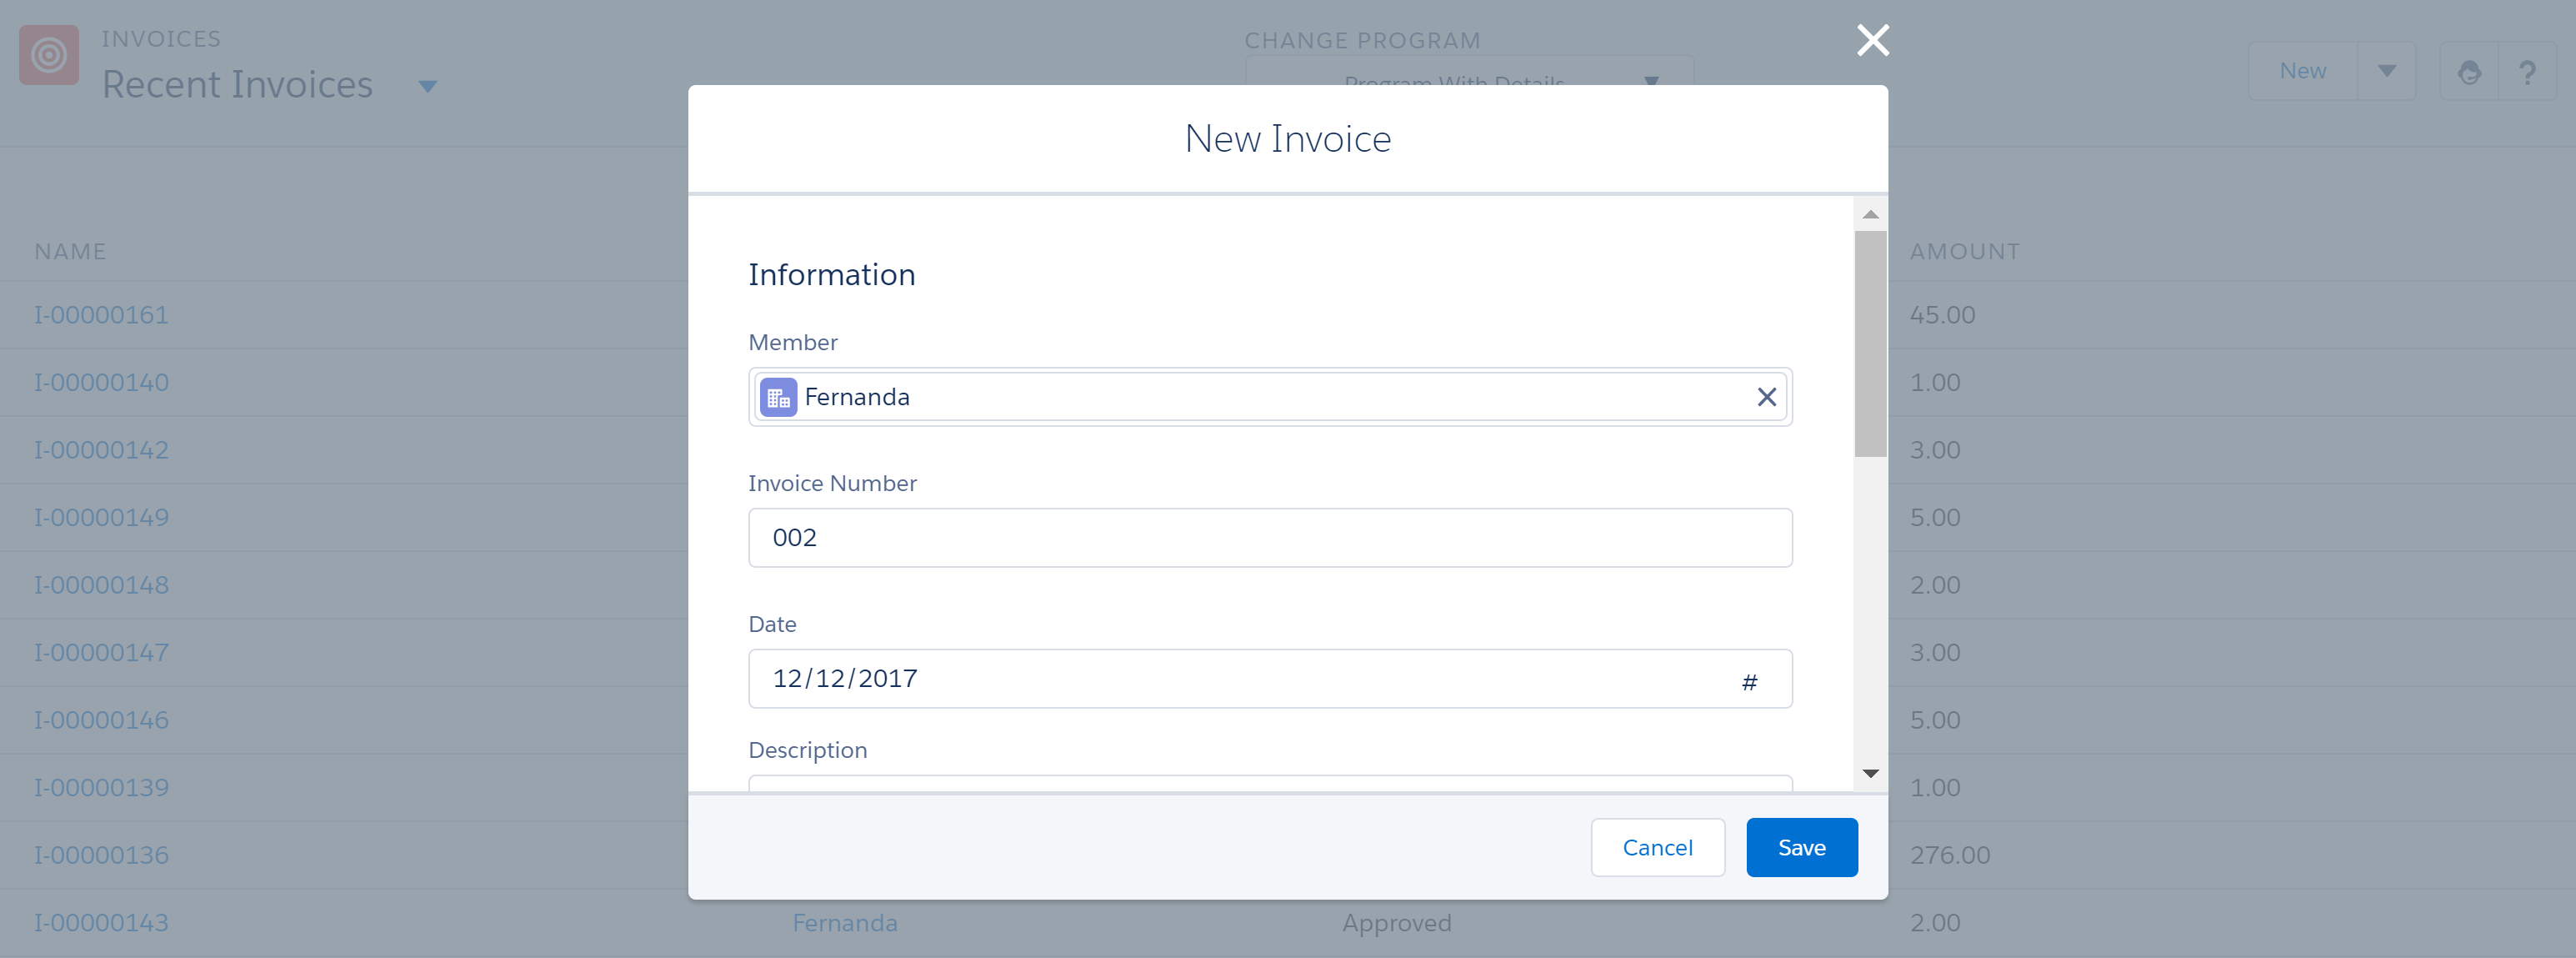
Filling out the Invoice
Description
You can include a description about the Invoice you're uploading. This field has a maximum limit of 255 characters.
Distributor
For this field, you need to select the Distributor that provided the Invoice which you can do by typing their name. Distributors must be one of your Salesforce Accounts which will feed directly here.
Amount
If you've configured your Program Settings so that Invoices do not include Products, then there will also be an Amount box to be filled out, where you will input the total value of the Invoice.
DuplicatesTo prevent duplicate Invoices, you cannot approve two Invoices with the same combination of Distributor and Invoice number
Invoice Items
If you have configured your Program Settings as Invoice including Products, you now need to add Invoice Items. Tthere are two ways of doing this:
Adding Products one at a time
If you only have a few Items to include and know how to find them by typing their names, you can do it directly from the Product Items area. When including Products directly from the Items area, you have to fill in the following fields:
- Quantity: Here, list the number of a given product.
- Product: Just start typing the product name and the item should appear for you to click on. This information feeds directly from Salesforce Sales Cloud.
- Unit Price: You'll need to list the value of a single item of the product. Alternatively, if you leave this blank, it will automatically be determined by dividing Total Price by Quantity.
- Total Price: This field is automatically calculated based on Quantity multiplied by Unit Price.
- Amount: Total invoice value. This field is automatically calculated by the system.
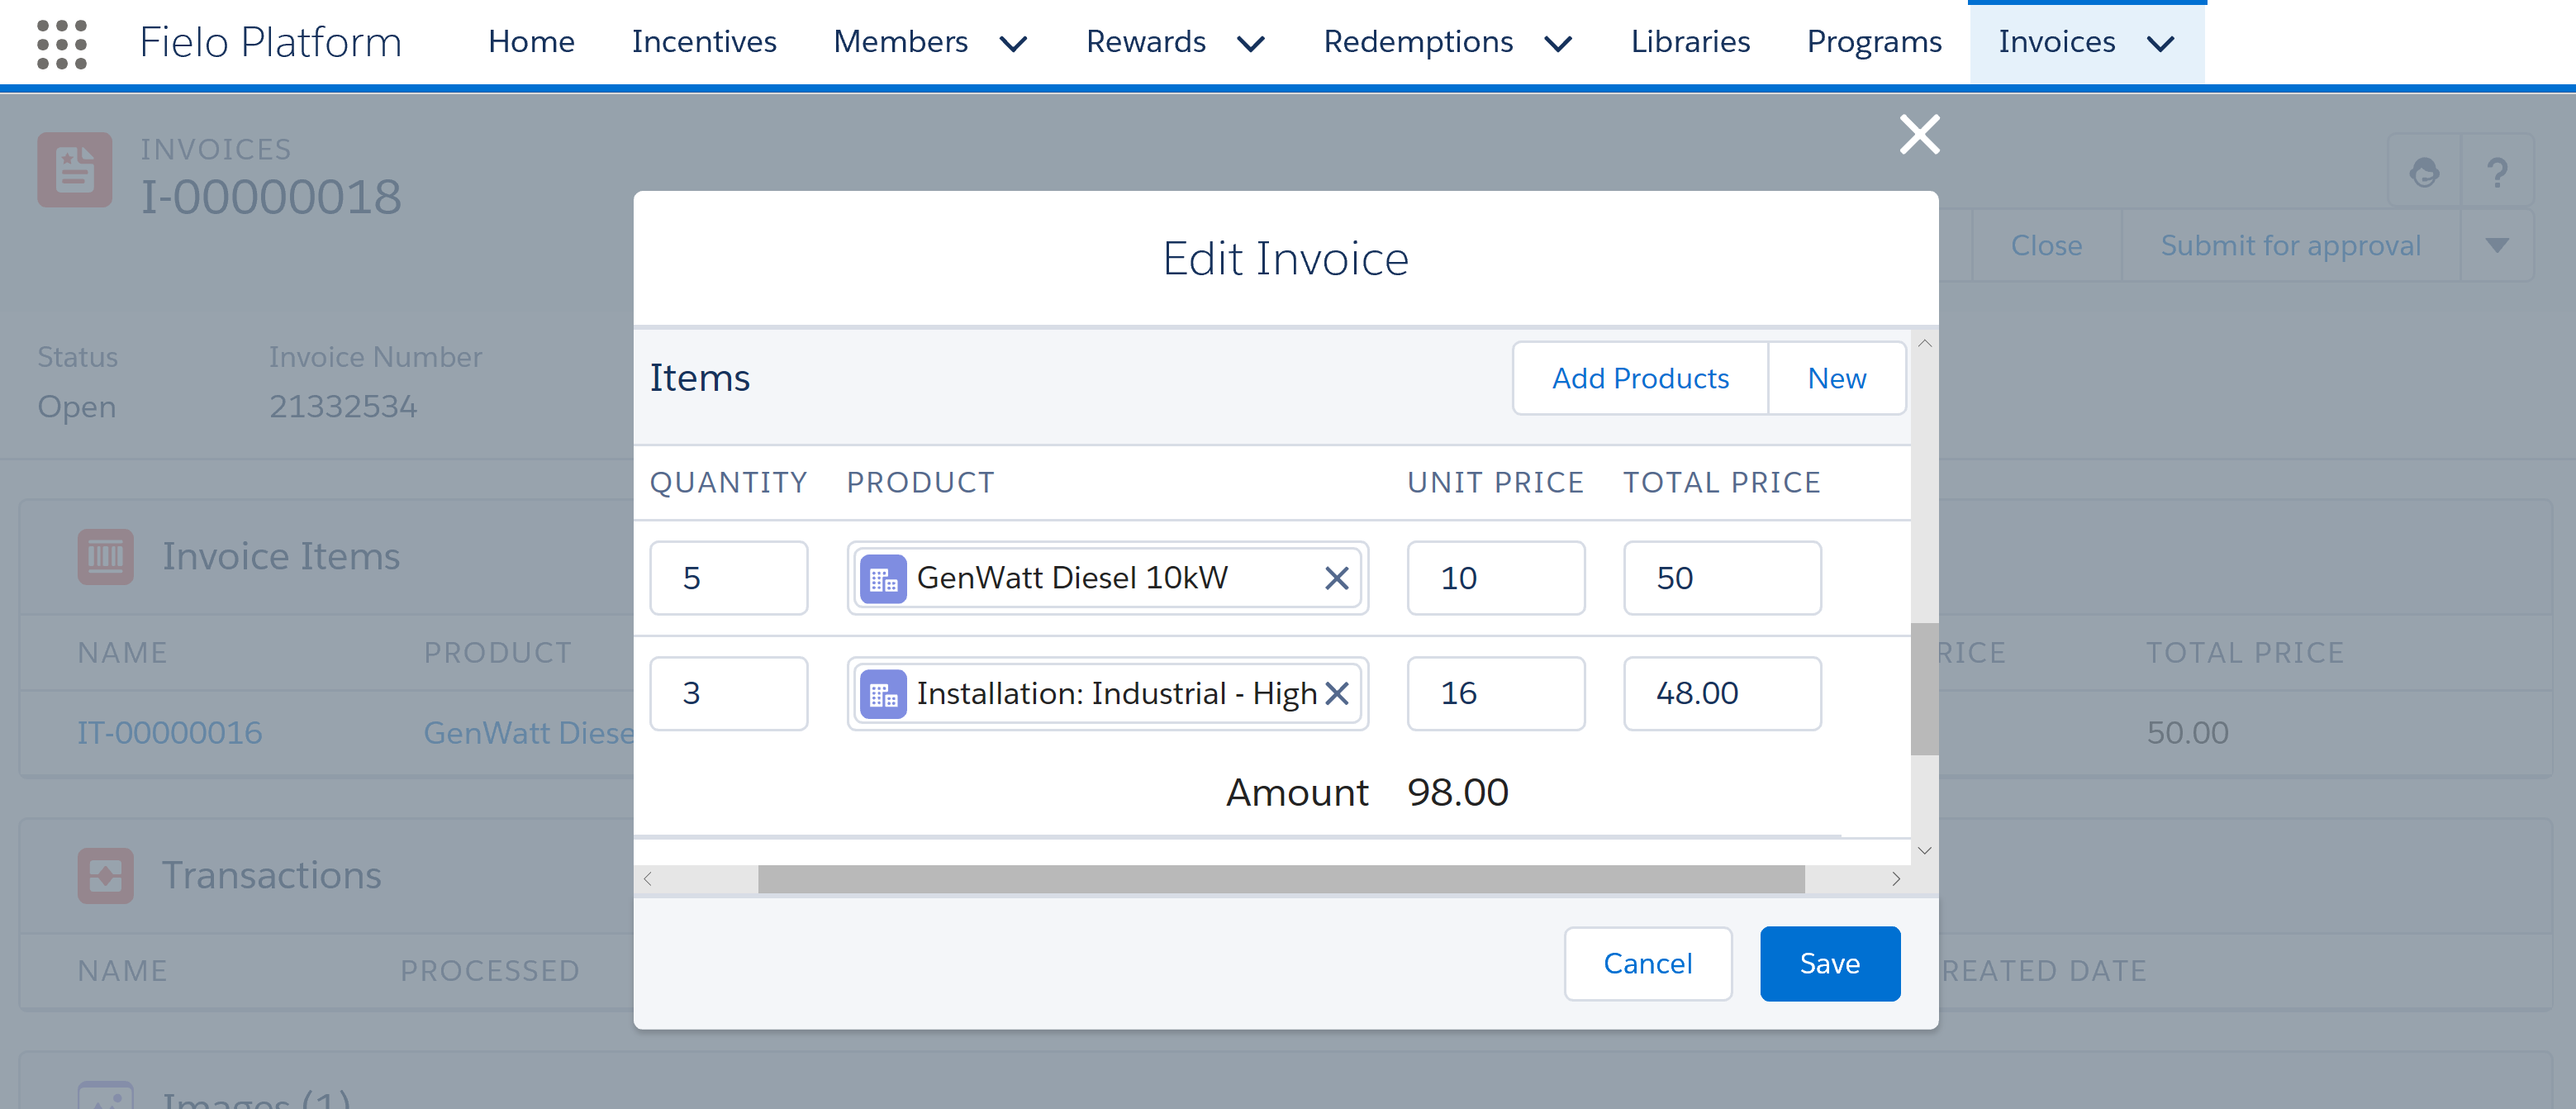
Adding a Product
To add new Products, just press the New button. A new line item will be created and you will need to fill out the above fields again.
If a line item needs to be deleted, click on the right.
Adding a set of Products
If you need to add a big quantity of Products, you can make an advanced search using the Add Products page. To include a set of Products, press the Add Products button. From here you can select your set by:
- Typing in and searching by Product Name.
- Selecting the Product Family from the drop-down menu.
- Typing in and searching by Product Code.
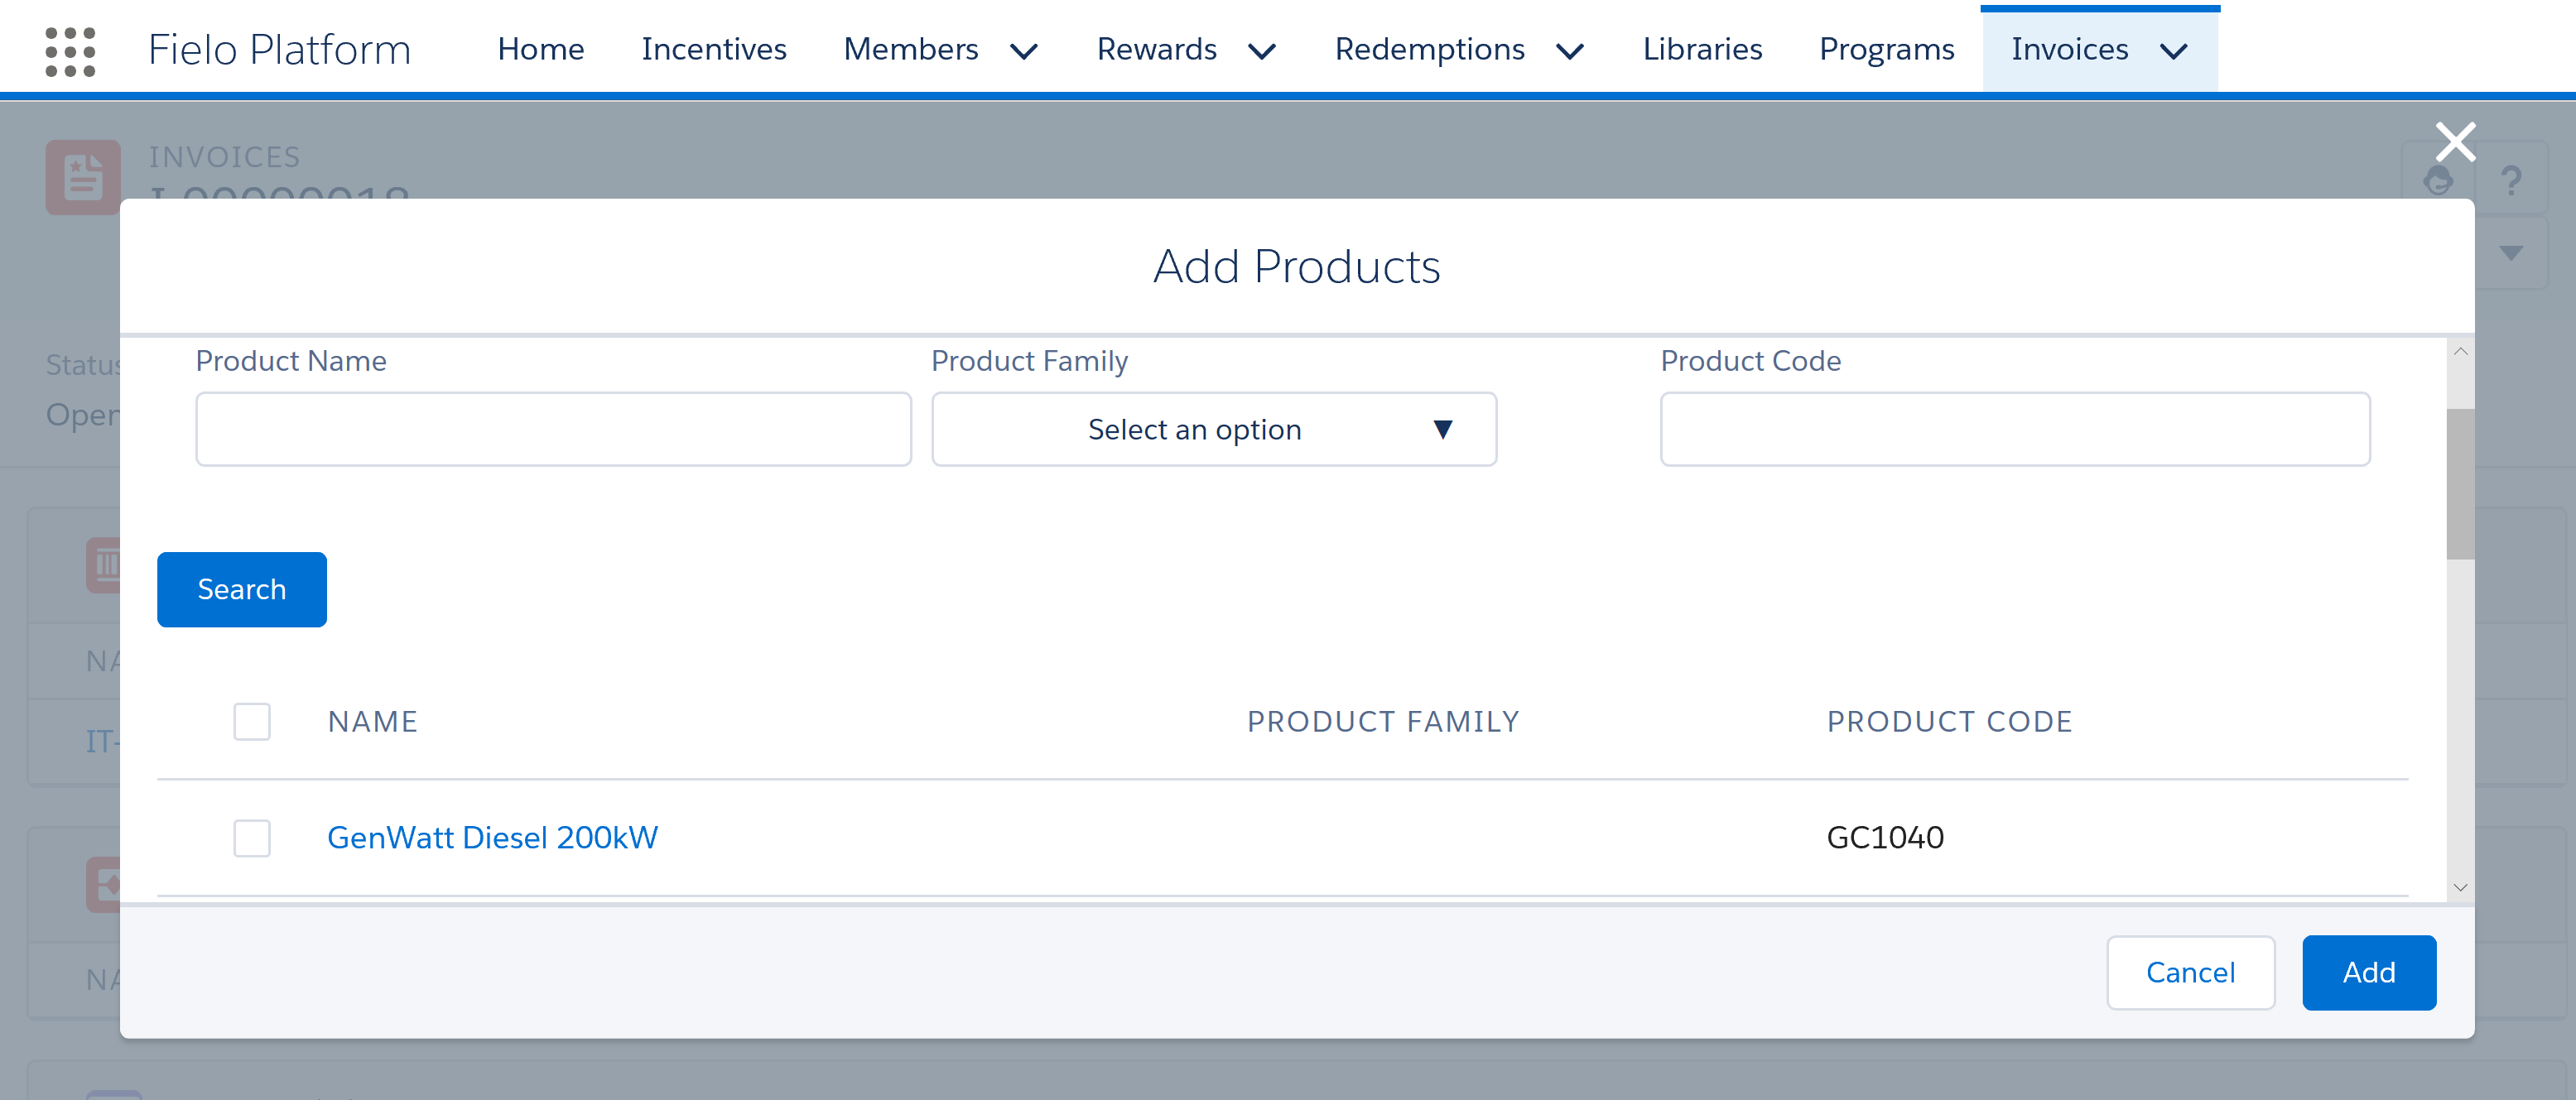
Adding a set of Products
It is possible to combine some or all of these filters to create an even more refined search.
Then simply select the ones you want using the along the left-hand side and click Add. You will then have to fill in all of the Product quantity and price information, as explained above under Adding products one at a time.
Uploading Invoice File
Lastly, you need to upload an Invoice file - the proof - so that Members can prove they have made a purchase and that it matches all the information you've previously included or that they have included when uploading the Invoice proof from CMS Site.
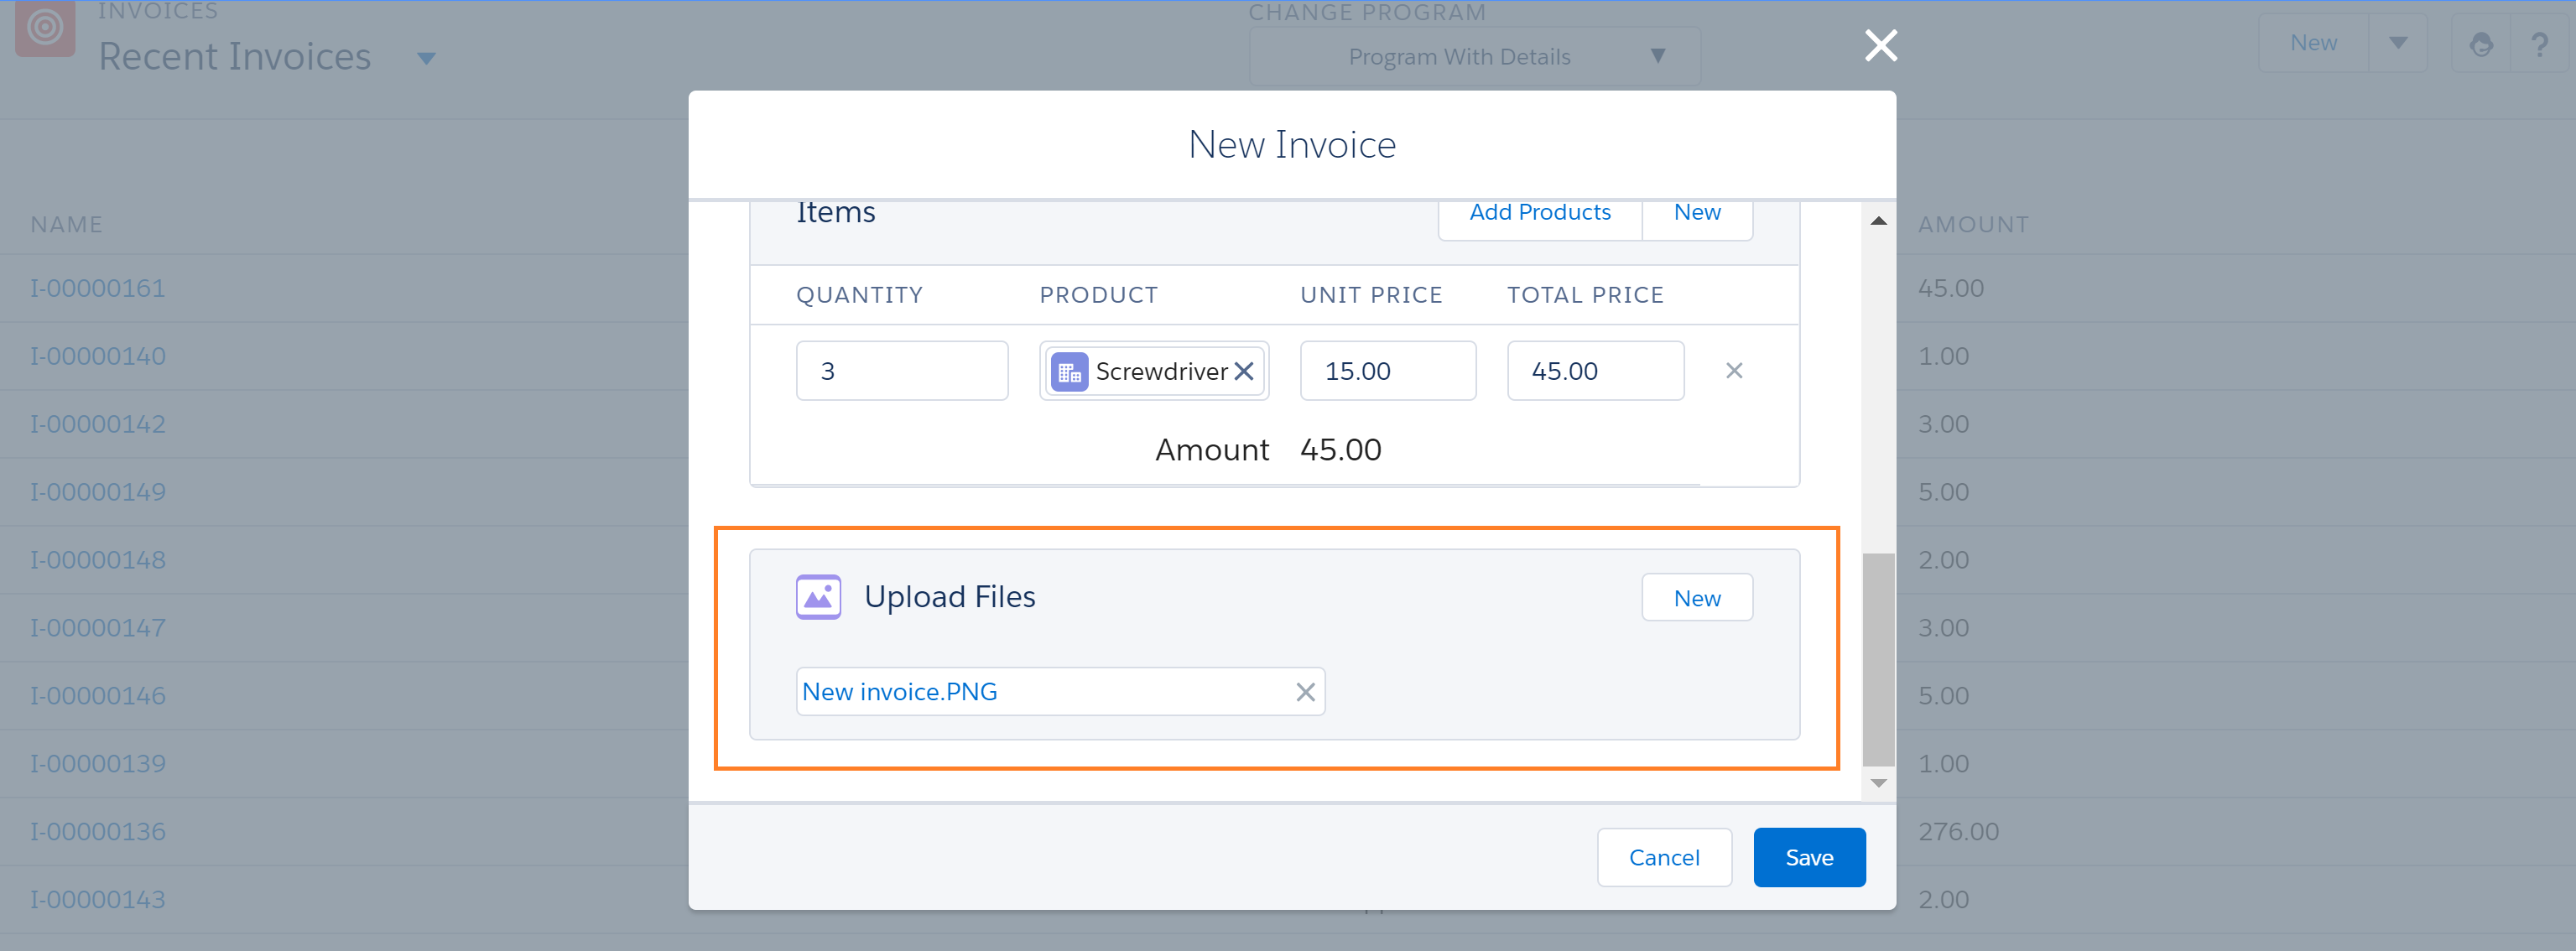
Uploaded Invoice File
File Size and FormatsInvoice files can be up to 4 MB in size and may be PDF, GIF, JPG and PNG. Note that BMP files cannot be read.
Finally, hit Save. You will now see an overview page with all of the information you inputted.
Invoices can also be uploaded by Members from the CMS Site. When using the CMS to create and upload an Invoice, the process is very similar, however the Member field is automatically set to the Member that is logged in.
Invoice Management Tools
Settings
If you want to extend or customize any of the Settings of your Invoice Pages, just read our Page Settings documentation. Page Settings control the layout and organization of buttons, fields, and related lists on Fielo pages. They also help determine which fields are visible, read only, and required.
For step by step guidance on how to change the default Product Object, refer to Advanced Features.
Products
When uploading Invoices which include Items, apart from configuring your Program Settings as Invoice including Products, you also need to have the Products available to later include them as Product in the Items area.
If you want to add a new Product to your Product listings, you need to go to the Invoices tab. Click the 🔽 button and then click Products.
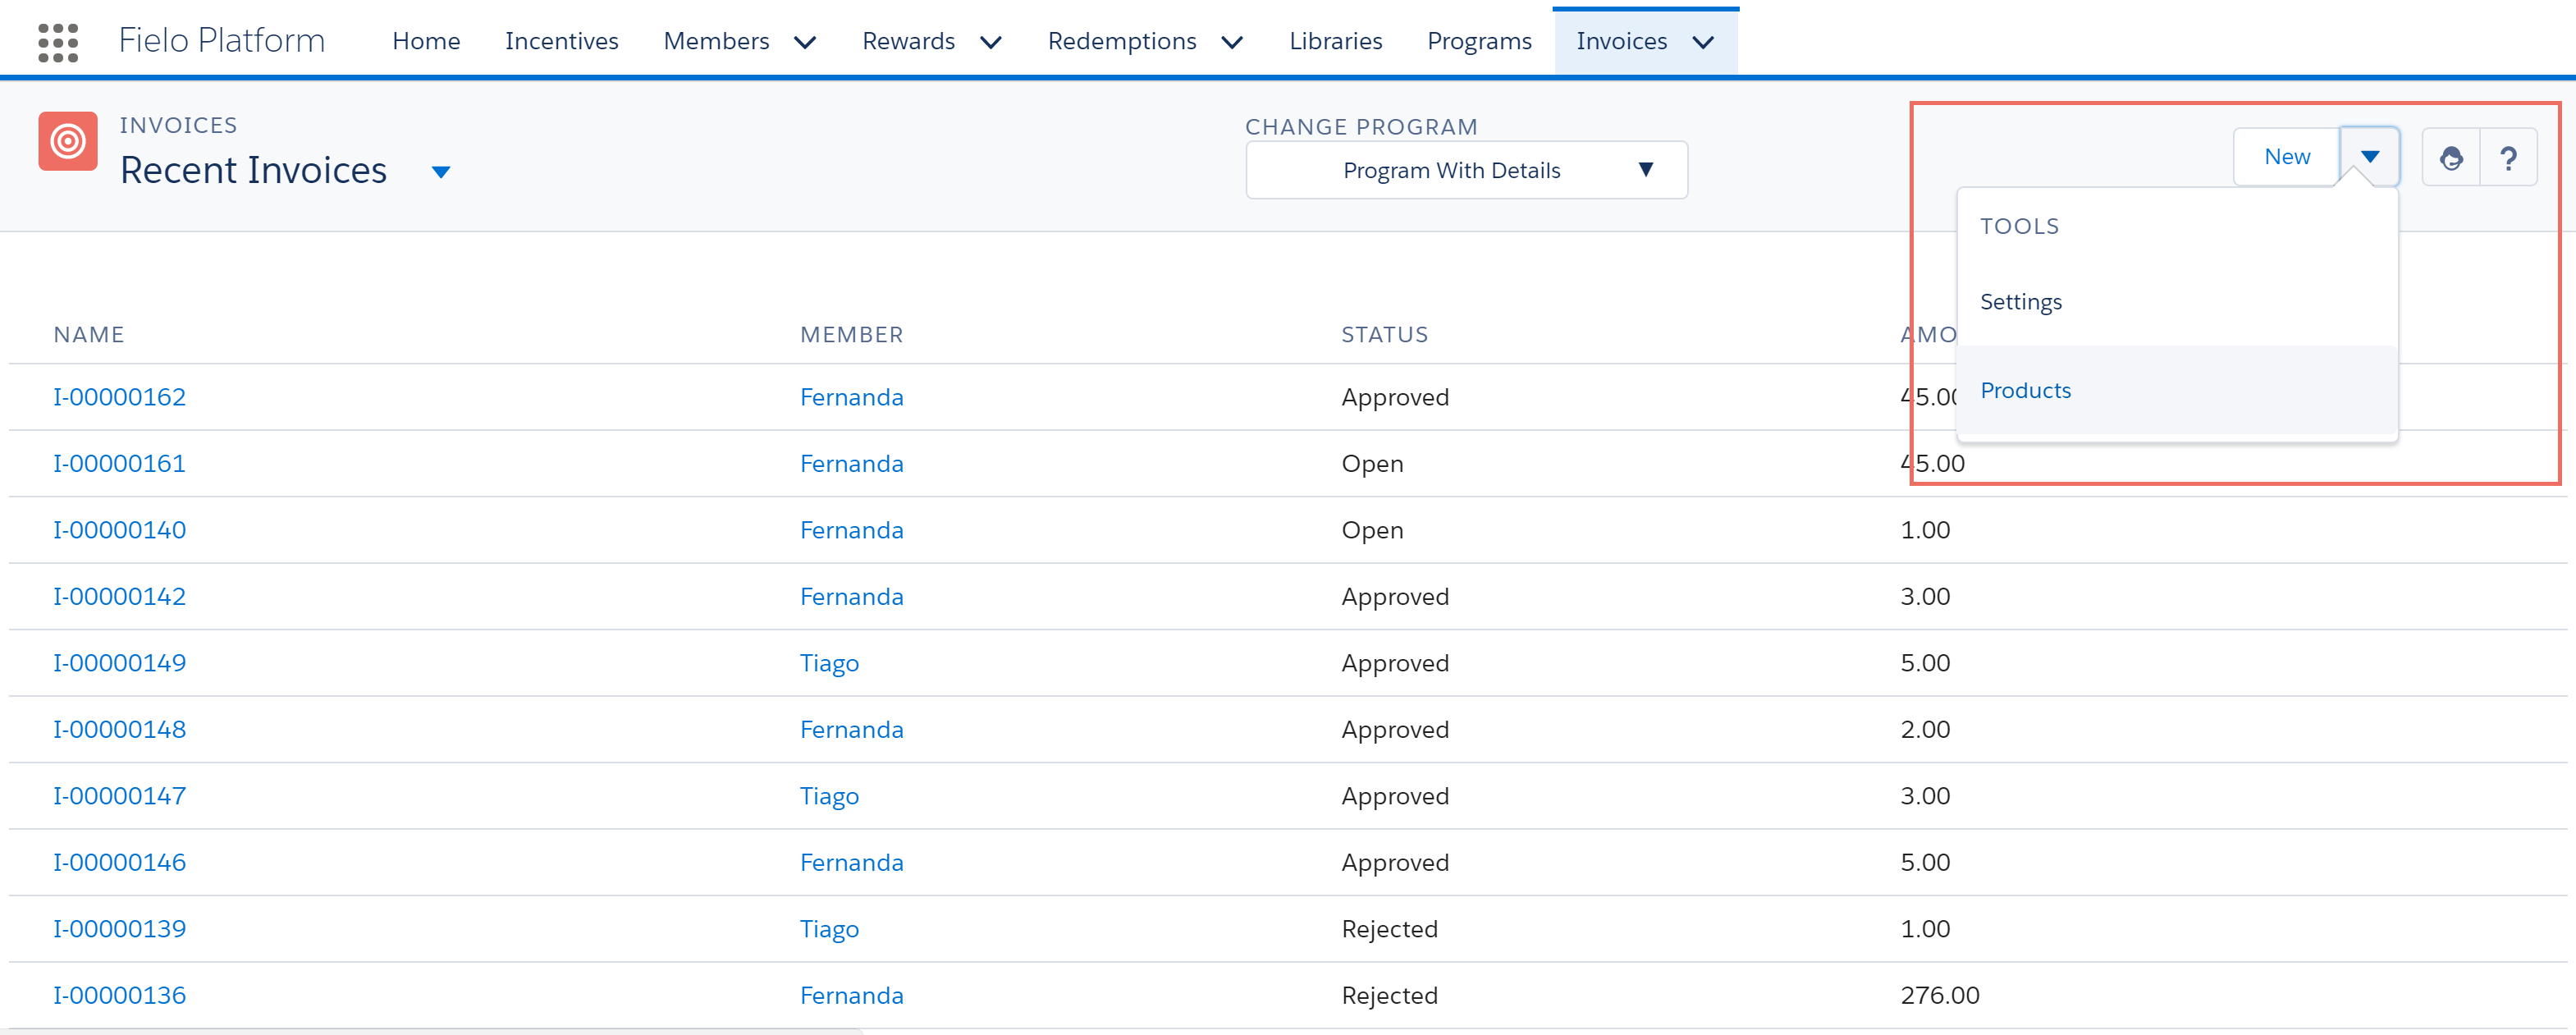
Adding new Products
Click New in the top right of the screen and then fill in all of the Product information.
- Name: Give your product a name.
- Active: active if you only want to work with active products (this requires an advanced setting in Programs)
- Product Code: Fill out the Product Code.
- Product Family: Select the Product Family if your new Product belongs to one.
- Product Description: Give the Product a short, catchy description.
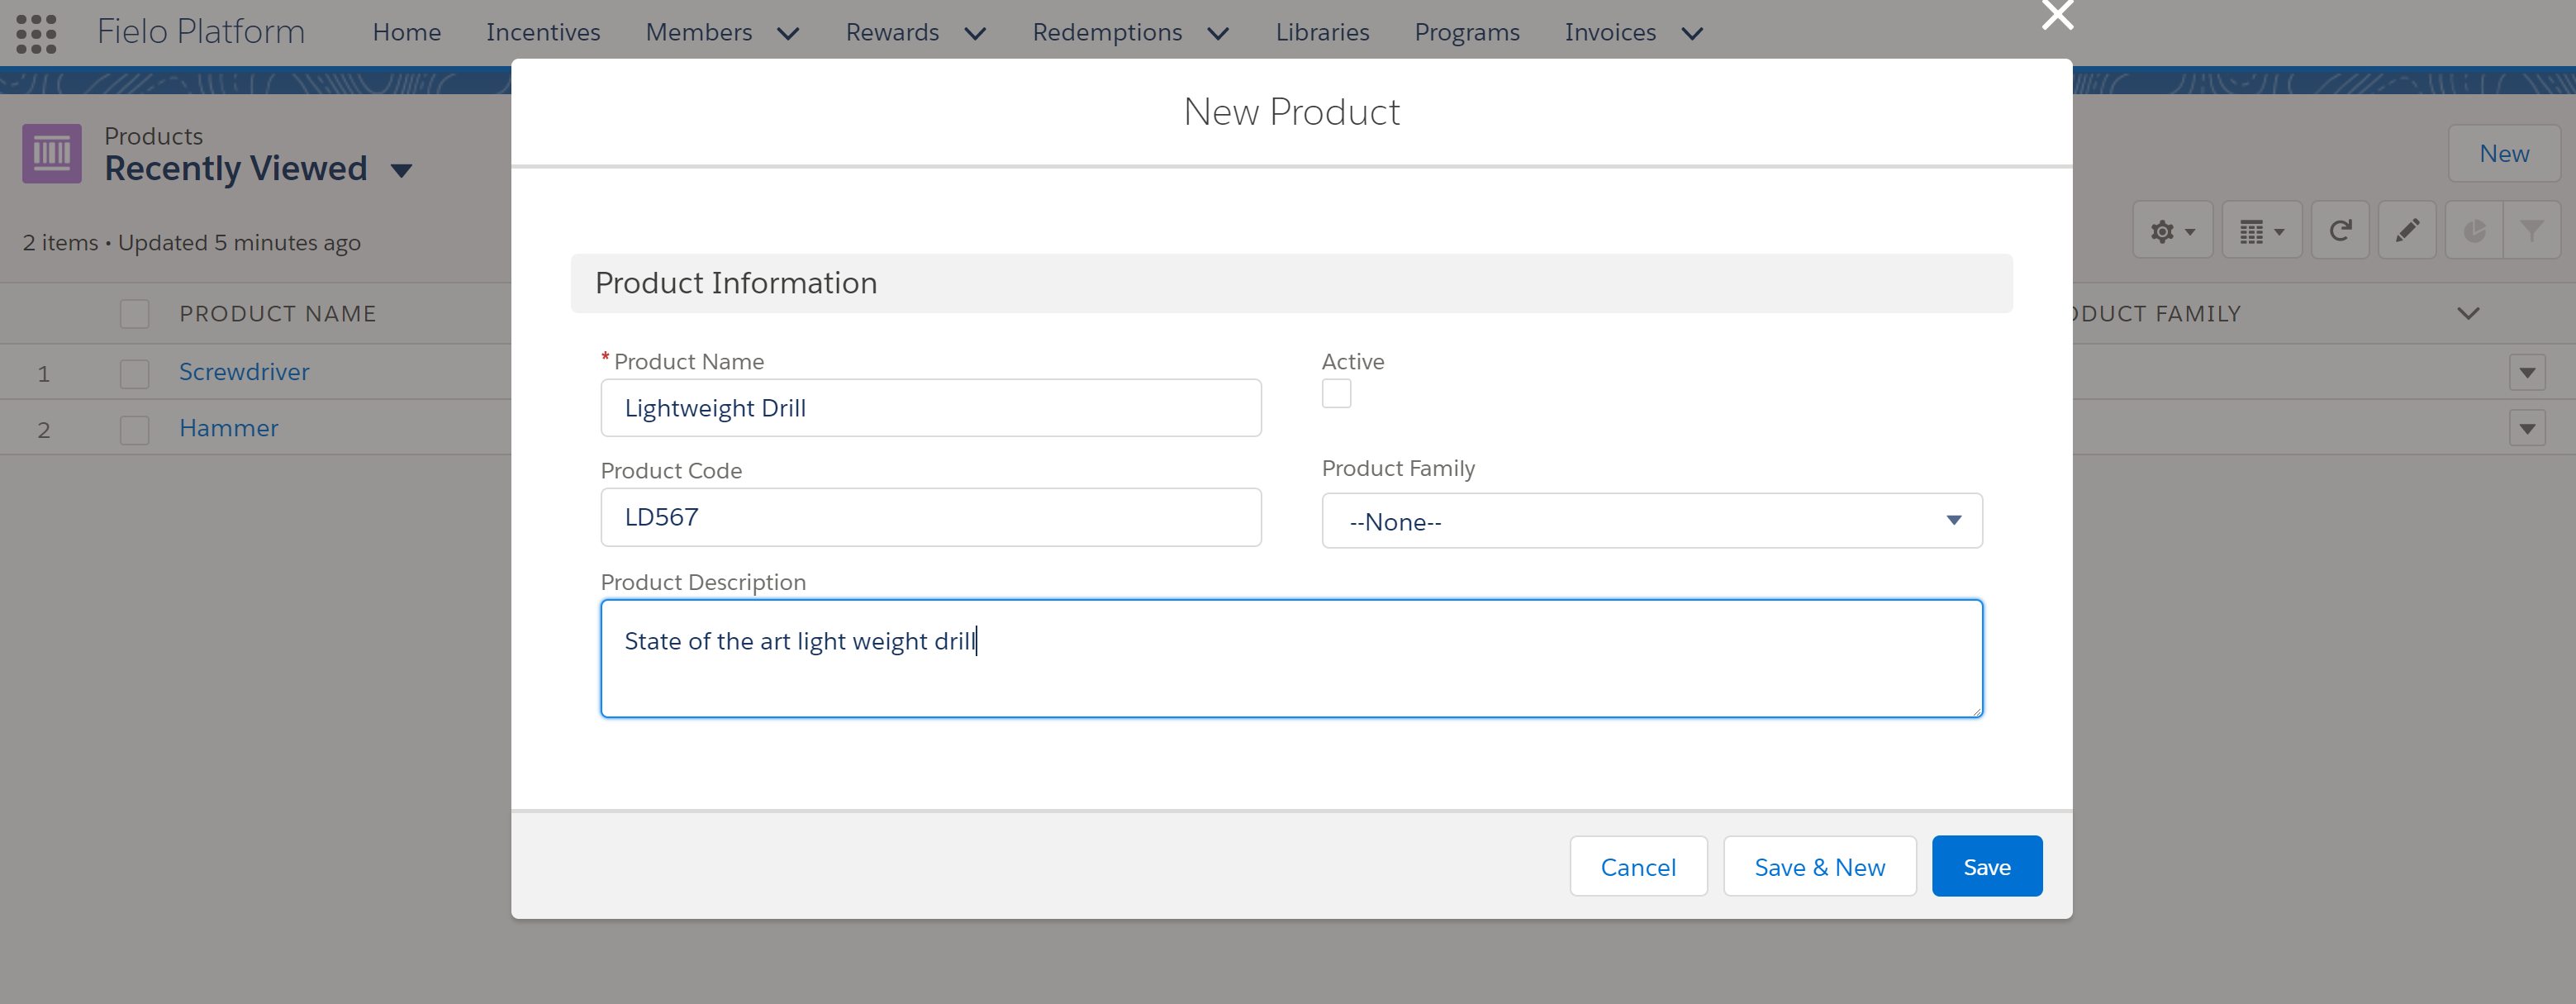
New Product information
Then you will see an overview screen with all of the Product Information you provided. From this point onwards, you'll be able to add this Product when you upload an Invoice.
If you want to make any changes to your new Product, or if you want to remove it entirely, you can select the Edit and Delete buttons in the top of the overview screen.
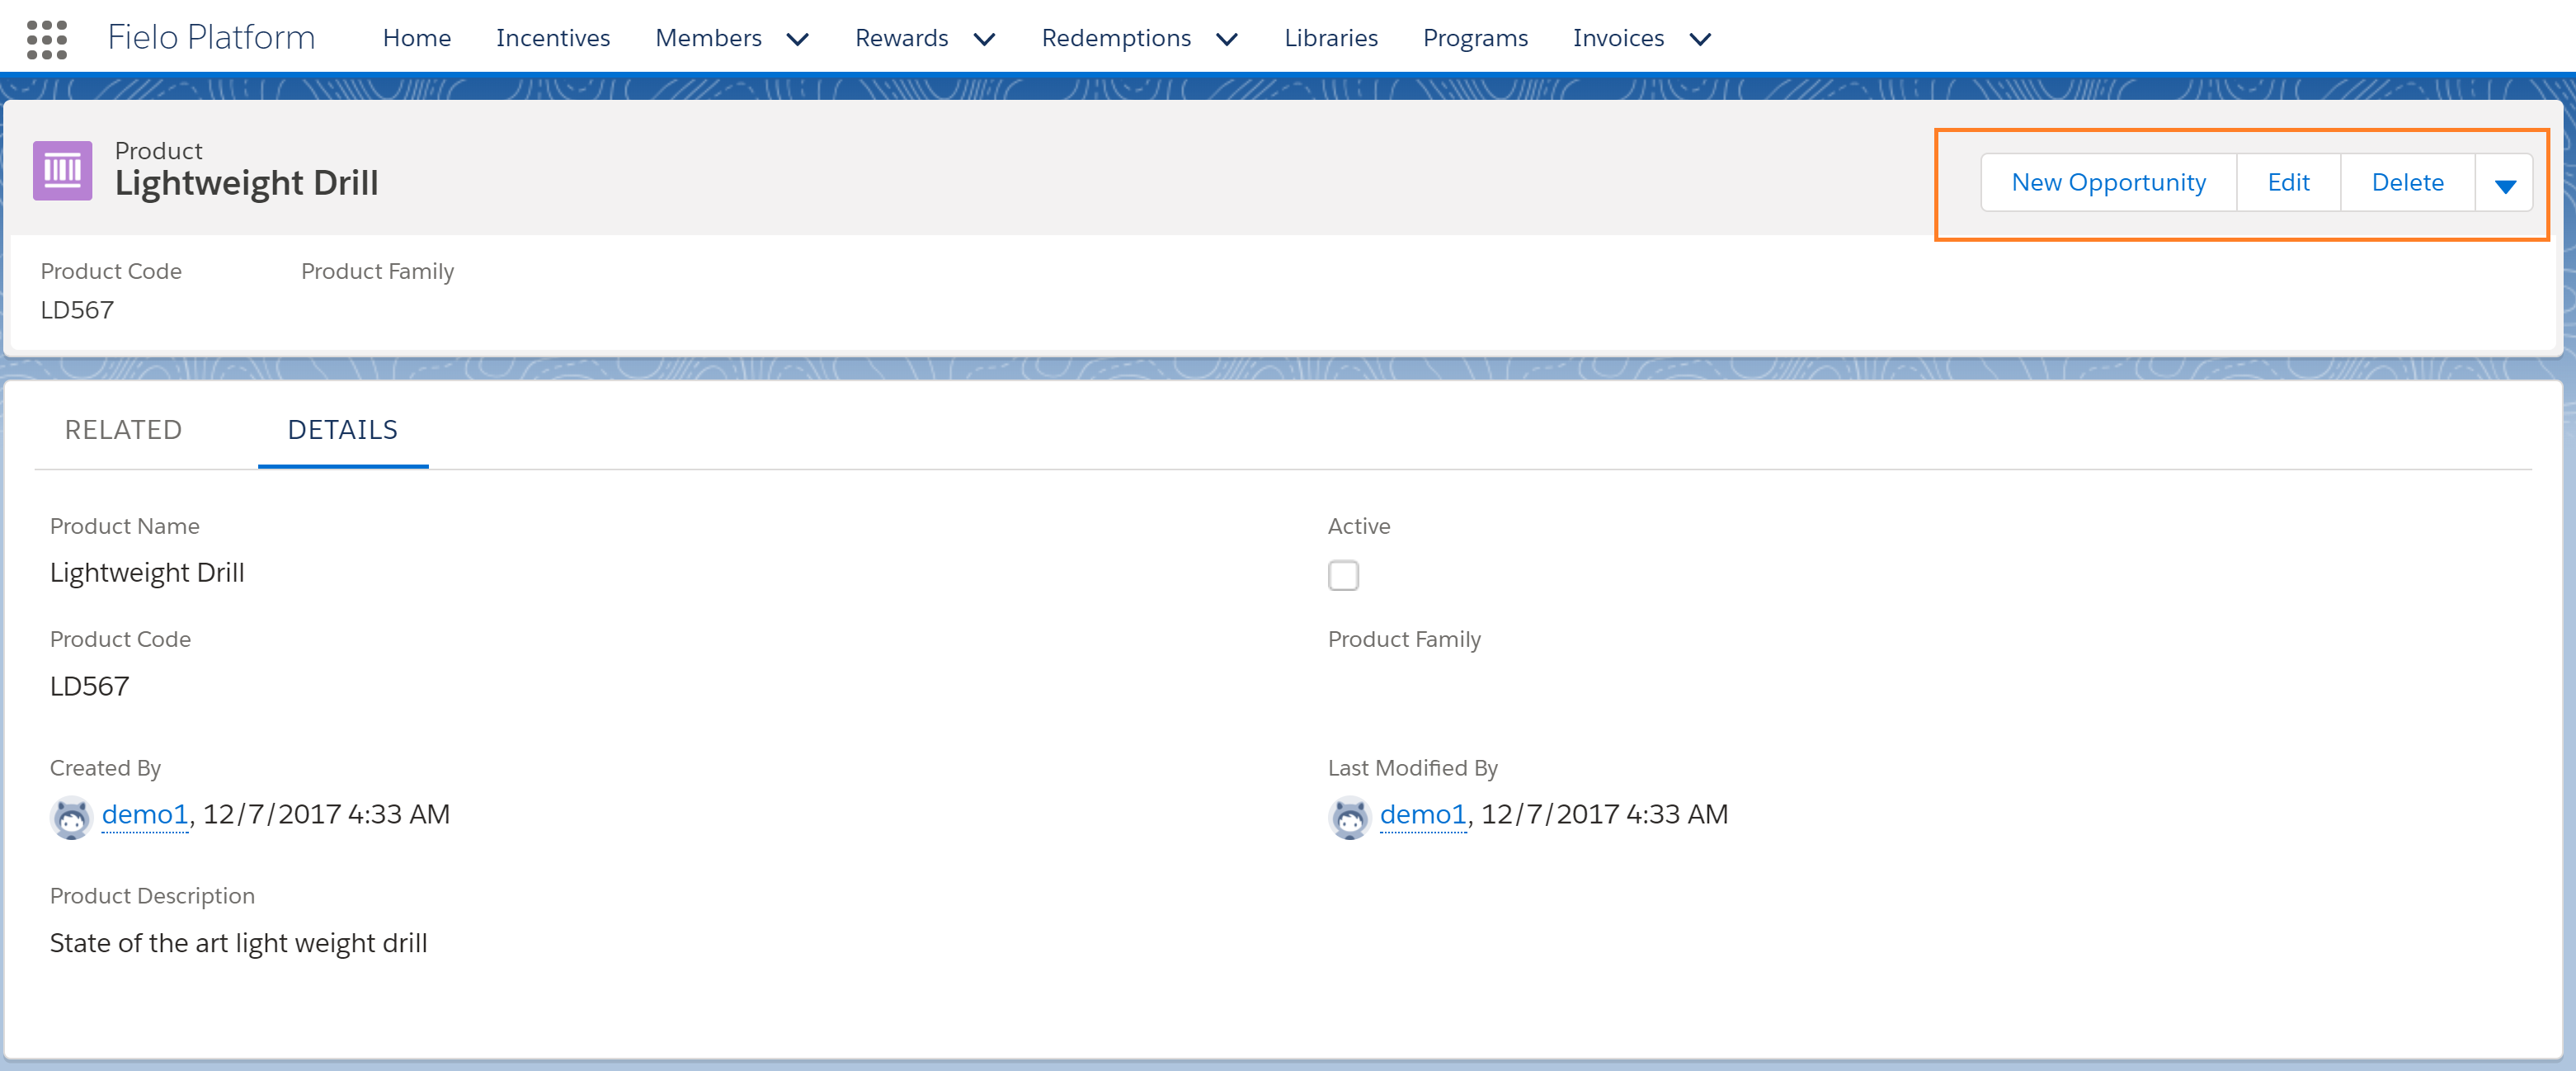
Edit or Delete your new Product entry
Updated over 1 year ago