
Advanced Features
How to change the Default Product object
Proof of Purchase has a functionality called Product Flexibility which enables you to change the Product object used by PRP By default, this Product obect used by Proof of Purchase is the object which comes with Salesforce (API Name: Product2). Here you will see how to use another object - a process which needs to be configured in both IAS and CMS.
For the purposes of explaning how to do this, we'll use an object called ExternalProduct__c (the __c stands for Custom) as an example of the replaced Proof of Purchase Product object.
Custom Settings
Both IAS and CMS use the same Custom Settings to discover which Product Object is being used. To change that, go to Setup and search Custom Settings on the Quick Find.
Click Manage on Public Settings (where Namespace Prefix is FieloPLT).
In the Default Organization Level Value section click Edit (or New if there is nothing defined).
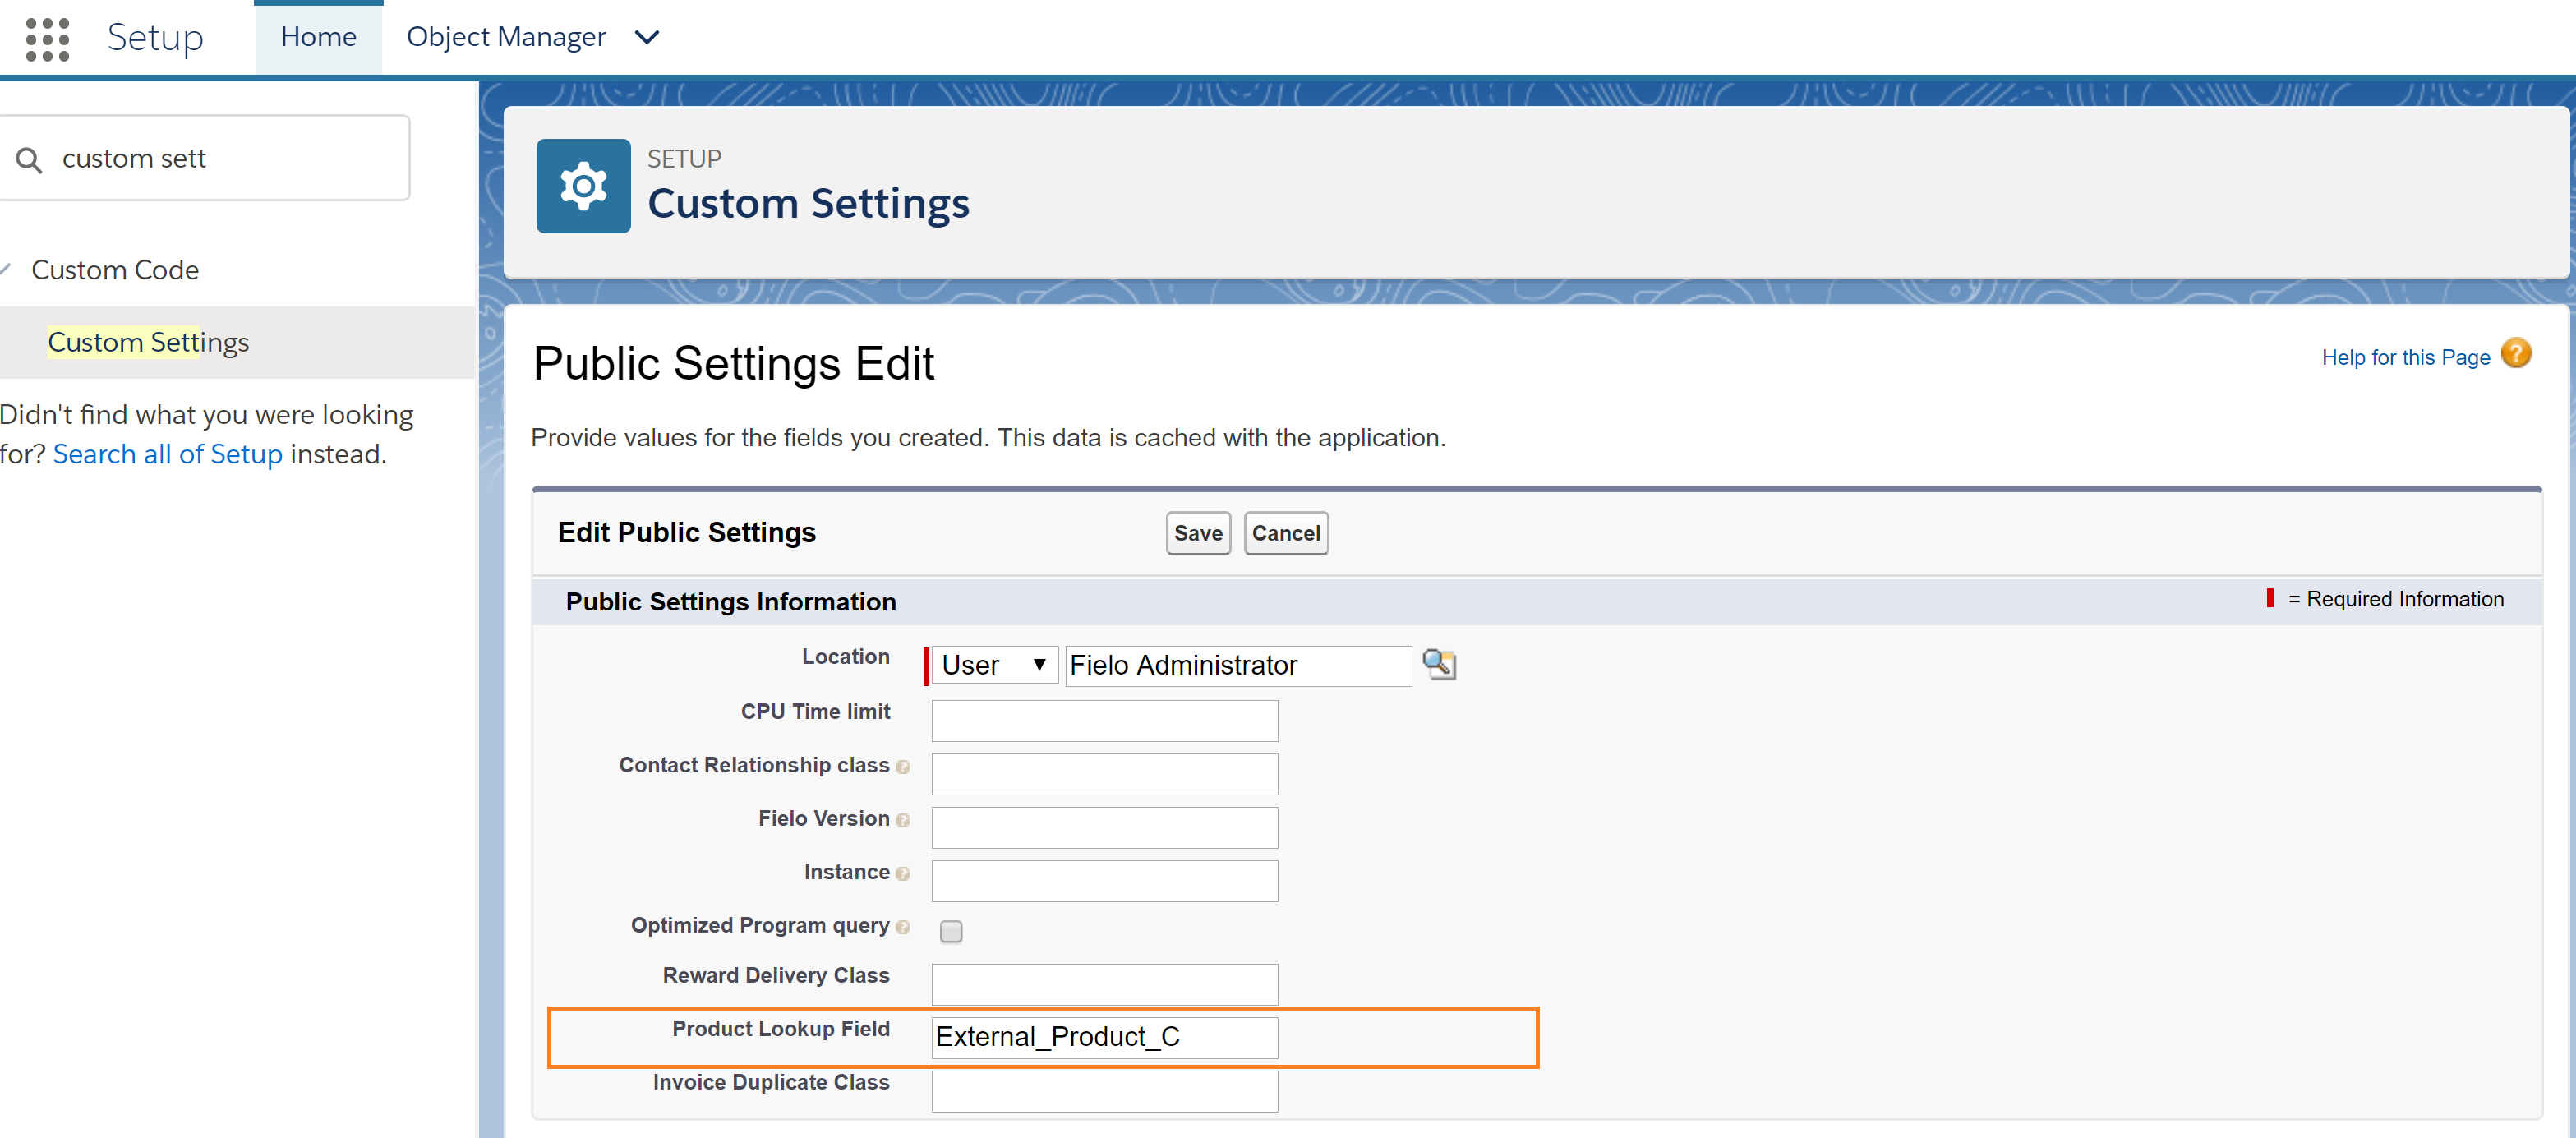
Product Lookup Field
In Product Lookup Field enter the API Name of the field that belongs to Invoice Items (FieloPRP InvoiceItem__c) that points to your custom Product object (in this case, (thec stands for Custom). Once ready, you can hit Save.
IAS
The field being used by the Invoice Item to reference the Product and the fieldsets of the Product Advanced Search are controlled by Page Settings. To get to the Invoice Page Settings, go to the Invoices tab and next to New, click on 🔽, then select Settings.
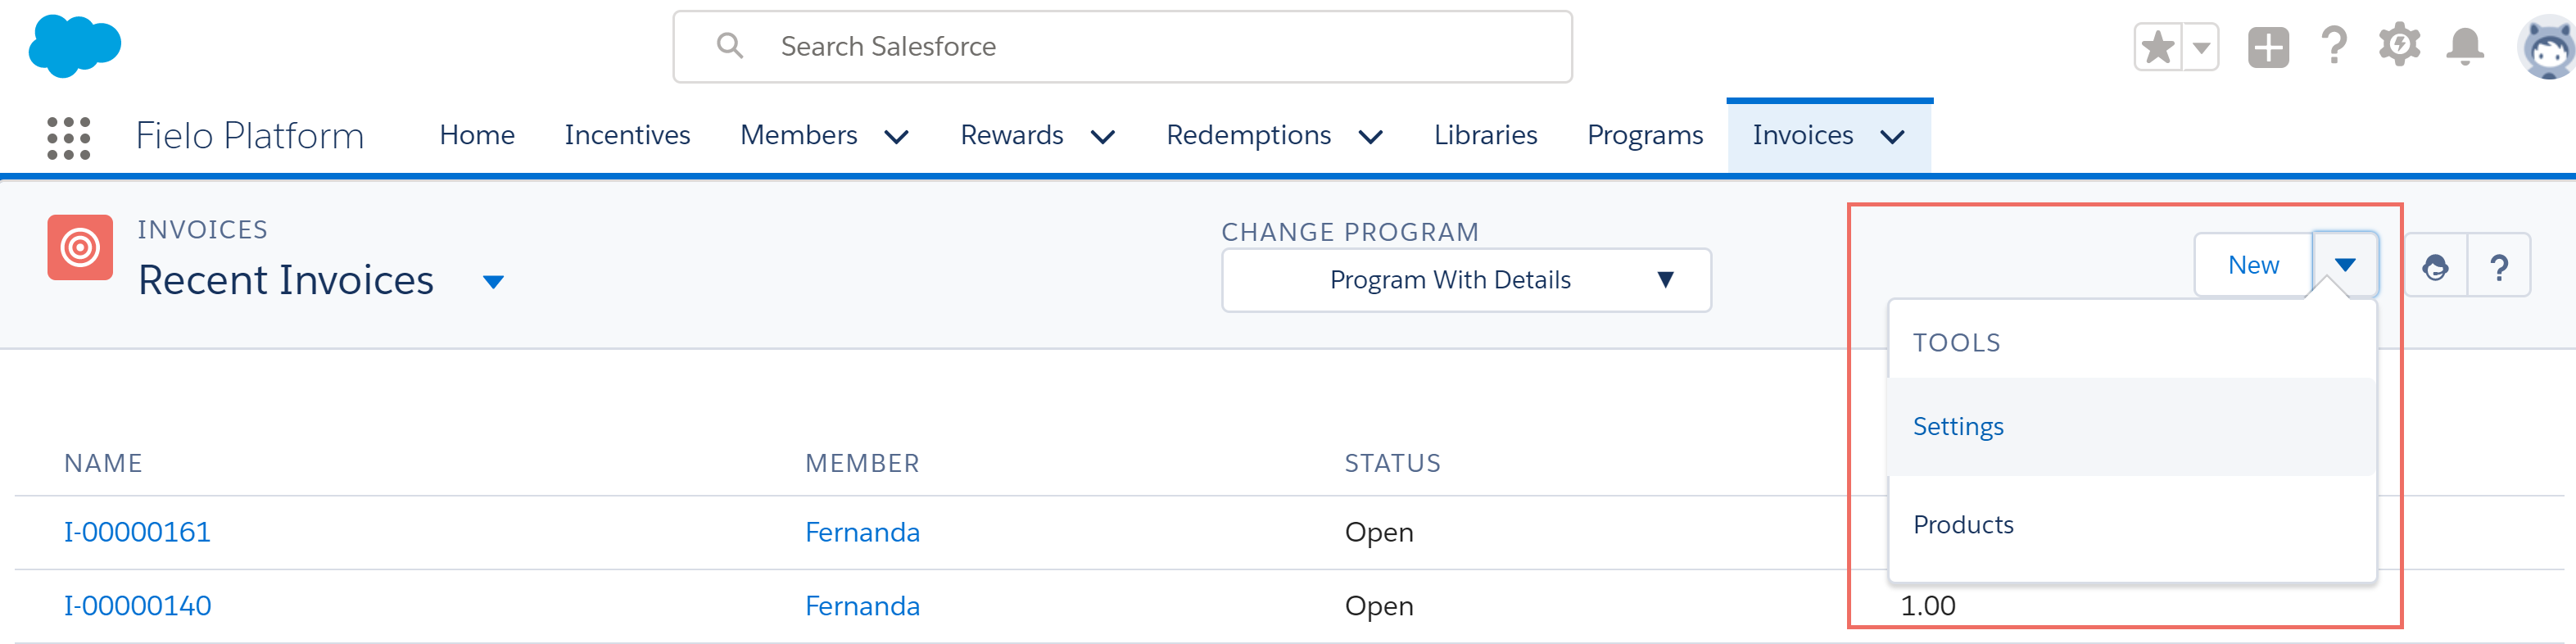
Invoice Page Settings
Invoice New Page
Under New Settings, click on Invoice> New. A New page is a form which provides the controls for creating a new record - for example, the information needed to create a new Invoice.
In the Sections field, you'll find a JSON file that contains 4 sections:
Information: Controls the fields displayed in the Information section, such as Invoice Number, Date, etc.
"Name":"Information",
	"Rows":[
		[
			{"Name":"FieloPRP__Member__c","Type":"lookup"},
			{"Name":"FieloPRP__HasDetails__c","Type":"checkbox"}
		],
		[
			{"Name":"FieloPRP__InvoiceNumber__c","Type":"input"}
		],
		[
			{"Name":"FieloPRP__Amount__c","Type":"input"},
			{"Name":"FieloPRP__Date__c","Type":"input"}
		],
		[
			{"Name":"FieloPRP__Description__c","Type":"input"}
			,{"Name":"FieloPRP__Distributor__c","Type":"lookup"}
		]
]FieloPRP__Product: Controls the fields displayed in the Advanced Product Search section.
"FieloPRP_Product":[
[
{"Name":"Name","Type":"input"},
{"Name":"Family","Type":"picklist"},
{"Name":"ProductCode","Type":"input"}
Which looks like this:
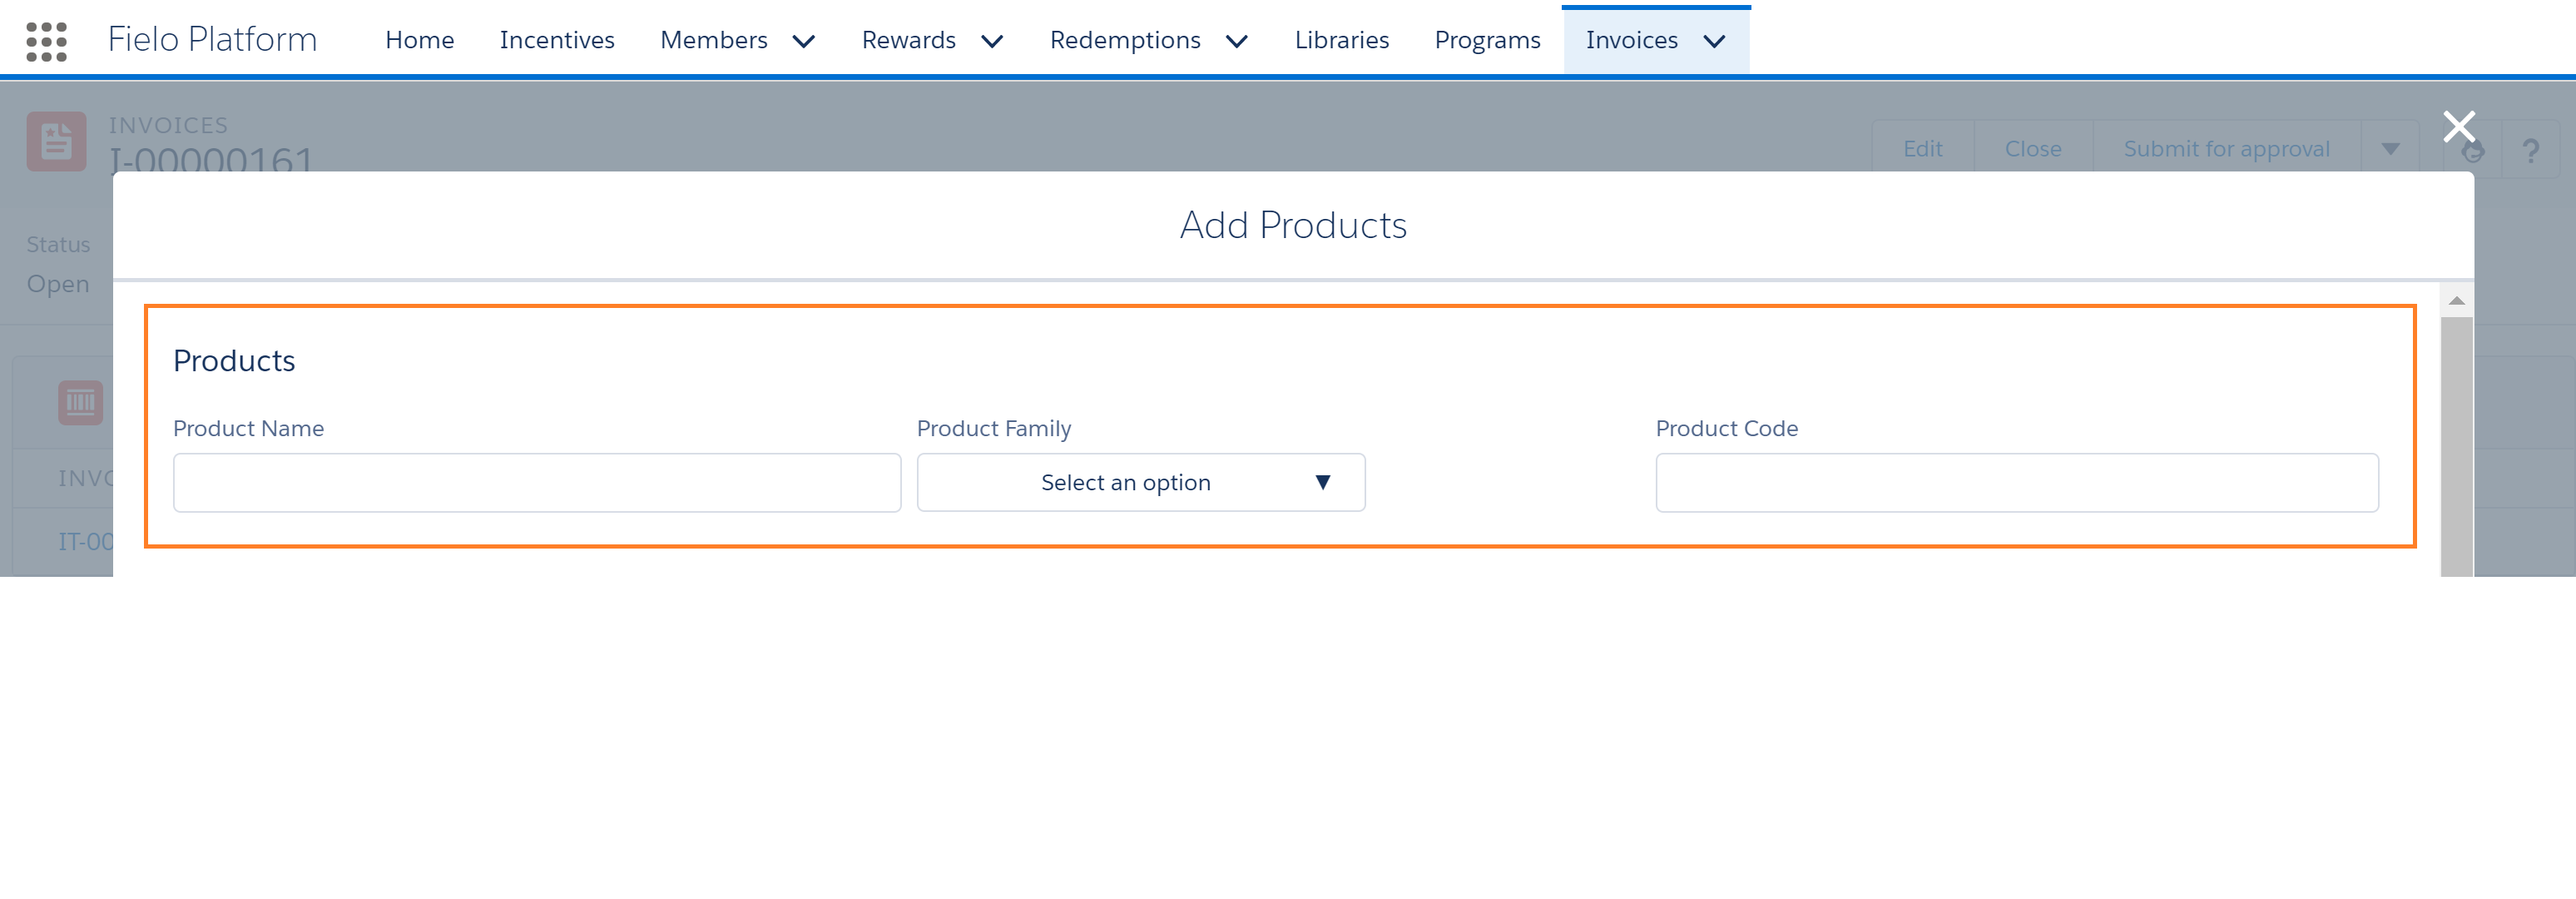
Advanced Product Search Section
FieloPRP__ProductRecent: Controls the fields displayed in the recent records results of the Advanced Product Search.
"FieloPRP_ProductRecent":[
[
{"Name":"Name","Type":"input"},
{"Name":"Family","Type":"picklist"},
{"Name":"ProductCode","Type":"input"}
Which looks like this:
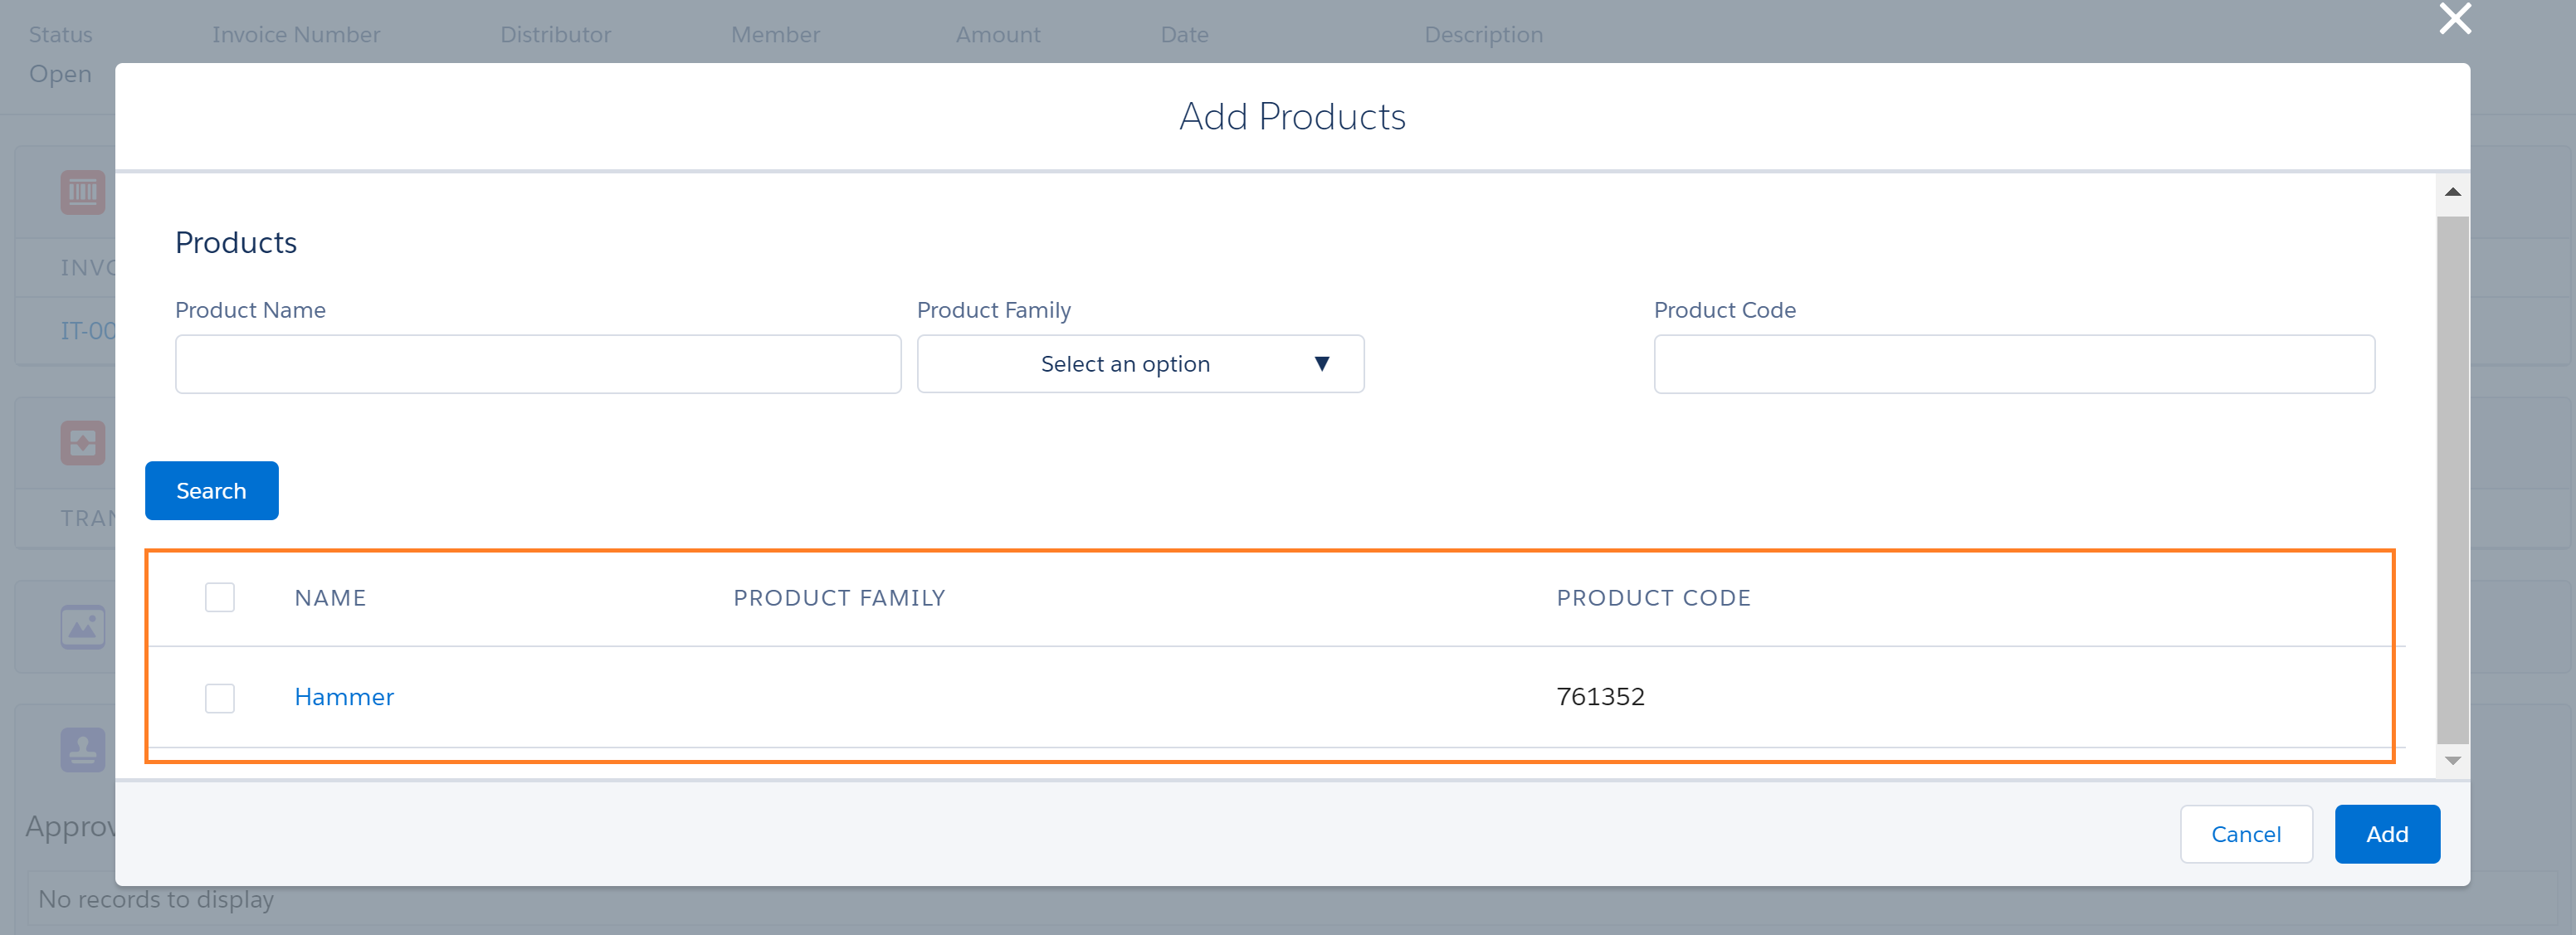
Advanced Product Search: Recent Records
FieloPRP__InvoiceItems: Controls the fields displayed in the Items section of the Invoice.
"FieloPRP_InvoiceItems":[
[
{"Name":"FieloPRP__Quantity__c","Type":"input"
"ClassName":fielosf-product_qty","onchange":
"refreshTotalPriceProxy_"},
{"Name":"FieloPRP__Product__c","Type":"lookup",
"ClassName":fielosf-product_name","onchange":
"refreshTotalPriceProxy_"},
{"Name":"FieloPRP__UnitPrice__c","Type":"input,
"ClassName":"fielosf-product_unit-price",
"onchange":refreshTotalPriceProxy_"},
{"Name":"FieloPRP__TotalPrice__c","Type":"input,
"ClassName":"fielosf-product_total-price",
"onchange":refreshTotalPriceProxy_")
Which looks like this:
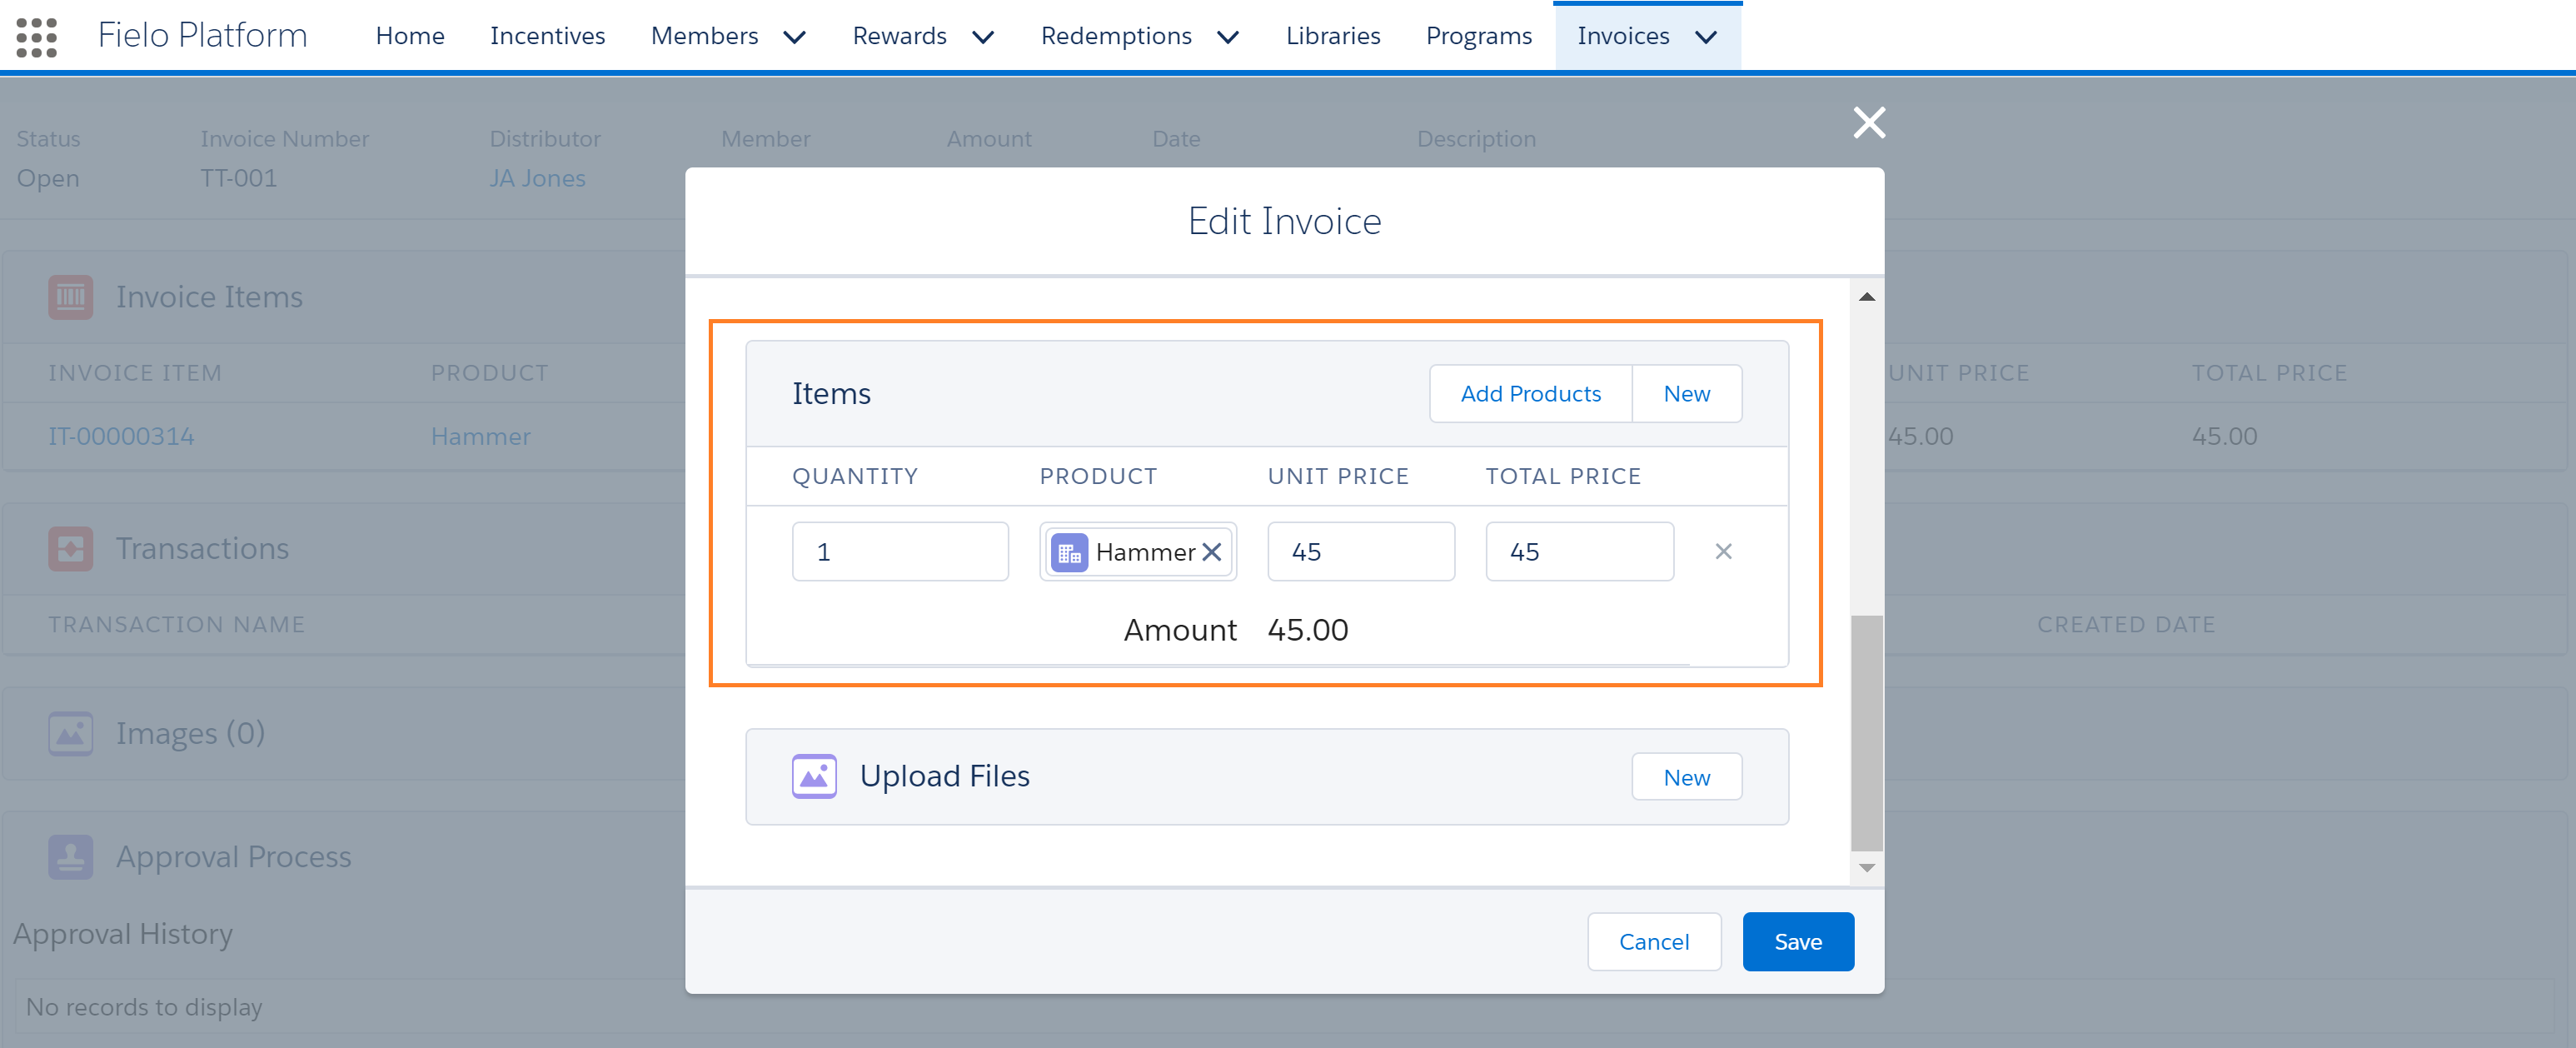
Invoice Items
We recommend using an advanced text editor tool to change the JSON. In order to input a new object, simply do the following:
"FieloPRP_Product":[
[
{"Name":"Name","Type":"input"},
{"Name":"Family__c","Type":"picklist"},
{"Name":"Description__c","Type":"input"}
Family__c and Description__c are fields from the new Product object.
"FieloPRP_ProductRecent":[
[
{"Name":"Name","Type":"input"},
{"Name":"Family__c","Type":"picklist"},
{"Name":"Description__c","Type":"input"}
]
Family__c and Description__c are fields from the new Product object.
"FieloPRP_InvoiceItems":[
[
{"Name":"FieloPRP__Quantity__c","Type":"input"
"ClassName":fielosf-product_qty","onchange":
"refreshTotalPriceProxy_"},
{"Name":"External__Product__c","Type":"lookup",
"ClassName":fielosf-product_name","onchange":
"refreshTotalPriceProxy_"},
{"Name":"FieloPRP__UnitPrice__c","Type":"input,
"ClassName":"fielosf-product_unit-price",
"onchange":refreshTotalPriceProxy_"},
{"Name":"FieloPRP__TotalPrice__c","Type":"input,
"ClassName":"fielosf-product_total-price",
"onchange":refreshTotalPriceProxy_")
External__Product__c is the lookup 🔎 field from Invoice Items for the new Product object.
Once you've saved your JSON file, go to the Libraries tab and click FieloPRP. Choose Invoice> New and Invoice> Edit from Page Settings.
Paste the content of the new JSON into the Sections field:
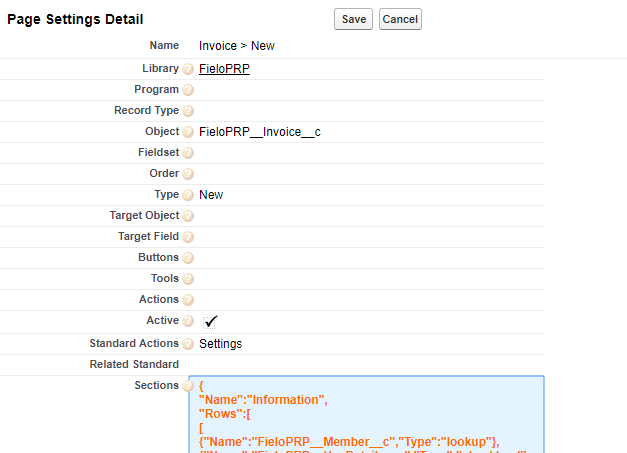
Pasting the new JSON
Save the changes in both Page Settings Types.
Invoice Landing Page
On the Invoices Landing Page, it is necessary to change the Products link (Tools > Products).
In Invoice > Landing page, go to Tools.
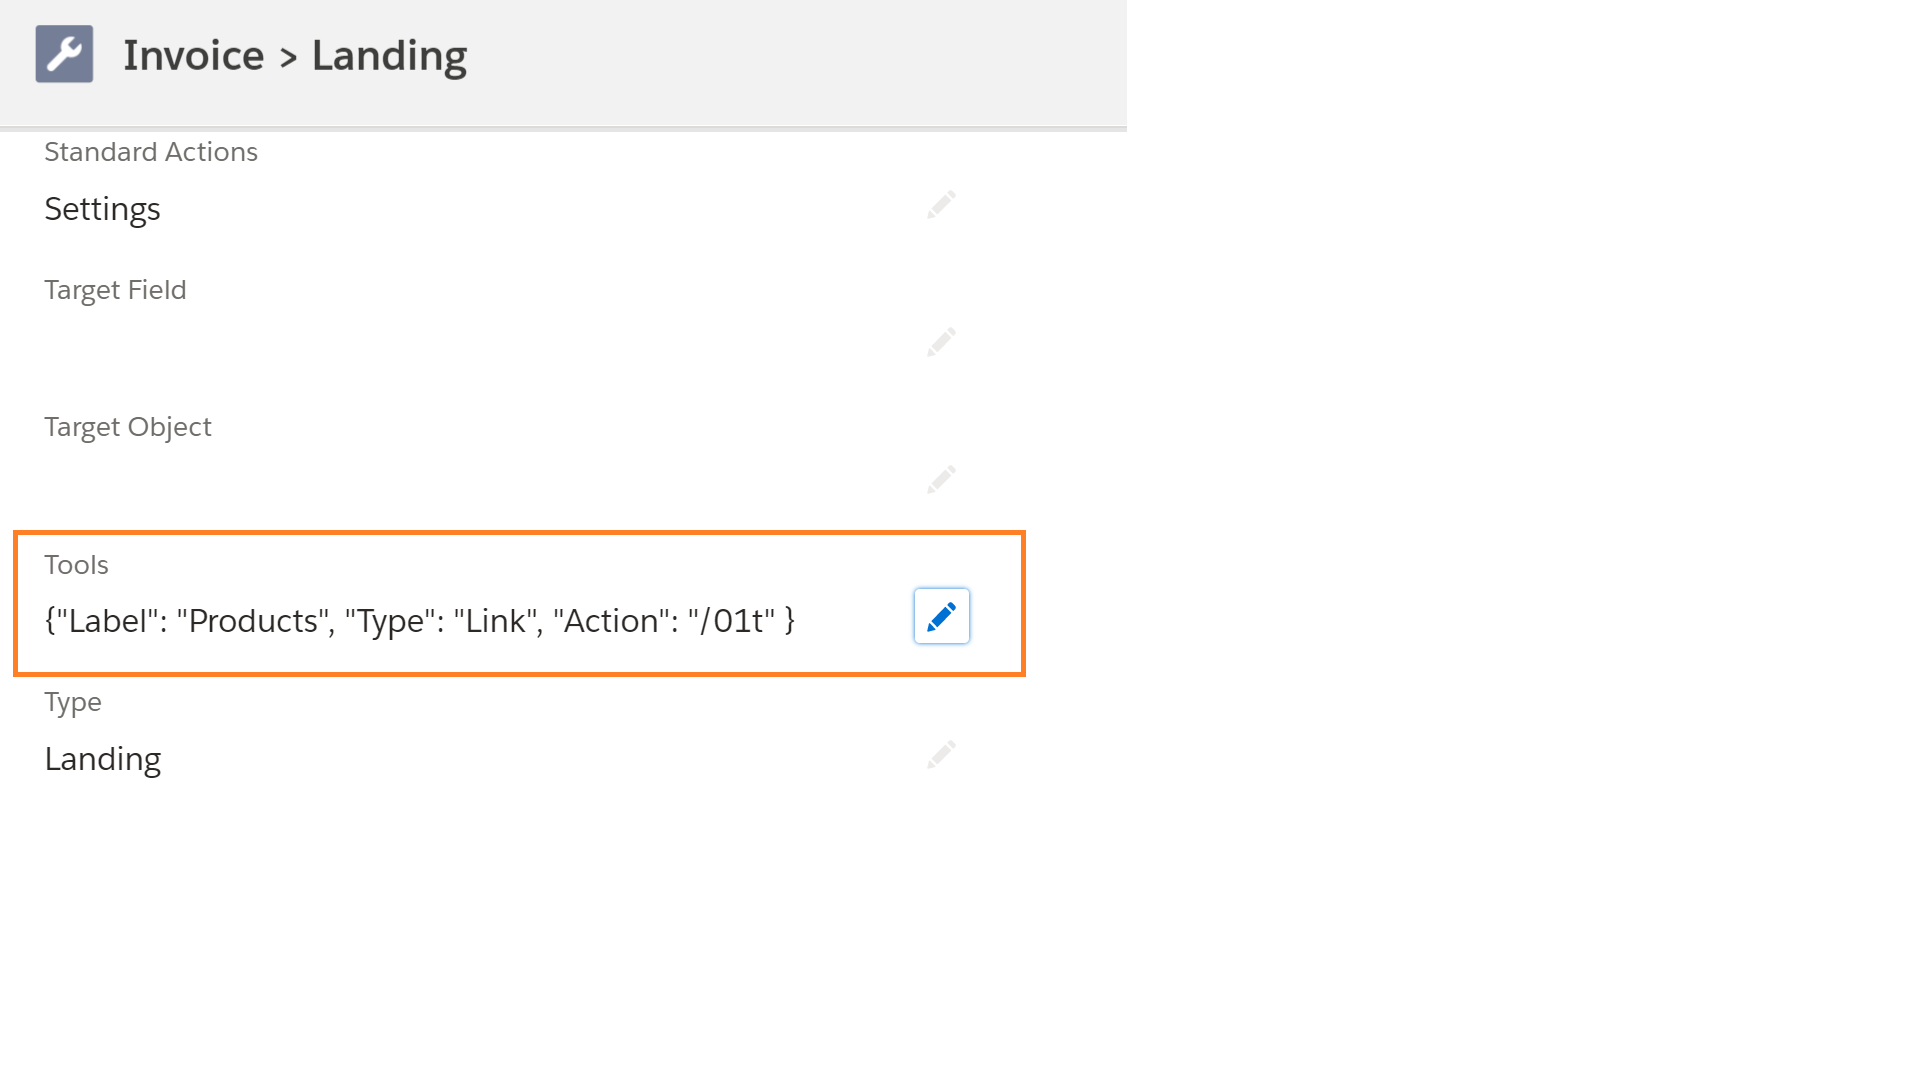
Landing Page Settings, Tools
Change the Action URL string to the one corresponding to the new External Product list.
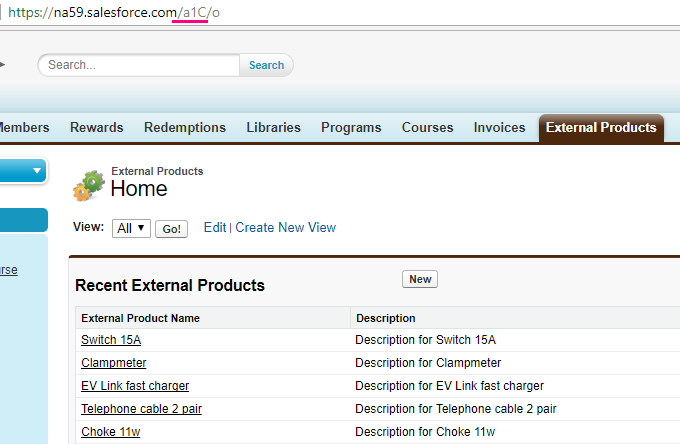
External Product List
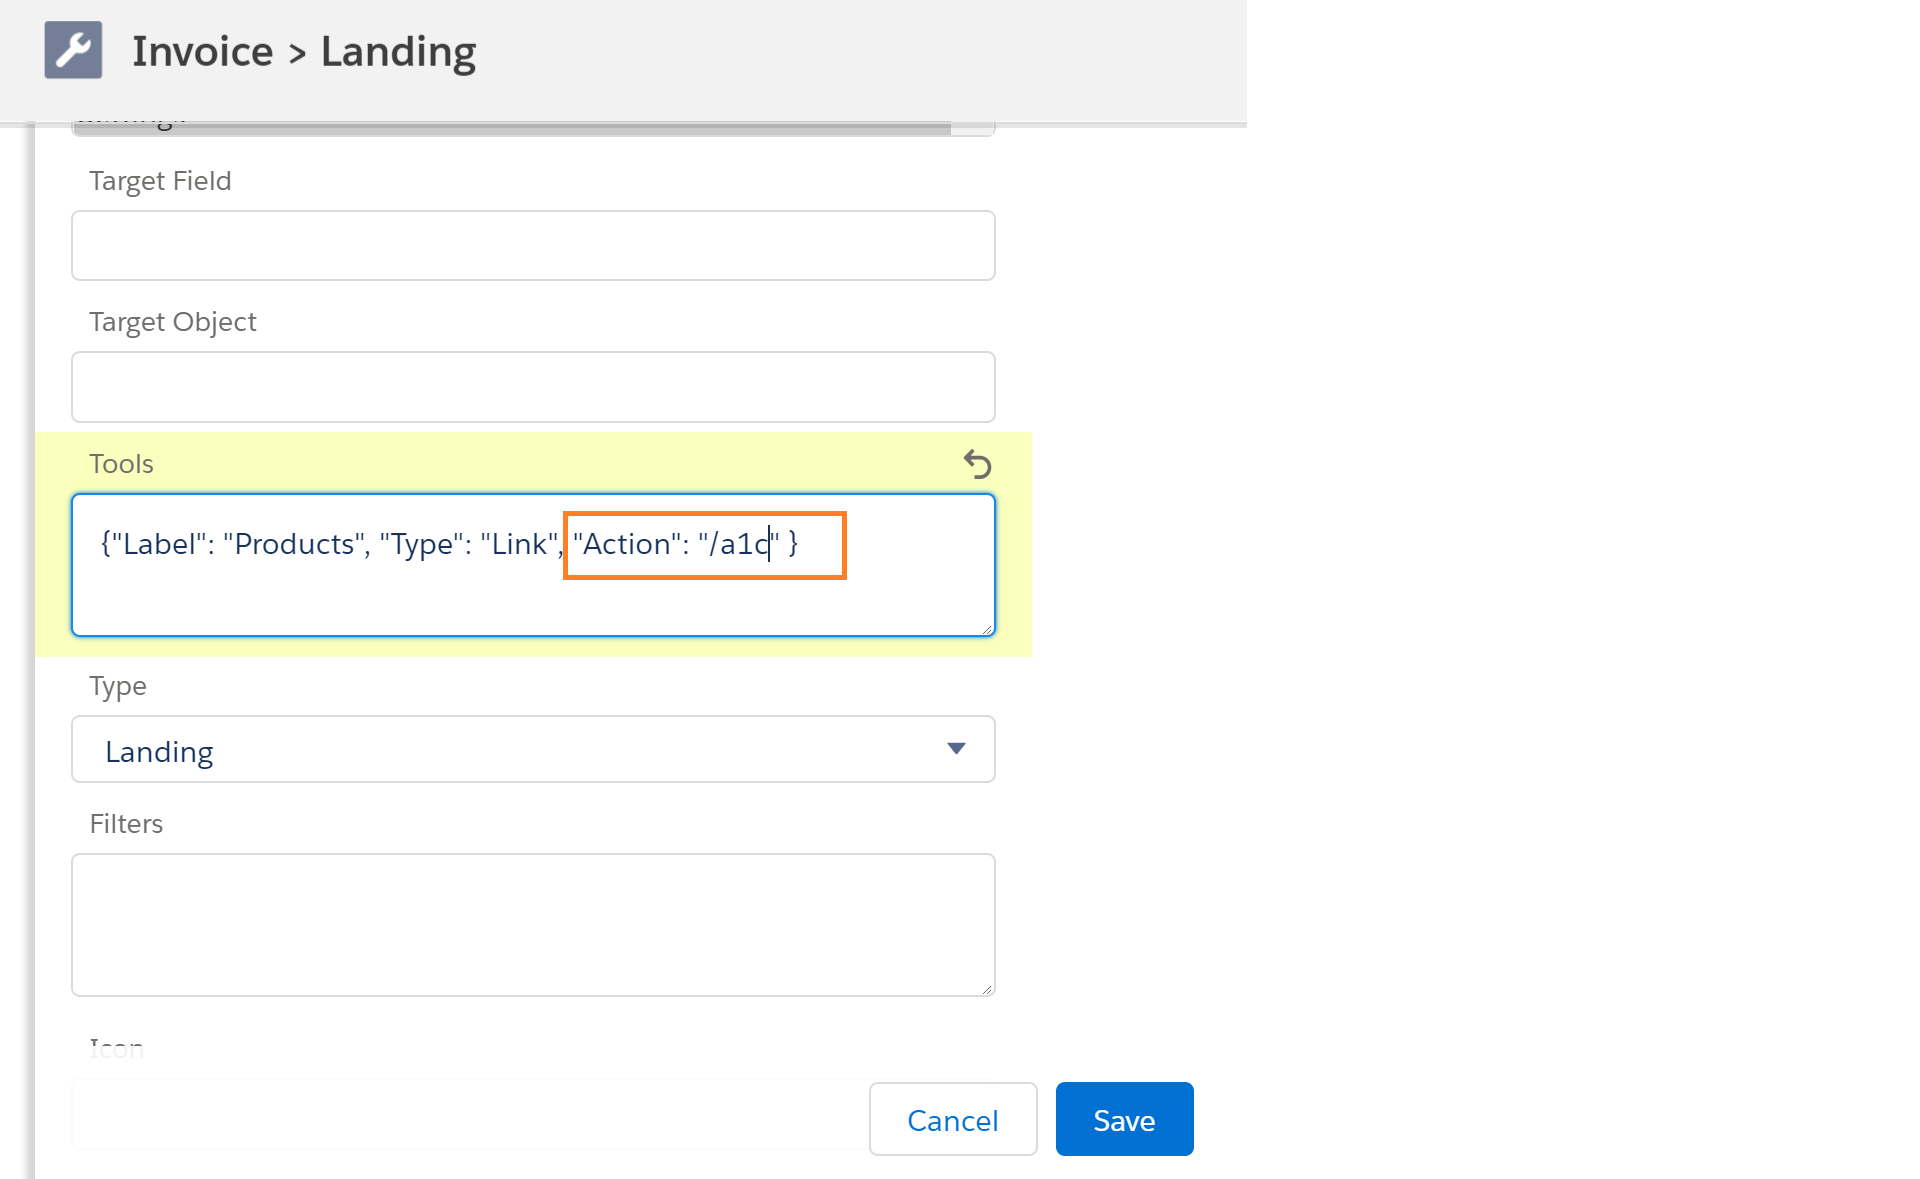
URL edited
After clicking the new Products link, you'll be able to see the custom Product (External Product) list.
CMS Settings
In order to use the custom Product object (i.e. External Product) in the CMS for your Site to show its information, you need to make the following settings:
Site Permissions
- From Setup, search Sites on the Quick Find bar.
- Choose Fielo Site to modify the Public Access Settings.
- Once you're in Public Access Settings, go to Apps and select Object Settings.
- For the new custom object (i.e. External Product) click Edit to enable all Object Permissions.
- Tick all Read Access and Edit Access (if available) checkboxes from Field Permissions.
Fielo Member Permissions
- From Setup, search Sites on the Quick Find bar.
- Choose the Fielo Member Site profile.
- Once you're in, go to Apps and select Object Settings.
- For the new custom object (i.e. External Product) click Edit and enable Read as the Object Permission.
- Tick all Read Access and Edit Access (if available) checkboxes from Field Permissions
Avoiding Products being shown as links
To prevent Products from displaying a link on the Invoice Detail page on the CMS Site.
- In the Invoice Item object, create a new Formula field.
- Assign it a label and a name, removing all the underlined characters from its Name field (CamelCase notation).
- Set the Formula Return Type to Text
- In the Formula field (Advanced Formula tab), click the Insert Field button, select the field as shown in the example below and click Insert.
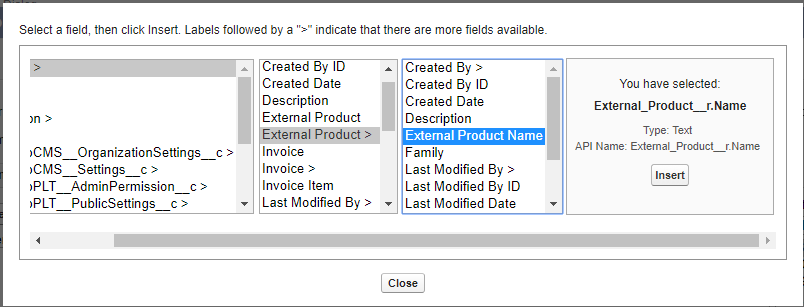
Formula settings
On the next page, make it visible for all profiles. Click Next then Save.
New Component for the new object
Now you need to create a Component so that you can include show the information contained in the new object (i.e. External Product) in Pages.
- From Fielo CMS, go to the Plugins tab.
- Click 🔽 and select Local
- From the Components Library card, click New.
- Create the new Component as follows:
Component Type: List
Name: Component Name (i.e. External Product).
Layout: Table
Object: Custom object created to replace Product (i.e. External Product).
Data Class: FieloCMS.StandardAPI.
Fields: Here you can add the desired fields you want the Component to show as Default Fields, such as Product Family, Description, etc. and any other field from External Product - the new object that replaces Product.
Site settings
- From Fielo CMS, go to the Sites tab.
- Select the Invoice Upload Settings Page.
- Add the Component created before.
- Change its name as desired. Make sure to include in the fieldset the fields to be displayed for the products and *Save**.
- Still on the Invoice Upload Settings Page, edit the Invoice Items Component by changing the Product Name field to the corresponding field of the new object. Save it.
- Back to Sites, hit the Invoice Detail page.
- In the Invoice Items Component, replace the Product Name field with the previously created Formula field and save it.
- On the Invoice Upload Page, edit the widget component, changing the Product Source Component from the old list to the new one.
Updated over 1 year ago