
Reports
How to make and use Reports for Programs, Promotions and Challenges
Fielo allows you to create Reports about your Program, right from the Programs tab. It also allows you to add them to particular Incentives, both Promotions and Challenges.
Creating a Report
Here we'll take you through how to add a Report, also referred to as a KPI Domain. The KPI Domain is the association between the KPI (report) and a specific Incentive or Program
Creating Reports for Challenges and PromotionsIf you created a KPI for Challenges or Promotions, you need to add that KPI Domain from the relevant Challenge or Promotion page.
For example, if you created a KPI for a Promotion, go to an existing Promotion detail page and add the KPI Domain there. Follow the steps outlined for a Program-specific Report.
If you created a KPI for a Challenge, go to an existing Challenge detail page and add the KPI Domain there. Follow the steps outlined for a Program-specific Report.
Here we'll show you how to create a KPI Domain for a specific Program.
Go to the Programs tab, and click on the Program you want to add the KPI to. This means that you can use the KPIs you created previously while Adding KPIs and add them to your Programs overview page.
The Reports widget provides a snapshot of all Reports, summarized with the total number of Users, Points, or engagements, month over month growth percentage, and a sparkline to show trending behavior for the past 30 days.
Once, you've added a range of Reports to your Program, it should look something like this:
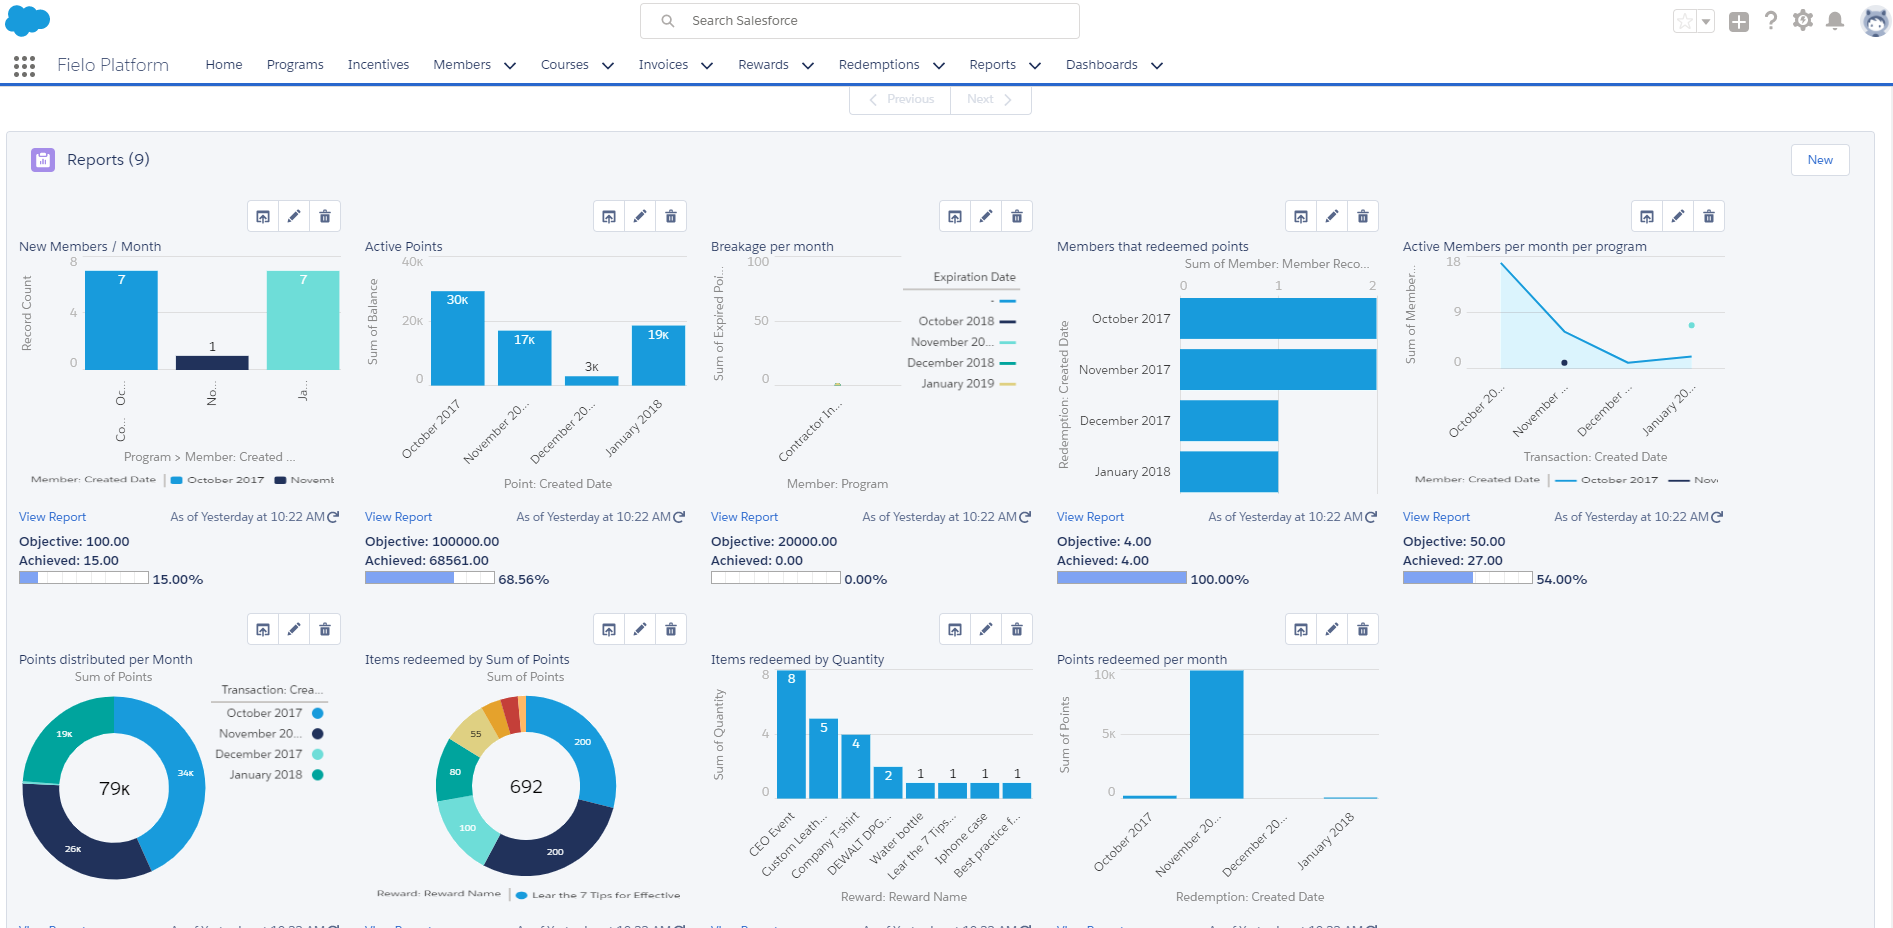
Clicking into an individual Report provides a detailed representation of the data.
Adding a Report or "KPI Domain"
To add a Report scroll down to the Reports section and click New.
You will then have to fill out the following information, which is linked to the KPIs you generated earlier:
- Program: This will automatically be filled out to correspond to the Program you're working from.
- KPI: This is where you select the KPI you want to use which was created earlier. Just start typing the name of the KPI and a list will appear. Select the one you want.
- Objective: This is the feature we mentioned earlier. It allows you to set a target that you want to reach. This should feed through from the KPI you made.
If the field "Report Objective Field" of the KPI was not correctly set, this feature won't work.
- Start Date: Pick the date you want the Report to run from.
- End Date: Pick the date you want the Report to run until.
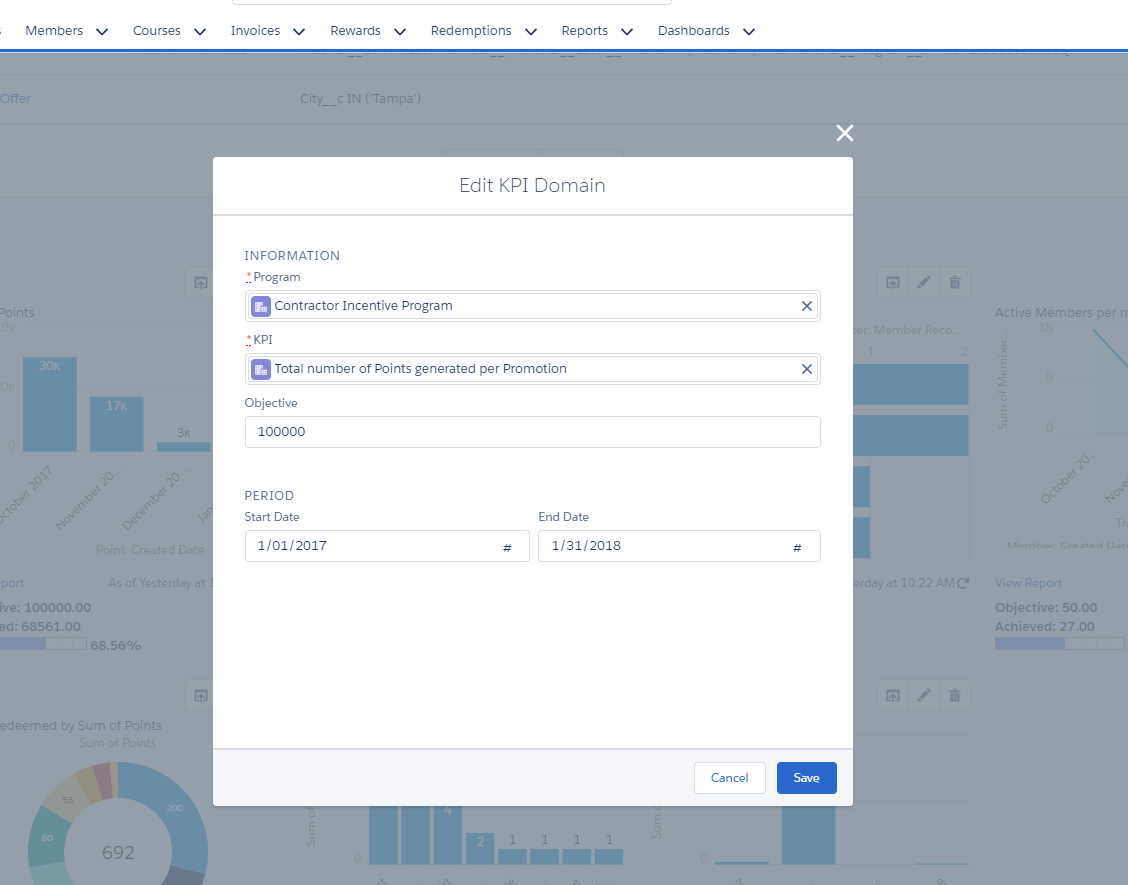
Finally, hit Save.
From here, simply navigate back to the Programs tab and scroll down to Reports again. Presto! You should see your new KPI displayed.
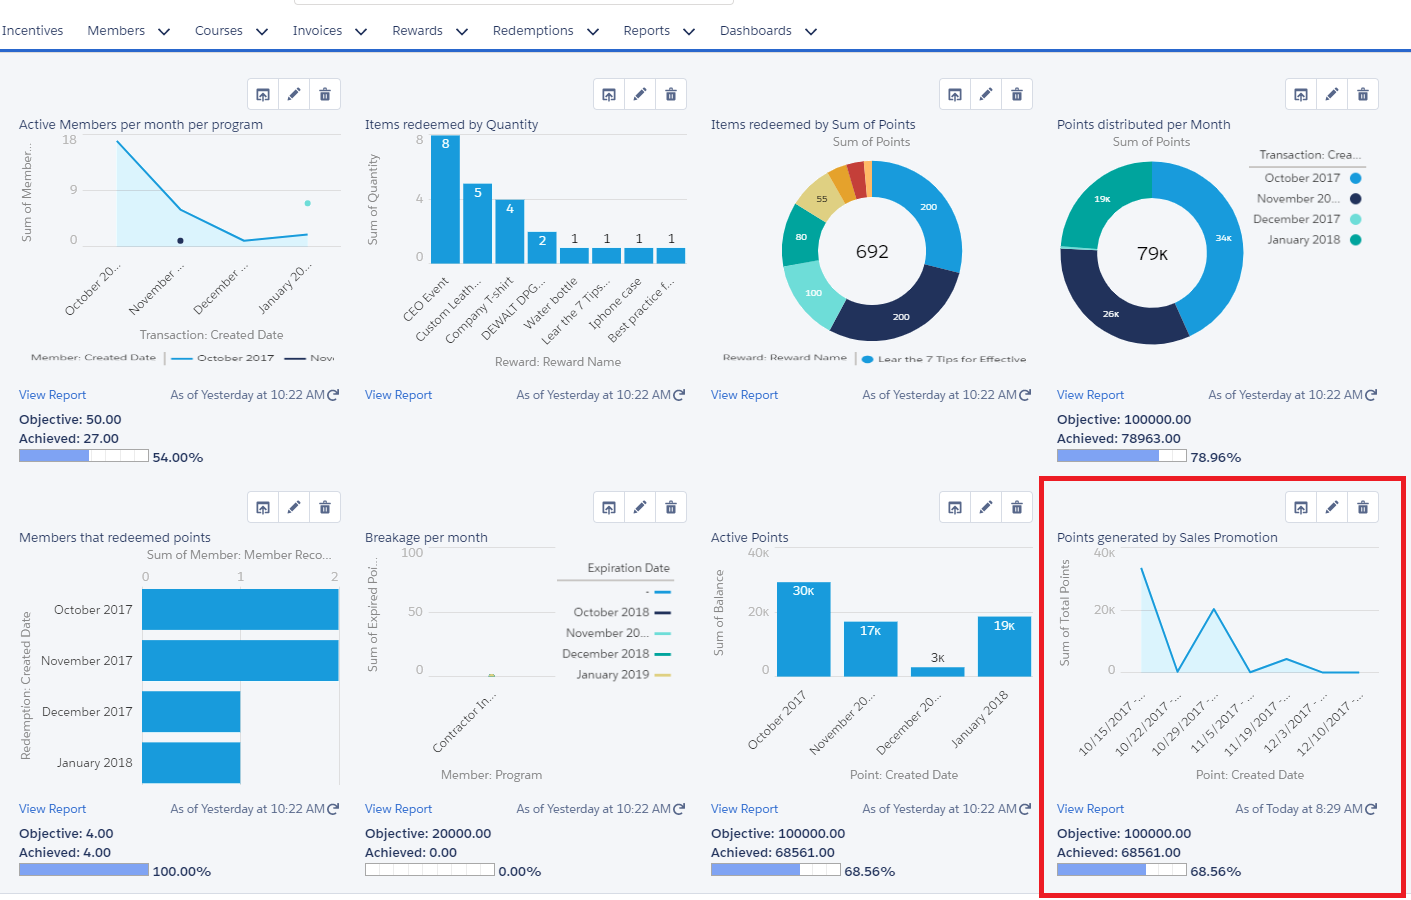
As you can see, there is a bar along the bottom of the graph which lets you see your progress compared to your Objective.
Adding the Program Stats Tab to IAS (Optional)
Optionally, you can access your Program Reports all in one place by activating the Program Stats tab. Let's see how!
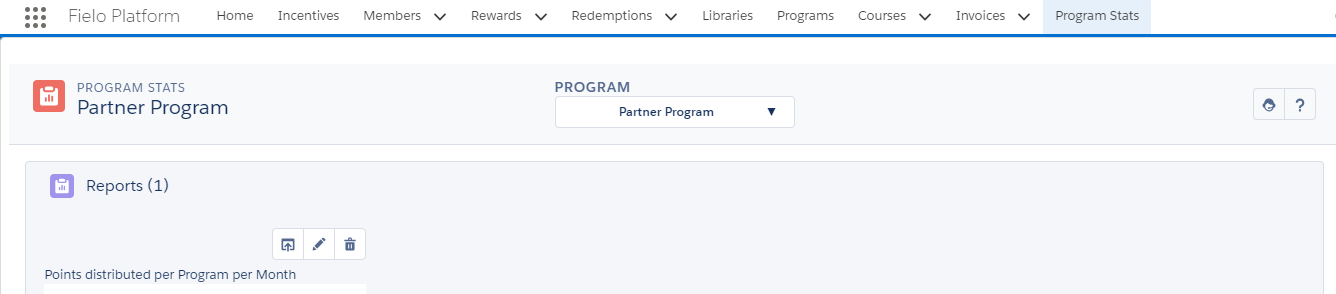
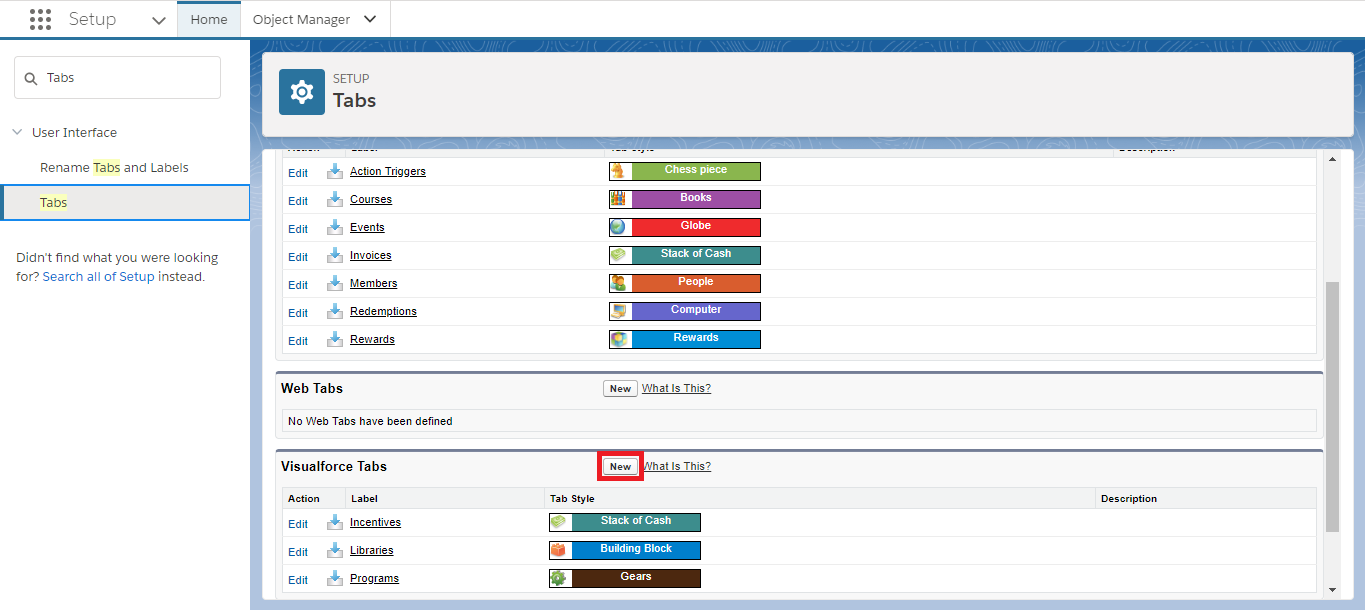
In Salesforce Setup, search for and select Tabs. Under Visualforce Tabs, click New.
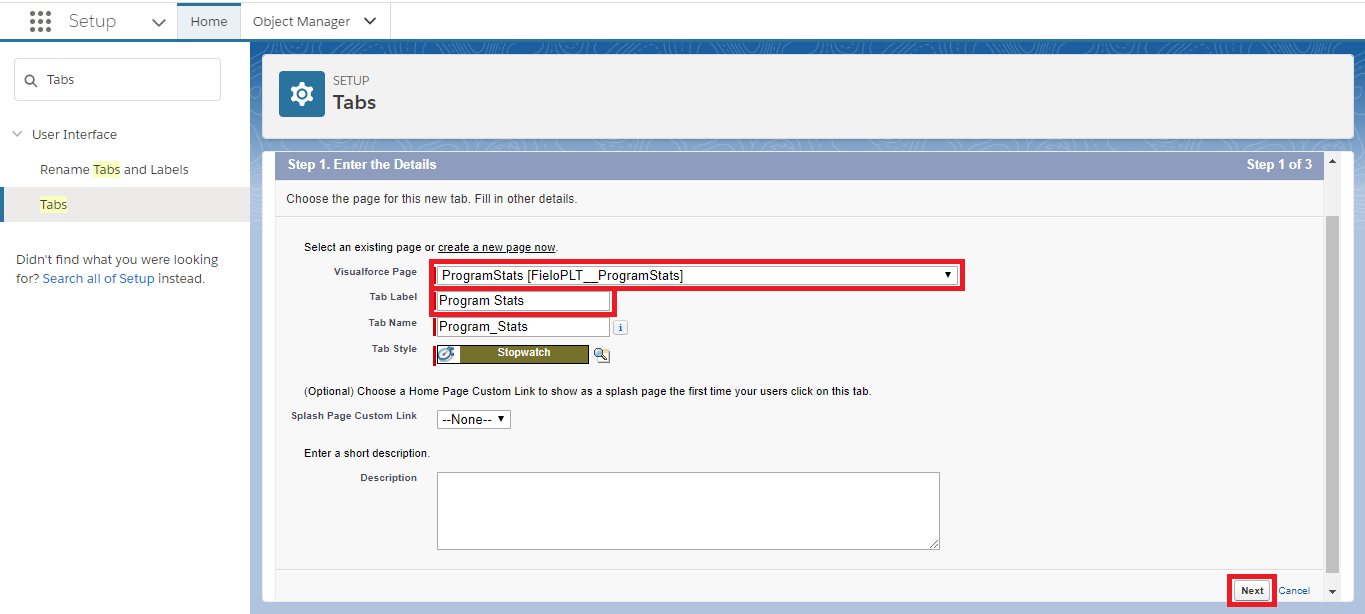
Choose the Visualforce Page called Program Stats and enter the Tab Label Program Stats. The Tab Name will complete automatically. Choose a Tab Style, then click Next.
Click Next again.
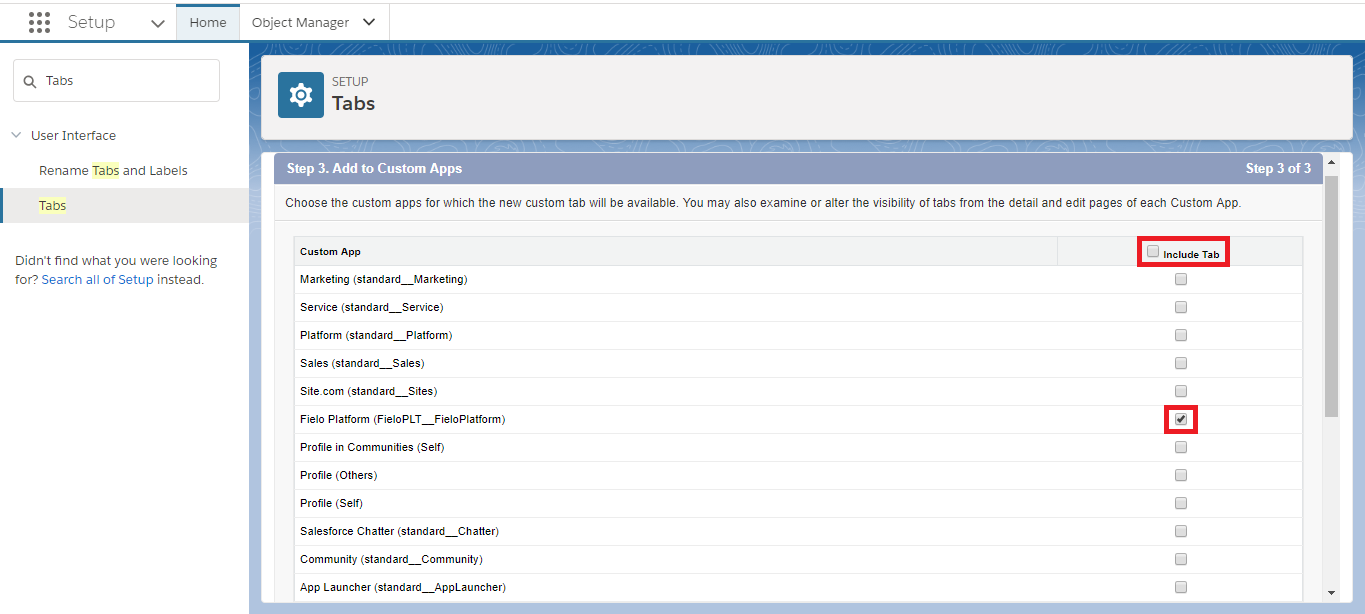
Now, untick Include Tab and tick Fielo Platform (FieloPLT__FieloPlatform).
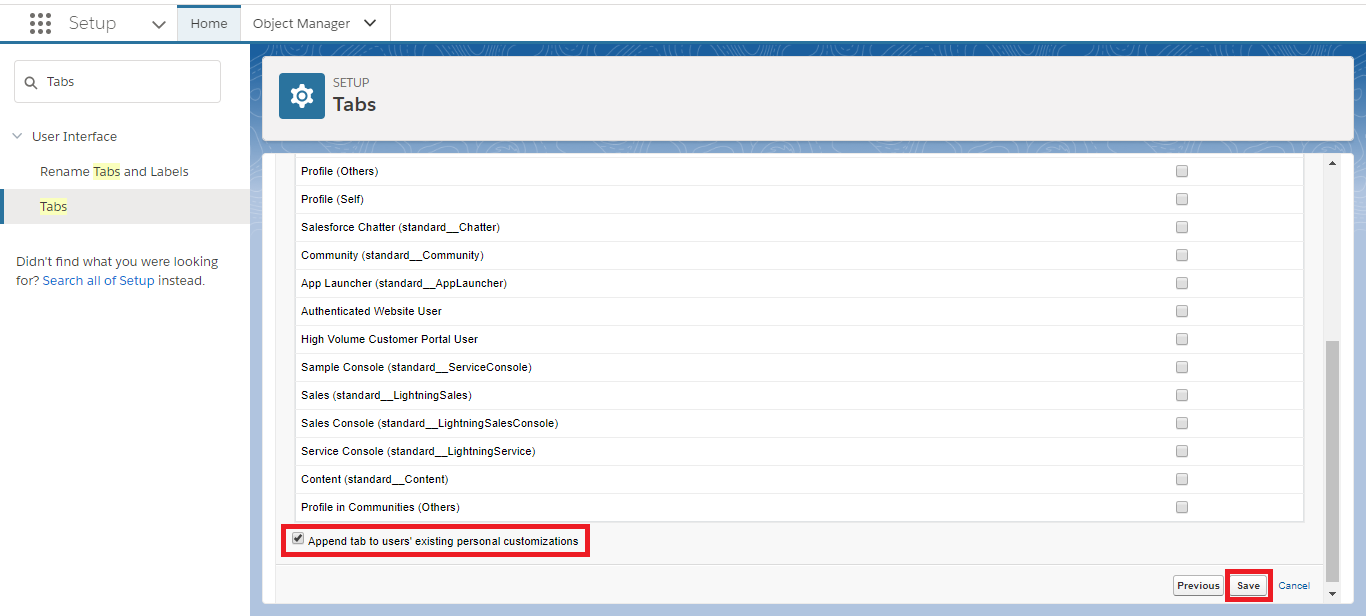
Make sure Append tab to users' existing personal customizations is ticked and click Save.
You're ready to go! Go into IAS and you should see the Program Stats tab.
Updated over 1 year ago