
Manually Upgrade from Winter '19 to Spring '19
If you're using our Winter '19 release (v2.60), upgrade to Spring '19 (v2.63) and take advance of our backend redesign for Incentives as well as the new record-based dynamic segments, historical data processing in a mission and other new features.
Versions Prior to v2.60.8If you're using FieloPLT v2.49 or before:
- First, follow these upgrade instructions for each version up to and including v2.51;
- Then, follow the instructions at Upgrade from Spring '18 to Summer '18 to get to v2.56.
- Lastly, use the Upgrade from Summer '18 to Winter '19
Before getting started, make sure you're logged into your Salesforce org and have system administrator permissions.
How to Upgrade
Once you're ready to go, follow these steps to upgrade:
- Click here to access the IAS installation package.
- If any internal users that aren't admins will use Fielo, click Install for Specific Profiles and give Full Access to their profile(s).
- If you're using Fielo components in Community Cloud, find the Community User profile(s) that you're using for your members. From the corresponding picklist(s), choose Fielo Community.
- Click Install. When the first part of the upgrade process is finished, you (or the org admin) will be notified by email.
- In your org, go to Salesforce Setup and, in the Quick Find box, find and select Apex Jobs.
- Confirm the following:
-The batch called "Spring19UpdateStatusBatchShedule" has a status of Completed.
If you are using the Segmentation EngineYou will want to confirm that "SegmentRecordBaseBatchSchedule 2" has also completed
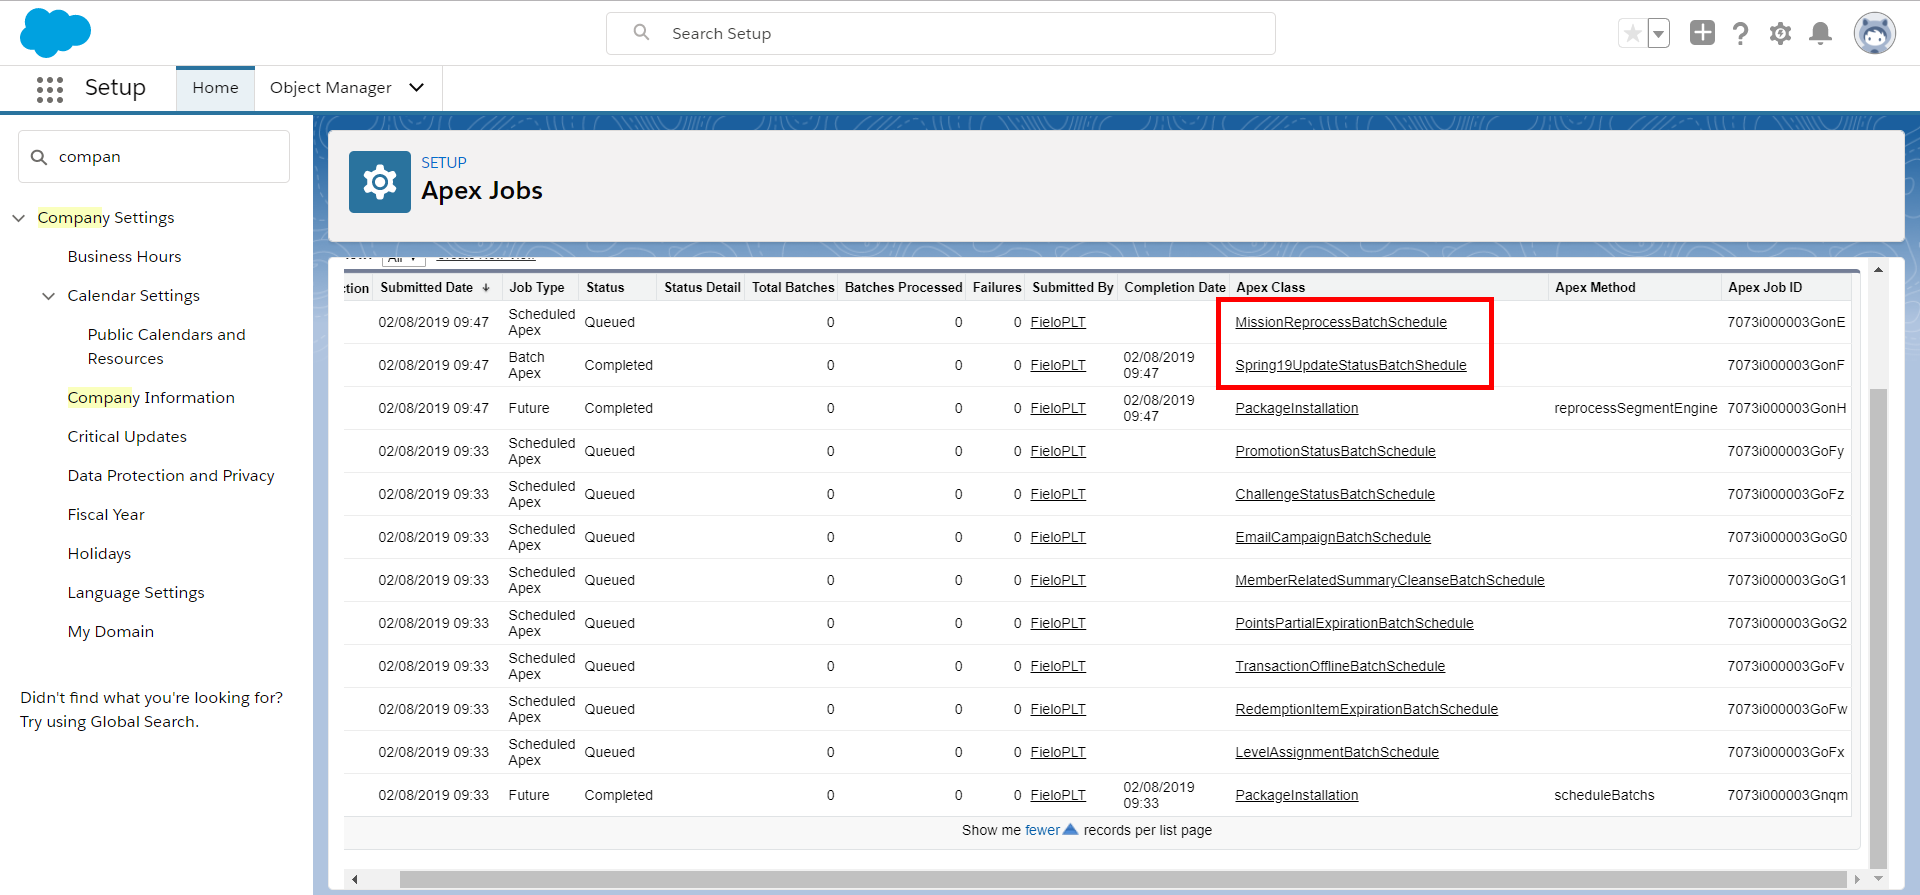
- Once you've confirmed that the batch has successfully completed, click the app launcher and enter IAS ("Fielo Platform").
- On the Libraries tab, upgrade the FieloPLT library to v4.005.
Layout and Object Configuration
Promotions
Go to the Object Manager and search for Promotion and click on Page Layouts. You will need to go into Promotion and find the section Salesforce Mobile and Lightning Experience Actions.
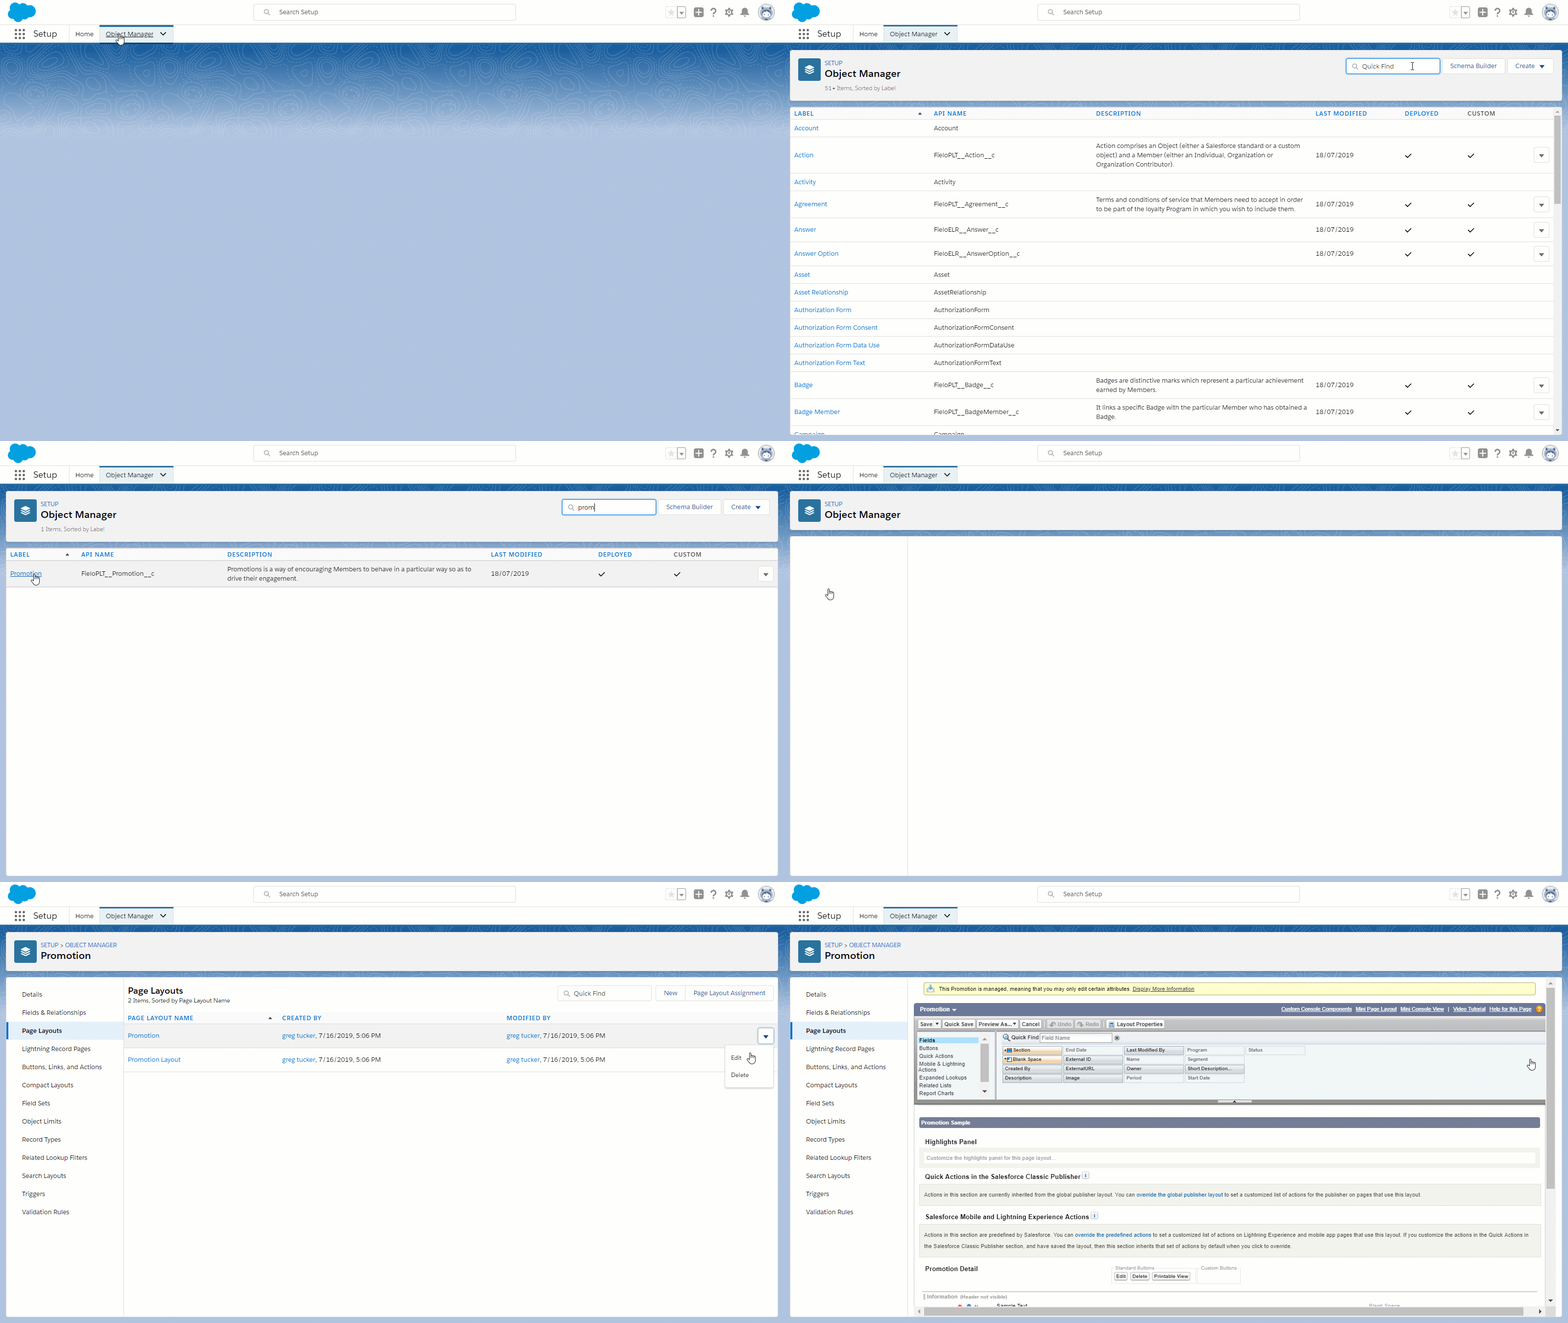
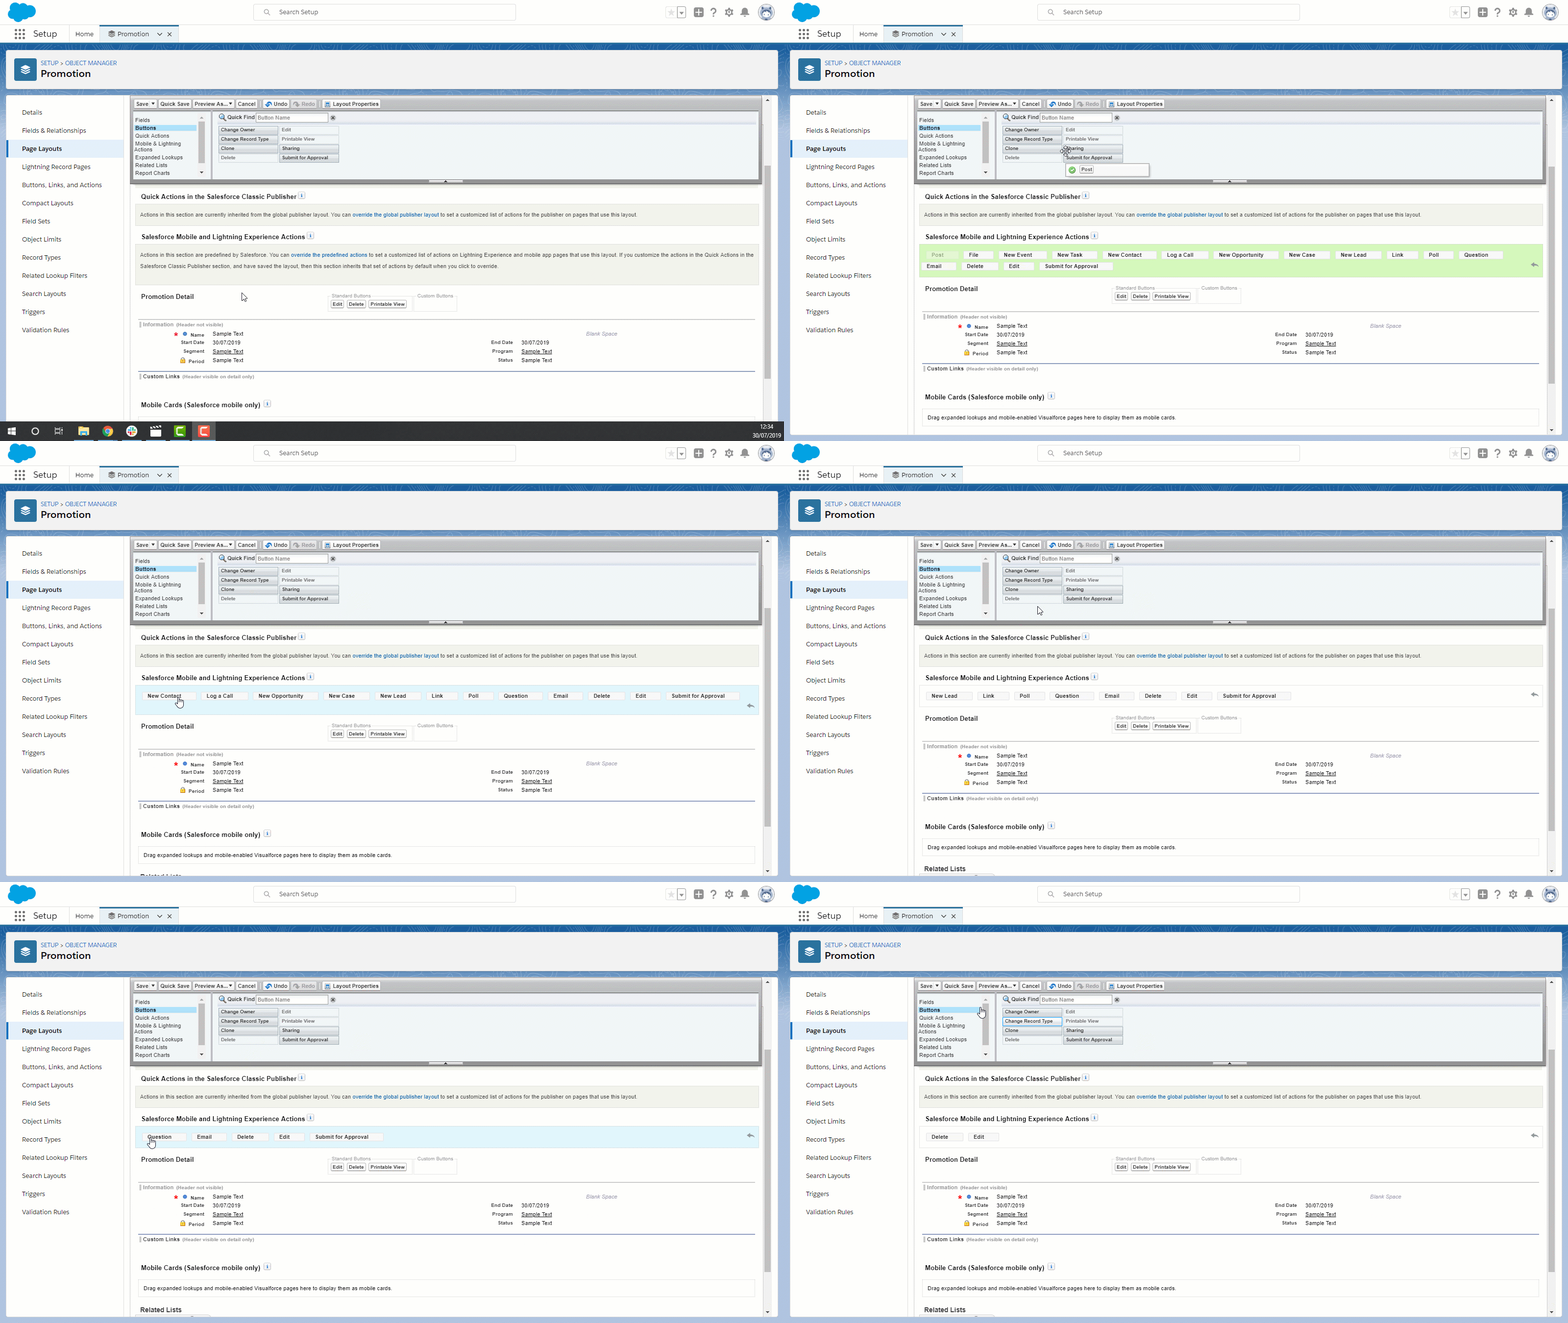
Within the Salesforce Mobile and Lightning Experience Actions window, section, go to the bottom right and click on the 🔧 icon. You will need to remove all of the items now being displayed except Edit and Delete.
Scroll to the Related Lists section, click on 🔧 icon to bring up Related List Rules. Click on the Buttons bar towards the bottom to show Standard Buttons. Make sure New is the only box selected. Once you are done, click Ok to close the window.
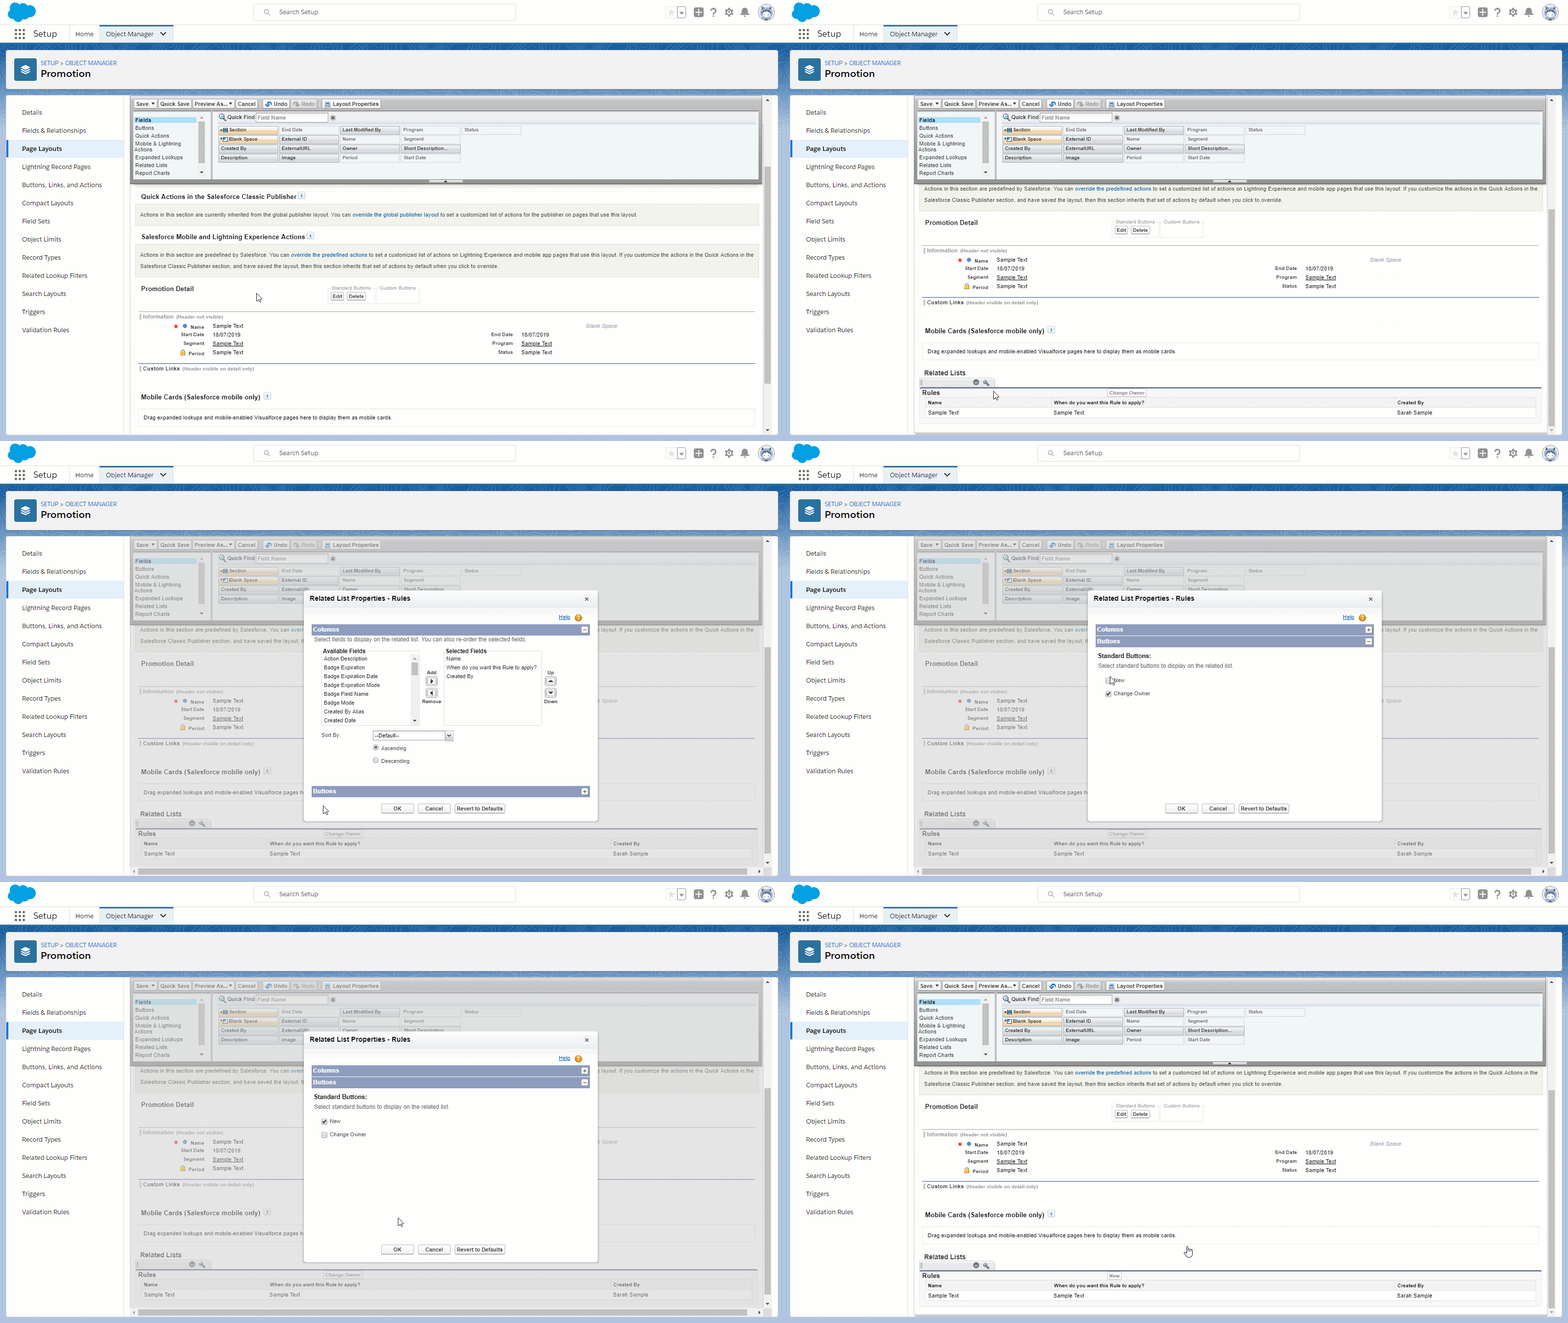
When you are done, you can go to the Layout Properties box and click Save.
Still within the Promotion Object, go to Fields & Relationships on the menu to the left. At the bottom of the list of options click on Status. In the Values section, Deactivate Pending and Rejected.
You should now see Pending and Rejected in the Inactive Values.
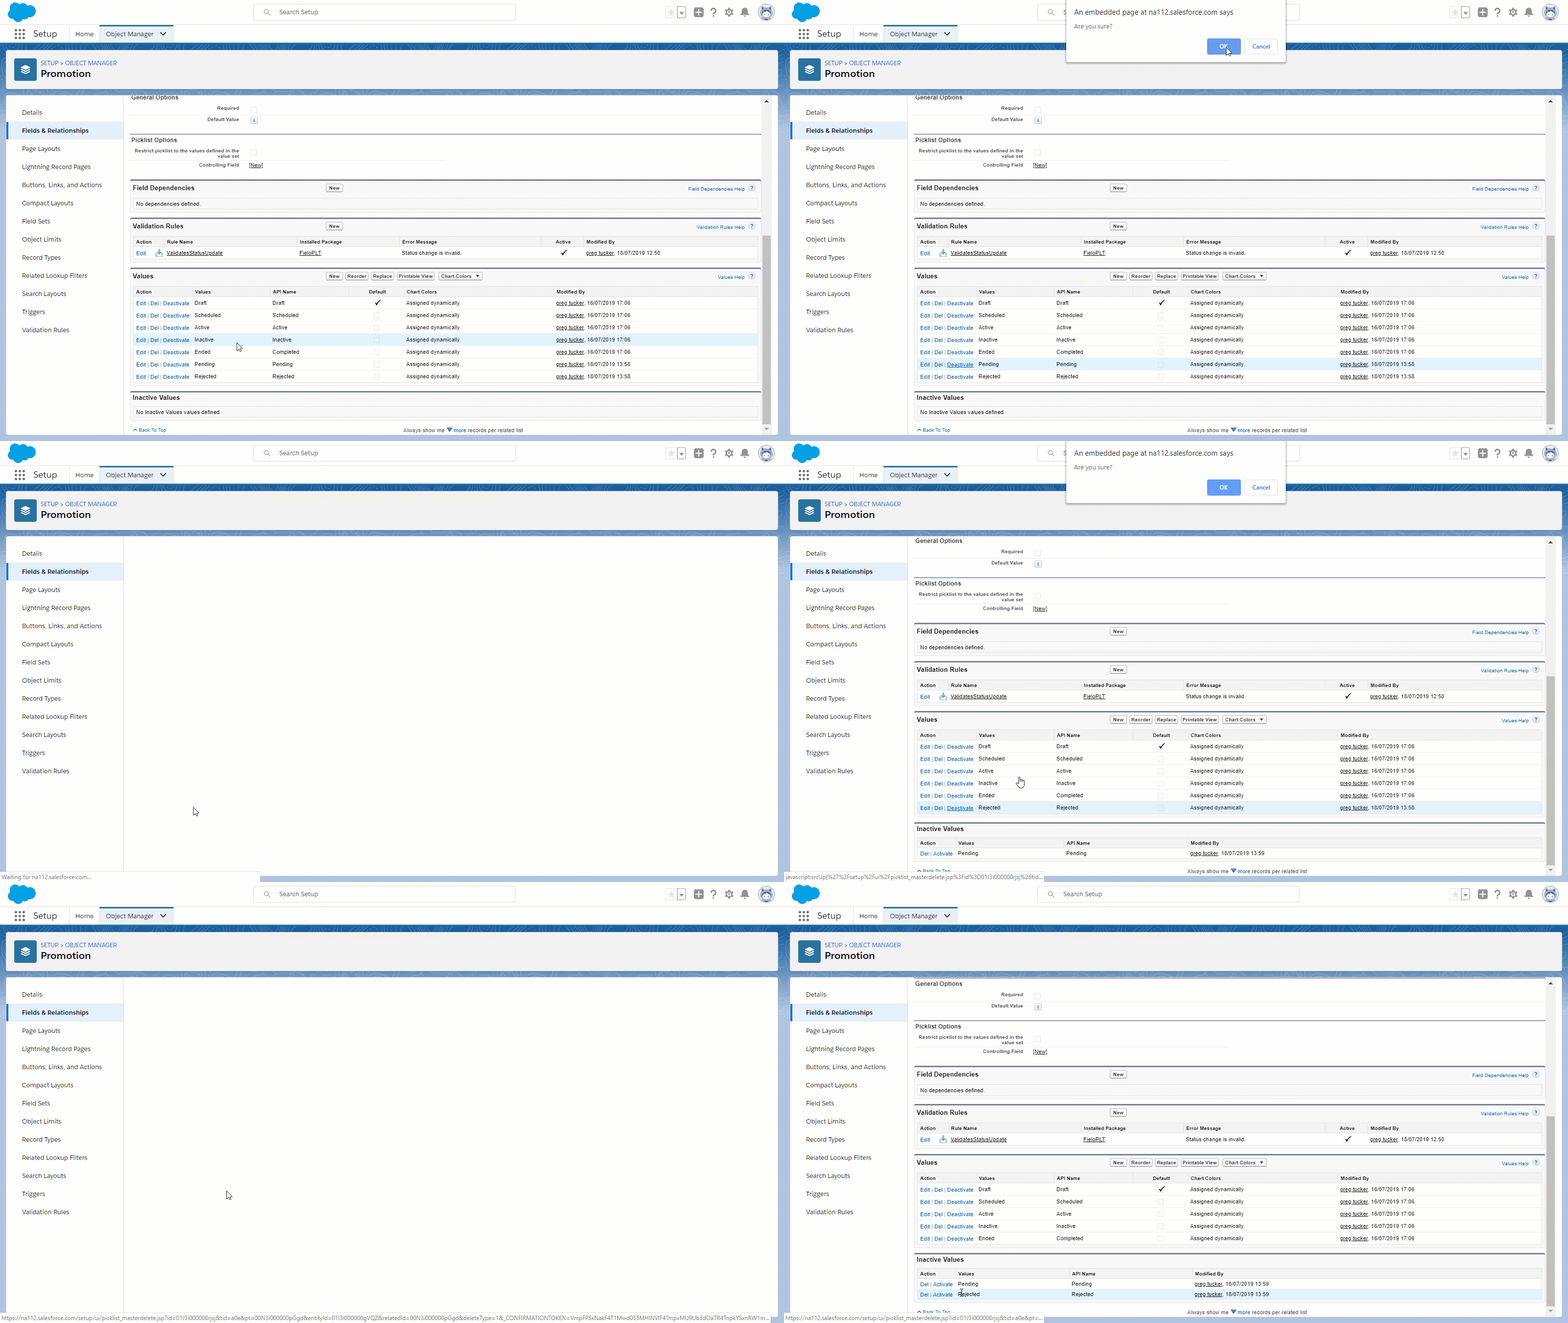
Pending and Rejected values should only be active if the org has the approval process for Challenges
Rule
Go to Object Manager and search for Rule. Select Rule and click on Page Layouts.
- Go into Rule Layout
- Find Salesforce Mobile and Lightning Experience Actions
- Click on the 🔧 icon
- Remove all of the items now being displayed except Edit and Delete
- Go to the Layout Properties box and click Save
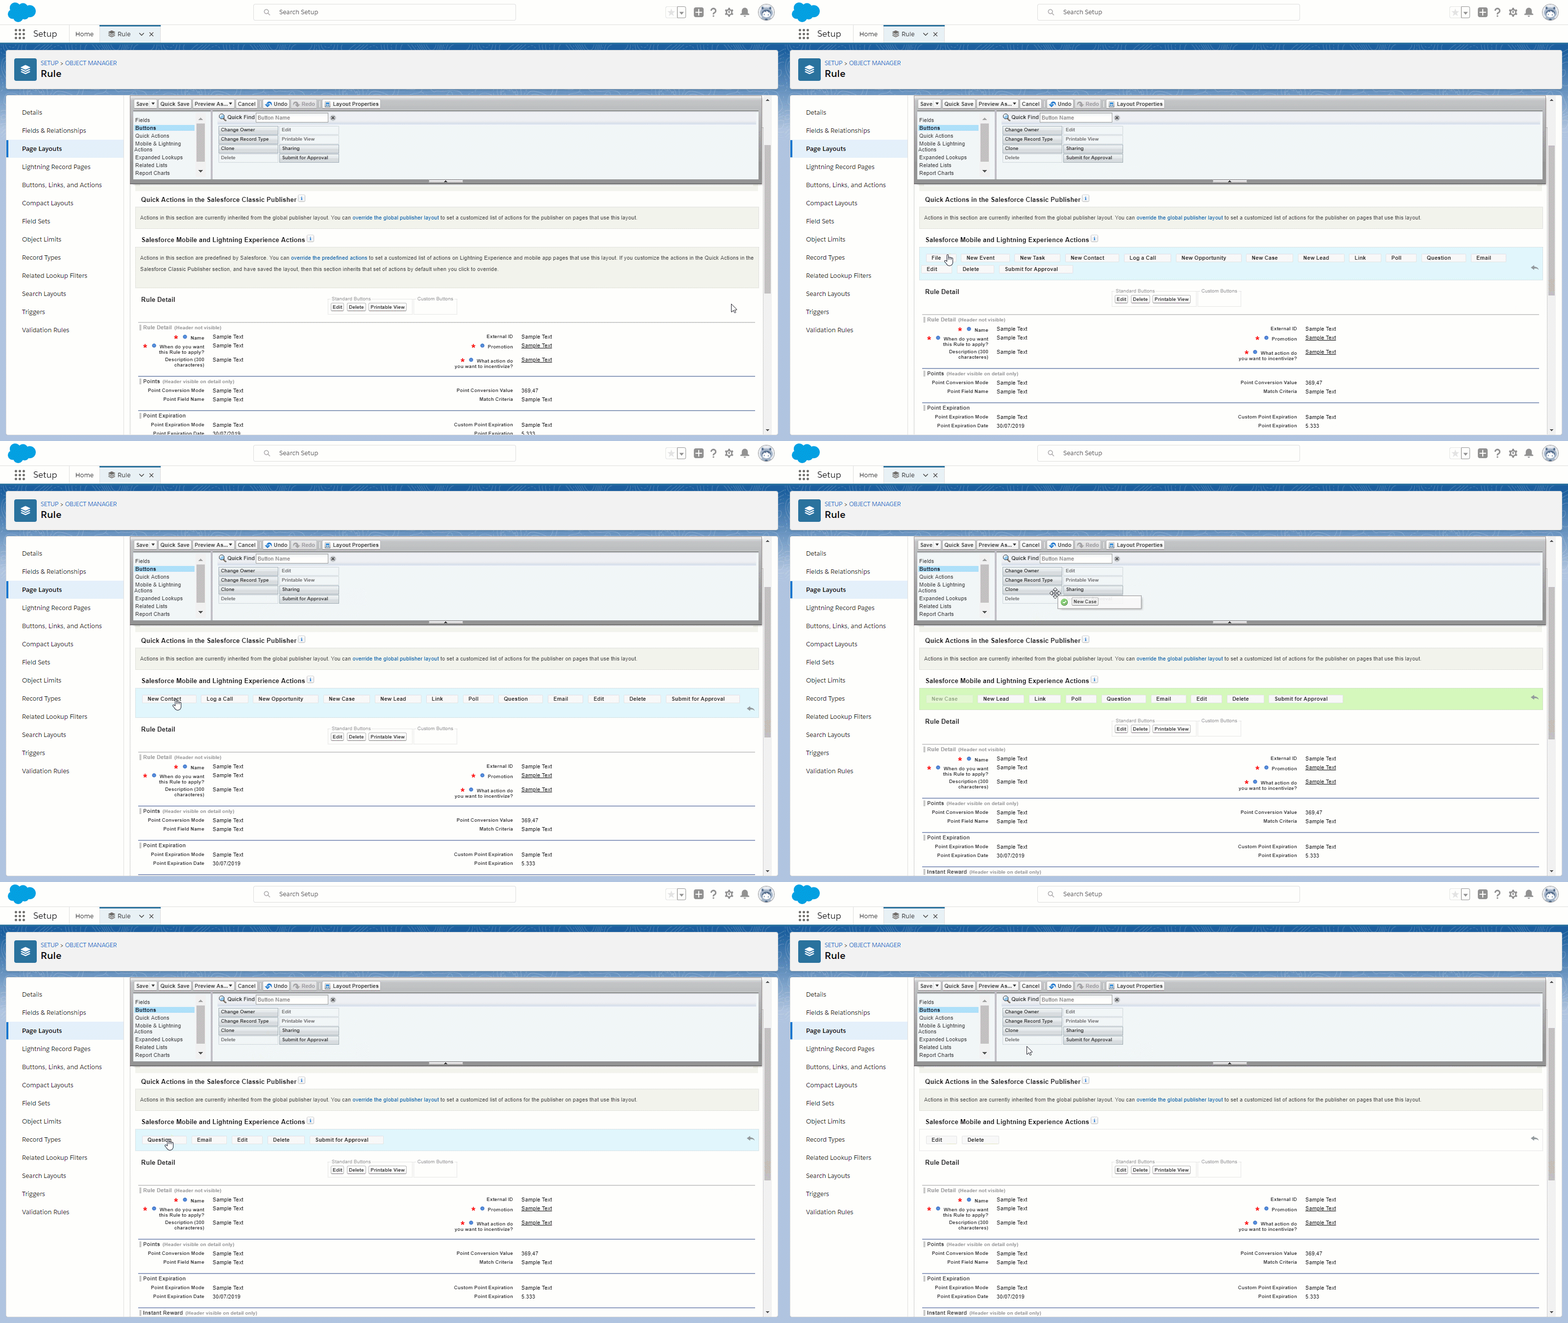
You should now only have Edit and Delete in the Salesforce Mobile and Lightning Experience Actions bounding box.
When you are done, you can go to the Layout Properties box and click Save.
Challenge
Go to Object Manager and search for Challenge. Select Challenge and click on Page Layouts.
- Go into Challenge Layout
- Find Salesforce Mobile and Lightning Experience Actions
- Click on the 🔧 icon
- Remove all of the items now being displayed except Edit and Delete
- Go to the Layout Properties box and click Save
Now navigate to Related Lists which will need to edit two sub-sections, Rewards and Members. Under Rewards, click on the 🔧 icon.
- Click on the Button bar to edit the buttons
- Select the New button
- Under Custom Buttons select Specify Rewarding Scheme and add it to the Selected Buttons group
- When you are done, click Ok
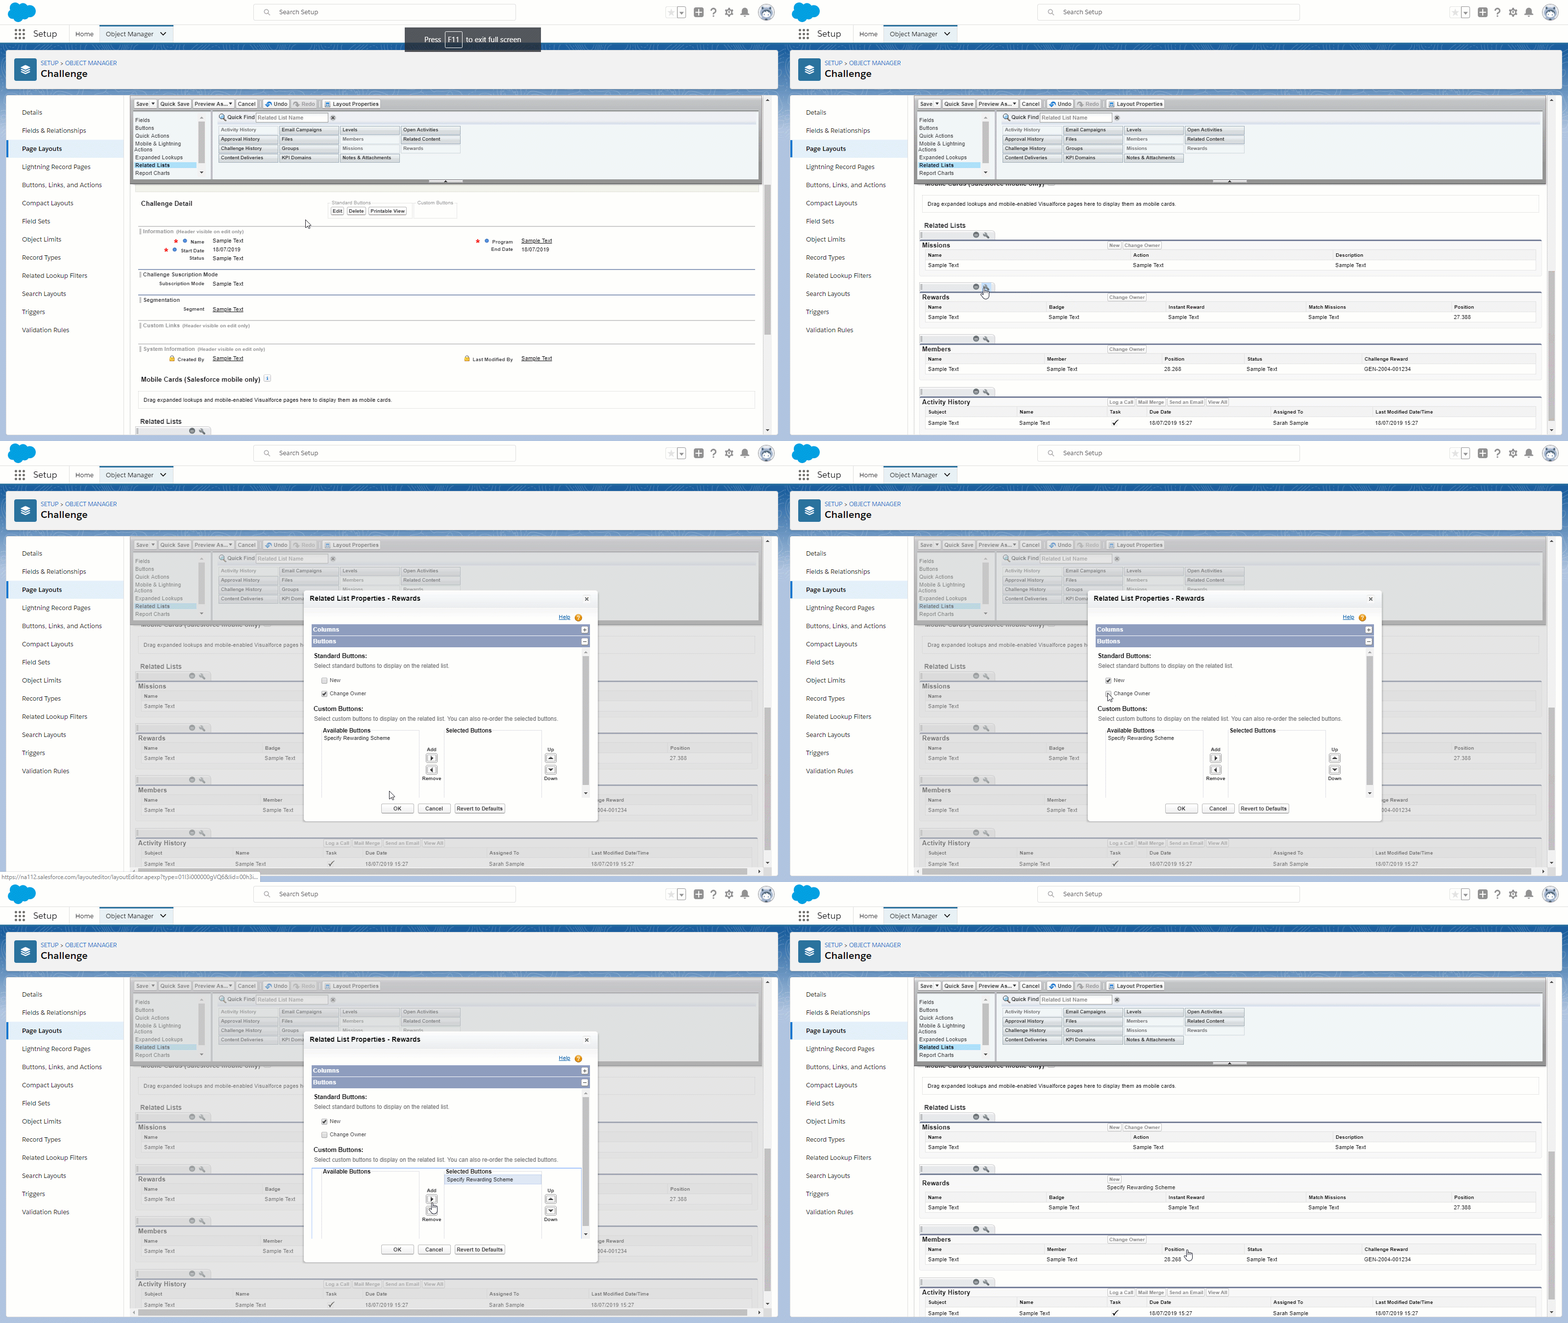
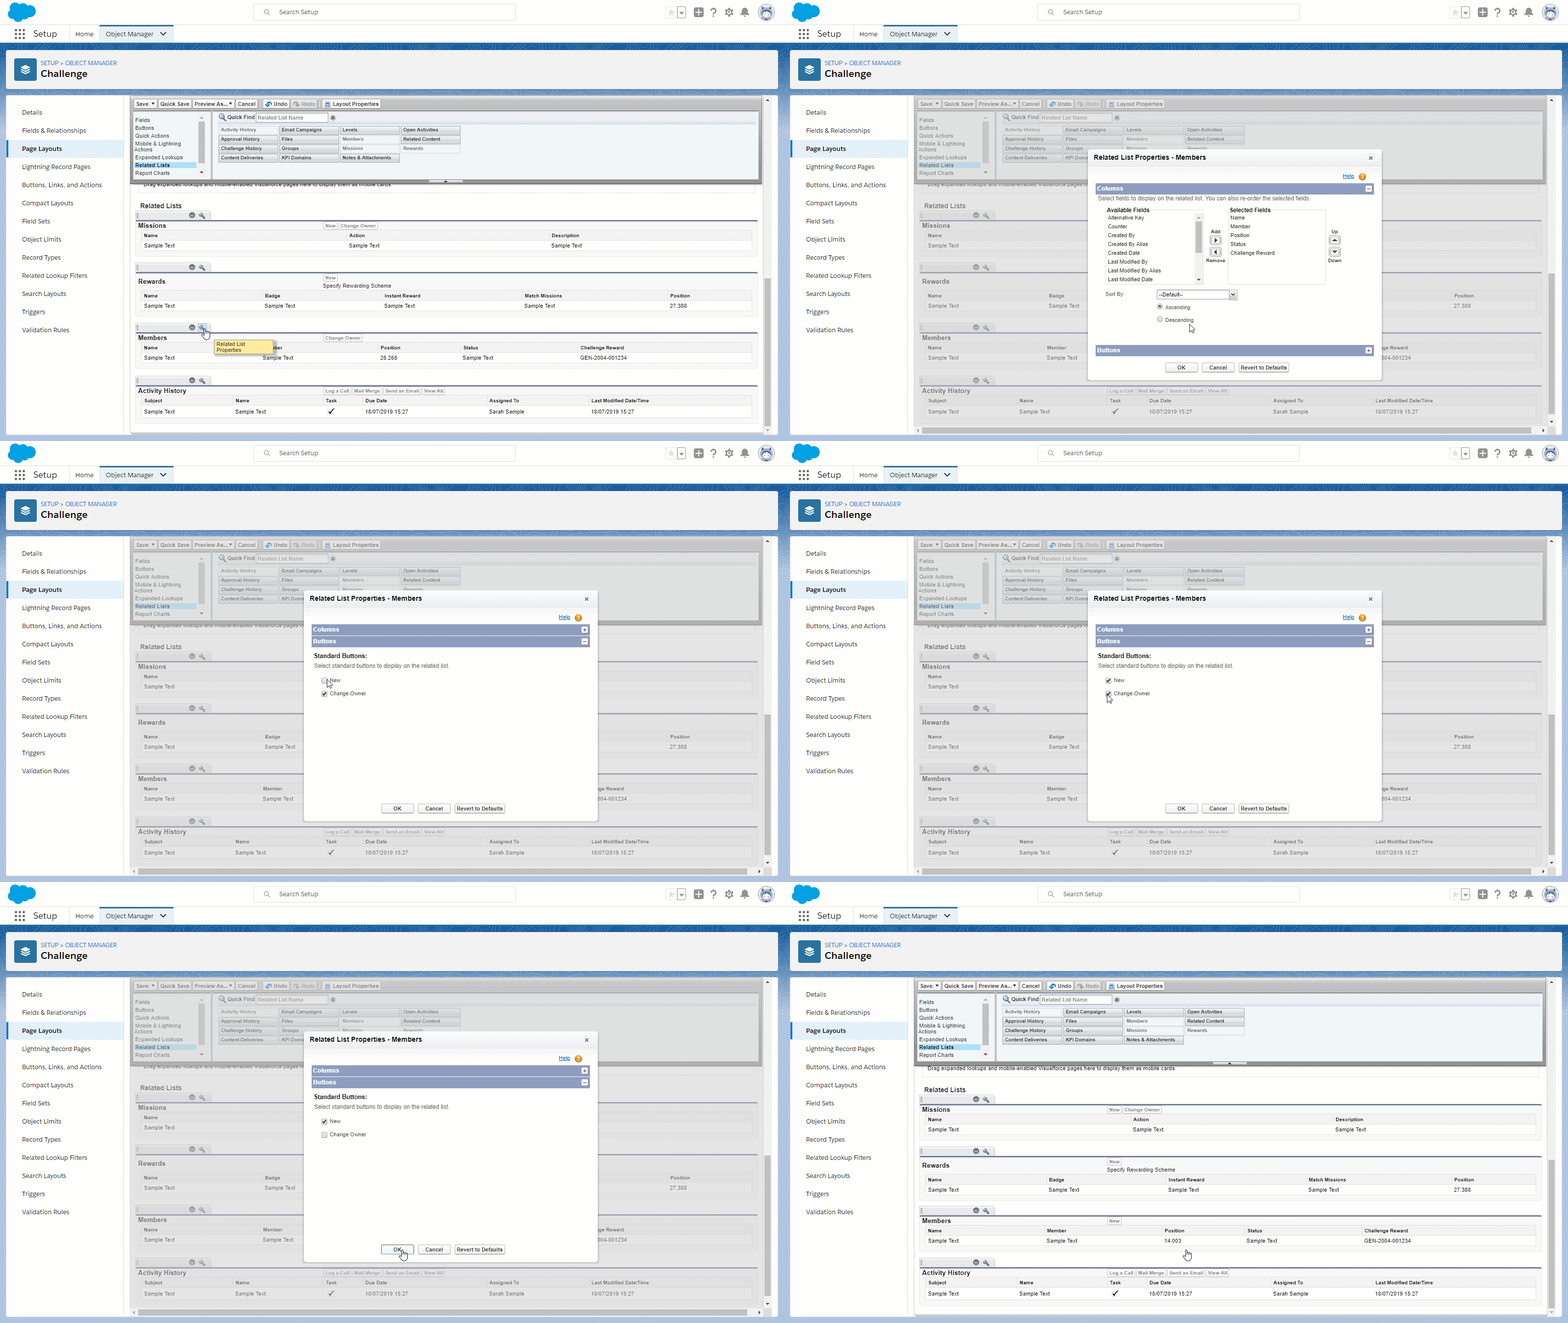
You will need to do something similar to Members. Under Members, click on the 🔧 icon.
- Click on the Button bar to edit the buttons
- Select the New button and deselect Change Owner
- When you are done, click Ok
- Go to the Layout Properties box and click Save.
Still within the Challenge Object, go to Fields & Relationships on the menu to the left.
- Find and select Status from the options
- In the Values section, Deactivate Pending and Rejected
- You should now see Pending and Rejected in the Inactive Values section.
From the left menu, click Fields & Relationships to get back to it's main menu and select Table Type.
- Go to the Values section to edit the Values for each API
- Go to the Action column and click Edit
- Copy and paste the values below into the Label field for each API
- Click Save
- Do the same for all the API names in the list.
| Values | API |
|---|---|
| Just one reward, one or more times | Singular |
| Different rewards depending on the order of completion | Time Table |
| Multiple rewards, but granting no more than one of them at the end of the challenge | Mission Table |
| One or more rewards, each one depending of missions accomplished | Level Table |
| Based on performance rankings at the end of the challenge | Position Range |
| Based on performance metrics at the end of the challenge | Value Range |
| None | None |
From the left menu, click Fields & Relationships to get back to it's main menu and select Subscription Mode.
- Go to the Values section to edit the Values for each API
- Go to the Action column and click Edit
- Copy and paste the values below into the Label field for each API.
- Click Save
- Do the same for all the API names in the list.
| Values | API Name |
|---|---|
| Global | Global |
| Private | Closed |
| Opt-In | Open |
Mission
Go back to the Object Manager section search in the Quick Find box for Mission. Select Mission and click on Page Layouts.
- Go into Mission Layout and find the section Salesforce Mobile and Lightning Experience Actions.
- Go to the bottom right and click on the 🔧 icon
- Remove all of the items now being displayed except Edit and Delete.
Next, scroll to the Related Lists section. Ensure that Rewarding has been added to the section from the Layout Properties.
- Under Rewards, click on the 🔧 icon
- Click on the Button bar to edit the buttons
- Select the New button
- Under Custom Buttons select Specify Rewarding Scheme and add it to the Selected Buttons group
- Click Ok
From the left menu, click Fields & Relationships to get back to it's main menu and select Table Type.
- Go to the Values section to edit the Values for each API
- Go to the Action column and click Edit
- Copy and paste the values below into the Label field for each API
- Click Save
- Do the same for all the API names in the list.
| Value | API Name |
|---|---|
| Just one reward, one or more times | Singular |
| Different rewards depending on the order of goal completion | Time Position |
| Based on performance metrics at the end of the mission | Performance Value |
| Based on performance rankings at the end of the mission | Performance Position |
| Successive, real-time rewarding based on performance | Cumulative |
Go back to Fields & Relationships and select How do you want to rank members? (FieloPLT__LeaderboardMode__c). You'll need to update its value's API names.
- Go to the Values section to edit the Values for each API
- Go to the Action column and click Edit
- Copy and paste the values below into the Label field for each API
- Click Save
- Do the same for both the API names in the list.
| API Name | New Label |
|---|---|
| Time | Order of completion |
| Performance | By Performance Value |
Challenge Reward
Go to Object Manager and search for Challenge Reward. Select Challenge Reward and click on Page Layouts.
- Go into Challenge Reward Layout
- Find Salesforce Mobile and Lightning Experience Actions
- Click on the 🔧 icon
- Remove all of the items now being displayed except Edit and Delete
- Go to the Layout Properties box and click Save
Challenge Member
Go to Object Manager and search for Challenge Member. Select Challenge Member and click on Page Layouts.
- Go into Challenge Member Layout
- Find Salesforce Mobile and Lightning Experience Actions
- Click on the 🔧 icon
- Remove all of the items now being displayed except Edit and Delete
- Go to the Layout Properties box and click Save
Setting up Domain
Go to Setup from the top right. Within the Quick Find menu search for "domain". You will see the category Company Setting and within that, click on My Domain.
You will need to create a new domainTo use Fielo's new Lightning-native UI, go to Salesforce Setup -> Company Settings -> My Domain and register a domain. Be sure to deploy your domain to all users.
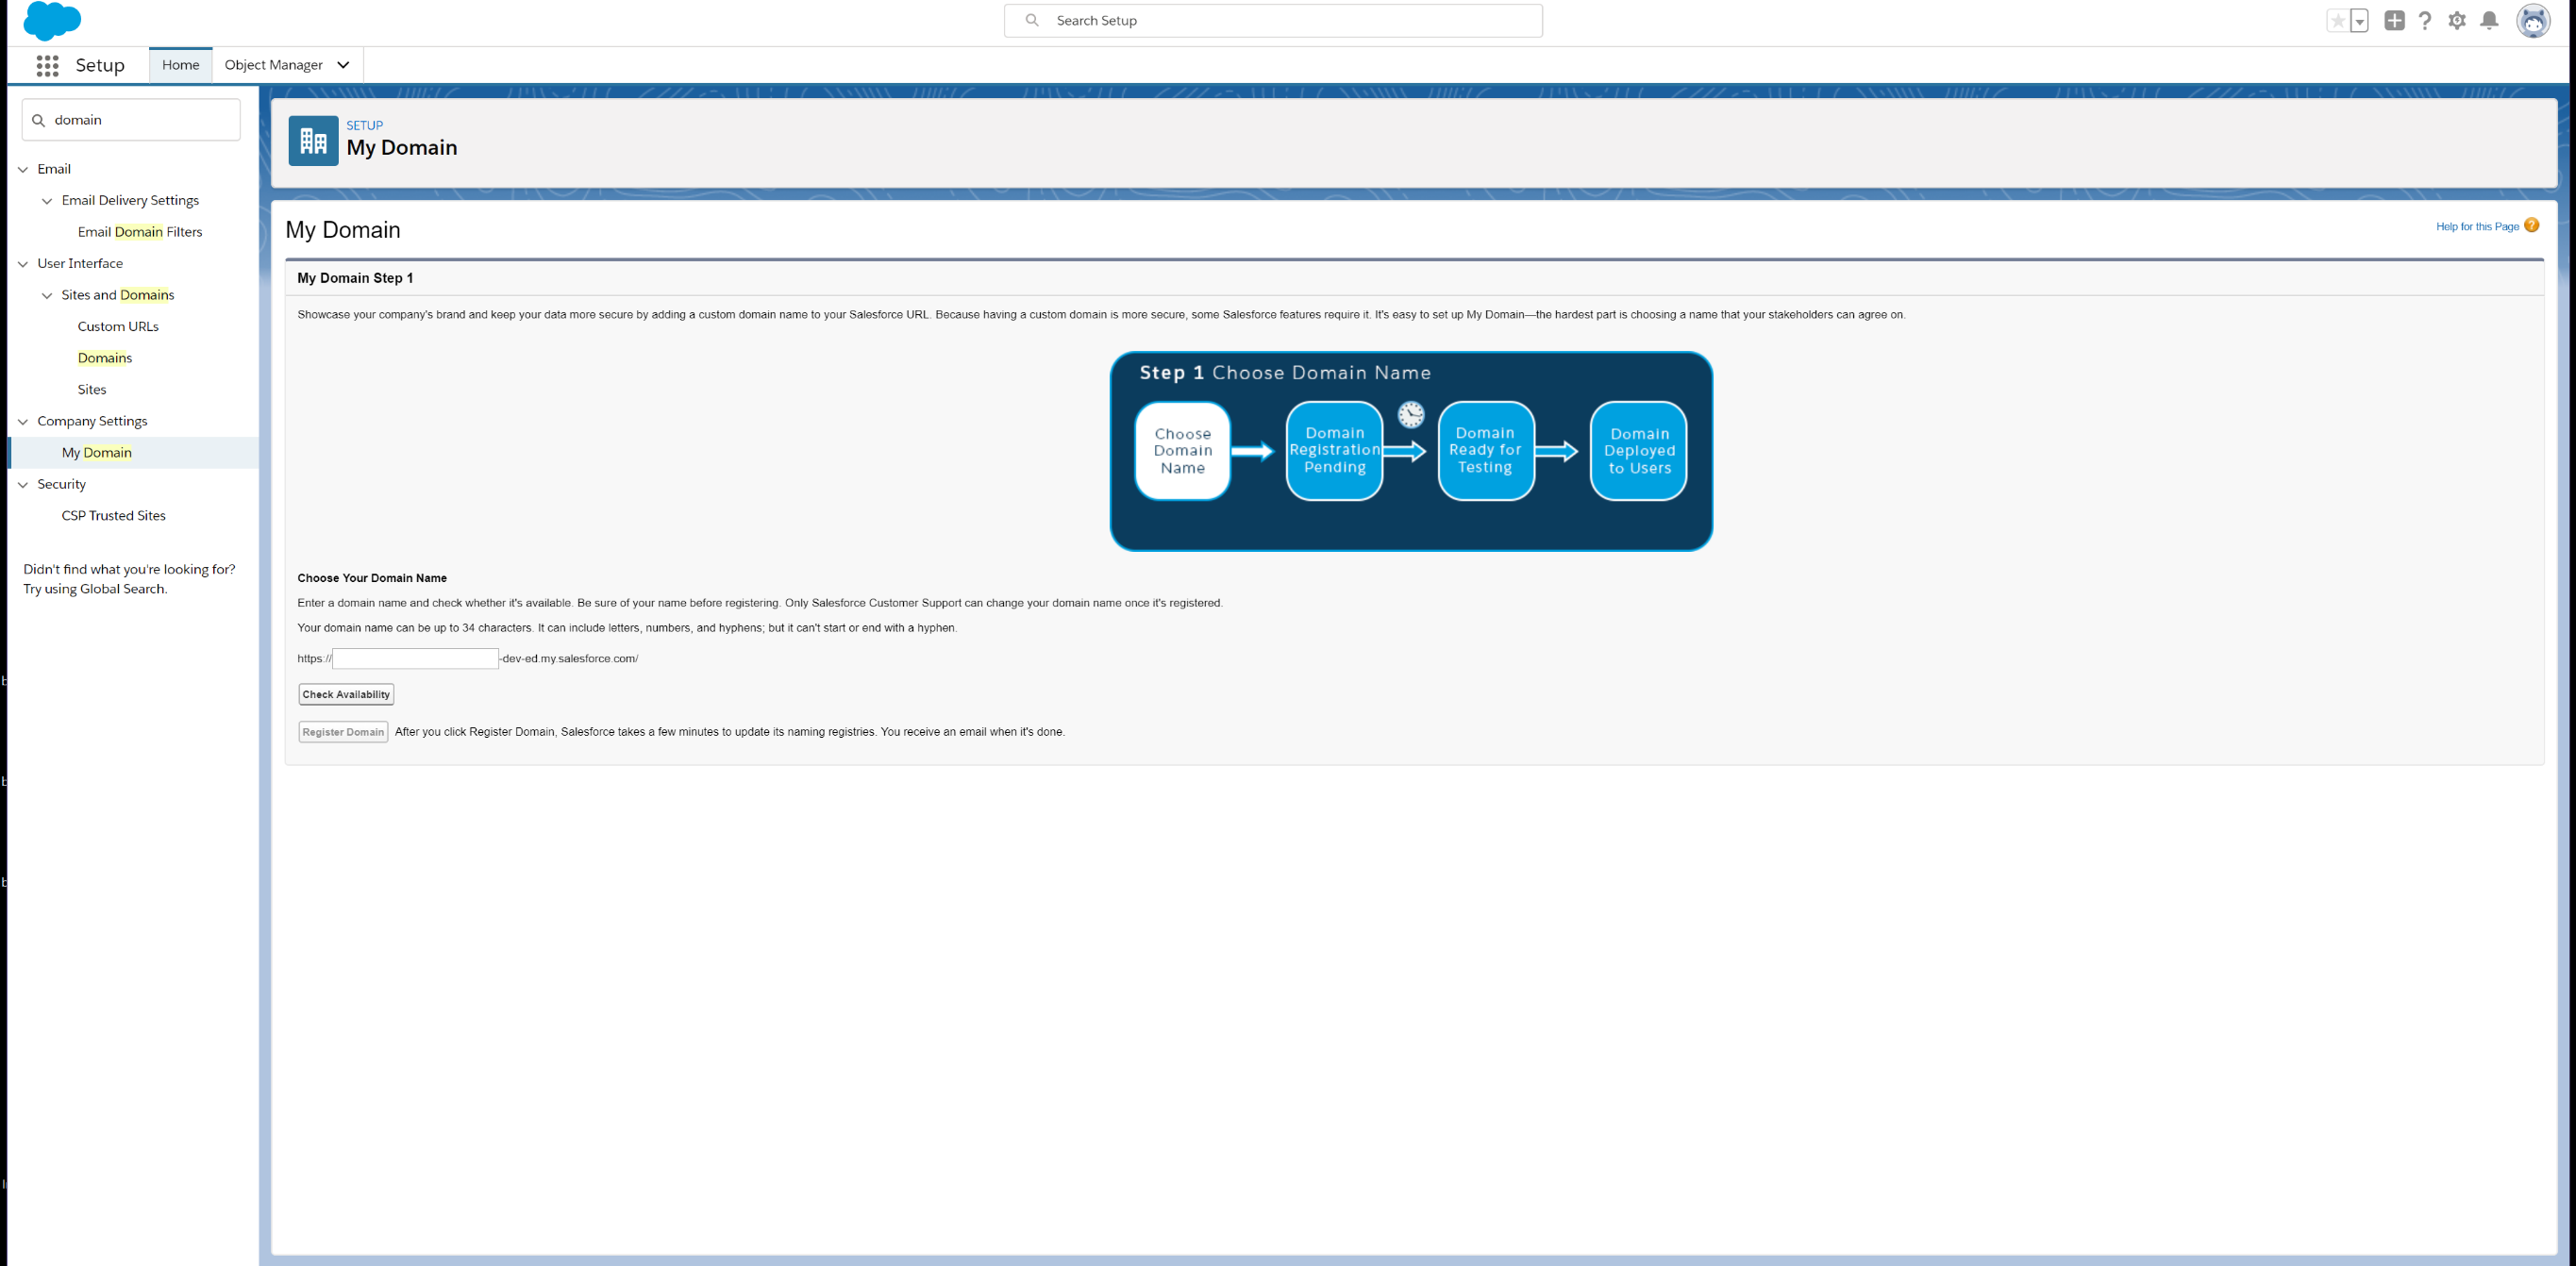
It will ask you to choose your domain name so go to the input field and enter a domain name that works for your program. Once you have entered a name, click the Check Availability button to make sure it able to be used. Once you have an approved domain name, click Register Domain.
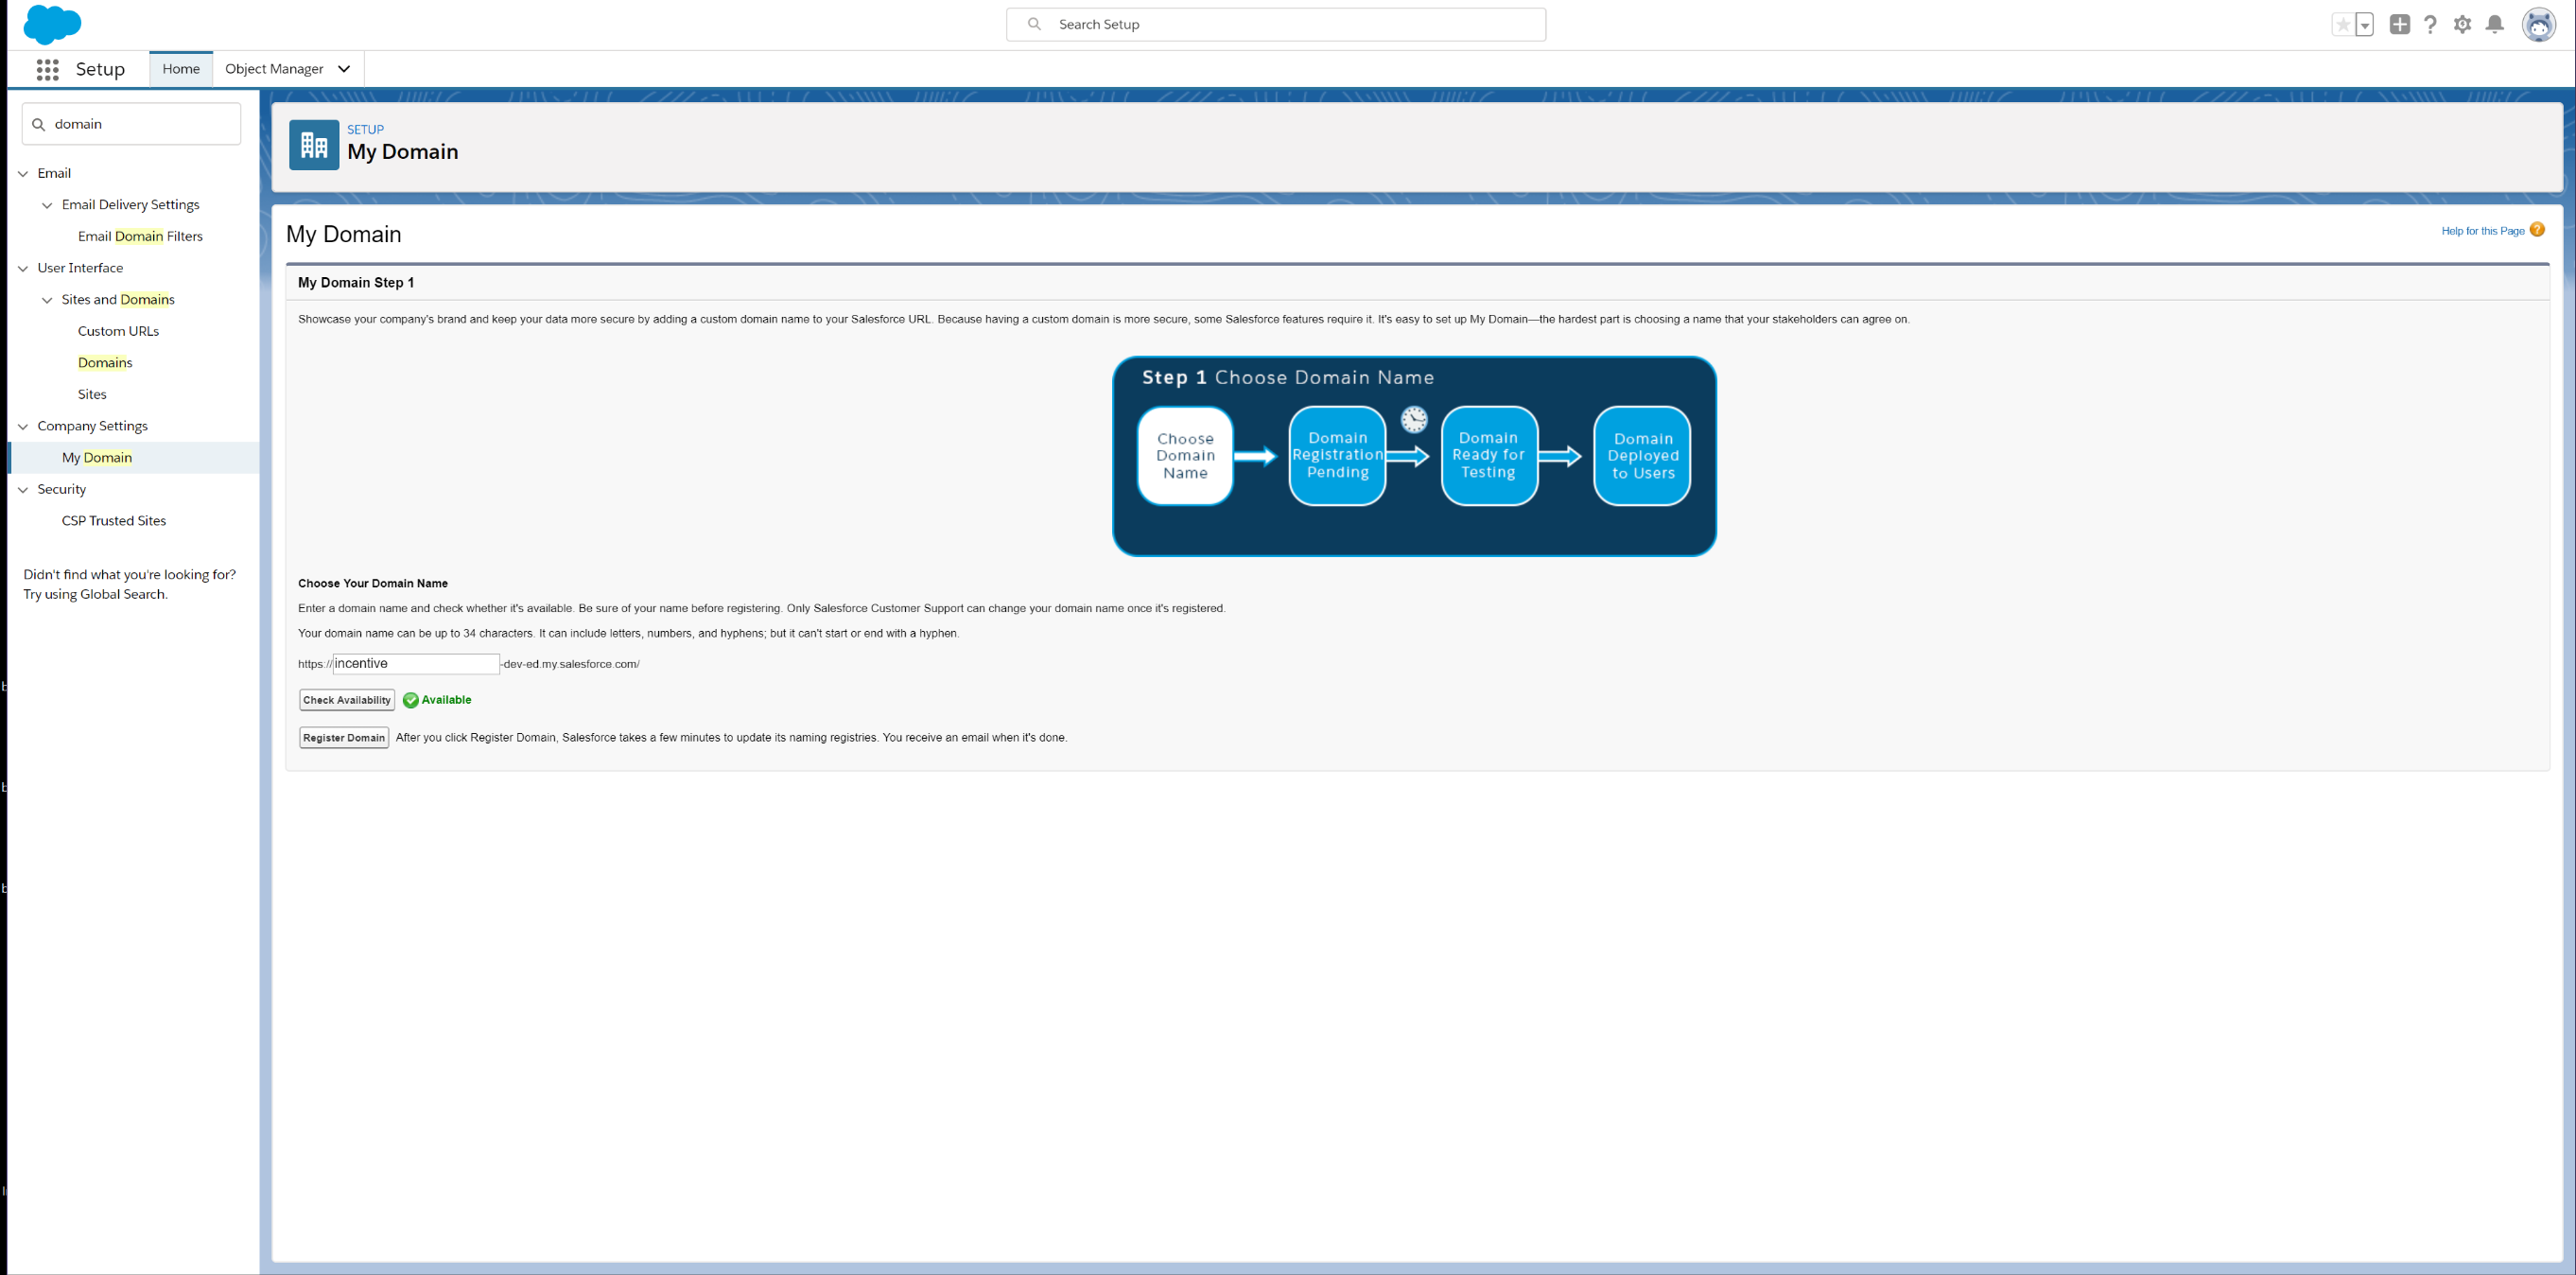
The process may take a few minutes to complete but you will receive an email titled "Salesforce domain ready for testing" once your domain has been made. You can either login from the email and go back to the domain section or refresh the original page if it is still open. You will be directed to Log in to test your domain before deploying it to your users.
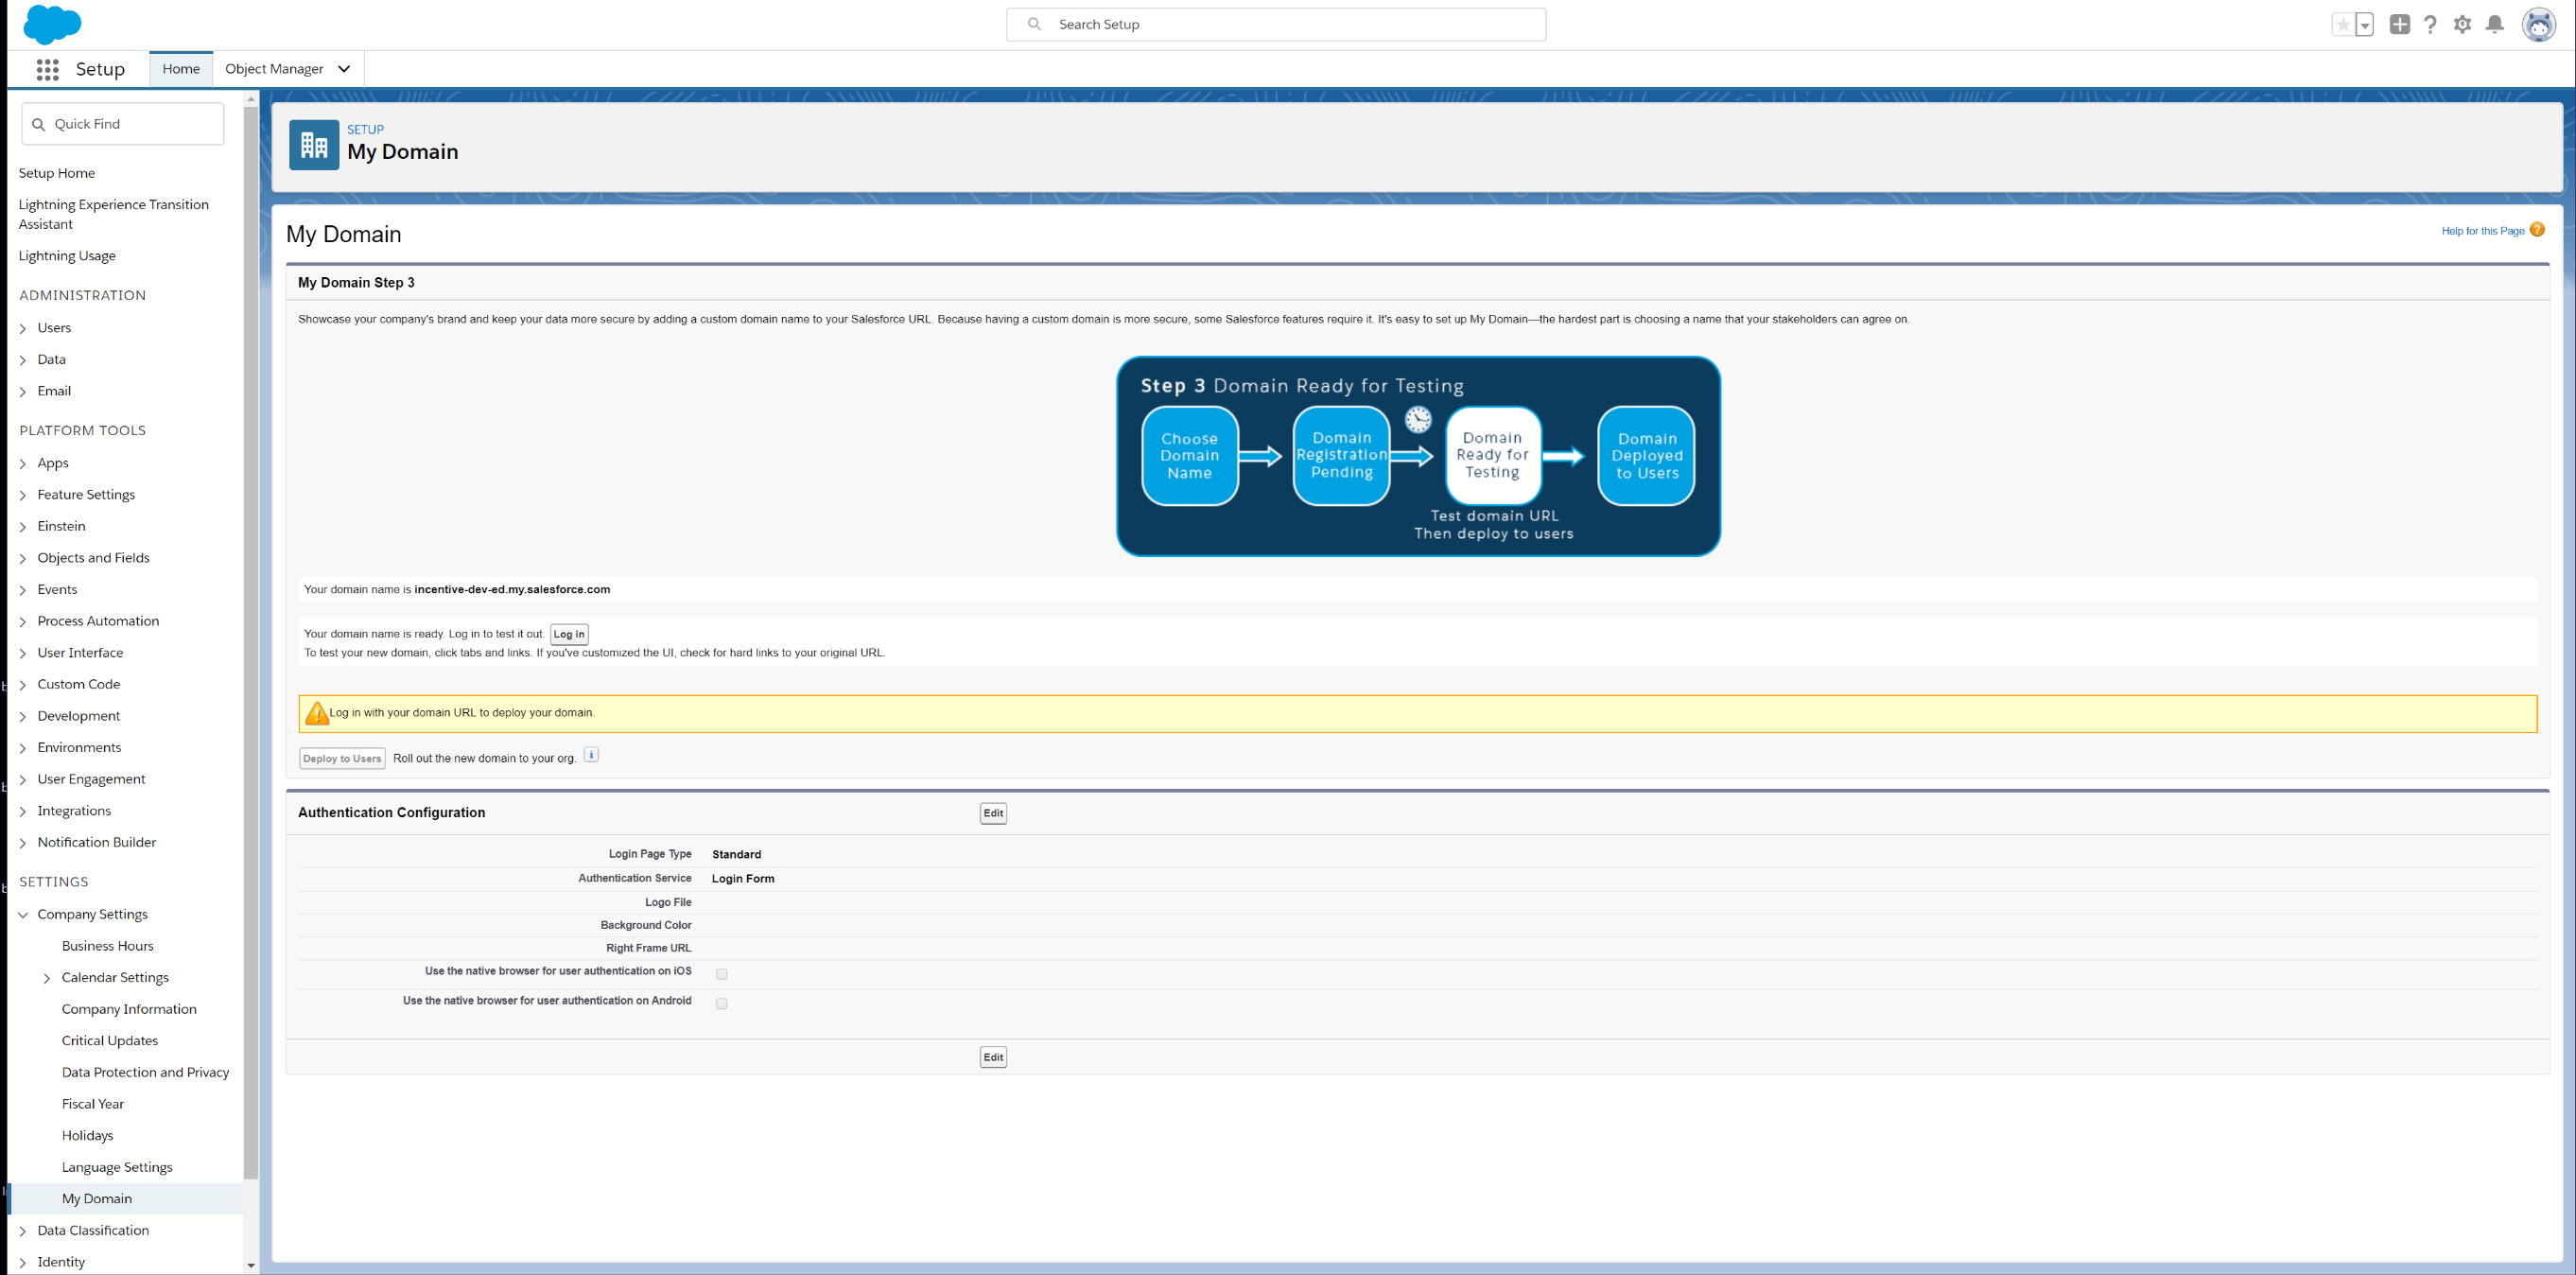
Once you have tested our domain, you are now ready to deploy to your users. The final step is to click Deploy to Users and you have now created your domain.
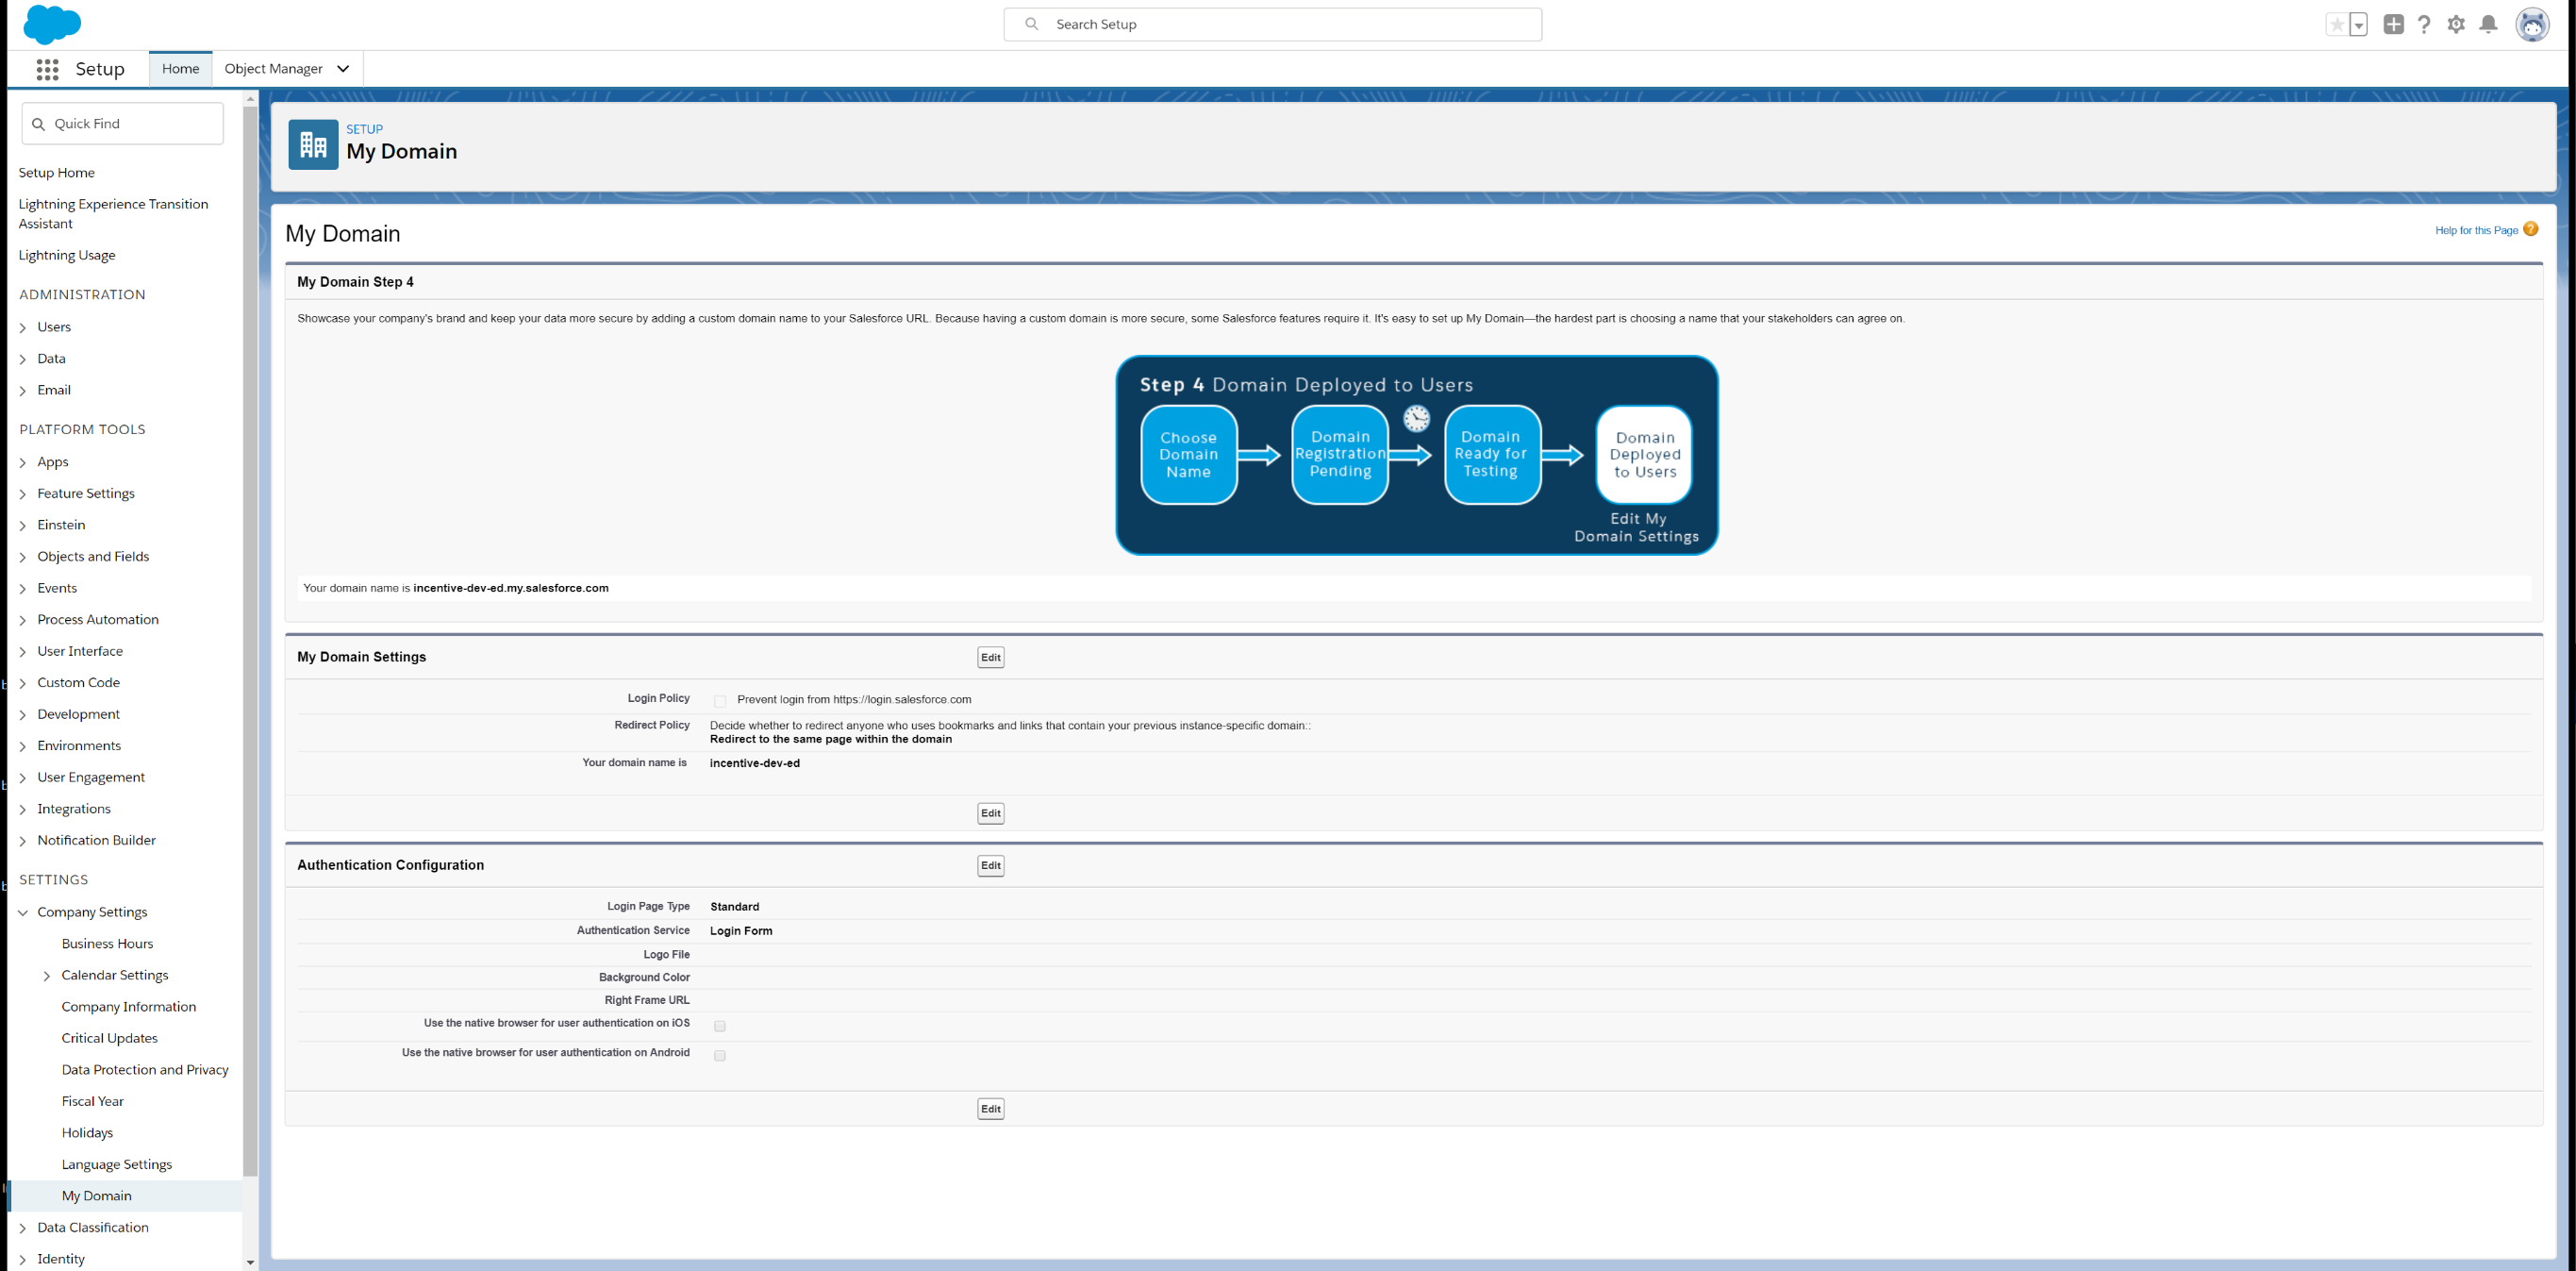
Congrats!You're ready to go with IAS Spring '19 edition.
New Objects and Fields
We've also added new fields to the following existing objects:
Challenge (FieloPLT__Challenge__c):
- LevelSummary (FieloPLT__LevelSummary__c)
- Short Description (300 characteres) (FieloPLT__ShortDescription__c)
Challenge Member (FieloPLT__ChallengeMember__c)
- Rank (FieloPLT__LevelMember__c)\
Level (FieloPLT__Level__c)
- Challenge (FieloPLT__Challenge__c)
- CustomAction (FieloPLT__CustomAction__c)
- SkipRank (FieloPLT__SkipRank__c)\
Level Member (FieloPLT__LevelMember__c)
- Challenge Member (FieloPLT__ChallengeMember__c)\
Member (FieloPLT__Member__c)
- Related Segments (FieloPLT__RelatedSegments__c)\
Mission (FieloPLT__Mission__c)
- Historical data start date (FieloPLT__ReprocessFrom__c)
- Status (FieloPLT__Status__c)\
Point Type (FieloPLT__PointType__c)
- Number of Decimal Places (FieloPLT__DecimalsNumber__c)
- Status (FieloPLT__Status__c)\
Program (FieloPLT__Program__c)
- Related Segments (FieloPLT__RelatedSegments__c)\
Promotion (FieloPLT__Promotion__c)
- Short Description (300 characteres) (FieloPLT__ShortDescription__c)\
Segment (FieloPLT__Segment__c)
- Update in real time (FieloPLT__OnlineProcessing__c)
- Enable for Analytics (FieloPLT__RecordBased__c)\
No action required for the following one cause it's a custom setting.
Public Settings (FieloPLT__PublicSettings__c)
- Related List Limit (FieloPLT__RelatedListLimit__c)
Updated over 1 year ago