
SendGrid Integration
Integrating SendGrid services with Messaging
Integrating Messaging with SendGrid is a fantastic way to strengthen e-mail communication with your Members. While Salesforce has limits on how many messages you can send, SendGrid offers several plans that allow you to scale up as your program grows. Integration with SendGrid is easy! Simply set up your SendGrid account, deploy the Fielo SendGrid Connector and configure a few settings in Salesforce. Let's get started!
Create a SendGrid Account
In order to use SendGrid as your external e-mail provider, check out their pricing options and create an account. For more details on SendGrid, check out their Knowledge Center.
Generate a SendGrid API Key
Once your account is created, we will generate an API Key that links your SendGrid services to Fielo. From the main landing page, click Settings and then API Keys.
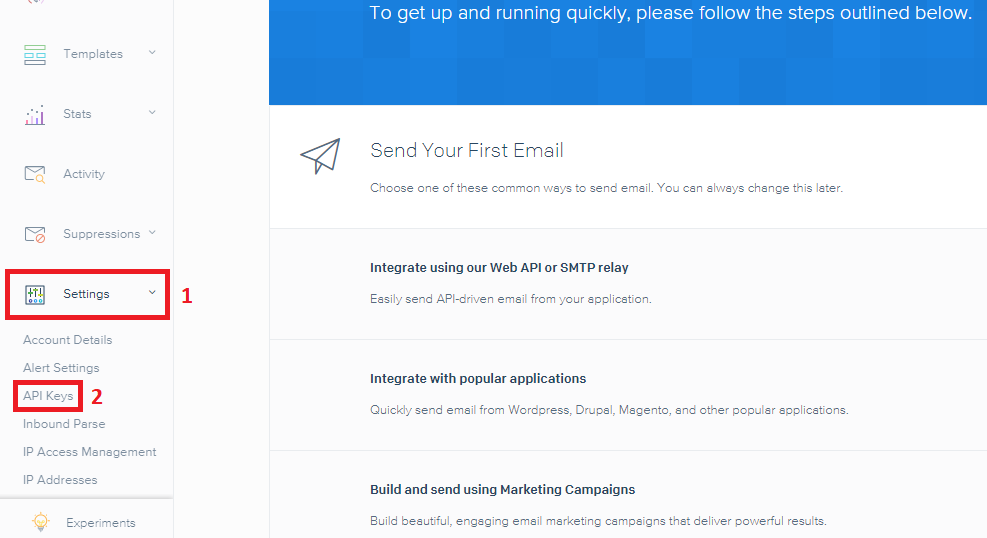
Access API Keys from landing page
On the top right, click Create API Key.
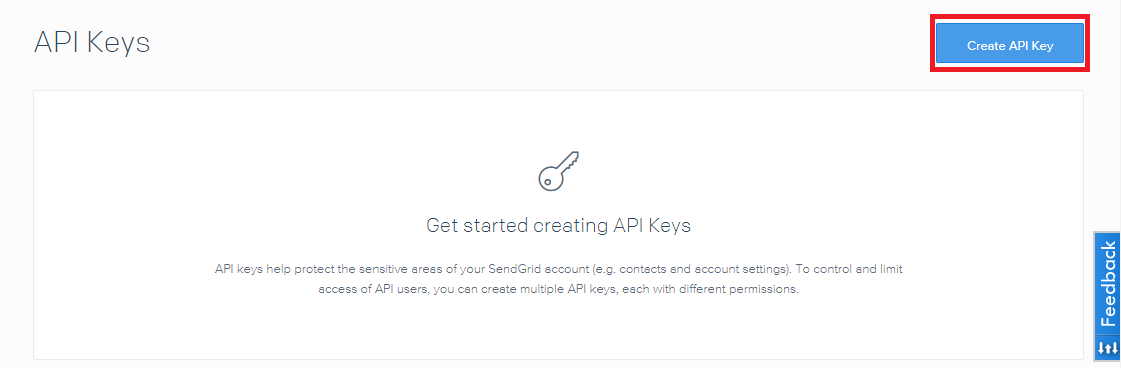
API Keys page
Now, enter the name you will use to identify your API key later on, choose an access level for your API key and click Create & View.
API Key PermissionsFor more information on API key permissions, check out SendGrid's doc page on the topic.
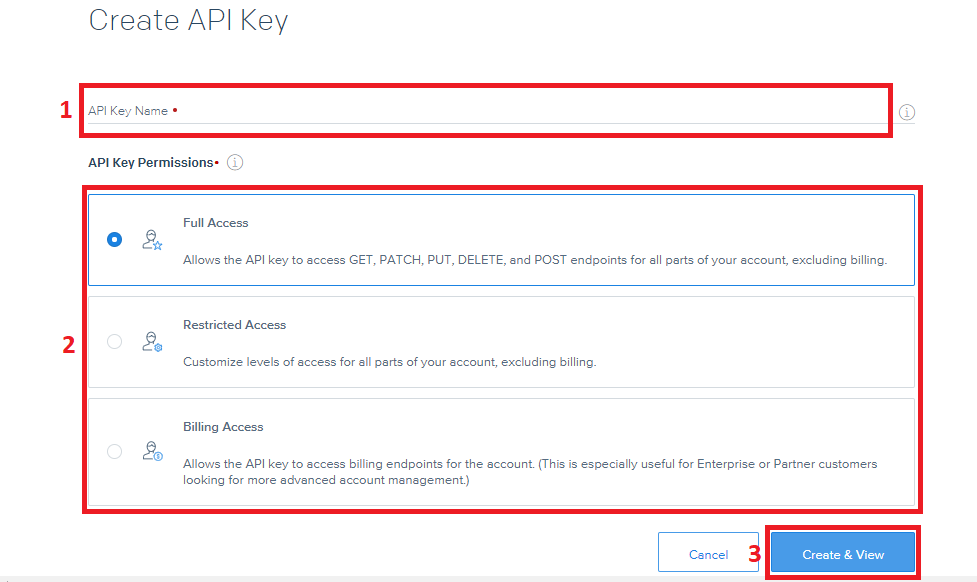
Create API Key form
With your API key ready, click on the key to copy it to your computer's clipboard. Be sure to store it securely.
API Key can only be displayed OnceOnce you exit this page, you won't be able to see this key again.
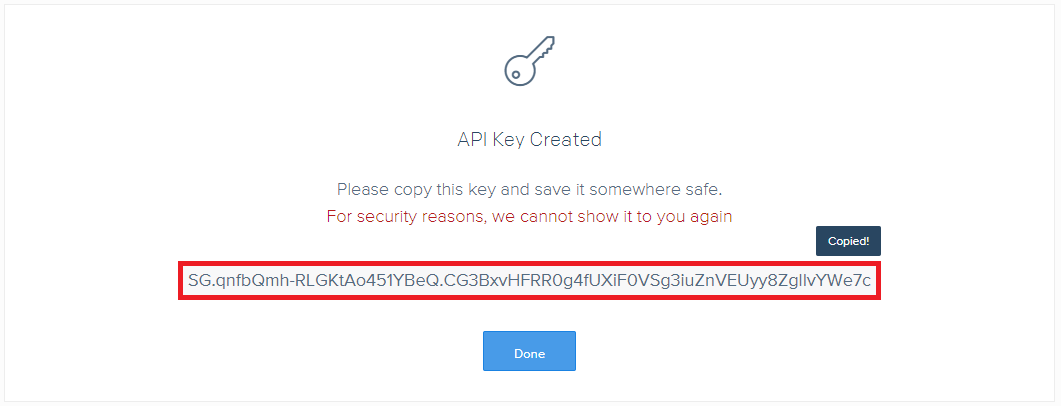
API Key Created
Install the Fielo SendGrid Connector
Now, you're ready to install the Fielo SendGrid Connector which allows Messaging to access SendGrid's services.
First, go to the Fielo SendGrid Connector public repository on GitHub and click Deploy to Salesforce at the bottom of the page.
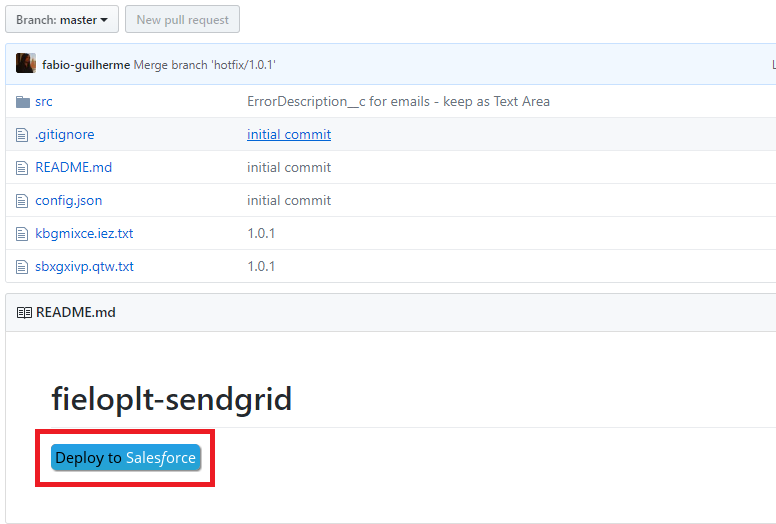
Deploy SendGrid Connector to Salesforce
If prompted, log in to Salesforce using your ORG credentials.
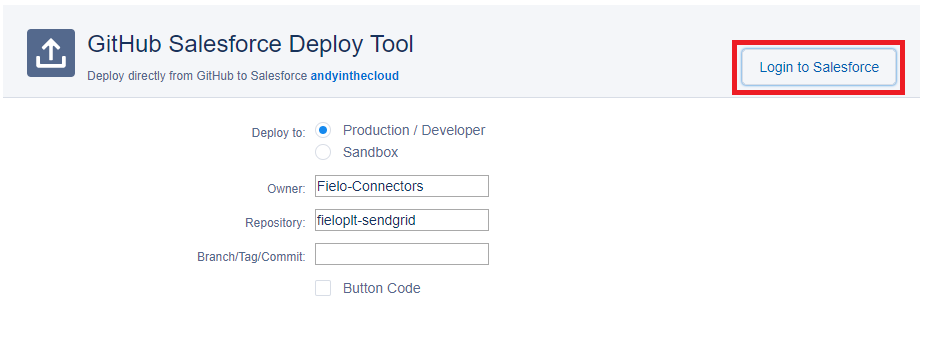
Log in to Salesforce
If you are already logged in to Salesforce, click Allow to enable the GitHub Salesforce Deploy Tool to access your Salesforce ORG.
If you are not logged in to Salesforce, enter the username and password of the ORG where Fielo PLT is installed. Click Allow to enable the GitHub Salesforce Deploy Tool to access your Salesforce ORG.
Now, click Deploy.
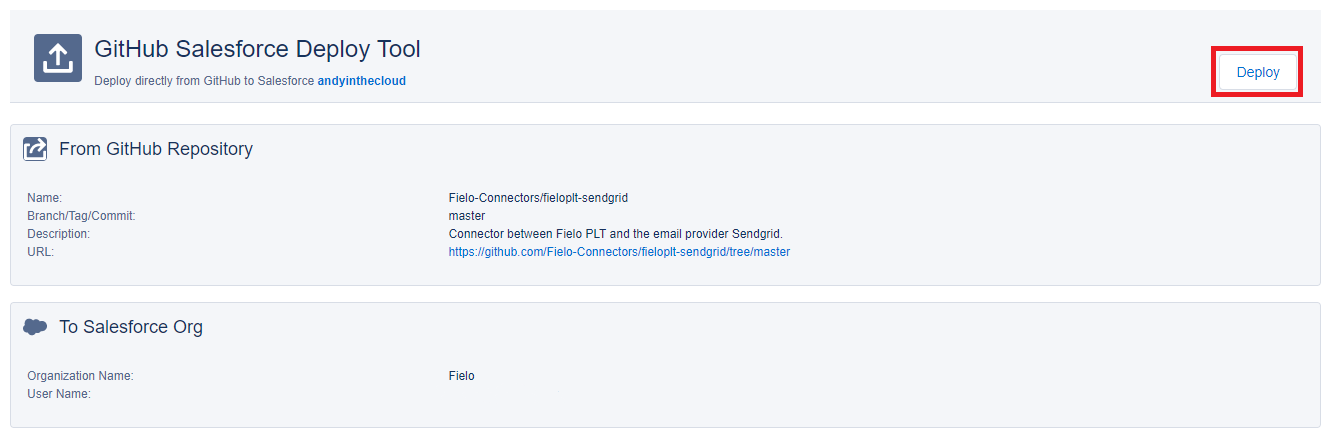
Deploy the Connector
Your deployment should be confirmed at the bottom of the page.
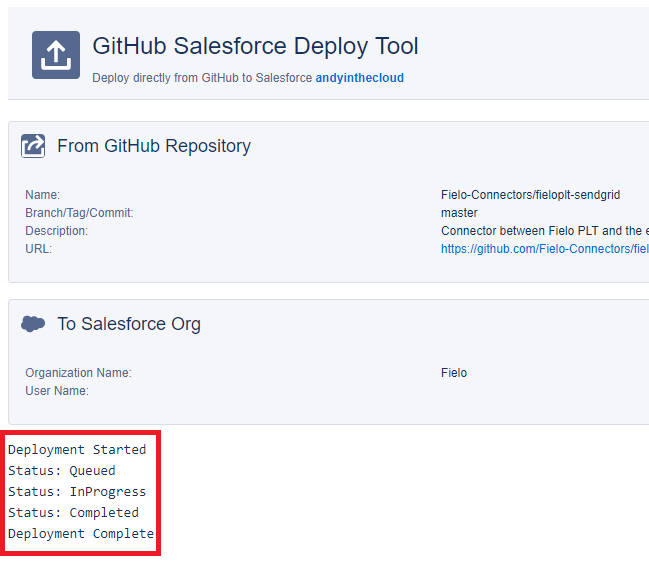
Deployment Complete
Link up SendGrid to Fielo
We'll start in Salesforce by setting up a new Remote Site. From Setup, enter Remote Site Settings in the Quick Find box and select Remote Site Settings. Click New Remote Site.
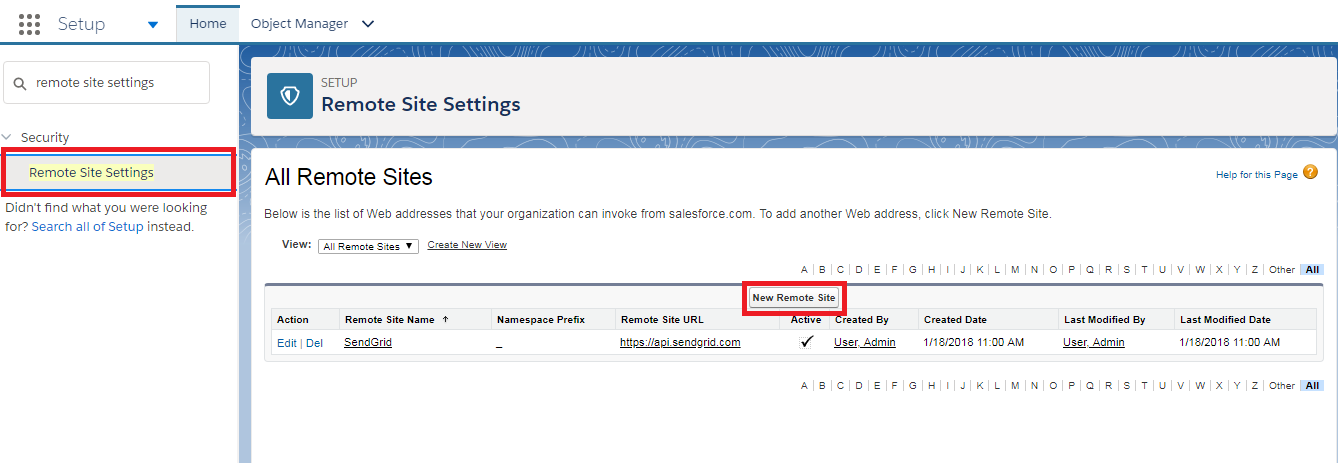
New Remote Site
From this screen, set the following fields:
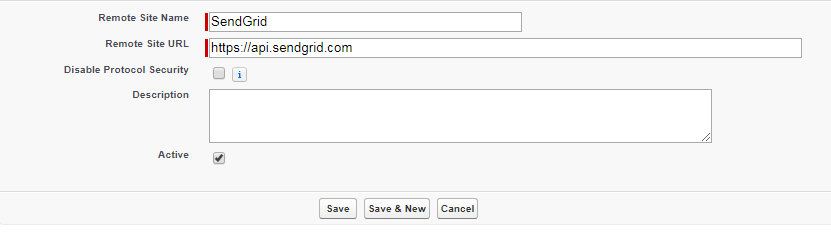
New Remote Site Settings
- Remote Site Name: SendGrid
- Remote Site URL: https://api.sendgrid.com
Disable Protocol Security should be left unchecked and Active should remain checked.
Click Save.
Now, from Setup, enter Custom Settings in the Quick Find box and then select Custom Settings. Select Public Settings - the one whose Namespace Prefix is FieloPLT.
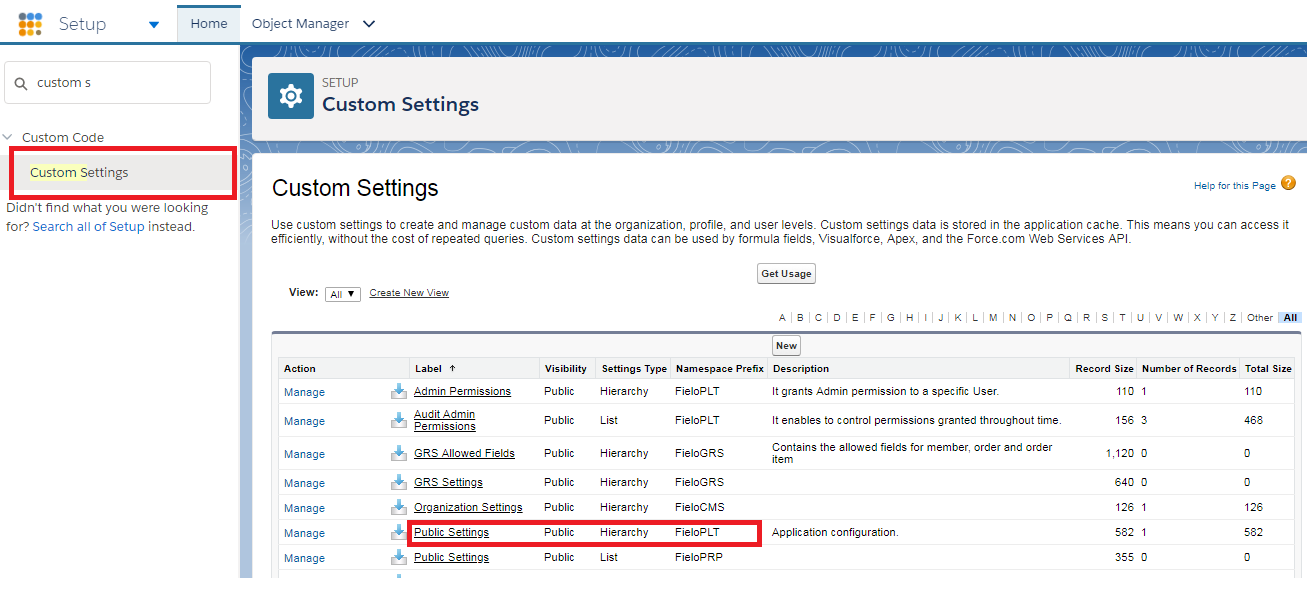
Custom Settings: Public Settings (Fielo PLT)
Click on the Manage button and then click Edit. In the Email Reflection Class field, input FieloPLT_EmailSendgridApi. In the Sendgrid API Key field, enter your SendGrid API key.
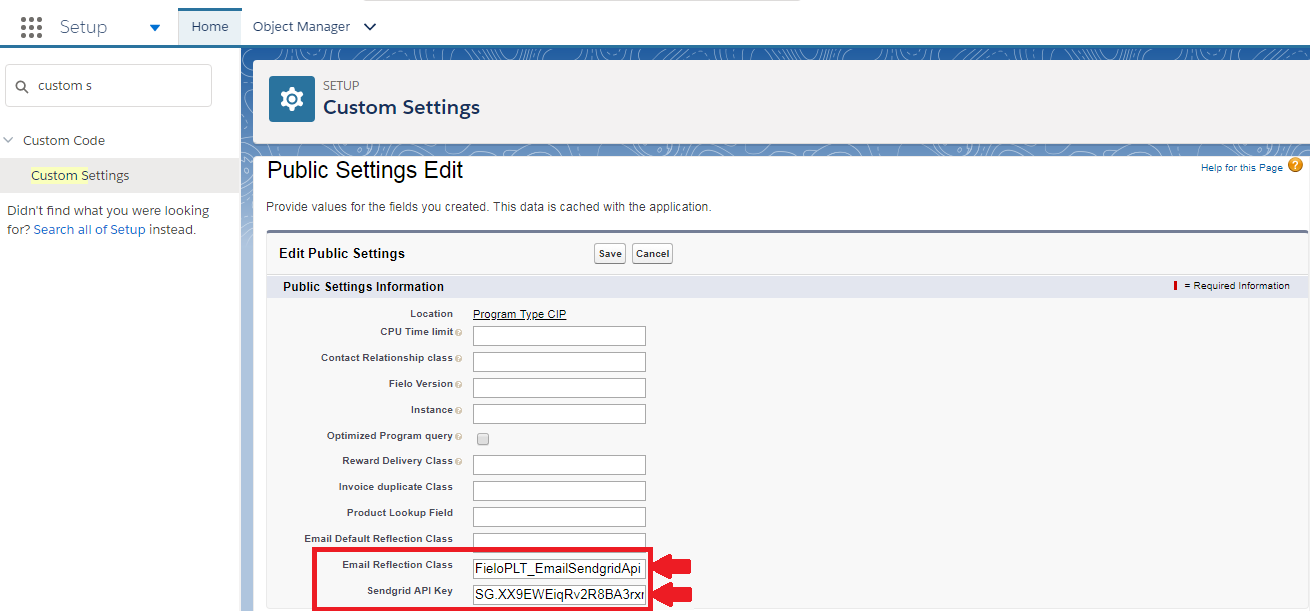
FieloPLT Public Settings for SendGrid Integration
Finally, click Save.
Great job!You're officially ready to use Messaging with SendGrid integration.
Updated over 1 year ago