
Libraries
Create and manage Libraries
Libraries are stacks which extend Fielo functionality. They comprise a suite of data such as Actions, Models and Page Settings designed to achieve more functionality for your incentive and loyalty program.
Each Fielo package includes its own reusable Library. For example, if you install and setup Proof of Purchase, you'll have its corresponding Library, FieloPRP, installed and ready to be enabled. You can also have and manage your own Library- Local Development Library- in which you can save all your customly-created Actions, Models and Page Settings to later reuse them as you like.
Managing Libraries
You can manage Libraries directly by accesing the Libraries tab. By default, all Libraries are Inactive but we guide you through how to enable them every time you install a new package - i.e. when installing and setting up IAS one of the last steps you need to do is enable FieloPLT Library; when you're setting up any Incentive and Loyalty Apps, we walk you on how to enable their corresponding Libraries (i.e. FieloPRP, FieloELR, FieloBCP).
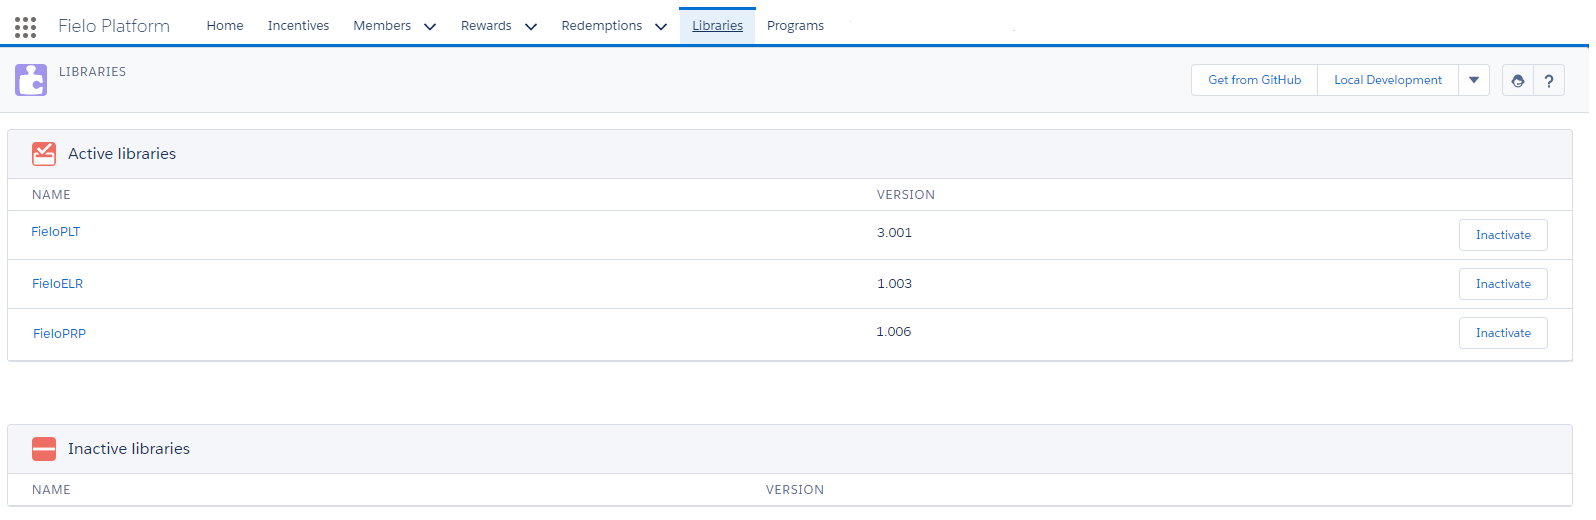
Libraries
Upgrading Libraries
Libraries might change when upgrading different Fielo packages. In the event that a new version of a Library is available, you'll have the possibility of upgrading them. For that, just click Upgrade next to the Library version to update.
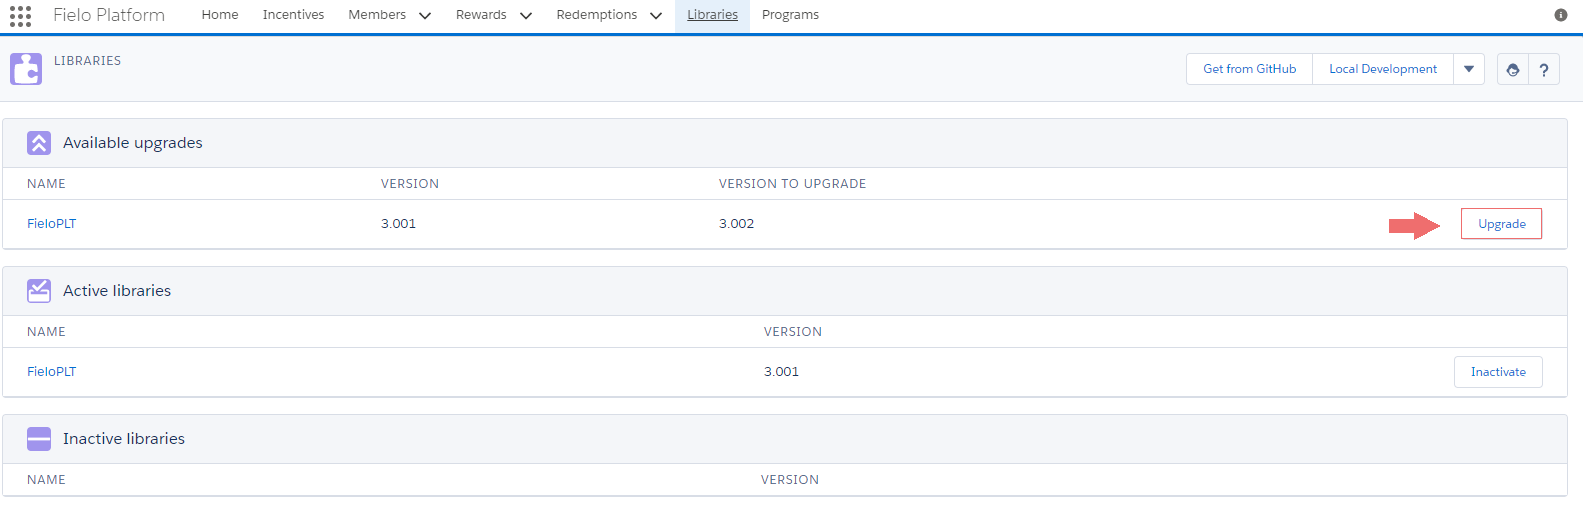
Upgrading FieloPLT Library
Once you've upgraded your selected Library, note that Available Upgrades is no longer available and that the Version Number has also changed, displaying the newly updated version.
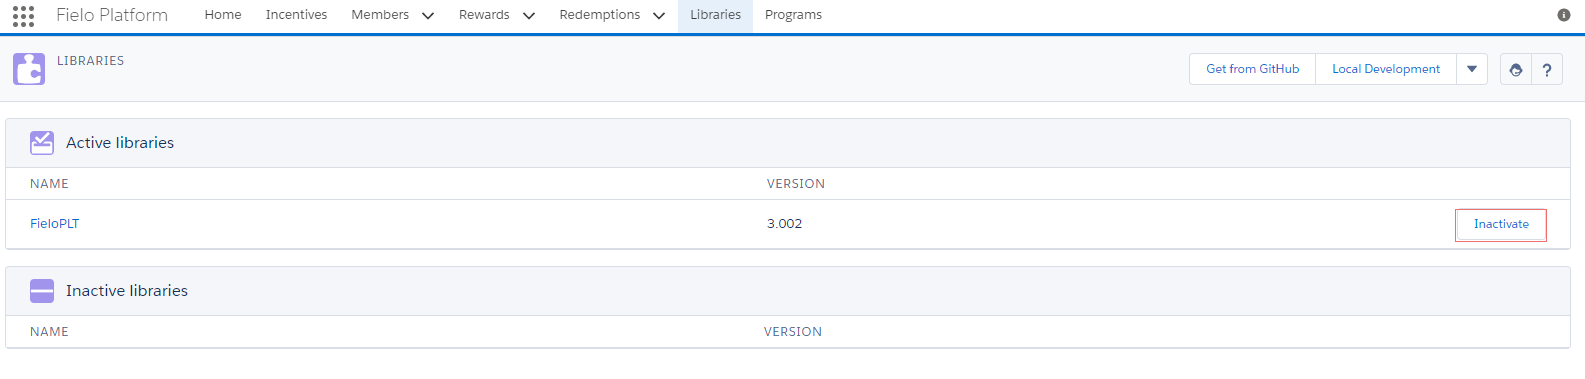
FieloPLT Upgraded Library
In this example, we're upgrading FieloPLT Library as we've installed a new version of IAS. You can do the same for each newly upgraded Library, such as FieloPRP, FieloELR, FieloBCP, etc.
Importing Libraries
elect Import to import a Library you or a colleague has previously exported.
Simply upload a JSON file containing all the data for the Library you wish to import. In most cases, this will be one that's been previously exported from another ORG, so you won't need to make any changes. We do, however, advise you to validate the JSON file before uploading.
Once you're ready, just hit Import.
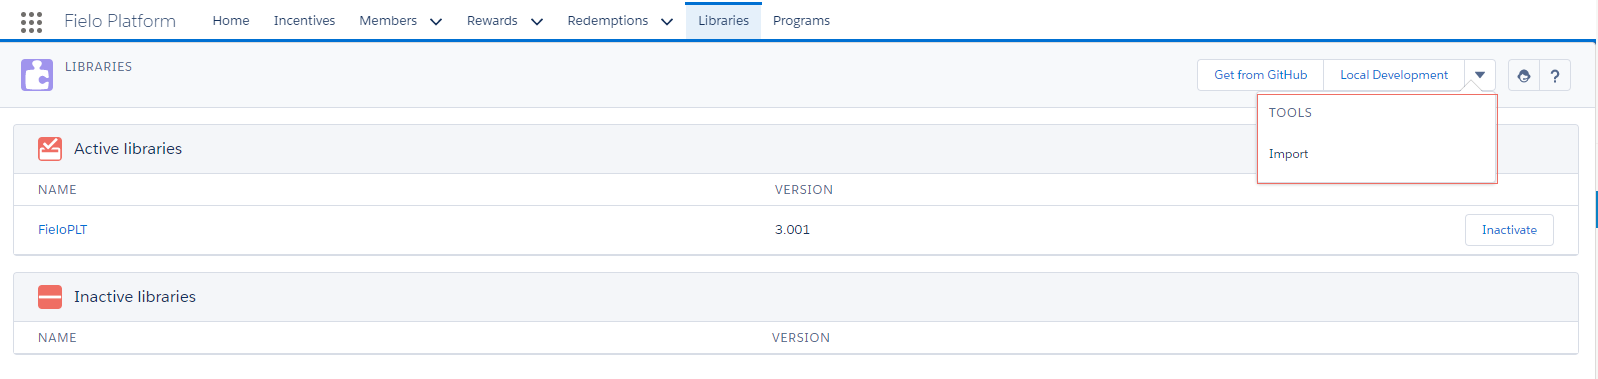
Importing a Library
FieloPLT Library
IAS comes with its own default Library called FieloPLT. FieloPLT Library includes a default Action - Event - and their Page Settings.
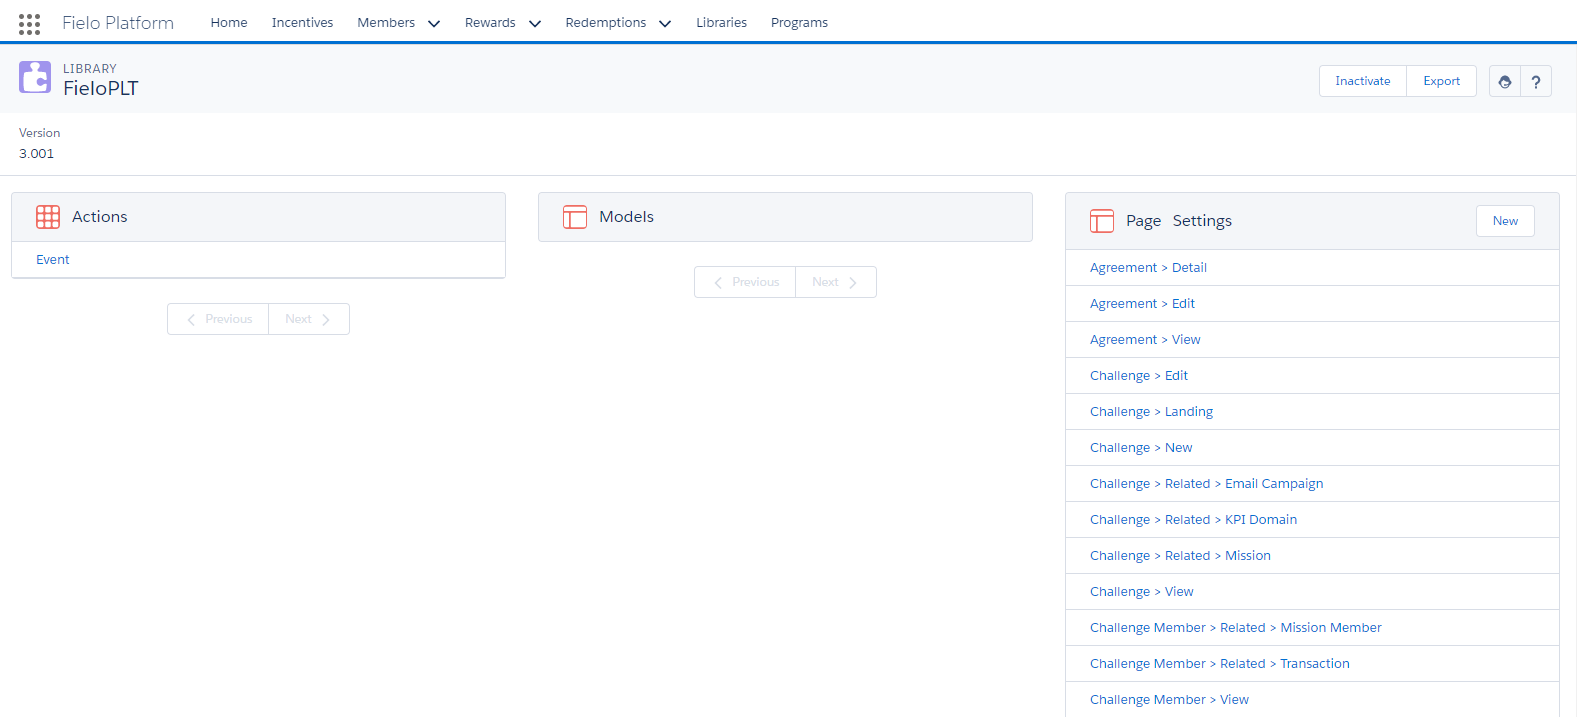
FieloPLT Library
Actions
Actions let you decide which behavior and participants to drive in your incentive and loyalty Program.
You can choose to drive a particular behavior by using Single Action Engine- i.e. award your Members every time they log in to your loyalty portal - or you can encourage your Members to carry out a set of activities in certain order, time frame or number by means of Multi Action Engine - i.e. you award your Members after logging 5 times in to your portal.
IAS comes with a default Action in FieloPLT Library - Event - which you can use as example to create your own Actions.
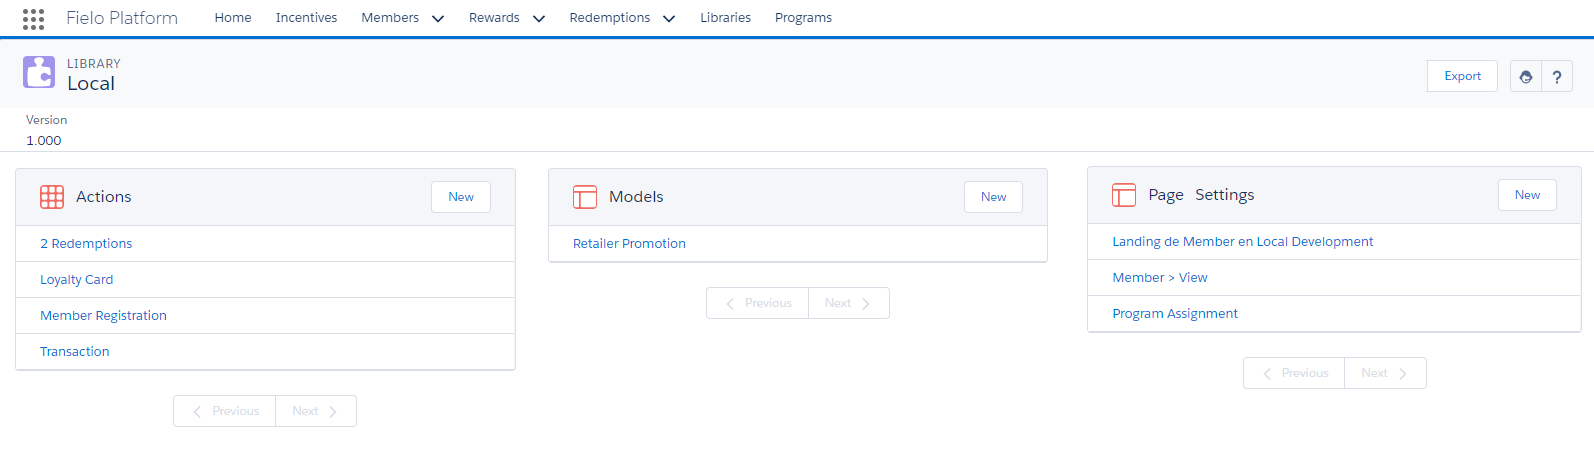
Action: Event
Models
Models are pre-configured, reusable Incentives and Programs templates you can use to create Programs and Incentives easier and faster. FieloPLT Library doesn't come with any Model, but some other Fielo packages, such as Proof of Purchase or E-learning, do bring some Models you can start using from scratch.
You can create new Models and reuse them any time you want! All of your own created Models are stored in Local Development Library.
Page Settings
Page Settings is a tool which lets you extend and customize IAS pages functionality and design. FieloPLT Library includes an array of different Page Settings for each page and form that can be customizable.
You can create new Page Settings for FieloPLT Library just by hitting New.
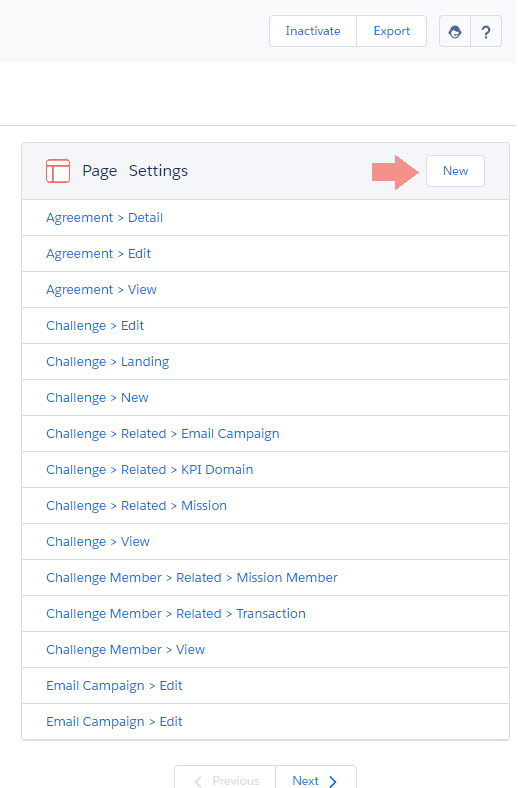
FieloPLT Page Settings
For a complete understanding on how Page Settings work, check Page Settings.
Activating and inactivating FieloPLT Library
You must enable FieloPLT Library to use IAS, as it contains all Page Settings that control every page layout and design. For that reason, it's one of the last step while setting up IAS.
To enable FieloPLT Library - and any other Library as well - just hit Activate on the right area of the Inactive Libraries related list. You'll see how FieloPLT moves from Inactive to the Active Libraries related list, which makes it ready for you to click and access it.
Inactive FieloPLT LibraryIf FieloPLT Library is inactive you won't have access to any IAS pages.
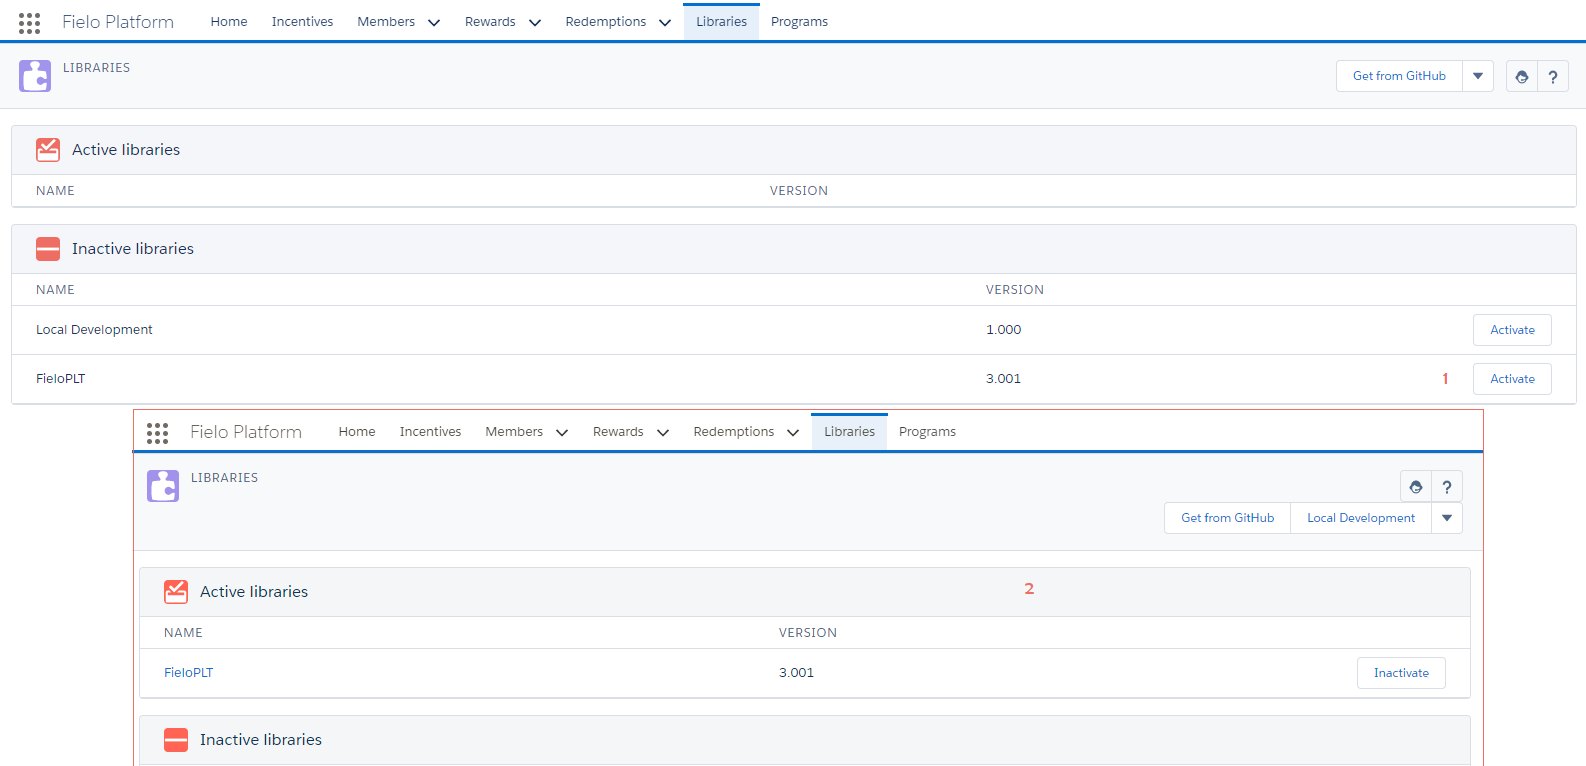
Activating FieloPLT Library
Exporting FieloPLT Library
You can easily export all data stored in FieloPLT Library, which can include Actions and Models, as well as all Page Settings of all Programs. After selecting FieloPLT, simply click Export in the top right corner of the page.
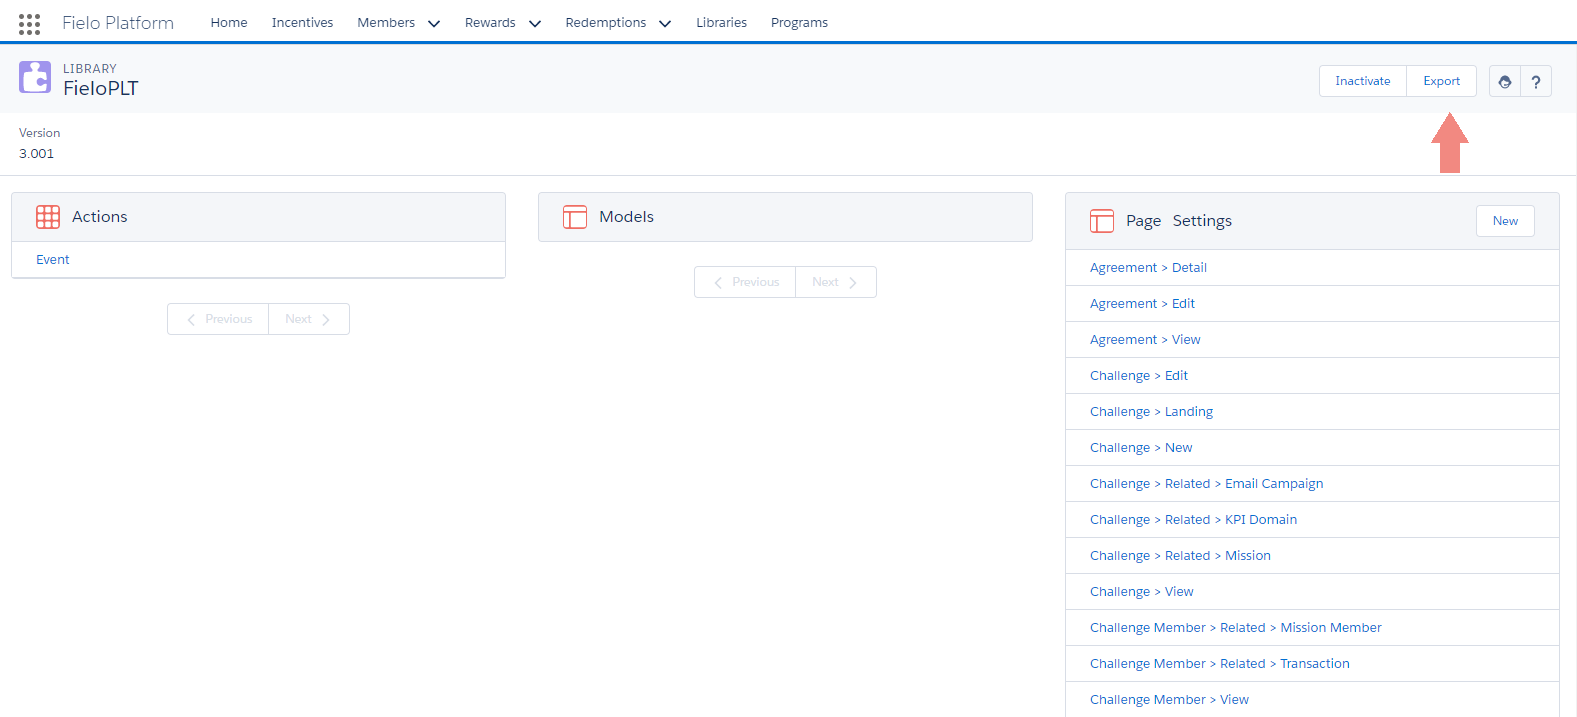
Exporting FieloPLT
You'll obtain a file in a JSON format containing the following object hierarchy:
FieloPLT Library (FieloPLT__Library__c)
FieloPLT__RuleTrigger__cFieloPLT__Action__cFieloPLT__ProgramAssignment__cFieloPLT__KPI__cFieloPLT__Model__cFieloPLT__ProgramAssignment__cFieloPLT__PageSettings__cFieloPLT__ProgramAssignment__c
You can export FieloPLT Library and then import the generated JSON in different ORGs. This tool is really useful when migrating from different ORGs, for example, from Sandbox ORGs to Production ORGs.
Get from GitHub
You can access our Github public repository, which includes different plugins to extend Fielo functionality. These plugins may be used for several specific solutions which can be applied to any of your customers' particular needs.
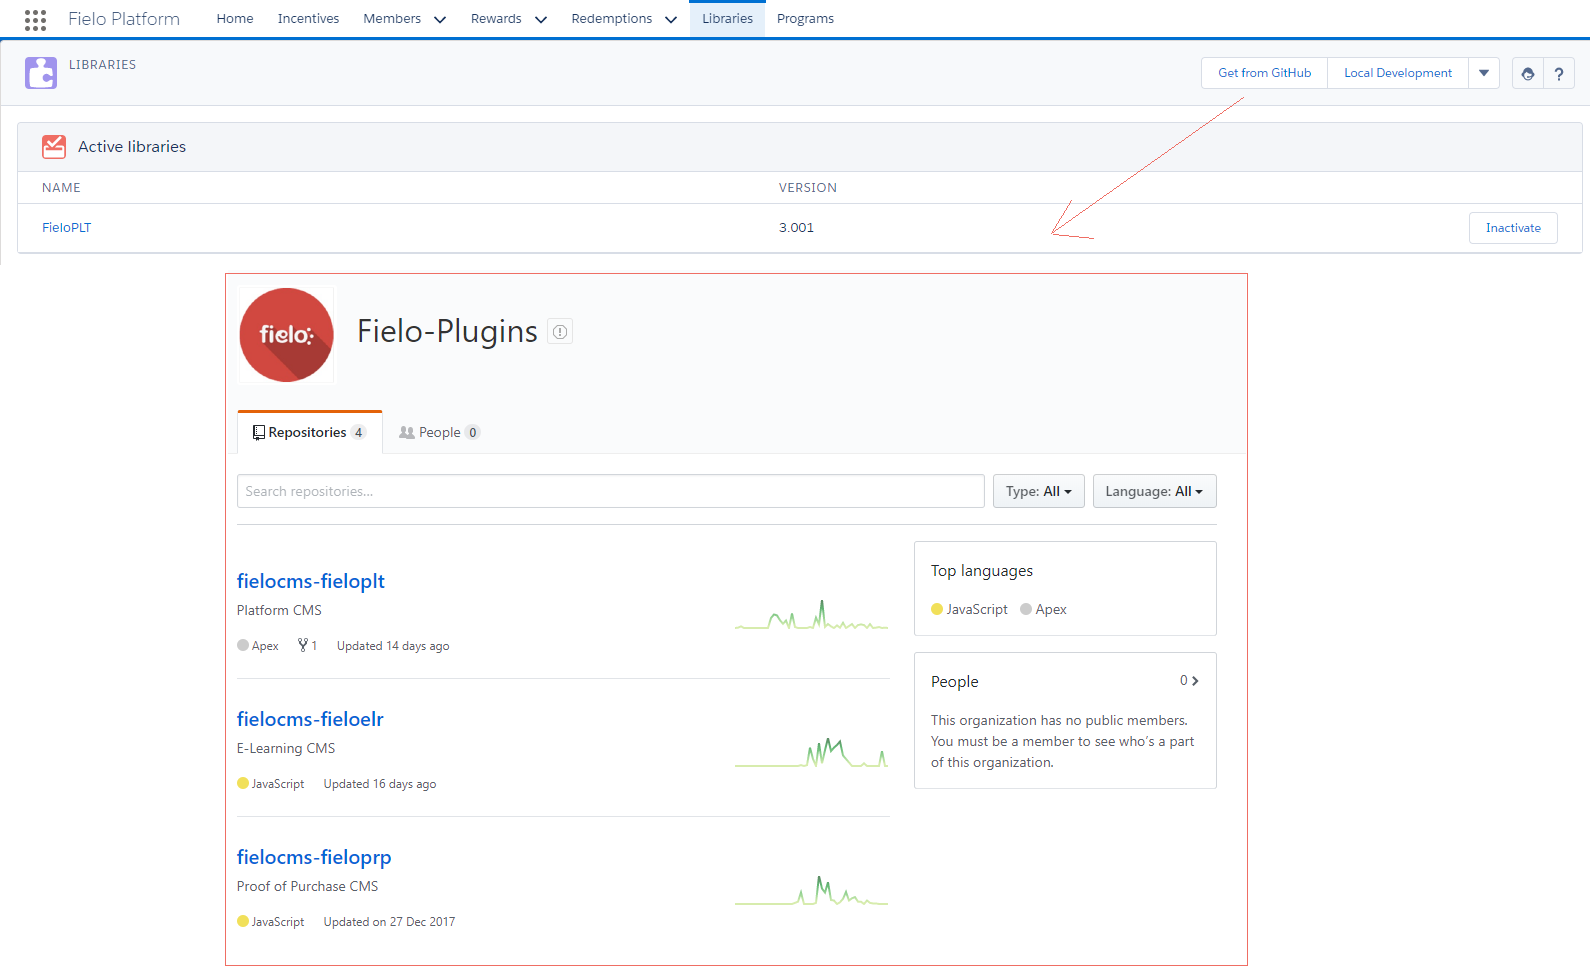
Get from Github
Local Development Library
Local Development Library represents a local repository you can use to create and store your own Actions, Models and Page Settings, independently of the default Libraries that come after installing the different Fielo packages.
To enable Local Library - and any other Library as well - just hit Activate on the right area of the Inactive Libraries related list. You'll see how Local Library is no longer part of the Inactive box but now it's available to access by clicking Local Library at the top right area of the page.
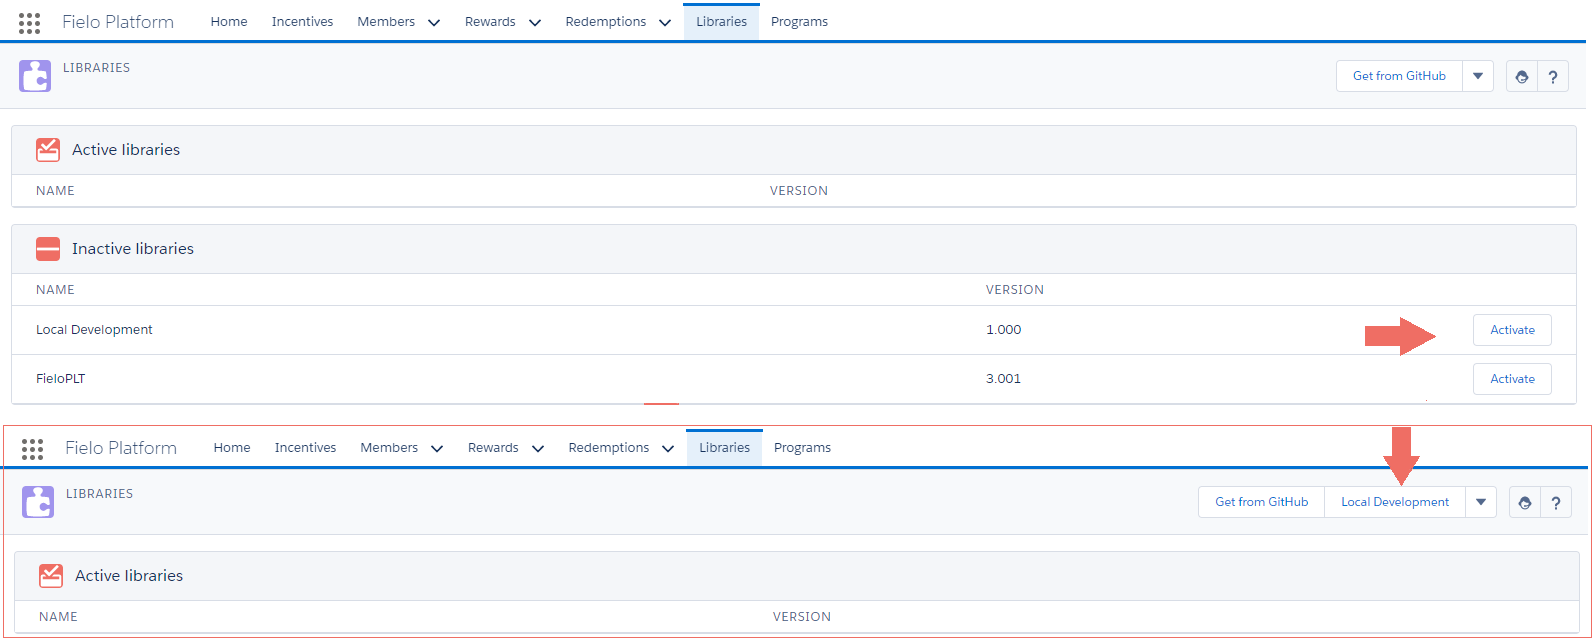
Activating Local Library
Once you've accessed Local Development, you are free to create all the Actions, Models and Page Settings you want!
Export
You can easily export all data stored in your Local Development Library, which may include Actions and Models, as well as all the Page Settings you've created for your Programs. After selecting Local Development, simply click Export in the top right corner of the page.
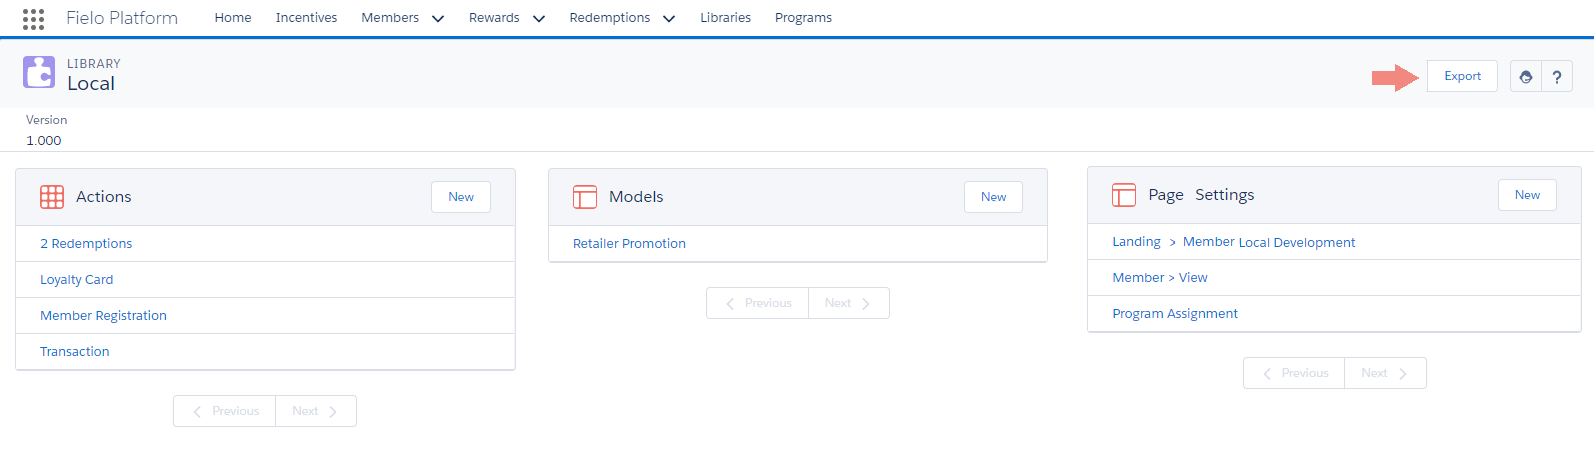
Local Development Library
Fielo Local Library
FieloPLT__RuleTrigger__cFieloPLT__Action__cFieloPLT__ProgramAssignment__cFieloPLT__KPI__cFieloPLT__Model__cFieloPLT__ProgramAssignment__cFieloPLT__PageSettings__cFieloPLT__ProgramAssignment__c
Advanced Features: Import/Export and Data Portability Utilities
The Import/Export and Data Portability utilities provide a simple way for you to specify what data you want to export. Exporting is available for Programs, Members (via Data Portability), Incentives, Rewards and Libraries.
Create an Export Config file
The first thing you need to do is to create an Export Config file. Export Config is a JSON file that includes two elements:
- configObjects: Here you can define all metadata from the objects you need to export, which includes their External ID and the fields to exclude.
- configModel: Here you define the data model to export, being sure to include any parent or related objects and lookup fields. You can also define a record filter using a whereCondition
{
   "configObjects":[
      {
         "apiName":"ExampleObject__c",
         "externalId":"ExampleField_ExternalID",
         "fieldsToExclude":"ExcludedField1__c,ExcludedField2__c",         "fieldsToExcludeModel":"ExcludedField1__c,ExcludedField2__c,ExcludedField3__c"
      },
      {
         "apiName":"AnotherExampleObject__c",
         "externalId":"AnotherExampleField_ExternalID"
      }
   ],
   "configModel":[
      {
         "apiName":"ExampleObject__c",
         "relatedObjects":[
            {
               "apiName":"RelatedObject__c",
               "relationship":"LookupExampleField",
               "relatedObjects":[
                  {
                     "apiName":"ParentObject__c",
                     "relationship":"LookupExampleField",
                     "whereCondition":"[{\"field\":\"AFieldToFilter__c\",\"operator\": \"=\",\"value\":\"SomeValue\"}]"
                  }
               ]
            },
            {
               "apiName":"AnotherRelatedObject__c",
               "relationship":"AnotherLookupExampleField"

            }
         ]
      }
   ]
}
Format your whereCondition
If using a WHERE condition, it must be in the form of a JSON string. For instance, the SOQL fragment WHERE FieloPLT__IsActive__c = true OR FieloPLT__IsActive__c = false AND LastModifiedById IN IsActive can be expressed as follows:
[
  {
    "andOrOperator": "",
    "field": "FieloPLT__IsActive__c",
    "operator": "=",
    "value": "true",
    "subQueryFilter": null
  },
  {
    "andOrOperator": "or",
    "field": "FieloPLT__IsActive__c",
    "operator": "=",
    "value": "false",
    "subQueryFilter":
    {
      "field": "IsActive",
      "objectName": "User",
      "filters":
      [
        {
          "andOrOperator": "and",
          "field": "LastModifiedById",
          "operator": "in",
          "value": "IsActive",
          "subQueryFilter": null
        }
      ]
    }
  }
]
Each JSON object represents an expression.
For the "andOrOperator" key, use an empty string ("") for the first expression. Use "and" or "or" in subsequent expressions to indicate the relation with the previous expression. If your WHERE condition will only contain one expression, set "andOrOperator" to null.
For "field", enter the API name of the field being used in the expression.
For "operator", specify how you want to compare "field" with "value". Use can choose from "=", "!=", "<", "<=", ">", ">=", "in", "not in" and "like".
For "value", enter the value you want to compare "field" with, which could be "true" or "false", a numerical value, or even the API name of another field.
For simple queries, you can set "subQueryFilter" to null. If using subqueries, the object should specify the "field" to be compared and, for "objectName", the API name of its related object. The subquery "filters" have the same structure as simple queries.
Now, imagine that you've created your own Page Settings to customize certain page layouts and you only need to export these Page Settings, but not the whole Local Development Library - no Actions nor Models. To do this, the first thing you need to do is create a Config as follows:
{
   "configObjects":[],
   "configModel":[
      {
         "apiName":"FieloPLT__PageSettings__c",
         "whereCondition":"[{\"field\":\"FieloPLT__Library__r.Name\",\"operator\": \"=\",\"value\":\"FieloLocal\"}]",
         "relatedObjects":[]
      }
   ]
}
Upload Your Configurations to Salesforce
Once the config file is ready, it's time to upload it to Salesforce.
First, go to Salesforce Setup and access Static Resources. Click New to create a new Static Resource.
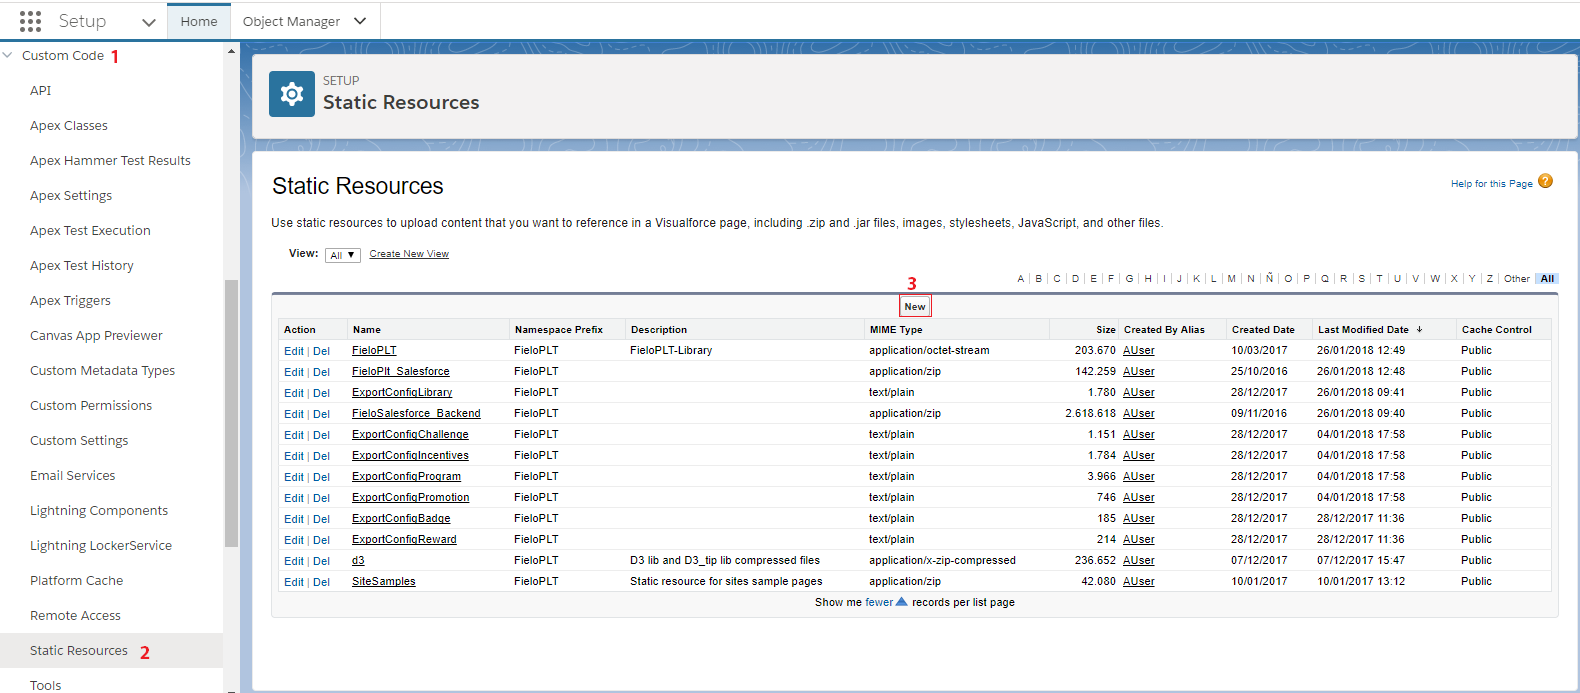
New Static Resource
Now, enter the name for your Static Resource and upload the config file containing the JSON definition of what we want to export.
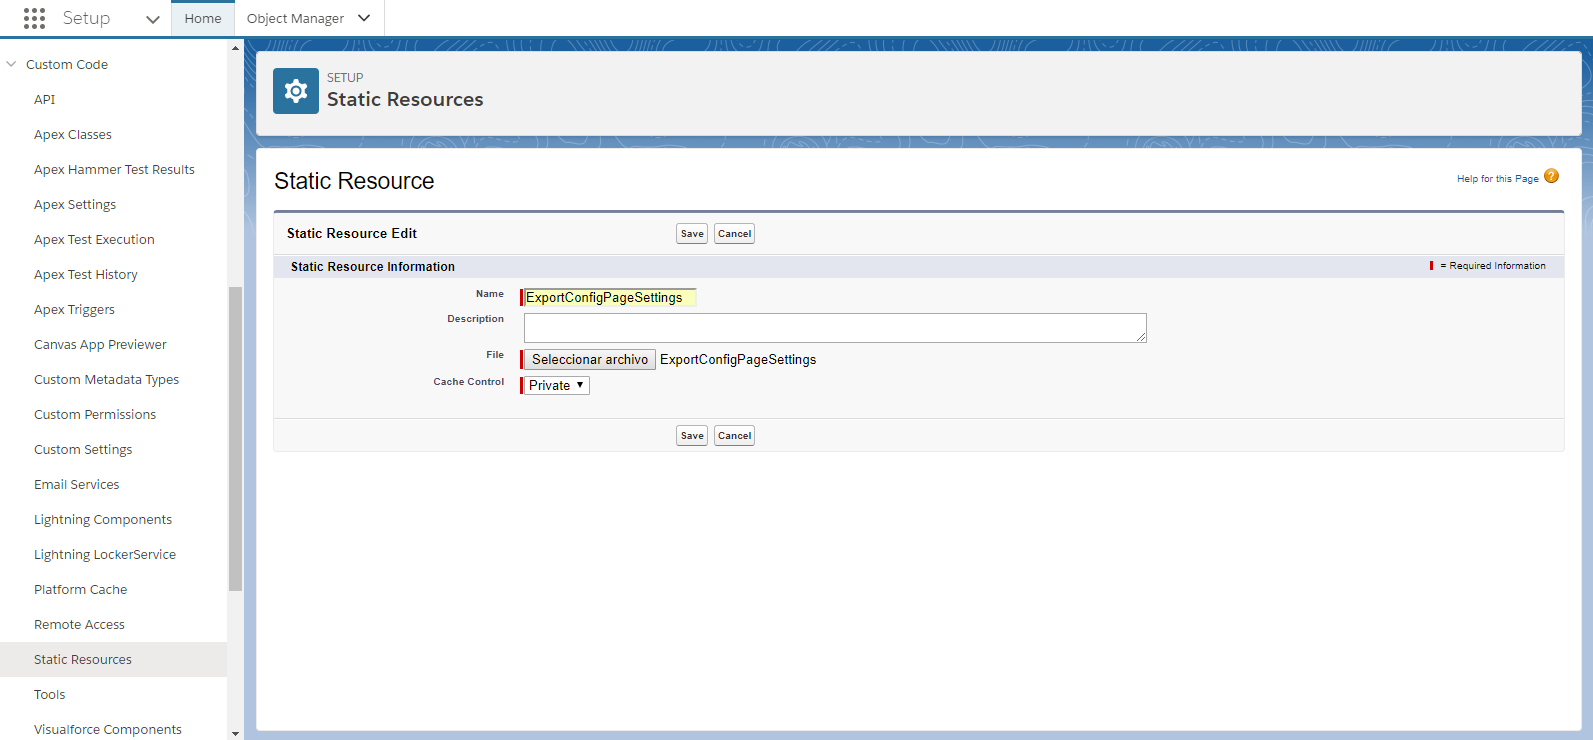
In this example, we're using the JSON config file for the Page Settings that we created before.
After clicking Save, you're ready to use your new JSON config file.
We advise you to give your Static Resource and JSON config the same name.
Link Your Config File to a Library
Lastly, you need to connect the configurations you've created before to the corresponding Fielo Library.
Internally, all information from each Fielo product is stored in different Libraries, i.e. all data included in Programs, Members, Incentives, Rewards, etc. is stored in FieloPLT Library; all Courses, Modules and Questions are linked to the FieloELR Library, and all Invoices to the FieloPRP Library.
So, once you've created and uploaded your config JSON file to Salesforce, go to the appropiate Library where the information you're exporting is stored. Here we're accessing Local Development Library as we're using the same example from our custom Page Settings.
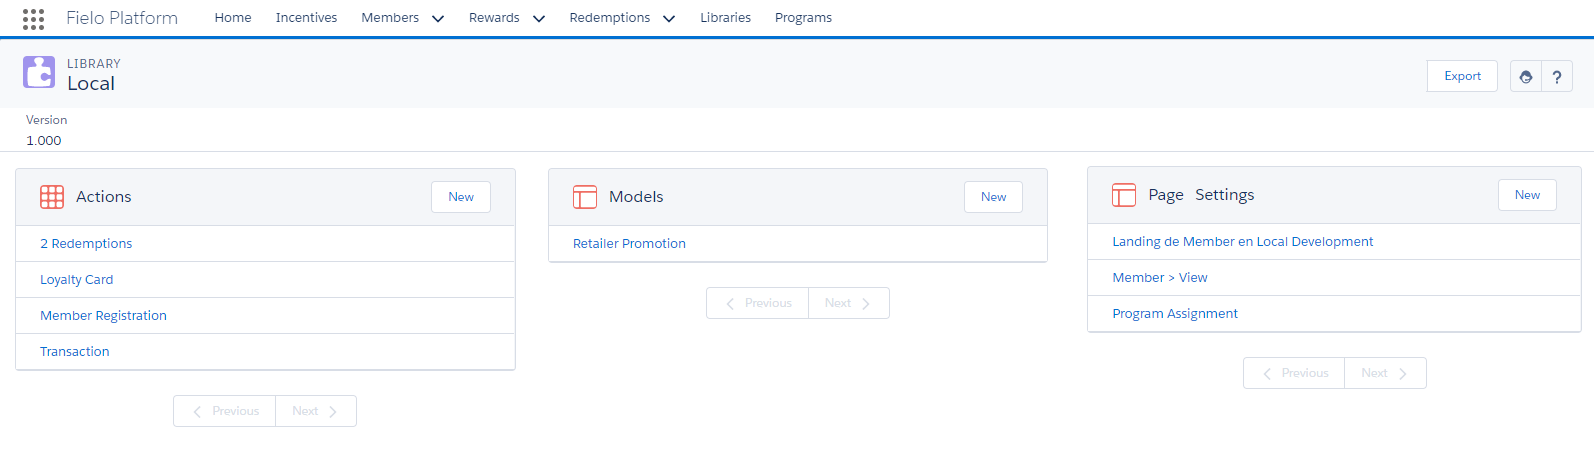
Page Settings in Local Development Library
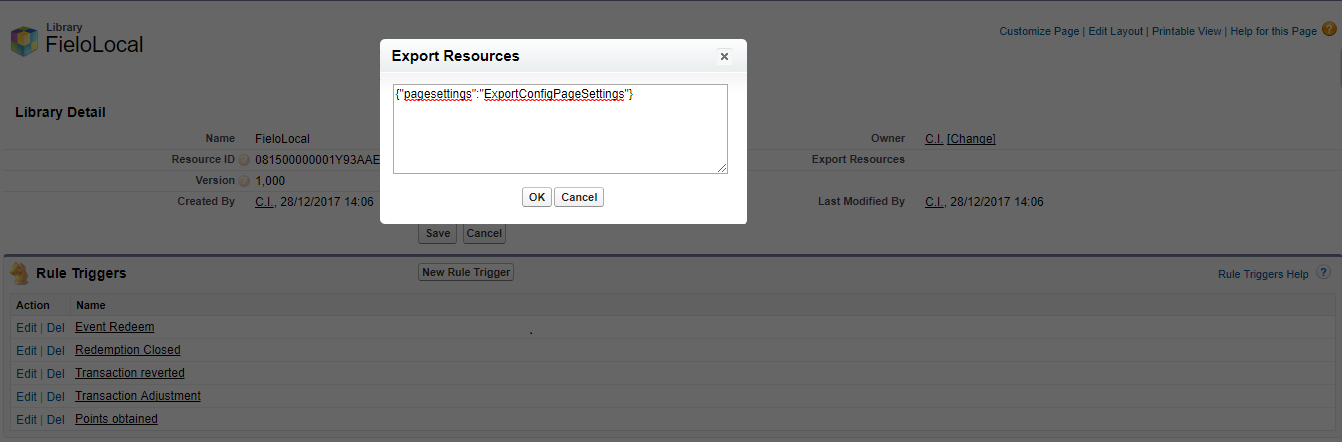
Now, switch to Salesforce Classic and change the URL by deleting /apex/apex/LibraryView?id=and adding ?nooverride. You'll notice that Library details are displayed, including a Resources field.
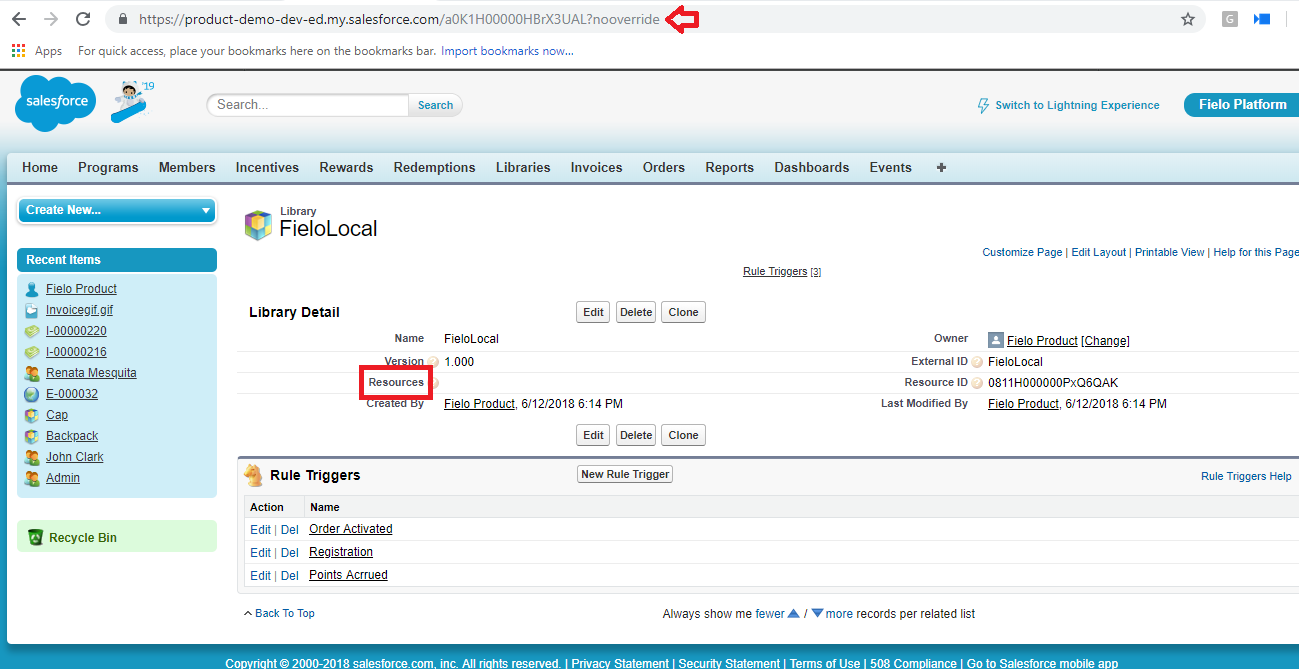
Add the key-value pair corresponding to the name of the object you want to export and the name of the static resource you created - in our example {"pagesettings":"ExportConfigPageSettings"} - that you created before and hit Save.
Resources
Note that the JSON object can contain multiple key-value pairs, separated by commas, for various object-resource pairings. Here are some possible options from the FieloPLT library:
| Key | Object / Purpose |
|---|---|
"programs" | Program export |
"libraries" | Library export |
"promotions" | Promotion export |
"challenges" | Challenge export |
"incentives" | Promotion and Challenge export |
"rewards" | Reward export |
"badges" | Badge export |
"members" | Member (Data Portability) export |
"memberAnonymize" | Configs for Member anonymizaton |
"memberMerge" | Configs for the Merge Members API method |
Using your Config File
Once you've created and uploaded the JSON config file containing the data you'd like to export, and linked it to Fielo, you can access it to download the data.
For that, you need to access a base URL as follows:
https://[app:Instance URL]/apex/fieloplt__xmlexport?exportPoint=yourConfig
You can include other parameters in the URL depending on the information you want your JSON export file to have:
- exportPoint: Name of the config to download. This parameter is mandatory.
- library: Here you can define the Library in which the Export Point is stored.
- exportType:
- exportRecords: Here you can set the IDs of the records to export. The parameter should be structured as follows:
ExampleObject__c:recordId1,recordId2;AnotherExampleObject__c:recordId1.
For our Page Settings example, the URL we use is made up like this:
https://[app:Instance URL]/apex/fieloplt__xmlexport?exportPoint=pagesettings&library=FieloLocal
Updated over 1 year ago