
Installation and Setup
Install and configure Fielo Invoicing
Requirements
Be sure you've first installed and set up IAS.
1. Install the Invoicing package
Click here to log in to your org and begin installation.
Choose which users in your org will be configuring. If it will be just you and/or other admins, select Install for Admins only and click Install. When the installation process ends, the org administrator will be notified by email.
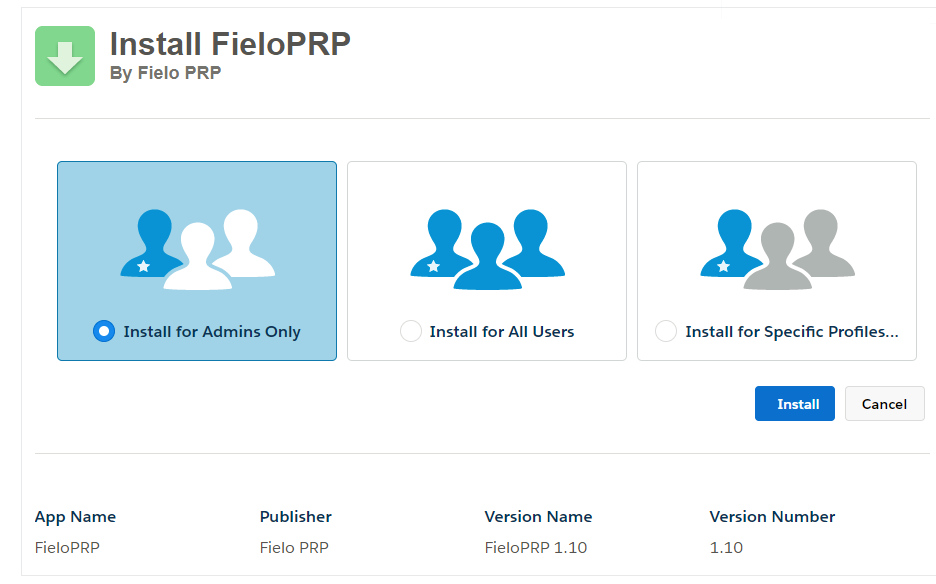
Install Proof of Purchase for Admins only
2. Deploy Fielo CMS-PRP Plugin (CMS-based Loyalty Portal Only)
If you plan to use Invoicing with Fielo CMS, access the Fielo CMS-PRP Plugin public repository on Github and click Deploy to Salesforce at the bottom of the page.
Deploy PRP to Salesforce
In Branch/Tag/Commit write the version number tag from Fielo CMS-PRP Plugin that is shown in Lastest Release (E.g. v2.6.0) and click Login to Salesforce:

Github Deploy
If you are already logged in to Salesforce, click Allow to enable Github Salesforce Deploy Tool to access your Salesforce ORG.
If you are not logged in to Salesforce, enter the username and password of the ORG where Fielo PLT and Fielo CMS packages were installed. Click Allow to enable the Github Salesforce Deploy Tool to access Salesforce ORG.
Now, sign in to Github or create a Github account. After authorizing the application, click Deploy.

Deploy
3a. Access User Permissions (CMS-based Loyalty Portal Only)
From Sites, choose your previously created Fielo Site to modify the Public Access Settings.
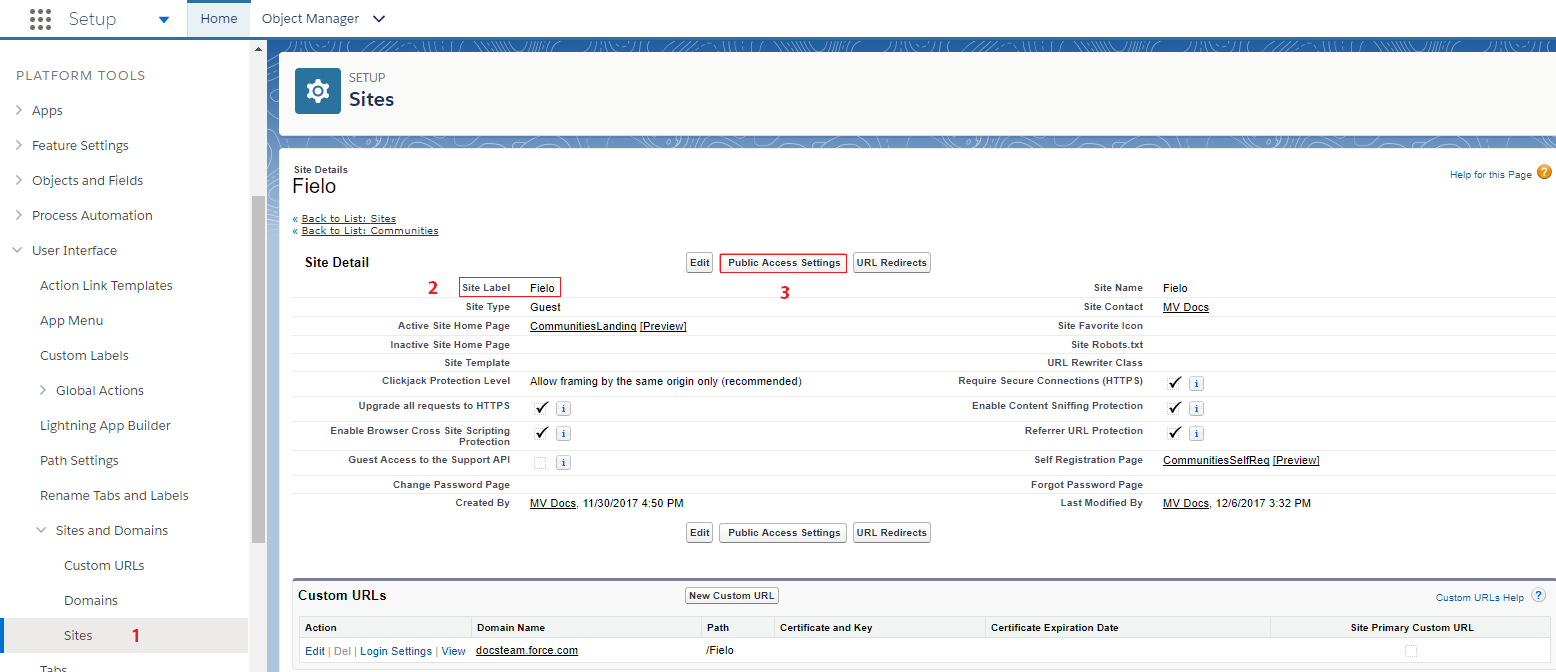
Fielo Site: Public Access Settings
Next, go to the Apps section and select Object Settings.
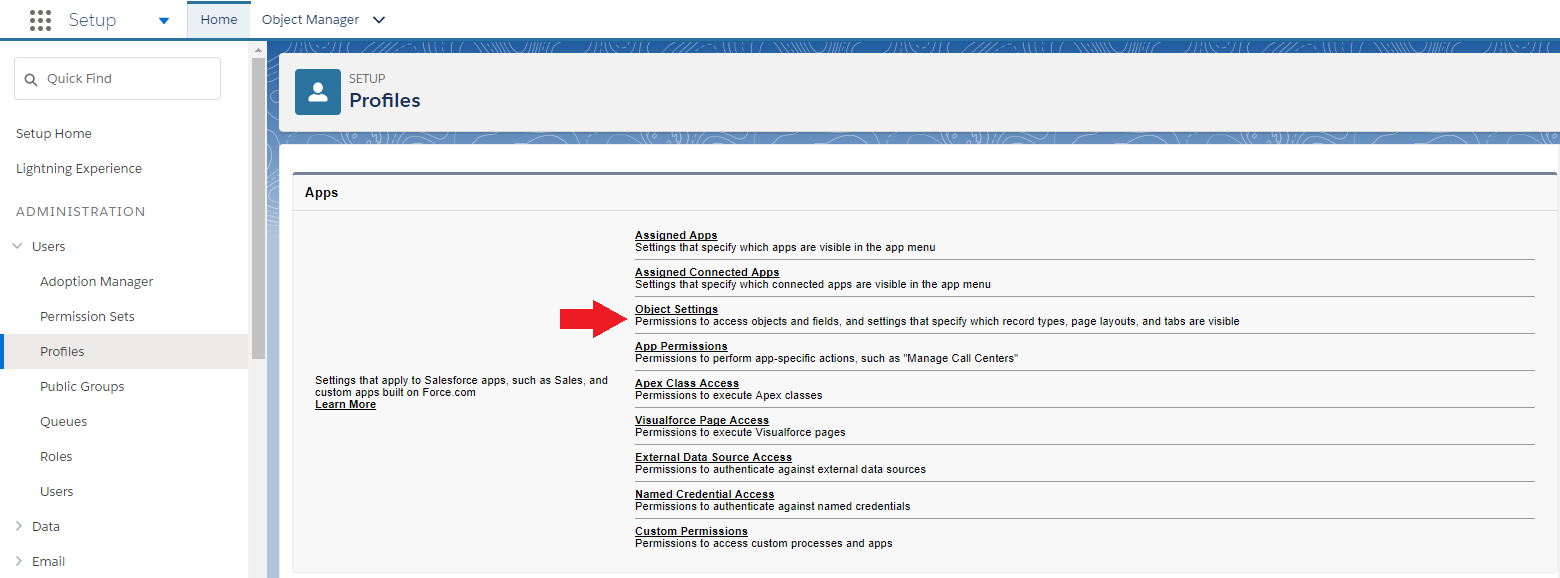
Profile: Object Settings
3b. Access User Permissions (Community Cloud-based Loyalty Portal Only)
From Profiles, choose the profile assigned to your loyalty portal Members.
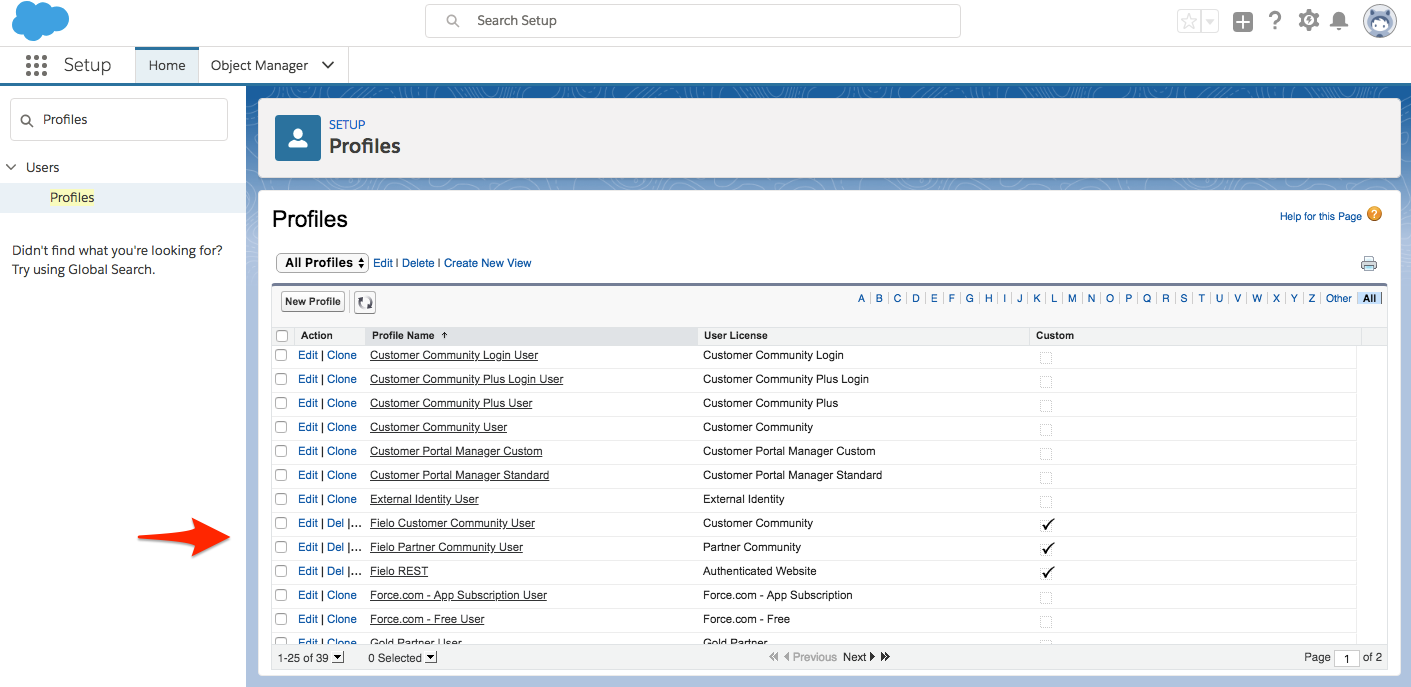
4. Provide User Permissions
For each of the objects below, enable the following Object Permissions:
| Object | Permission Name |
|---|---|
| Invoices | Read, Create and Edit. |
| Invoice Items | Read, Create and Edit. |
| Products* | Read, Create and Edit. |
*Depending on your implementation needs, you can use another object instead of Product.
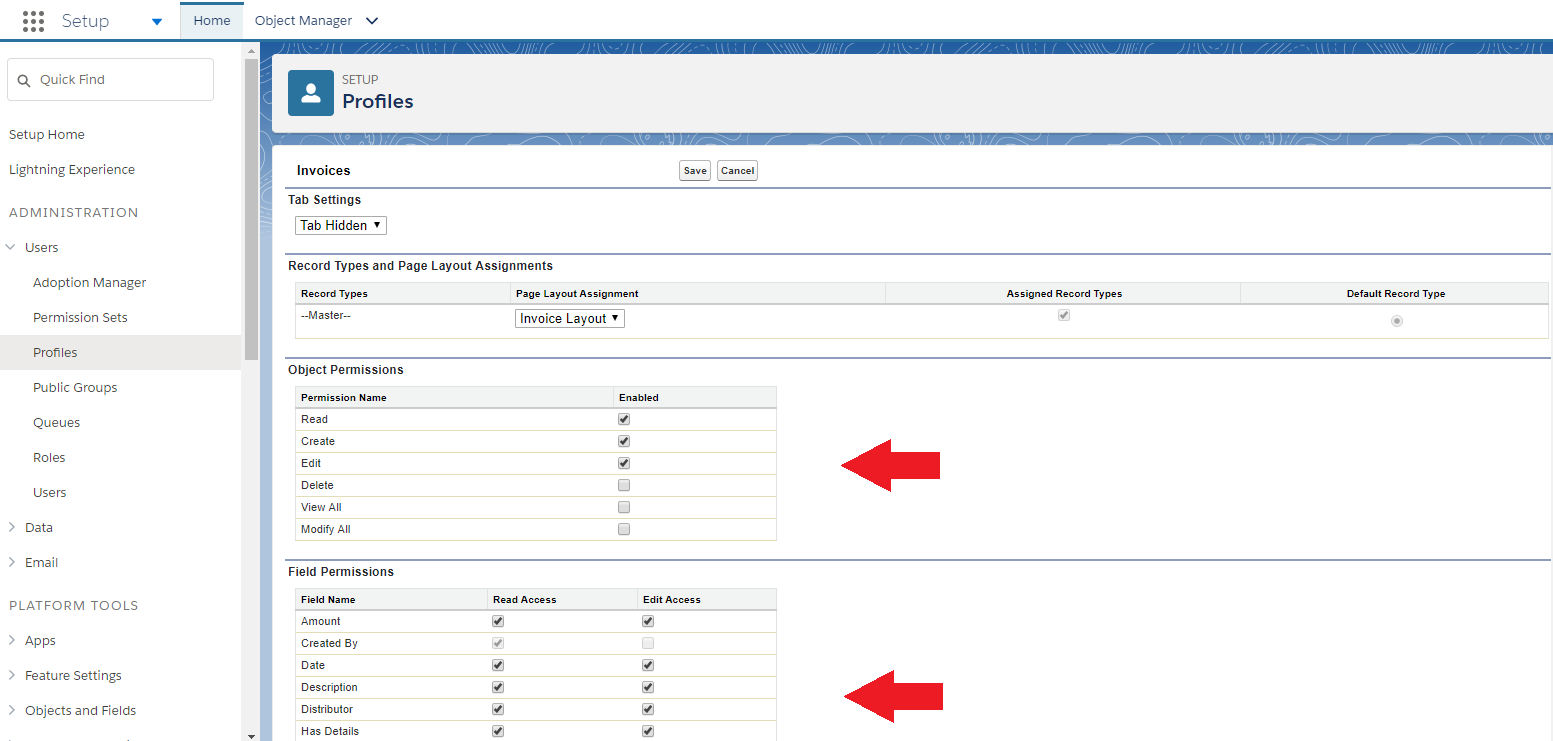
Object and Fields Permissions for Invoices
For Field Permissions, tick all Read Access and Edit Access (if available) checkboxes.
5. Enable the FieloPRP Library
After installing Invoicing, you need to activate the FieloPRP Library so that Invoice incentives and page settings for Invoicing are enabled.
From the App Launcher () choose Fielo Platform. From Libraries, hit Activate for FieloPRP.
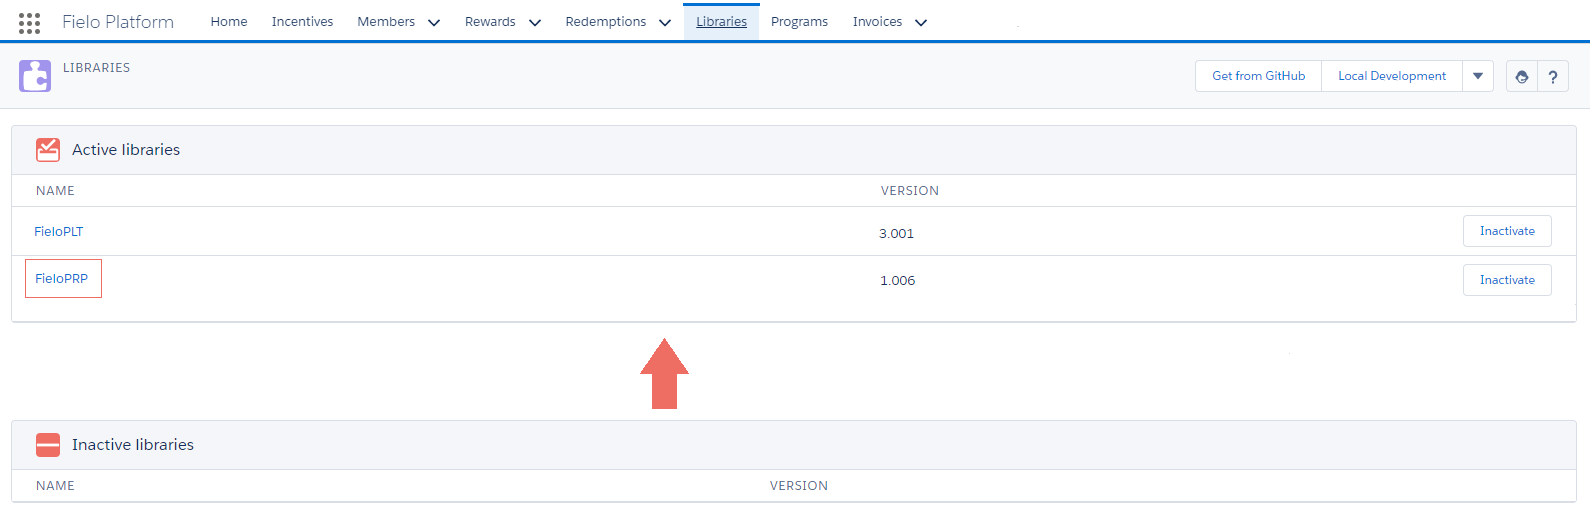
Enabling FieloPRP Library
6. Add the Invoices Tab
To access Invoicing, you'll need to add a new tab so that you can access it from IAS. (Note: This may have happened automatically in the previous step if you're using Lightning Experience.)
From Salesforce Setup, search for and selected App Manager. In the row corresponding to Fielo Platform, click and choose Edit. Then select Invoices from Available Tabs to add it to the Selected Tabs list.
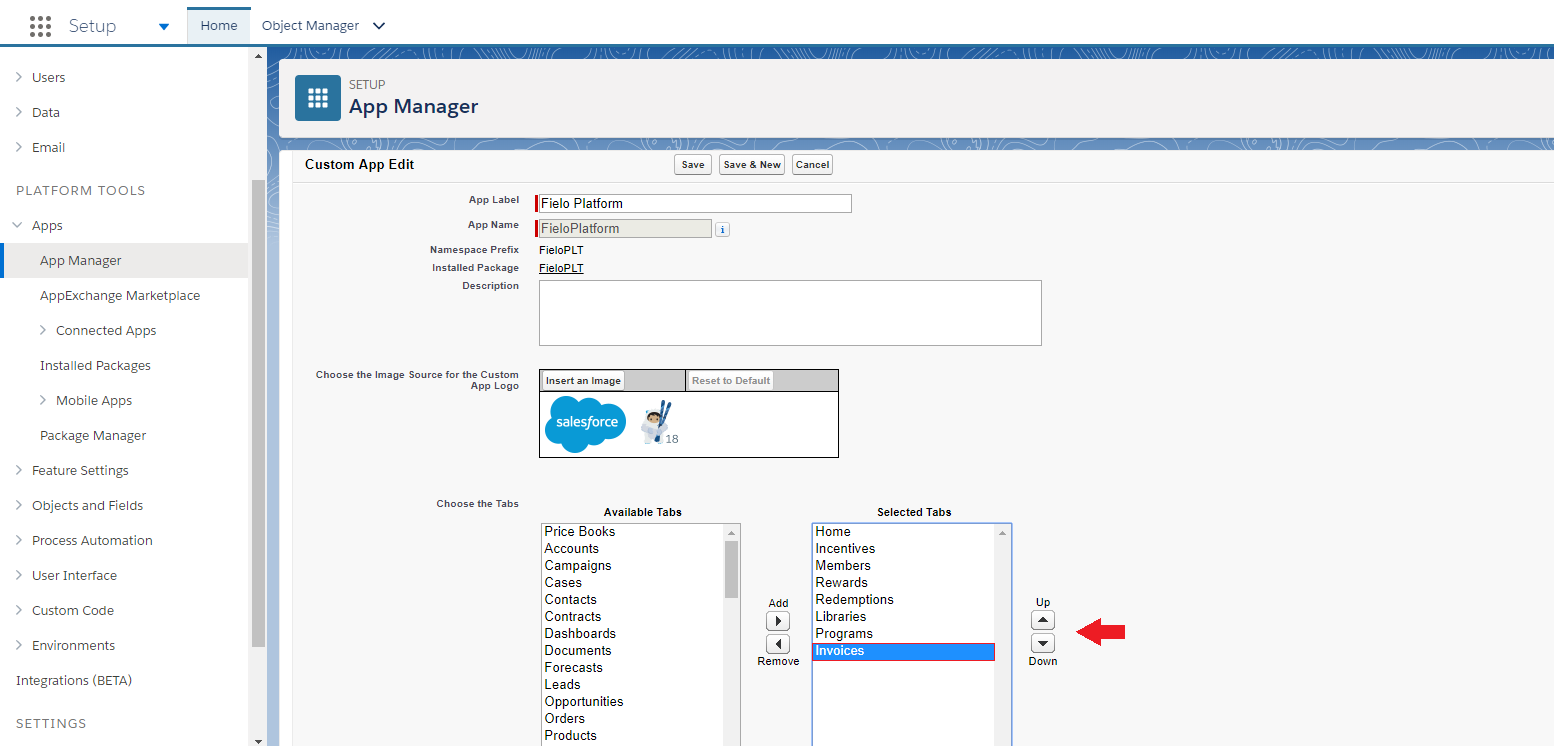
Choosing Invoice tab
7. Enable the PRP Plugin (CMS-based Loyalty Portal Only)
If you're using Fielo CMS and plan to create a Site for your Members to upload their Invoice, first you need to enable PRP Plugin in CMS. Proof of Purchase Plugin contains both Components and Models libraries that will let you build Pages for your Site.
Once you've accessed Fielo CMS through the App Launcher (SF Lightning) or Force.com App Menu (SF Classic), go to the Plugins tab and click on PRP Plugin to enable it.
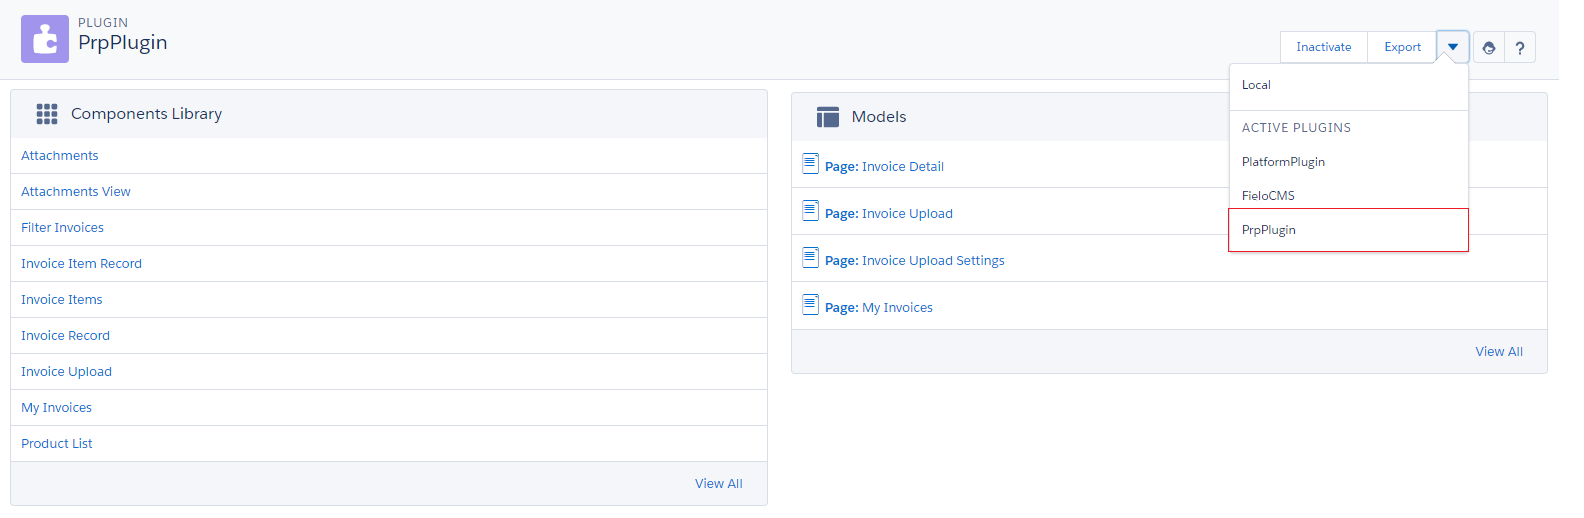
PRP Plugin
Updated over 1 year ago
What's next
After successful installation and setup, you can move on to preparing your program for Invoice incentivization.