
Activity Feed
The Activity Feed shows users their account activity. It can show a wide range of activities, or you can limit it to just one or two types of activity available on their feed. This section is really more as a way of referencing when transactions were completed, badges achieved, and courses joined.
By default, all available activity is included as a part of the member's Activity Feed:
- Incentive Rewards
- Program Level
- Challenge Rank
- Module Completion
- Course Completion
- Incentive Opt-In/Out
- Payouts
- Redemptions
For Redemptions, only points are considered. If you would like to add other currencies, you will need to add a static resource to replace the default Redemption category.
We'll go over how to remove these later. For now, we'll look at how to enable this feature, and other tasks you may need to complete before it's available for users.
Make sure to add Fielo MX - Member Selector” component on the pageIn order for any Fielo MX Component to work, you need to add the “Fielo MX - Member Selector” component on that page (or the “Fielo MX - Member Overview” with the Member Selector sub-component set). You can find more information here Member Overview.
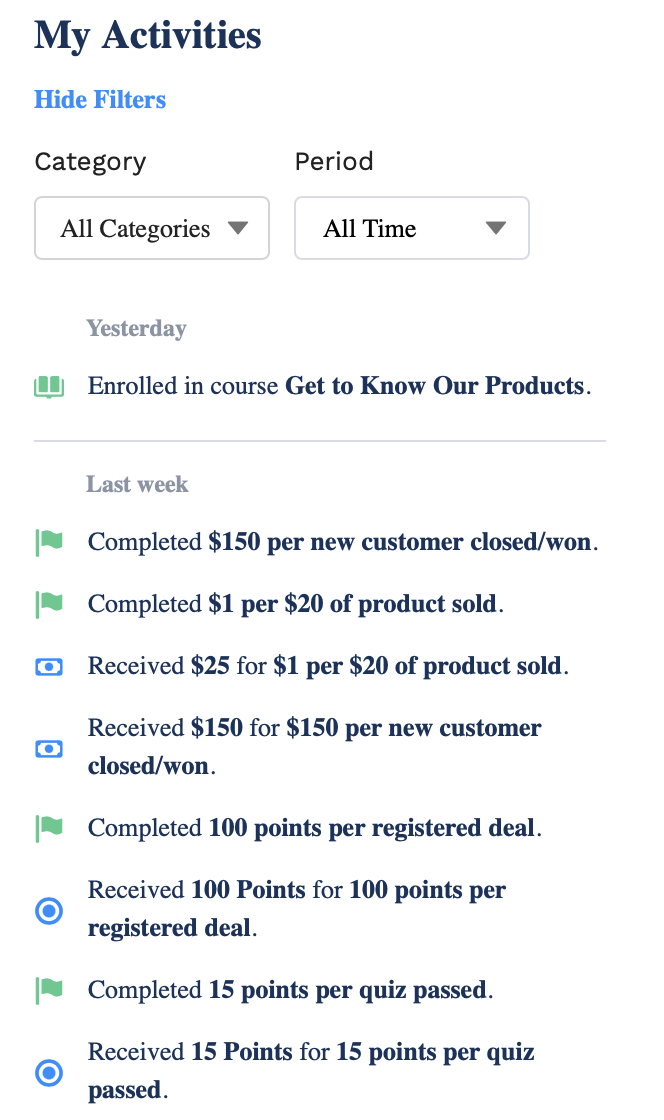
Enable and Manage Activity Feed
*Activity Feed can be incredibly helpful since it lets your members see what they have done recently, and it allows you to track how teams are performing overall. Since it does save data, you have the ability to disable the feature as needed. You can also reduce how long activity is saved in SalesForce.
Data StorageEnable the Activity Feed will consume data storage so we recommend setting a period no longer than 60 days.
Enable the Activity Feed
The feature must be enabled on the Member's Program, which can be done by going to Programs > Program > Settings, then clicking on Enable Member Activity. By default, this is turned off.
Once it is enabled, activity will start being added to the feed. However, it will not be retroactive. If you want to allow for activity to be shown prior to when it was enabled, you can have it generated by completing the following steps:
- Go to Tools > Batch Jobs.
- Run Create Historical Member Activities.
Once you enable the component, go ahead and set the duration for how long the activity data will be stored.
Set Activity Data Storage Period
The feature must be enabled by the Member's Program, which can be done by going to Programs > Program > Settings, then clicking on Store Member Activities. By default, tracking is set to 60 days.
Note: If delete the field so there is no value, the data will be saved indefinitely.
Once it is enabled, your members' activities will be stored for the specified period of time. A daily batch job runs to delete activities that are older than the Store Member Activities period.
Establish What Appears on the Members' Feed
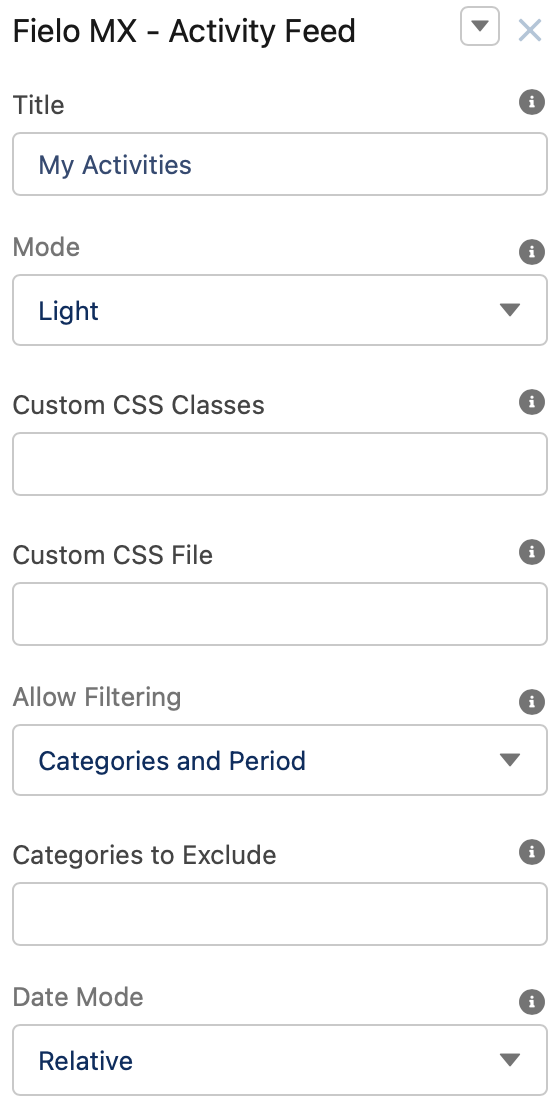
Once you add the component to a page, you can change what people see. There are a lot of fields, so we'll go through each of them so that you can decide what will work best for your members.
Title
This field controls the title of the component. By default, it is set to "My activities". It can be changed to whatever value you want. You can also set a custom label that can be translatable.
Mode
This field controls the overall look and feel of the component. We can choose between two settings: Light or Dark.
Custom CSS Classes
This allowed Custom CSS Classes to be applied in the main element, separated by space. Work with your IT department to update this with their customized CSS code.
Custom CSS File
This allowed a CSS file to be imported from a static resource. Work with your IT department to include the customized CSS information.
Allow Filtering
This setting controls which filters will be available to the member on the front end. We can choose:
- Categories and Period members will be able to filter by Categories and Period
- Categories members will only be able to filter by a category
- Period member will only be able to filter by period
- None members won't be able to use any filter.
This is just a function that lets members review their activity. By setting just Categories or Period, they will still be able to see the details on their usual feed, they just won't be able to filter on whichever option you haven't selected.
Categories to Exclude
This field allows us to exclude (or remove) from the Activity Feed component certain categories we don't want to be displayed. To do so we need to place the names of the categories we want to exclude separated by a coma. The list of categories we can exclude are:
- Incentive Completed
- Opted-In Incentive
- Opted-Out Incentive
- Tier Promotion
- Tier Demotion
- Redemption
- Badges Earned
- Currency Received
- Currency Deduction
- Payouts Received
- Instant Reward
- Modules completed
- Courses completed
- Invoice Status
Date Mode
This field controls how the Activity Date is shown by the component. We can choose:
- Relative will show how many hours since the activity occurred, and groups activities based on this.
- Exact Date will display group activities based on the date they occurred.
Note: The date format will depend on the User's Local.
Number of Activities to Show
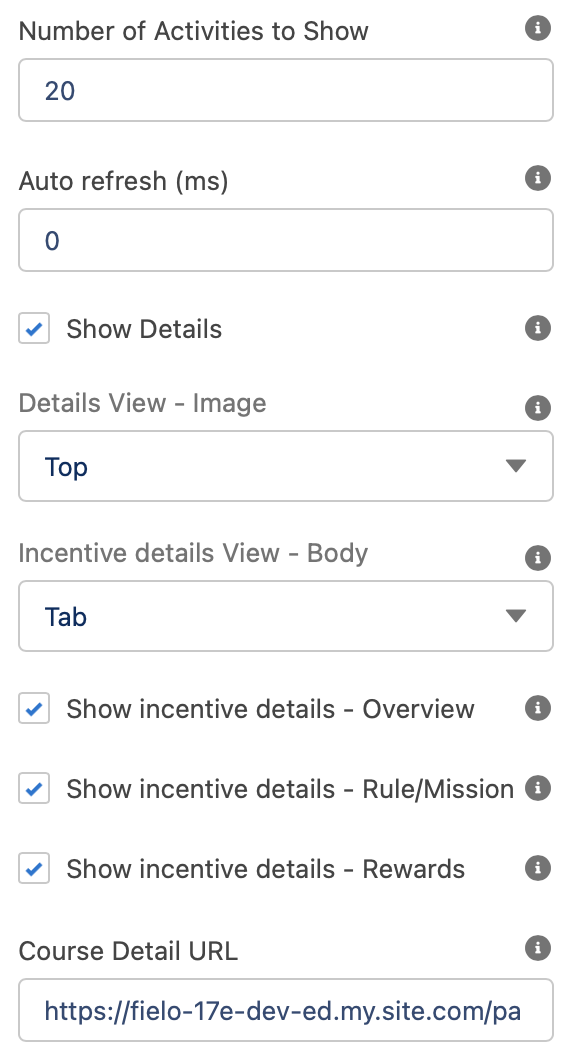
This field controls how many activities the component will display by default (x). If there are more activities, the member can load the next (x activities) by clicking the "Show More" button.
You can manage how many activities users see at a time.
By default, 20 activities will show on the member's Home tab. There is currently no limit to how many activities can be shown, but you want to keep it to a manageable number so that it doesn't take up too much space on the page.
Auto Refresh (ms)
This field will control the frequency (in milliseconds) with which the component should refresh to show any new items. If left blank (or empty), the component will not auto-refresh.
Show Details:
This checkbox will control if the activity feed will allow members to click in order to view the details.
Details View - Image
This aligns the image for the posted activity to the top, left, or right. You can also disable it if you don't want to display images for the activities.
Incentive Details View - Body
You can choose if the information displayed for incentives is in a tab or list form. There are three fields that you can use to fine-tune how the incentive details are displayed.
Show incentive details - Overview
Lets you decide if you want an overview presented with the incentives rendered.
Show incentive details - Rule/Mission
Lets you decide if you want these details displayed when the incentives are rendered.
Show incentive details - Rewards
Lets you decide if you want reward details shown when the incentives are rendered.
Course Details URL
You will need to add the address to the address linked under the Learning tab. This is the page that you use for members to enroll in different courses.
Make sure to test this link once you add it because you want to make sure that they can quickly access the course or review it from their Activity Feed.
Text Orientation:
This picklist setting will control the overall look and feel orientation:
- Left to Right this is the default value. When selected, all elements will be rendered from Left (first) to right (second.)
- Right to Left when this setting is selected all elements will be rendered from the right (first) to left (second).
Updated over 1 year ago