
FieloGRS Component for Experience Cloud
Fielo incentivization meets GRS reward flexibility
The FieloGRS Component for Experience Cloud integrates Fielo's top-rated loyalty and incentives solutions with GRS's world-renowned rewards fulfillment. In addition to GRS Storefront, FieloGRS incorporates Fielo's Multi-Program and Multi-Membership models, meaning rewards will update automatically when a Member switches among Programs. If you've configured GRS with Levels, rewards will also be segmented so that Members see only those targeted toward them.
Salesforce Experience CloudPreviously known as Community Cloud, as of Salesforce Spring '21 release, it is now referred to as Experience Cloud and/or Site.
Before Starting
Be sure you've completed all of the steps to configure GRS rewarding, including those involving your GRS account manager (Connected App, SAML Metadata, etc).
Making Sure your Profiles Have Connected App Access
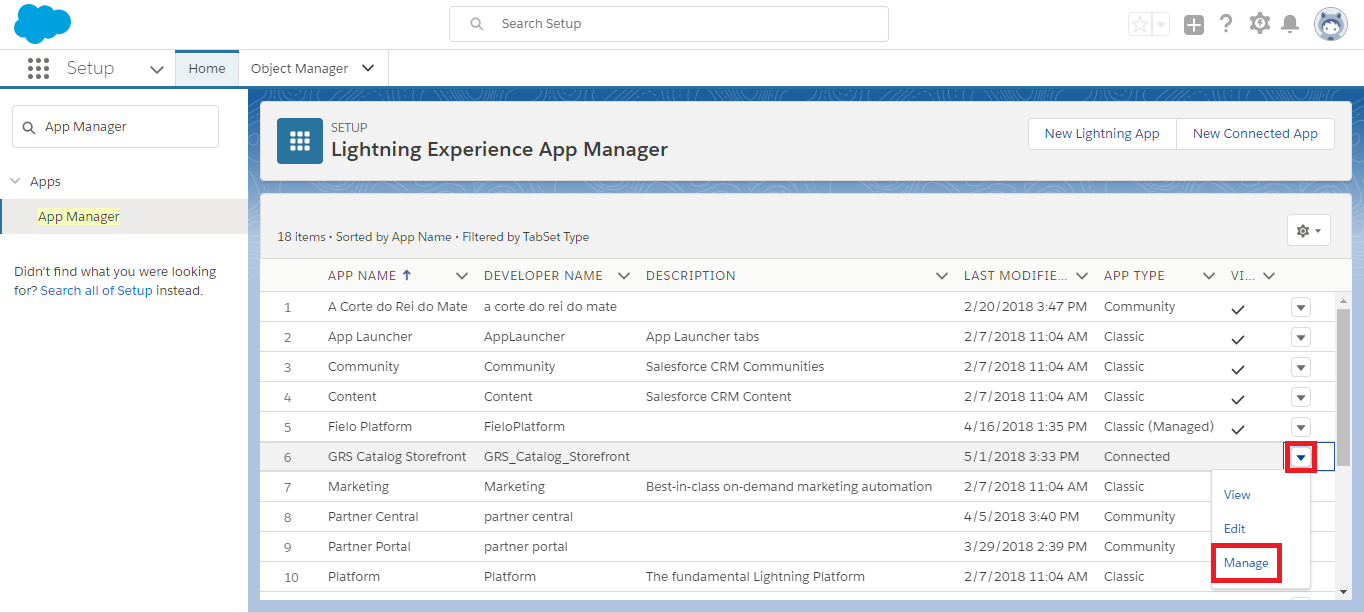
From Salesforce Setup, search for and select App Manager. Click in the row corresponding to the Connected App you created during configuration with your GRS account manager. Then, select Manage.
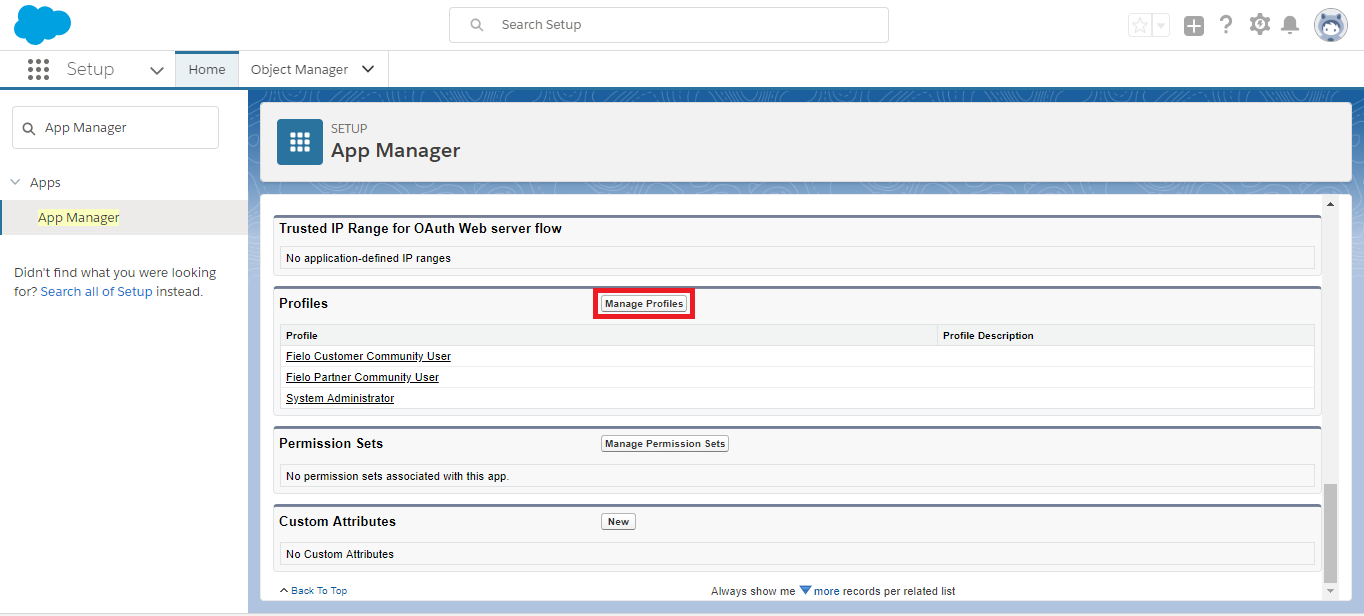
On the Connected App management page, under Profiles, see what Profiles are assigned to the Connected App.
If your System Administrator and Fielo Community User profiles are not all there, click Manage Profiles.
Tick your System Administrator profile and all profiles you will use with your Fielo loyalty portal(s). Then, click Save.
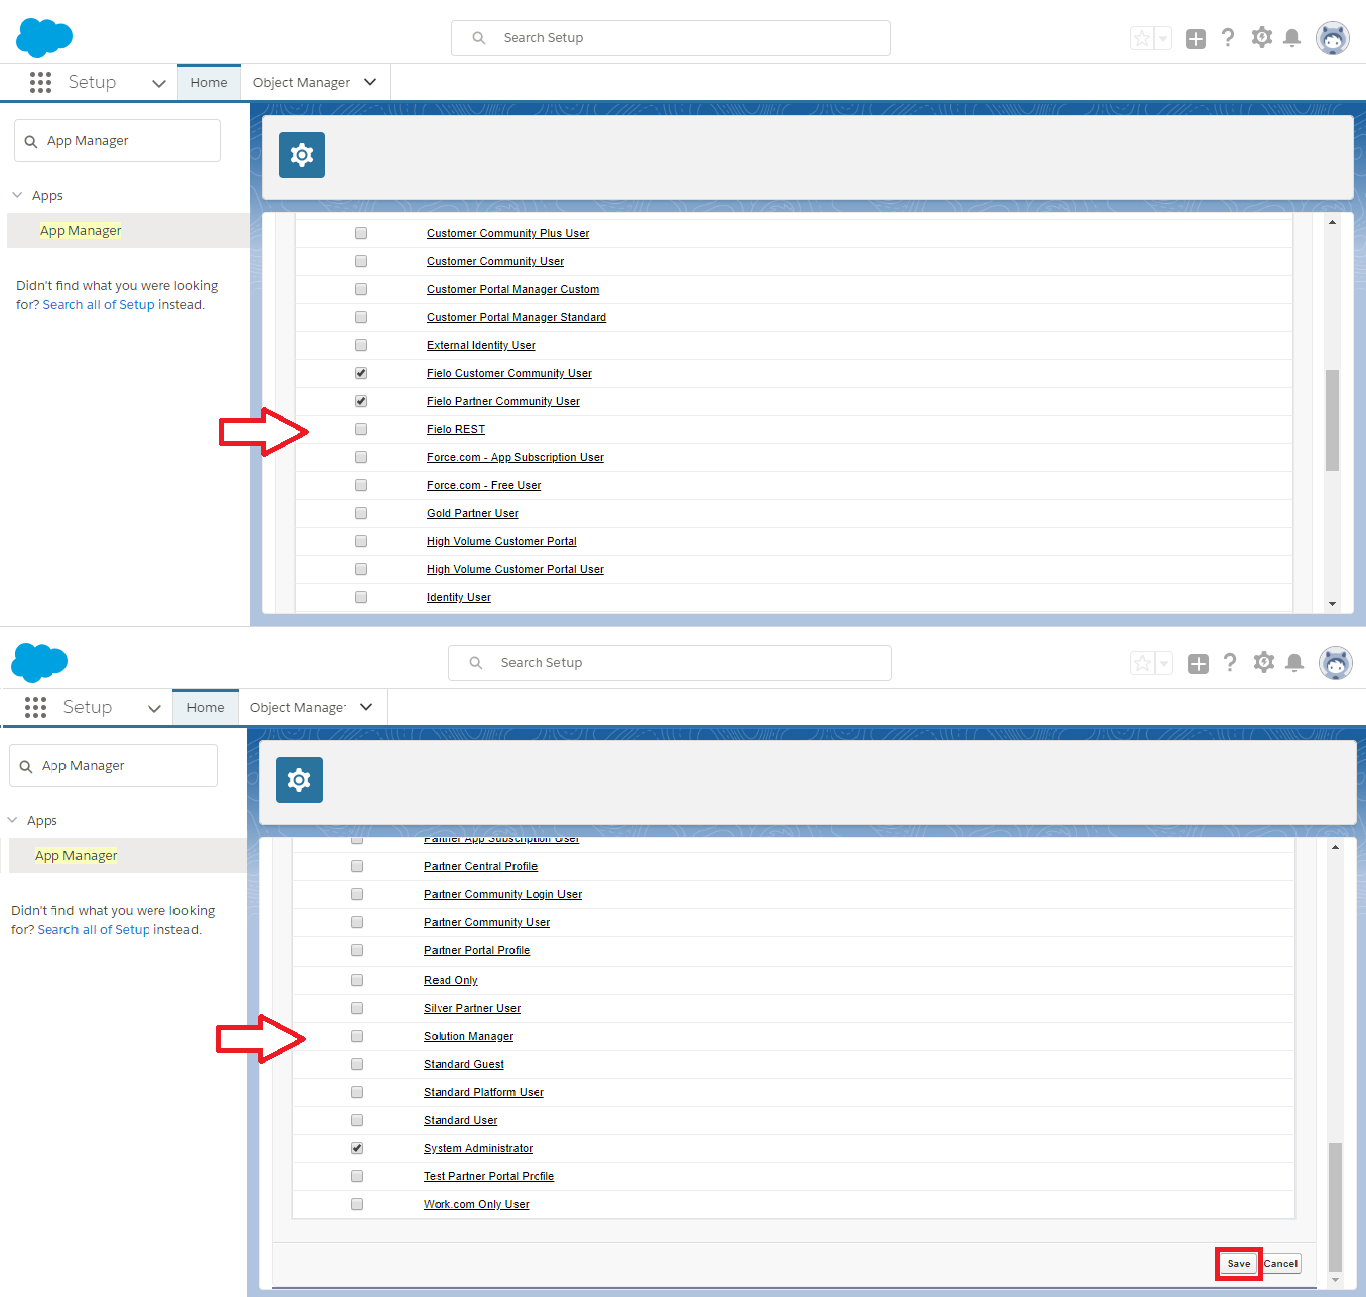
Remember: in case you have more than one storefront for GRS, you will need to create a connected app for each one - related to each storefront's domain.Therefore, it is mandatory to perform this step to every App you have; also selecting the profile that you setup to have access to that specific storefront.
Preparing your Site
From Salesforce Setup, search for and select All Sites. Enter the Builder for your Site.
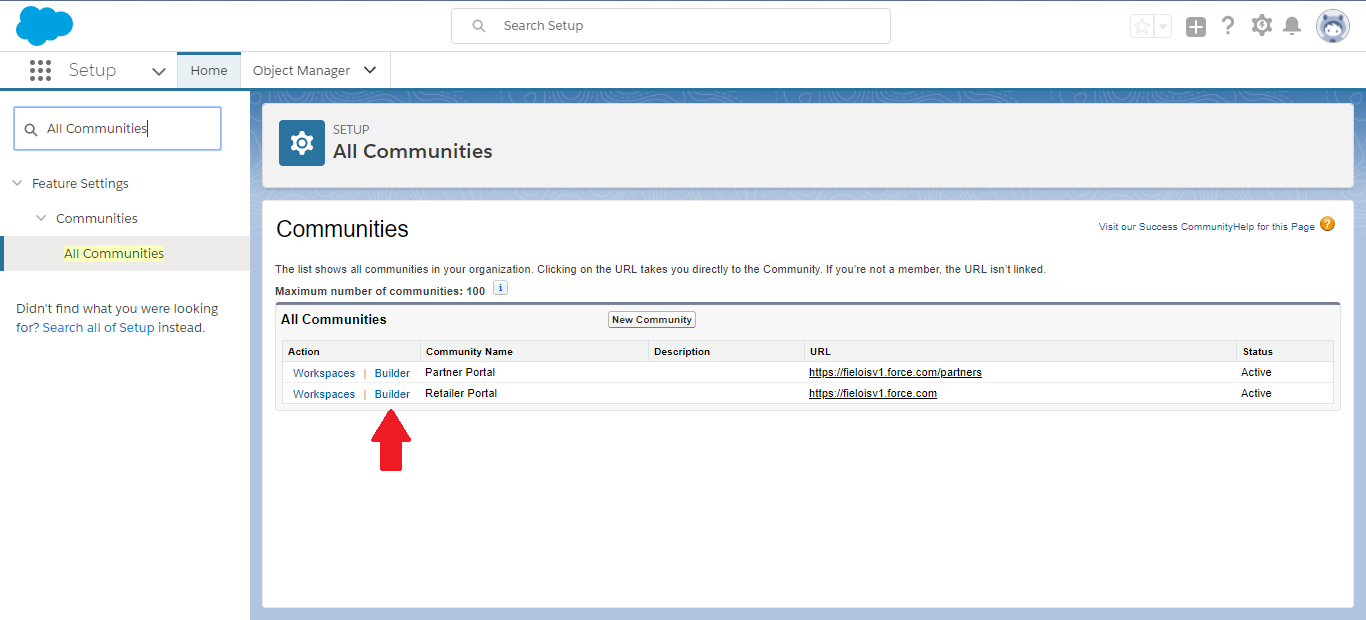
Entering Experience Builder
Navigate to the page on which you'd like to place the GRS Storefront. We recommend using a dedicated 1 full-width column page for rewards.
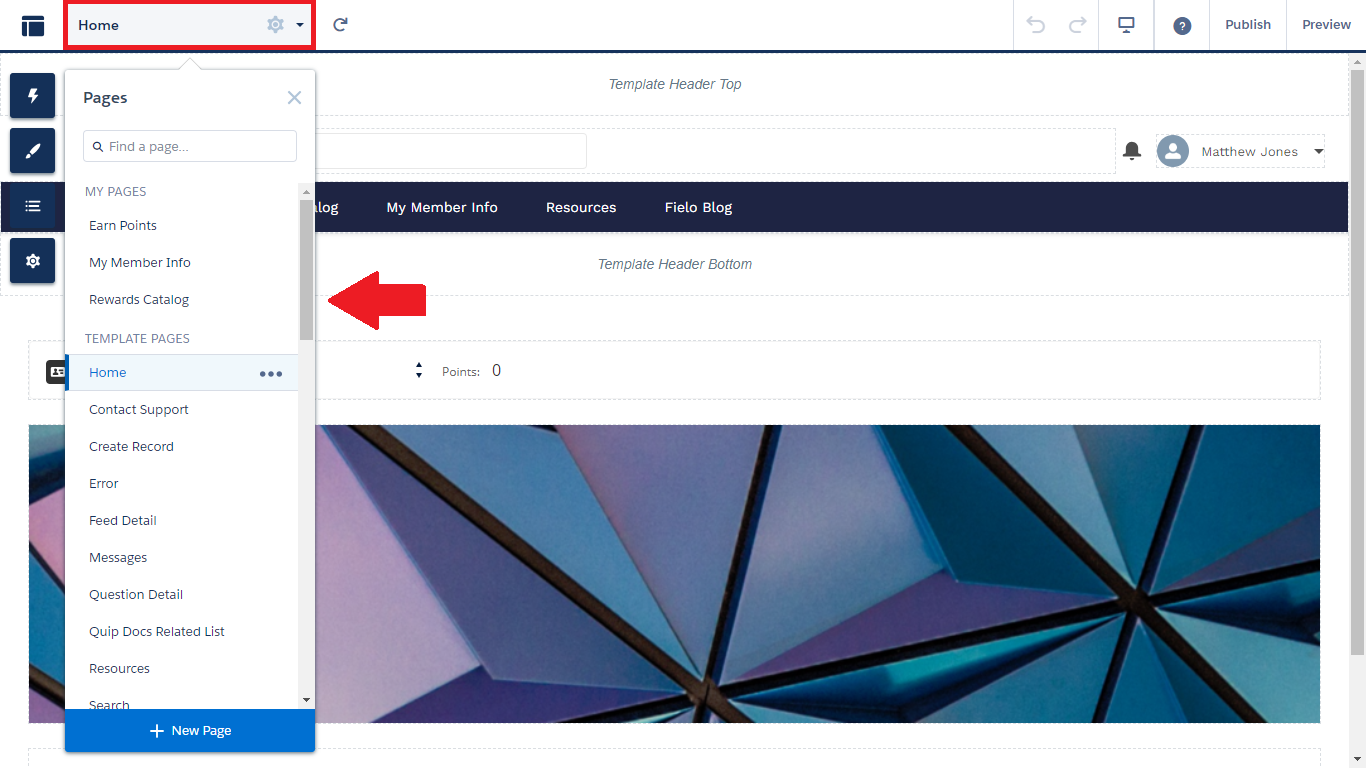
Adding and Configuring the FieloGRS Component
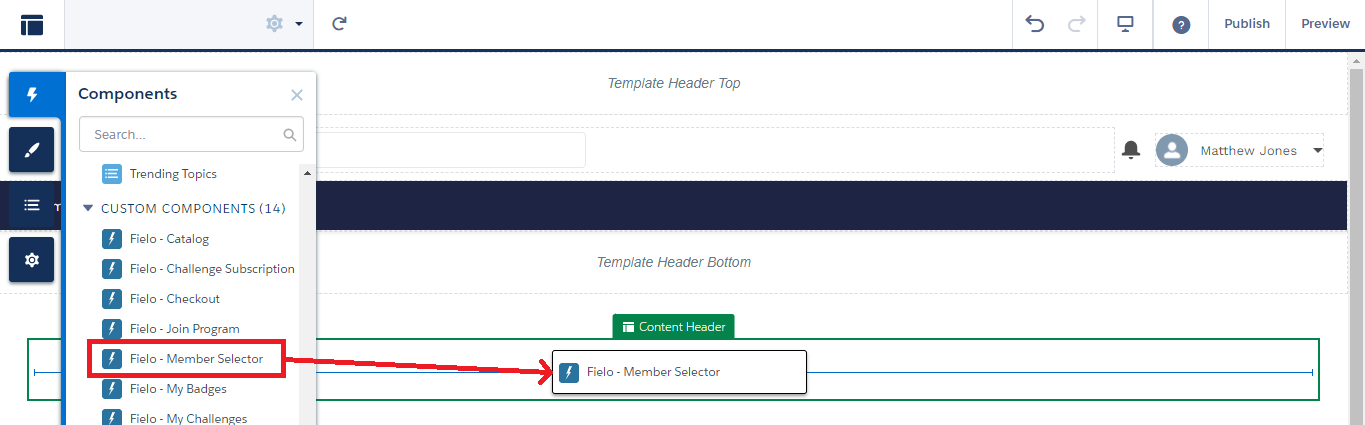
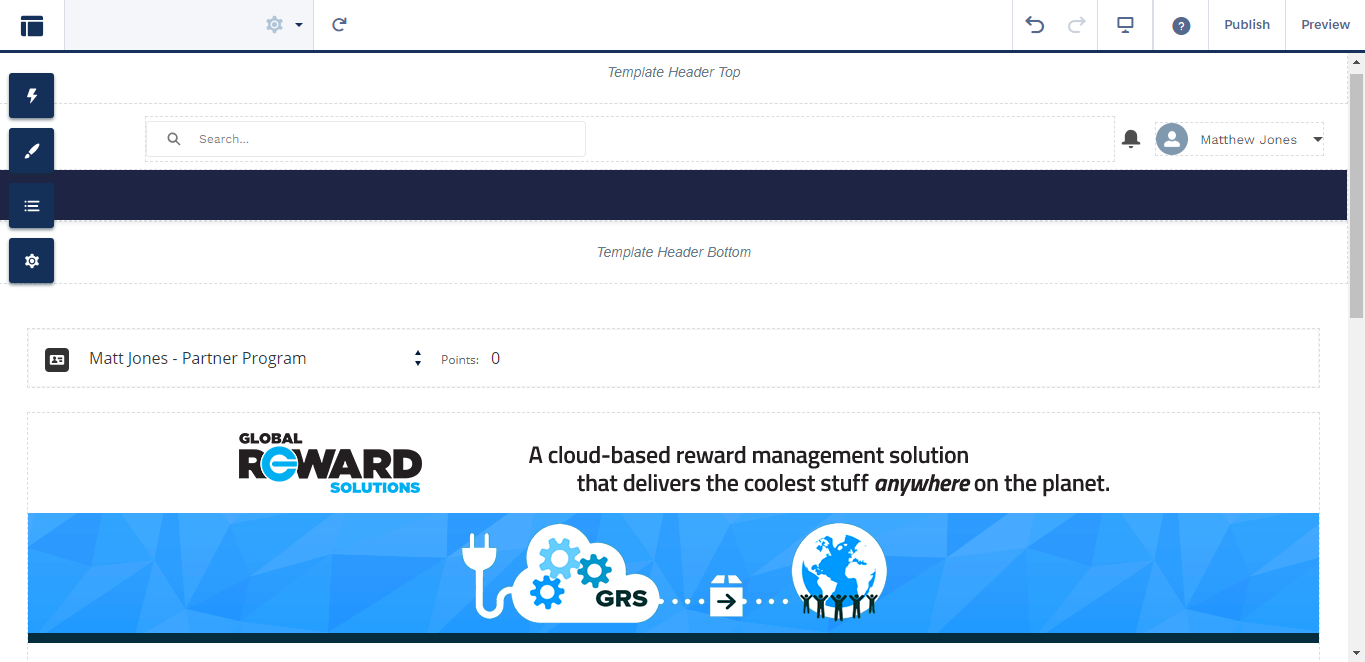
On the page you've selected, click on the icon and drag and drop Member Selector.
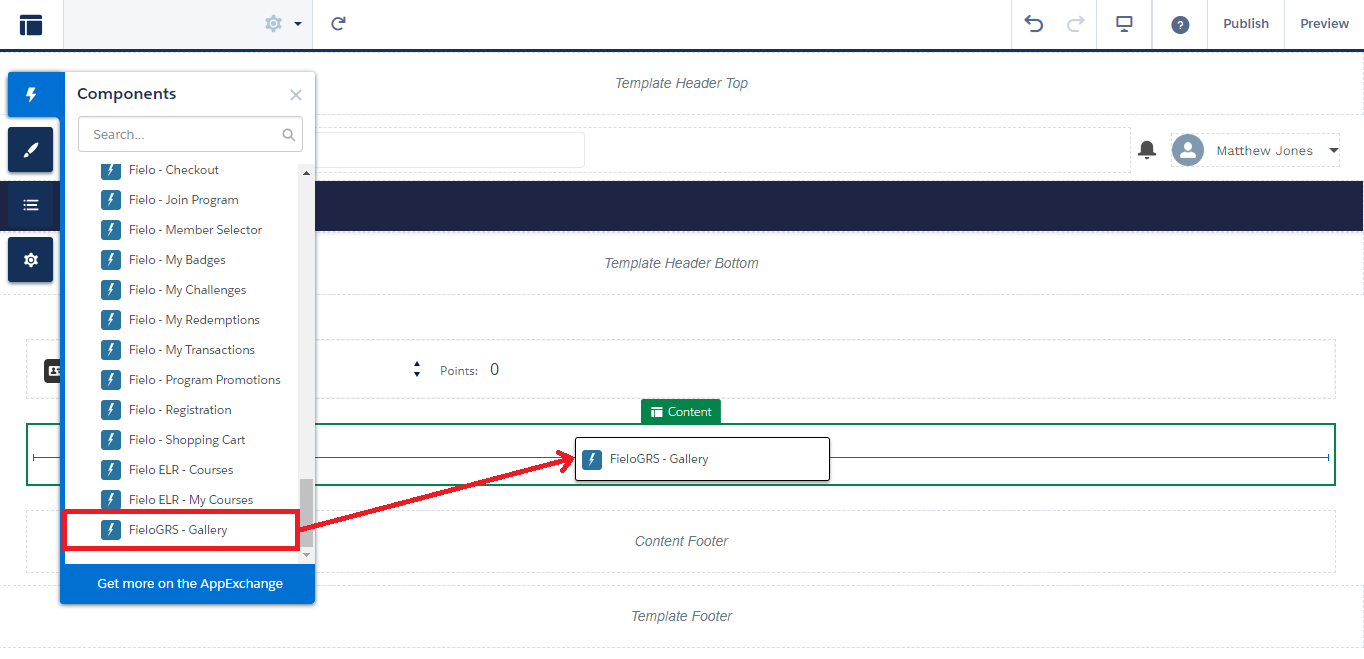
Click on the icon again and drag and drop the FieloGRS - Gallery component onto the content area of your page.
The properties window for FieloGRS - Gallery will appear. In the property App Id, enter the name of the Connected App you created with your GRS account manager.
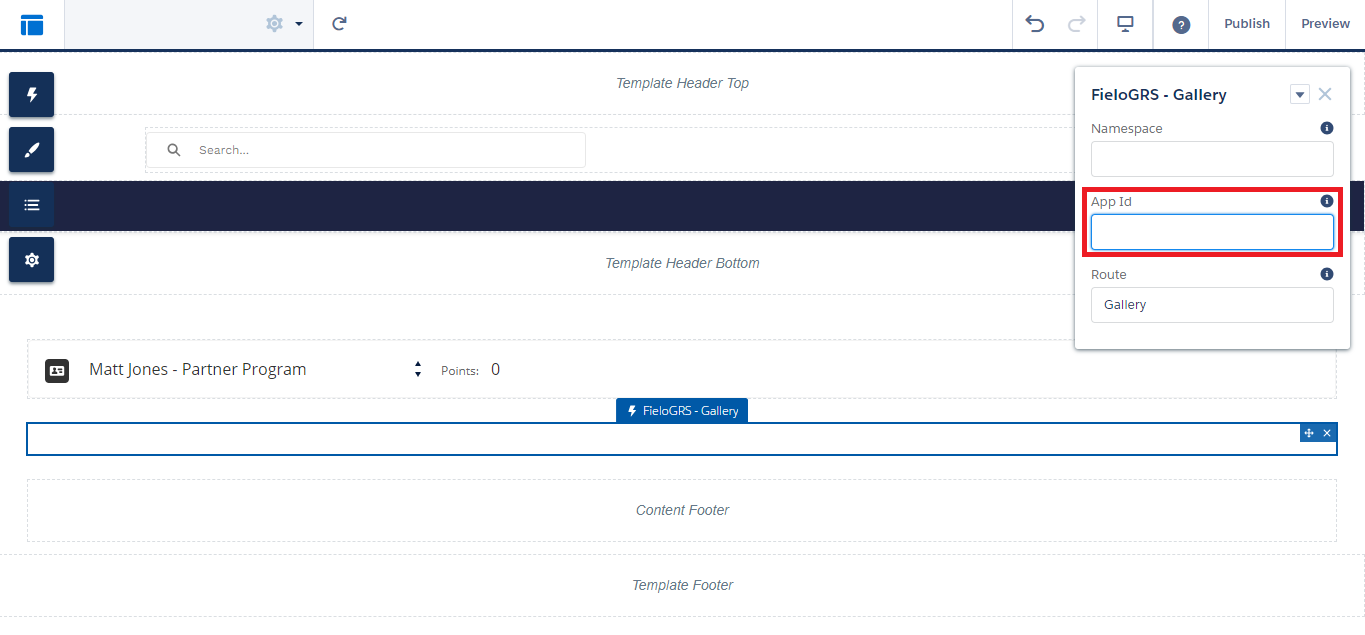
Refresh your page and see your GRS Storefront come to life in your loyalty portal!
Updated over 1 year ago