
Upgrade from R2 2022 to R1 2023
FieloPLT v2.167.5
If you're using Fielo’s R2 2022 release, upgrade to R1 2023 to take advantage of all the features and enhancements we've added to the platform. Take a look at What's New in R1 2023. Continue reading to upgrade to Fielo R1 2023.
Versions Prior to R2 2022If you're using a version prior to R2 2022, you must perform all of the upgrades required to get you to the R2 2022 release (v2.152.x) before proceeding:
- Upgrade steps for versions 2.23 through 2.51
- Upgrade from Spring '18 to Summer '18
- Upgrade from Summer '18 to Winter '19
- Upgrade from Winter '19 to Spring '19
- Upgrade from Spring '19 to Summer '19
- Upgrade from Summer '19 to Winter '20
- Upgrade from Winter '20 to Spring '20
- Upgrade from Spring '20 to Spring '21
- Upgrade from Spring '21 to R1 2022
- Upgrade from R1 2022 to R2 2022
Also, make sure you're logged into your Salesforce org and have system administrator permissions before getting started.
How to Upgrade
Follow these steps to start the upgrade process:
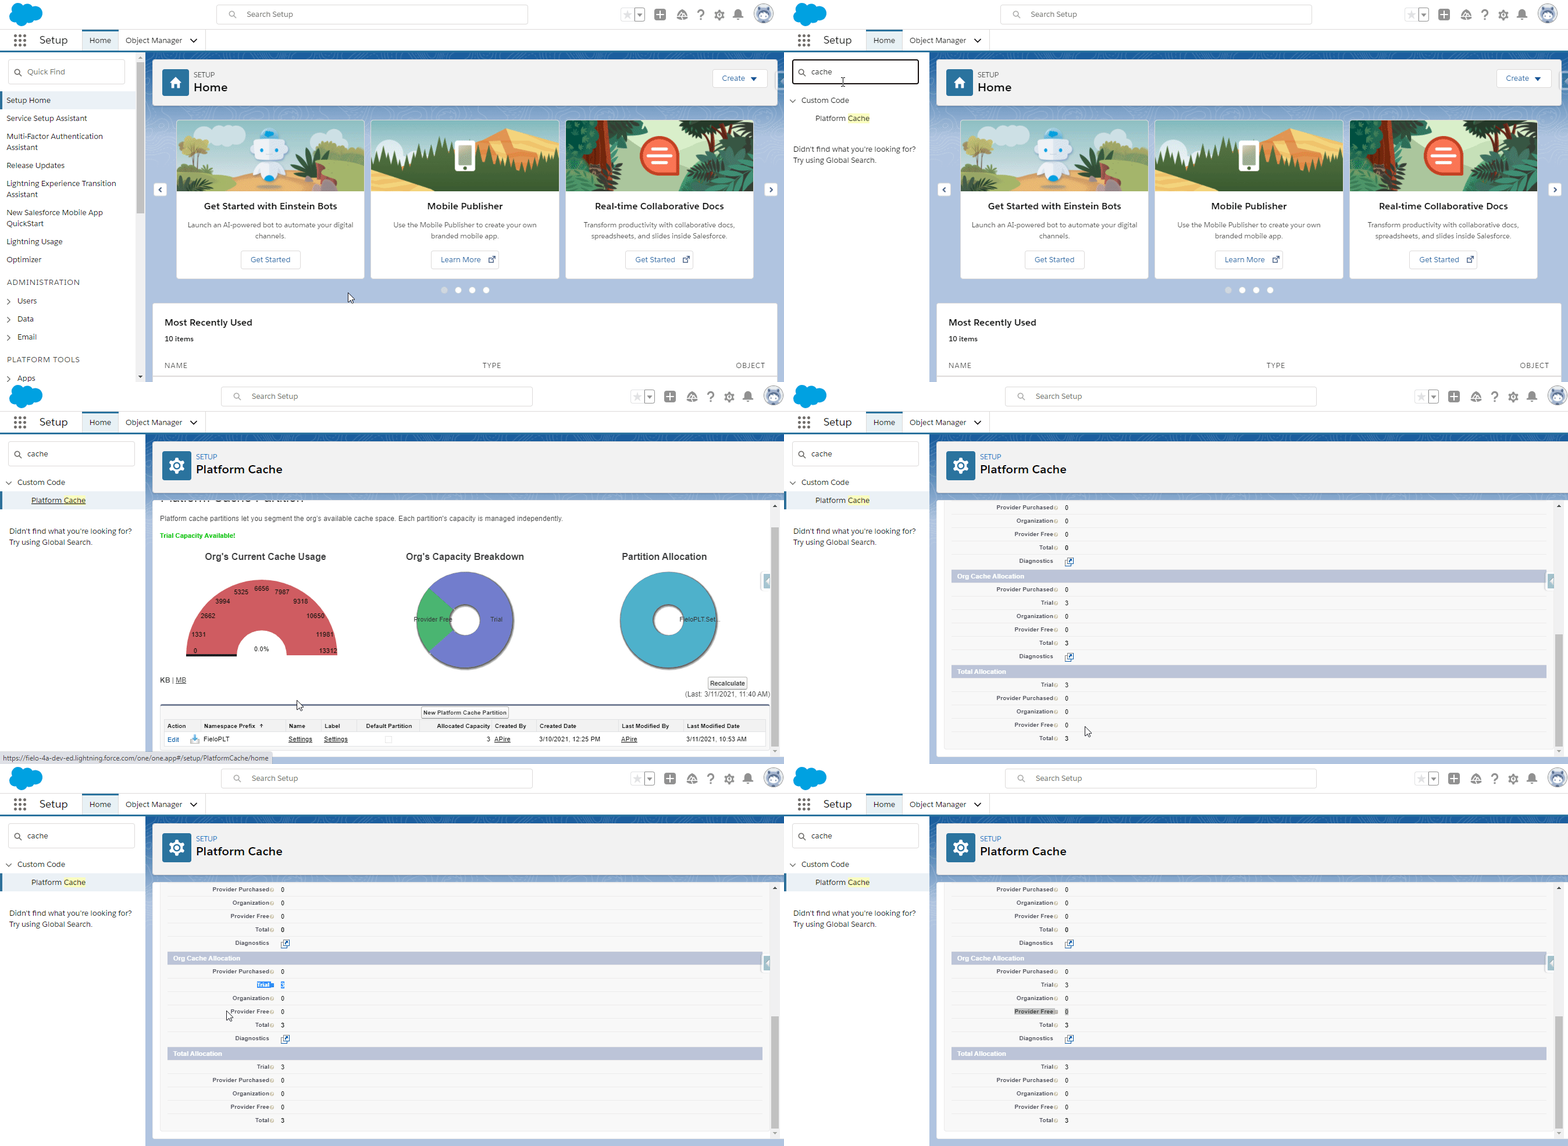
- Make sure that your org has Platform Cache enabled and 3MB or more of Org Cache allocated to FieloPLT.
- On the Incentives tab, check for any Promotions or Challenges that are in Edited status. Before installing the new package, select Apply Changes on these incentives so that their statuses move to Active.
- In Saleforce Setup, navigate to Custom Settings and, next to Public Settings (Namespace: FieloPLT), click Manage. Make sure there are values filled in for Funds Notification Frequency and Delta Minutes Threshold. If you're not sure what values to put, use
180for Funds Notification Frequency and1440for Delta Minutes Threshold. - Click here to install the FieloPLT package.
- If any internal users that are not admins will use Fielo, click Install for Specific Profiles and select Full Access on the profile(s) of those users. If only System Administrators will use Fielo, or if internal users are granted permissions via the FieloPLT Admin permission set, click on Install for Admins Only.
- Click Upgrade. When the first part of the upgrade process is finished, you will be notified by email.
- Once you've been notified, in Salesforce Setup, search for and select Apex Classes and then click Compile all classes.
Open Fielo
Once you've received the e-mail from Salesforce confirming successful installation, go ahead and open the Fielo app. Wait to see if you receive a pop-up message about any post-installation processes that need to be retried.
If you receive the message, navigate to the Developer Console and run the following script in the Execute Anonymous Window:
FieloPLT.PlatformEventsService.publishAsyncEvent('UpdateR1/2023',null);If you do not receive any such message, continue to the next step.
Upgrade FieloPLT Library
The latest version of the FieloPLT library is 4.021. Go to Fielo > Tools and verify that you're on the latest version. If an upgrade for the FieloPLT library is available, click Upgrade.
Delete Deprecated Date Fields
Going forward, Fielo will use date/time fields rather than date fields to mark the start and end of Promotions, Challenges and Missions. To this end, you can remove the old Start Date and End Date fields from these objects.
Custom Classes and ChangesetsIf you have any custom classes, including test classes, that reference these fields, you'll need to remove or replace those references before proceeding.
Learn more about how to handle org migration for this upgrade
Before deleting the Start Date and End Date fields on the Promotion, Challenge and Mission objects, double-check that all of your active and scheduled incentives have the new Start Date & Time and End Date & Time fields properly filled in.
If the new date fields haven't been filled in, you can try rerunning the R1 2023 post-installation script.
See the R1 2023 Technical Release Notes for important considerations around the new date/time incentive fields.
Delete Date Fields
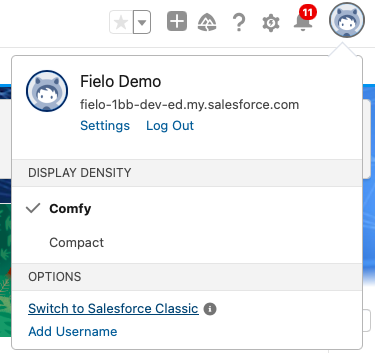
We'll start with the Start Date field on Challenge. From Salesforce Setup, click on your profile icon and switch to Salesforce Classic.
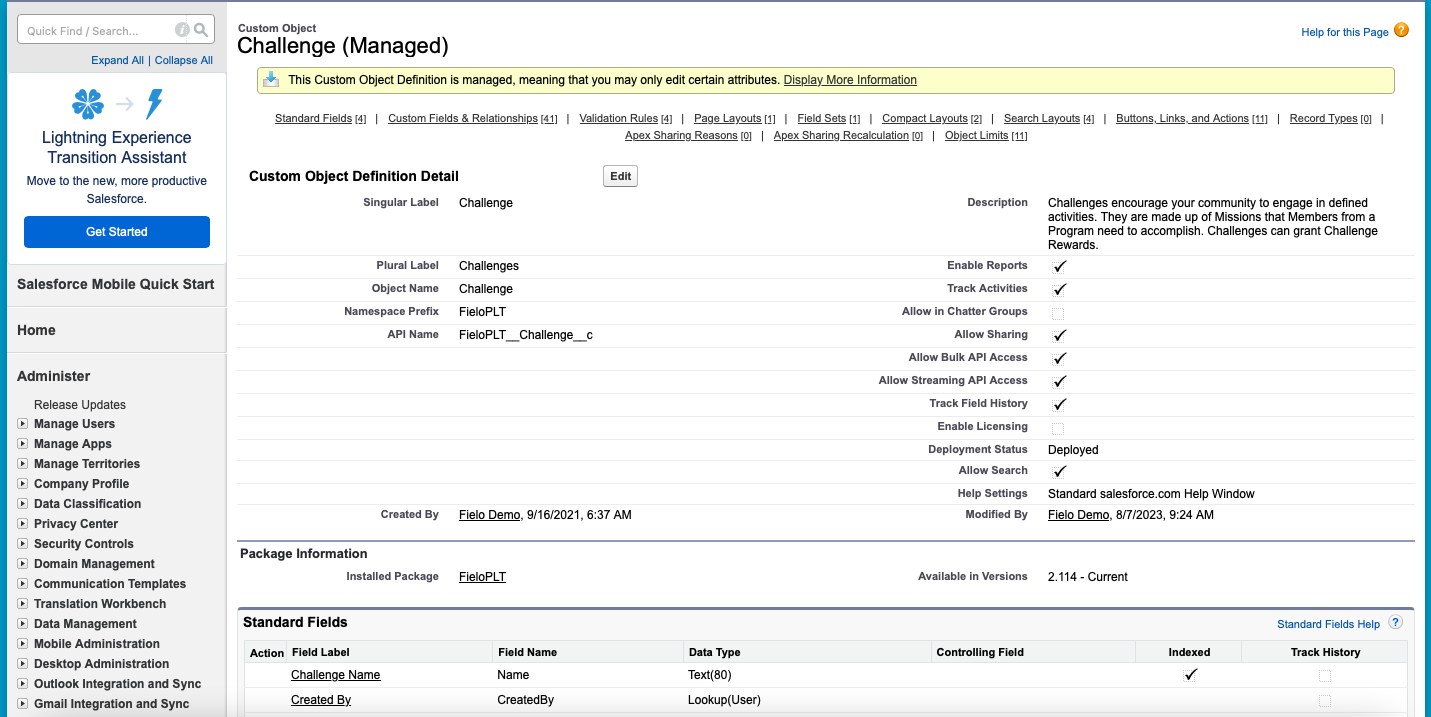
In classic Setup, search for and navigate to the Objects page. From that page, click on Challenge.
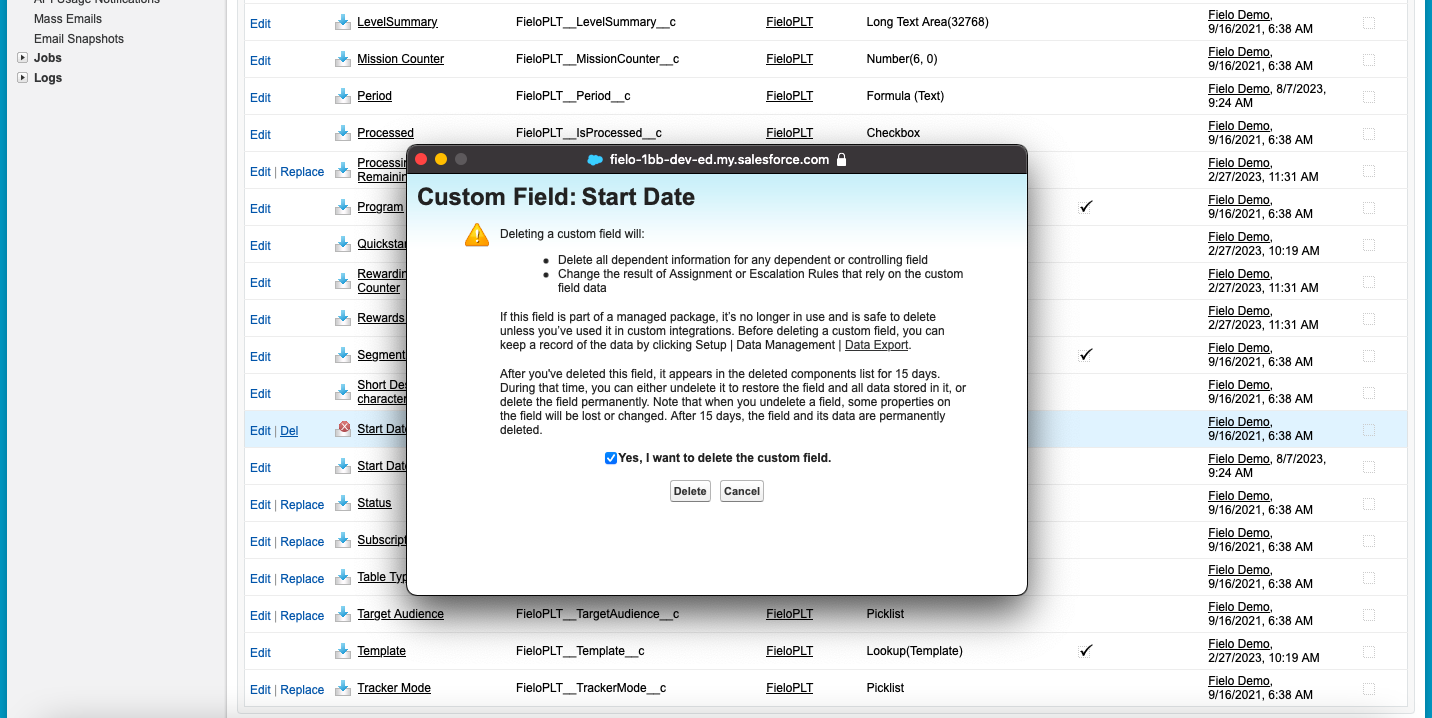
Under Custom Fields & Relationships, in the row corresponding to Start Date, click Del. Review the prompt and confirm the deletion.
Repeat this deletion process on the following fields:
- End Date on Challenge
- Start Date and End Date on Mission
- Start Date and End Date on Promotion
When you're done, switch back to Lightning Experience.
Permanently Erase Date Fields
From the Object Manager, go to the Fields & Relationships page of the Challenge object and click Deleted Fields.
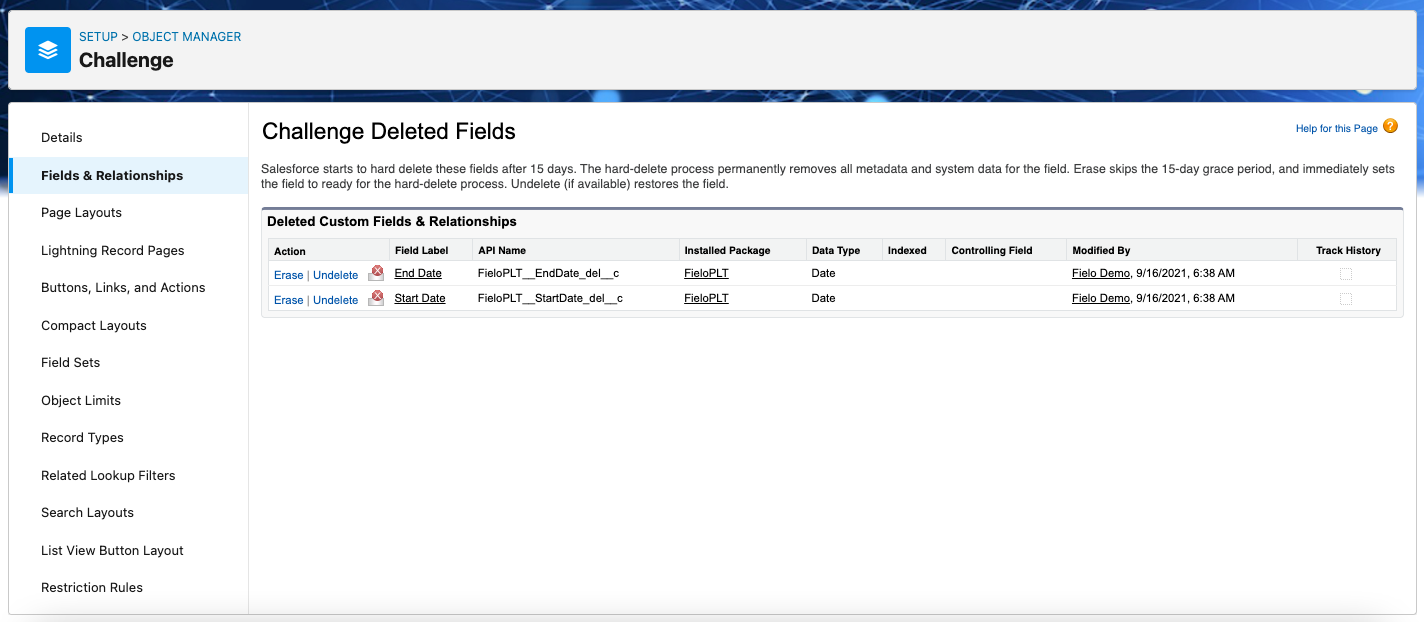
Erase the Start Date and End Date fields. Do the same for the Start Date and End Date fields on the Mission and Promotion objects.
Refresh Cache
Once you've removed the date fields that are no longer in use, you can update the cache to ensure your incentives continue running smoothly.
From Salesforce Setup, search for and navigate to Platform Cache. In the row corresponding to FieloPLT, click on Settings. From there, select Clear Cache and confirm.
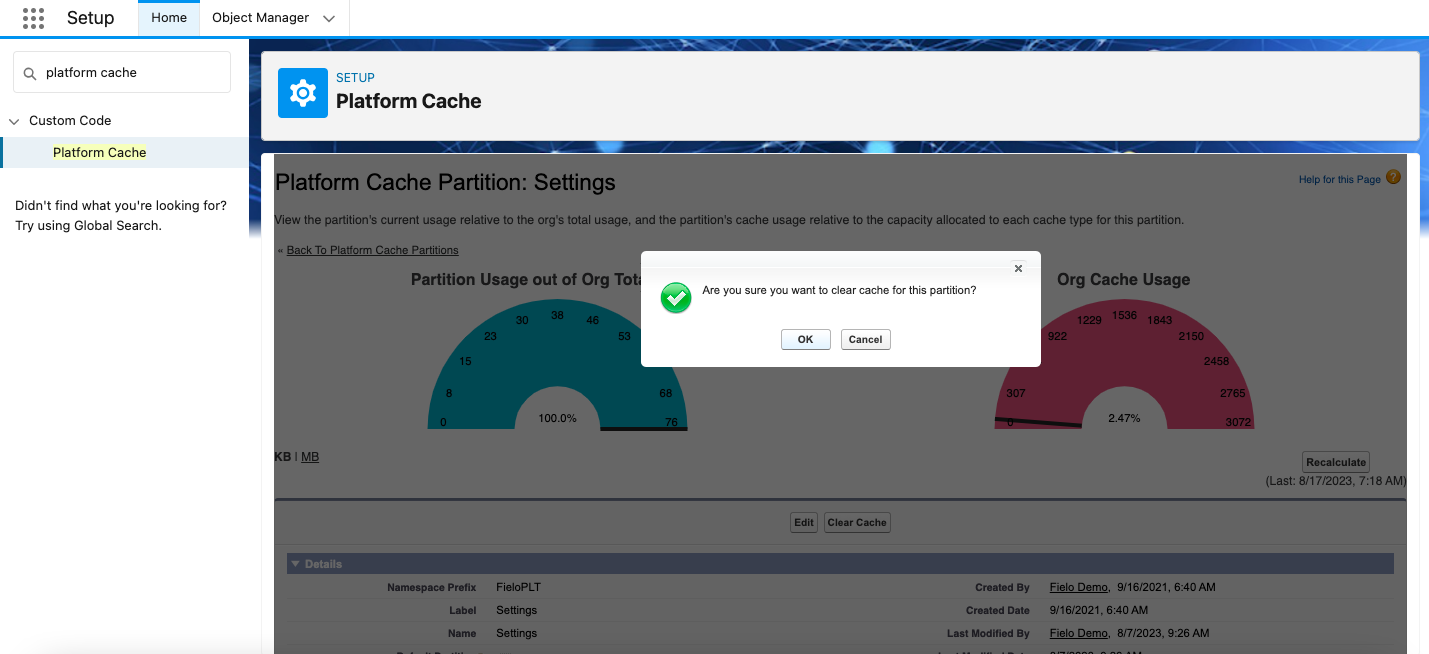
That's all. You are ready to use the R1 2023 Fielo release!
For more in-depth info on the release, check out the R1 2023 Technical Release Notes.
Updated over 1 year ago