
Learning (How It Works)
Are you using our Learning app with Salesforce Experience Cloud? Take your loyalty portal to the next level! The Fielo MX - E-learning component puts your Members on the fast track to joining courses, passing modules, and developing new skills. Let's see how!
The Members navigate to a page where the Fielo MX - E-learning component will be set, providing them access to courses, modules, content, and quizzes.
They can check out more information on a course and see what lessons (modules) it includes.
Since you want to make it as easy as possible for your members to keep track of their online courses, this component is made to be robust and easy for people to navigate.
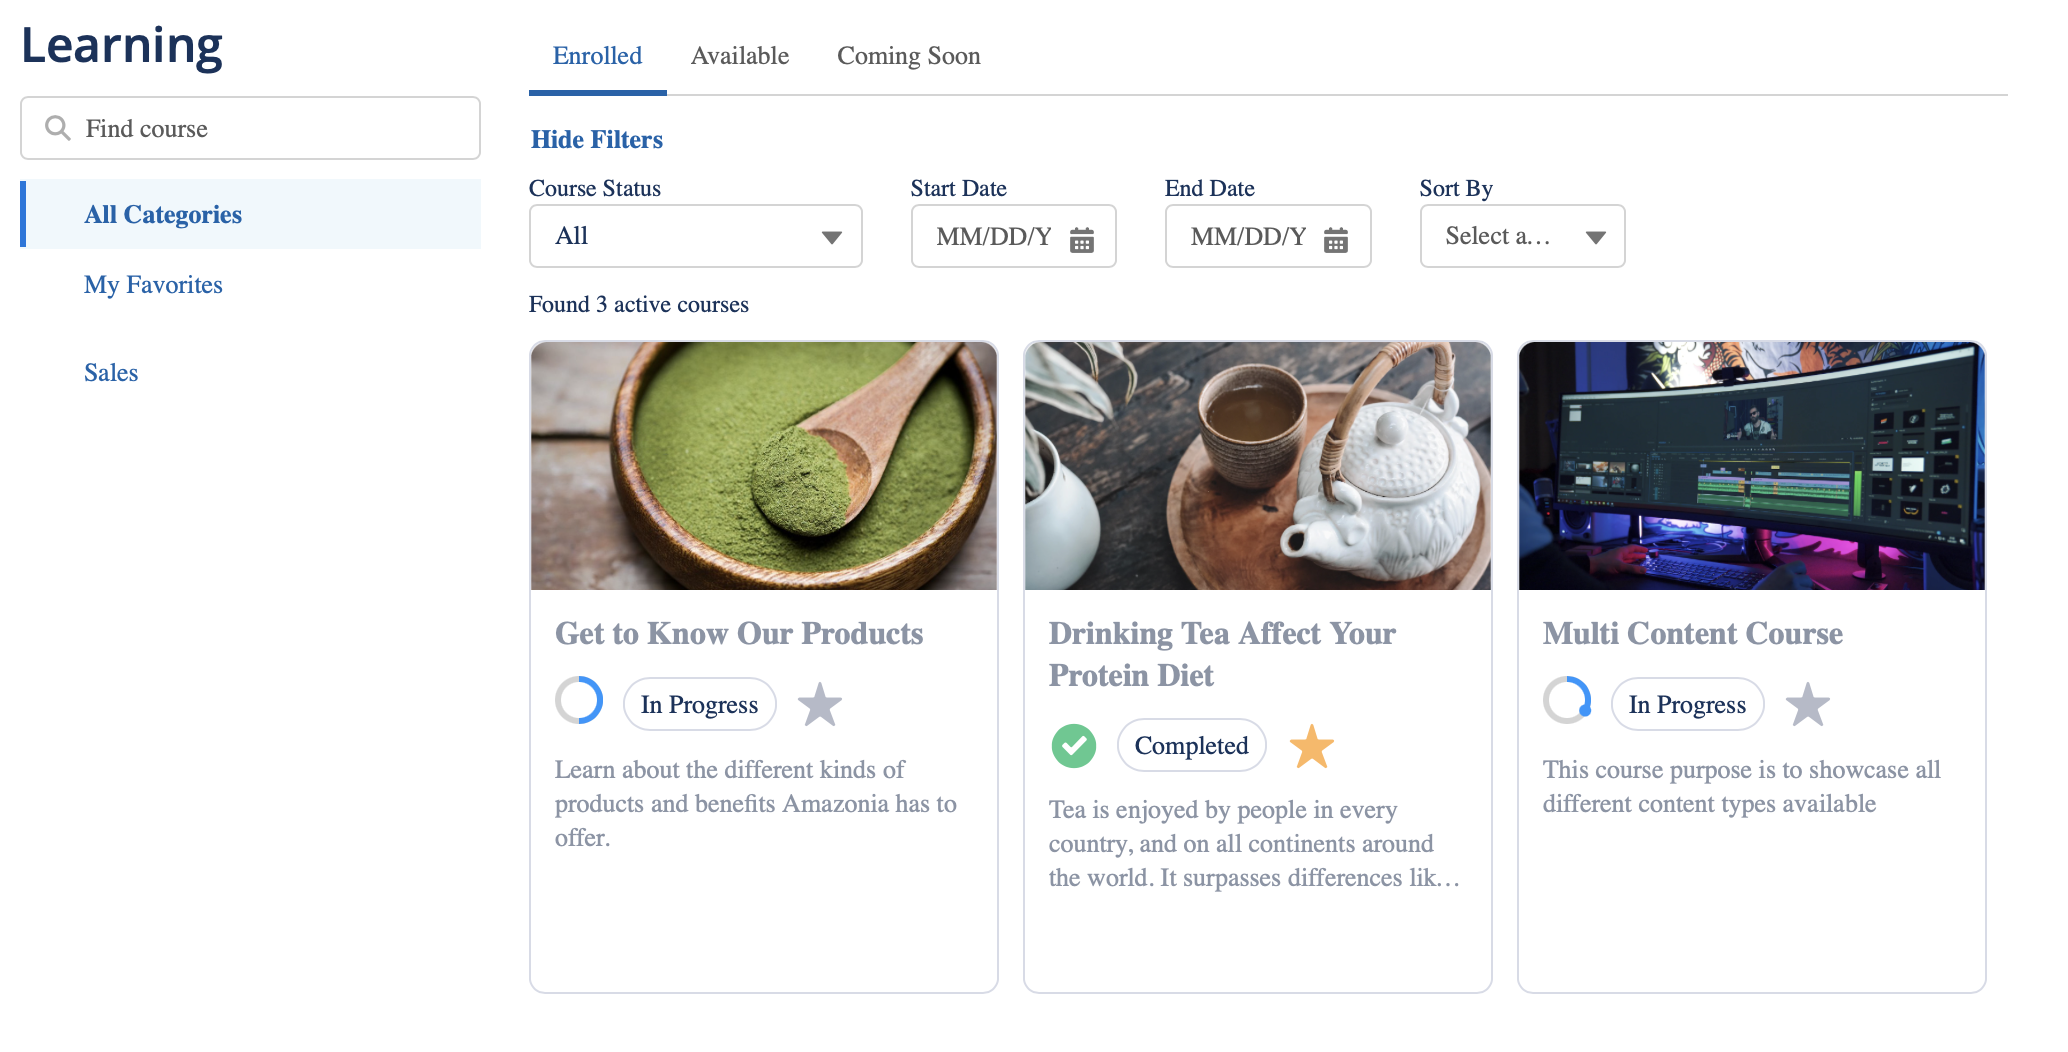
Let's take a look at each of the different elements on the initial Learning screen so you can better manage the different parts of the component when you configured it.
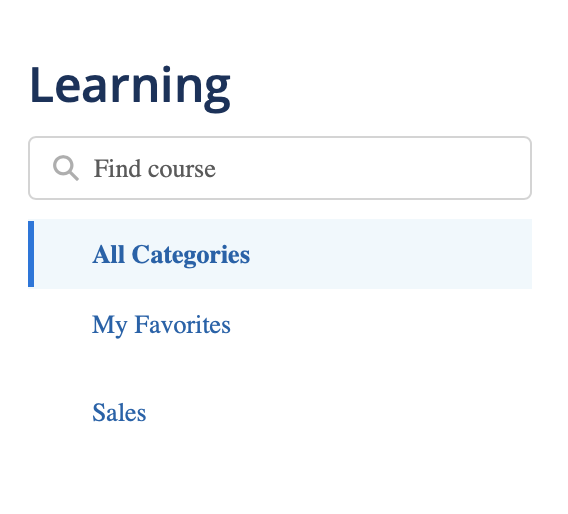
The left side of the component shows members the different course categories. When setting a course you can relate as many categories as you would like. The first option is always All Categories so that they can see all categories at one time.
When a member selects one of the categories, it will update what they see under each of the tabs (along the top).
There is also a search box so that members can look based on a specific word or phrase.
Tabs
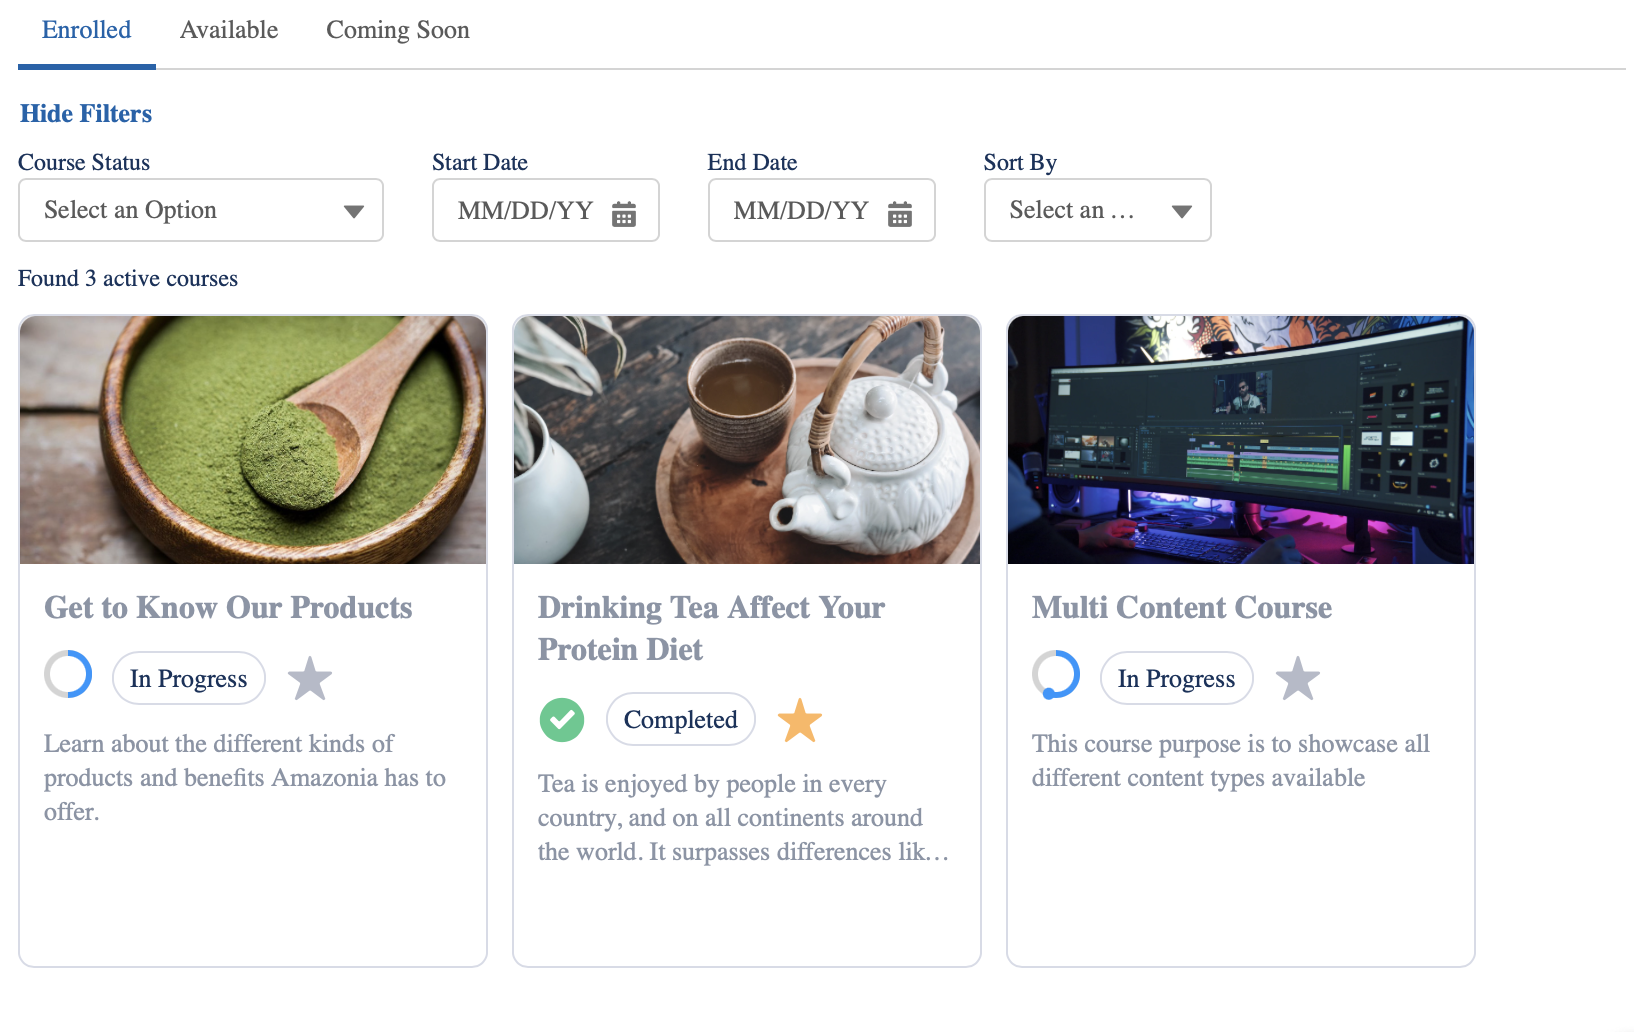
The following tabs indicate the status of all courses that are (or were) available to the member:
- Enrolled shows the user all of the courses that they are currently enrolled in, as well as courses they have completed.
- Available shows all of the courses that are available, whether or not they have enrolled in the courses.
- Coming Soon includes all courses that aren't yet available, but will be made available in the near future.
- Ended (if configured) shows the user all courses that have ended.

Sorting and Filtering
Members can sort and filter the courses based on one of several factors:
- Course Status lets members sort courses based on their current status based on the member's interaction with them:
- All includes all courses that a member can take.
- Completed includes all courses that the member has completed.
- In Progress includes all courses that a member is currently taking.
- Ended includes all courses that have expired, whether or not the member completed them.
- Start Date and End Date let members choose dates for when the courses were available. Members can choose to only enter one date if they aren't sure about how far back they need to go.
- Sort By lets the member sort the courses based on one of four factors:
- Start Date
- End Date
- Name Descending
- Name Ascending
Interacting with Courses
Some parts are interactive or show the member more about their own progress, while other parts are more default settings that you determine to provide information about the course.
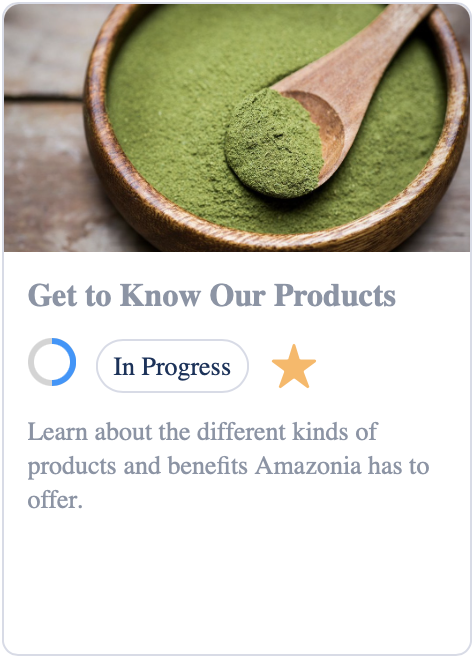
The informative parts include the following details:
- The image at the top shows a preview of the course.
- The course title appears under the image.
- The lower part is the description of the course.
- A "New" tag will be displayed for courses that have started within the last 30 days. After this period, the tag will automatically be removed from the course card view.
The interactive parts and parts reflect the member's actual work on the course.
- The circle on the left shows the member's progress in completing the course.
- The text next to the circle indicates the member's status for the course.
- Available means that the member either can enroll or start.
- In Progress indicates the member is working through the course.
- Completed indicates the member finished the course.
- The star can be clicked on to indicate that the member likes the course, similar to a favorite or like button.

Taking Courses
Members can click on the card to enroll and start the modules. If the course has more than one module, it will be listed on the main screen. Members can easily track their progress, access modules, and see details about the module.
This is what you need to know about what members see and how they interact with the component. From here you can start setting up the Learning component.
Updated over 1 year ago
What's next
Now, learn how to set up the Learning component as an Experience site admin.