
Fielo with REST API Services
2.96.24
If you plan to use Fielo with Fielo REST API services, follow the steps below.
Before Starting
First thing's first: log into your Salesforce org and make sure you have system administrator permissions. You'll also want to confirm that your org has the Authenticated Website license.
Install Fielo
Now that you've created a profile for the REST API, you're ready to install Fielo in your org.
-
Click here to access the installation package.
-
Select Install for Admins Only.
-
Click Install. When the installation process is finished, you (or the org admin) will be notified by email.
-
Once Fielo is installed, go ahead and configure the Fielo REST API.
Setting up Domain
In case you created your production ORG in Salesforce Winter ’21 release and later, you can skip this step. The newest ORGs have a My Domain by default.
Go to Setup from the top right. Within the Quick Find menu search for "domain". You will see the category Company Setting and within that, click on My Domain.
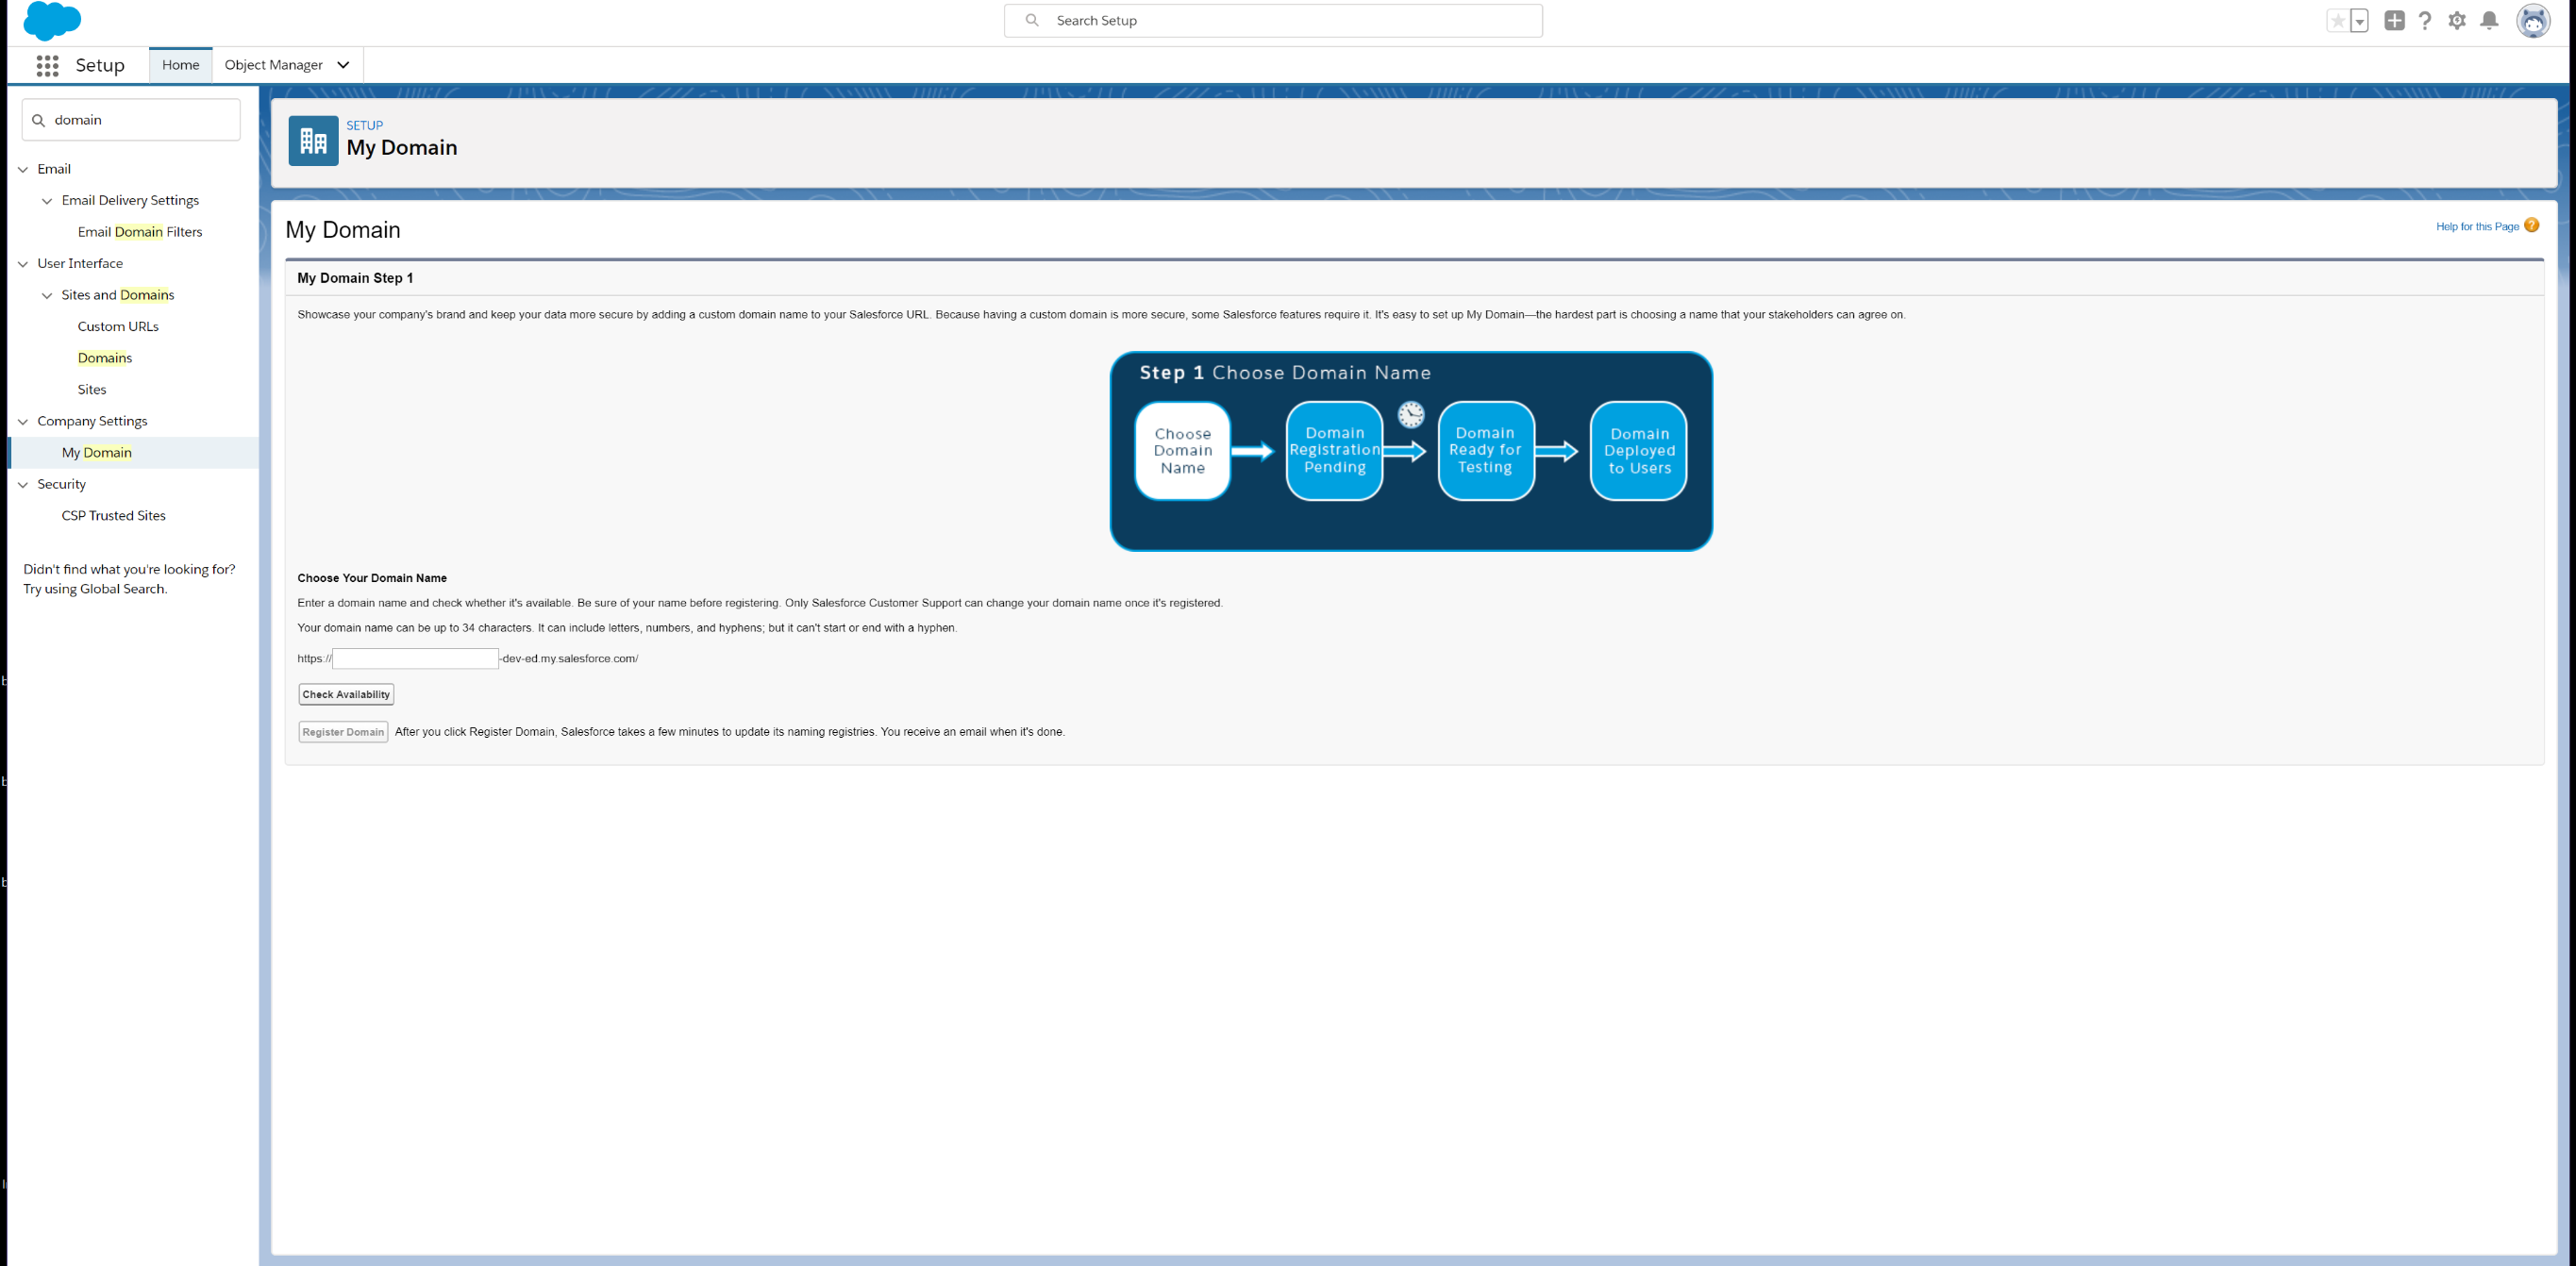
It will ask you to choose your domain name so go to the input field and enter a domain name that works for your program. Once you have entered a name, click the Check Availability button to make sure it able to be used. Once you have an approved domain name, click Register Domain.
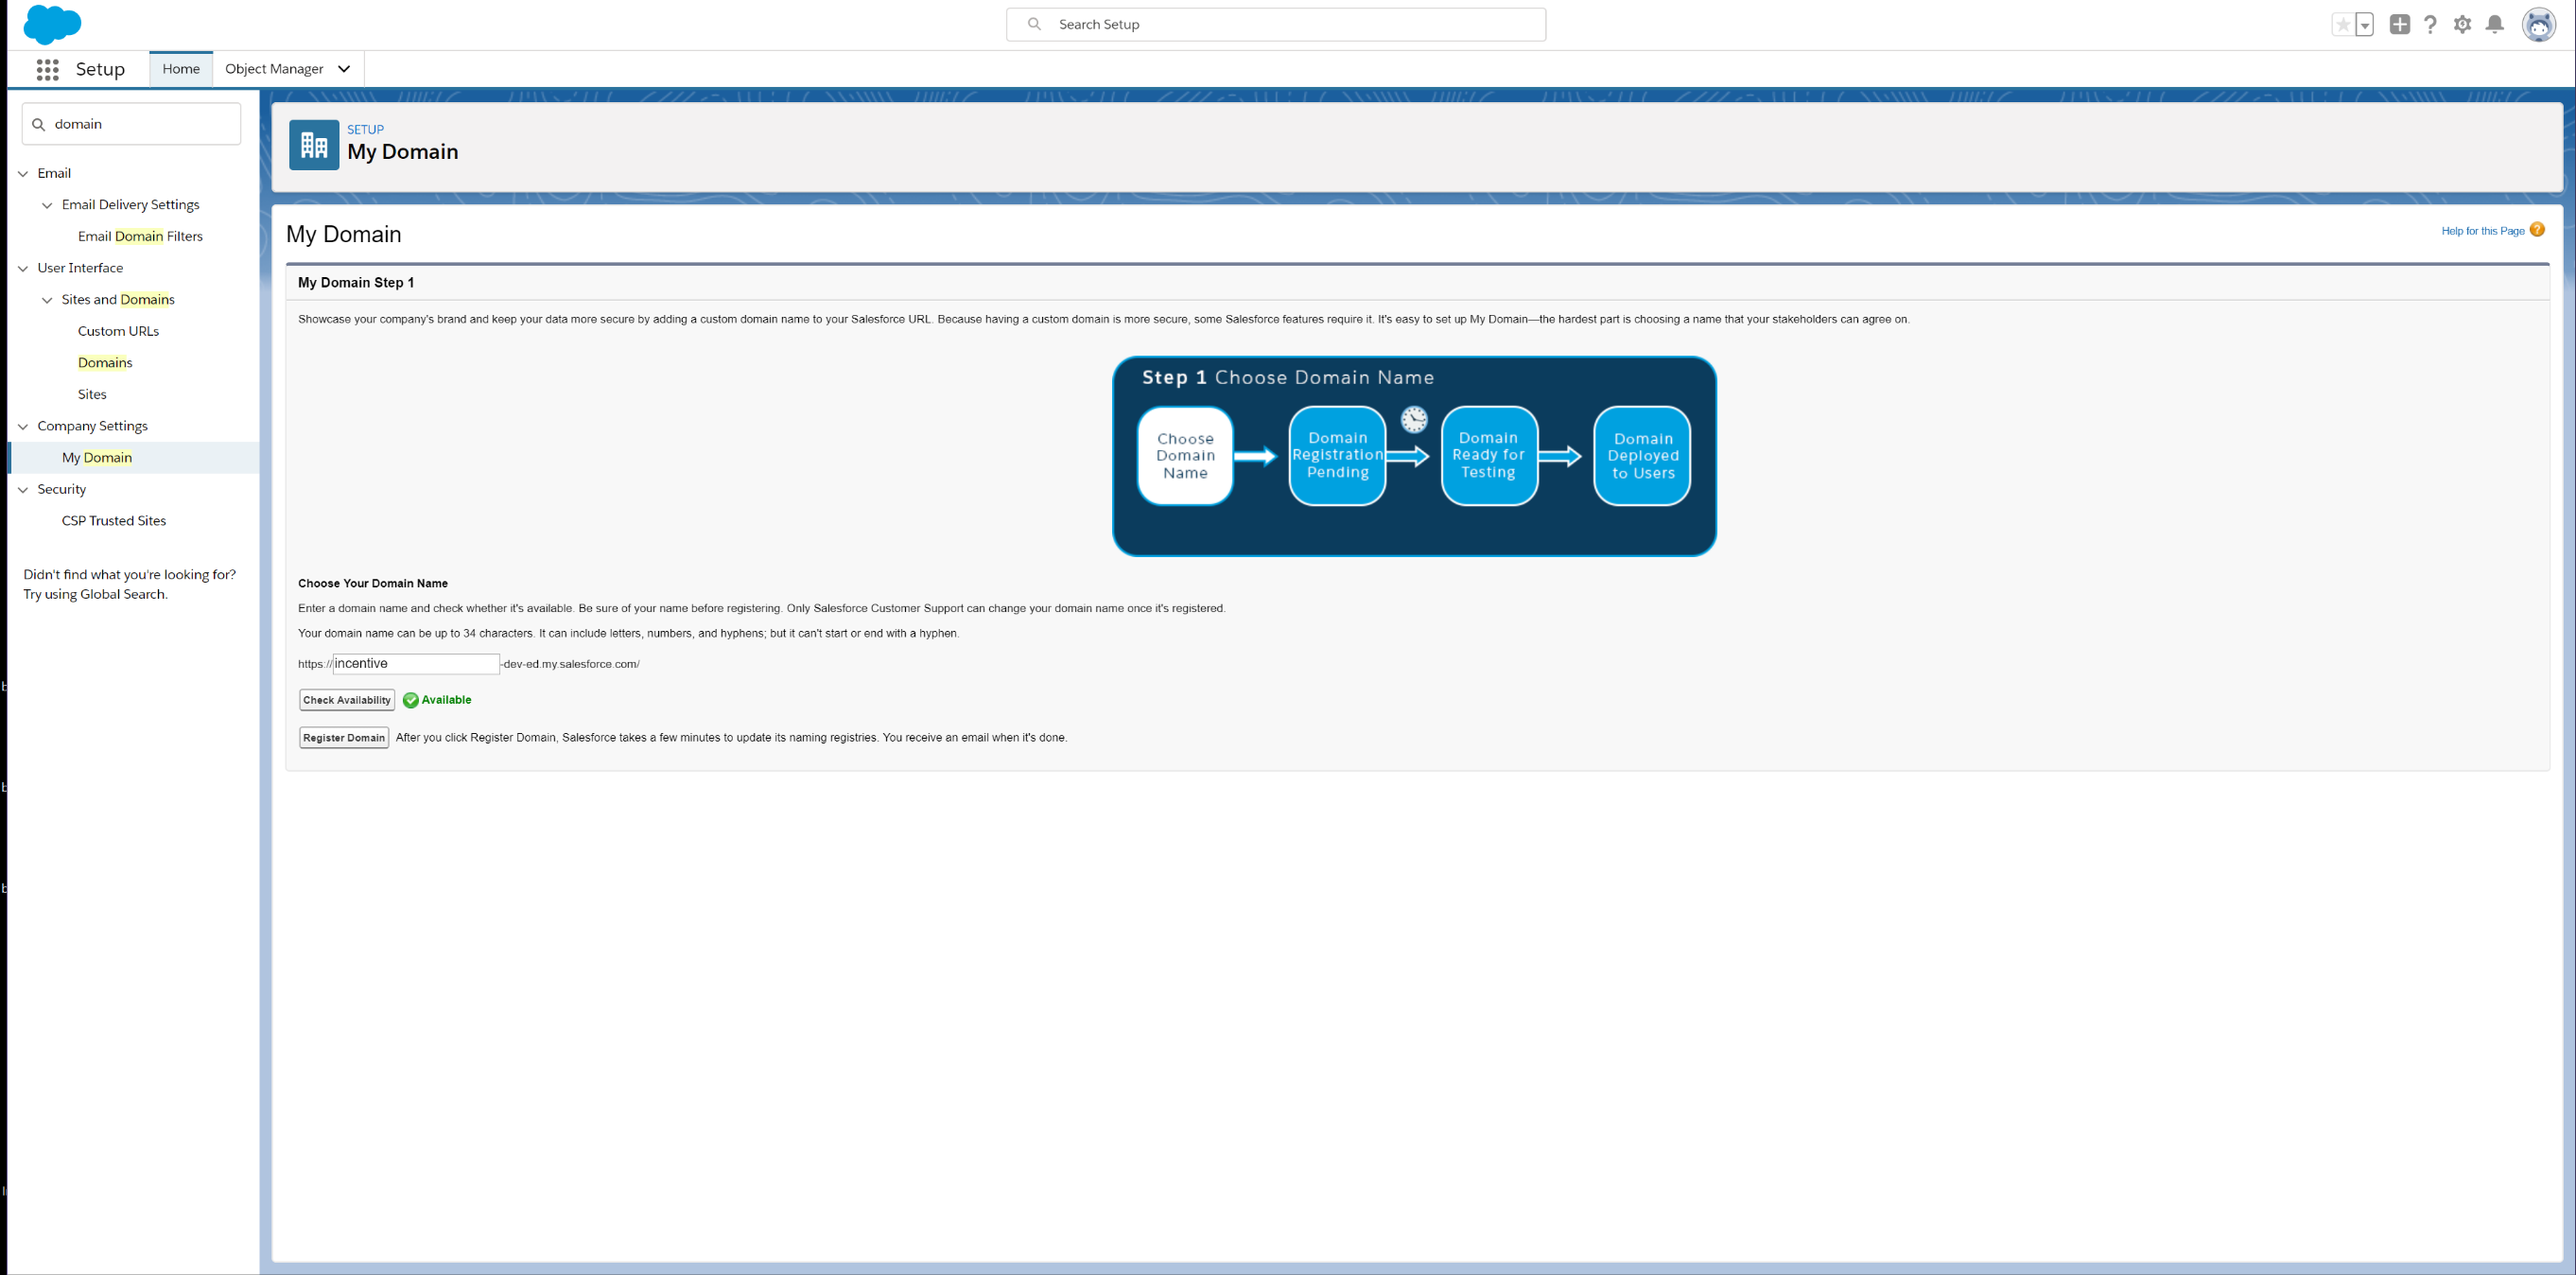
The process may take a few minutes to complete but you will receive an email titled "Salesforce domain ready for testing" once your domain has been made. You can either login from the email and go back to the domain section or refresh the original page if it is still open. You will be directed to Log in to test your domain before deploying it to your users.
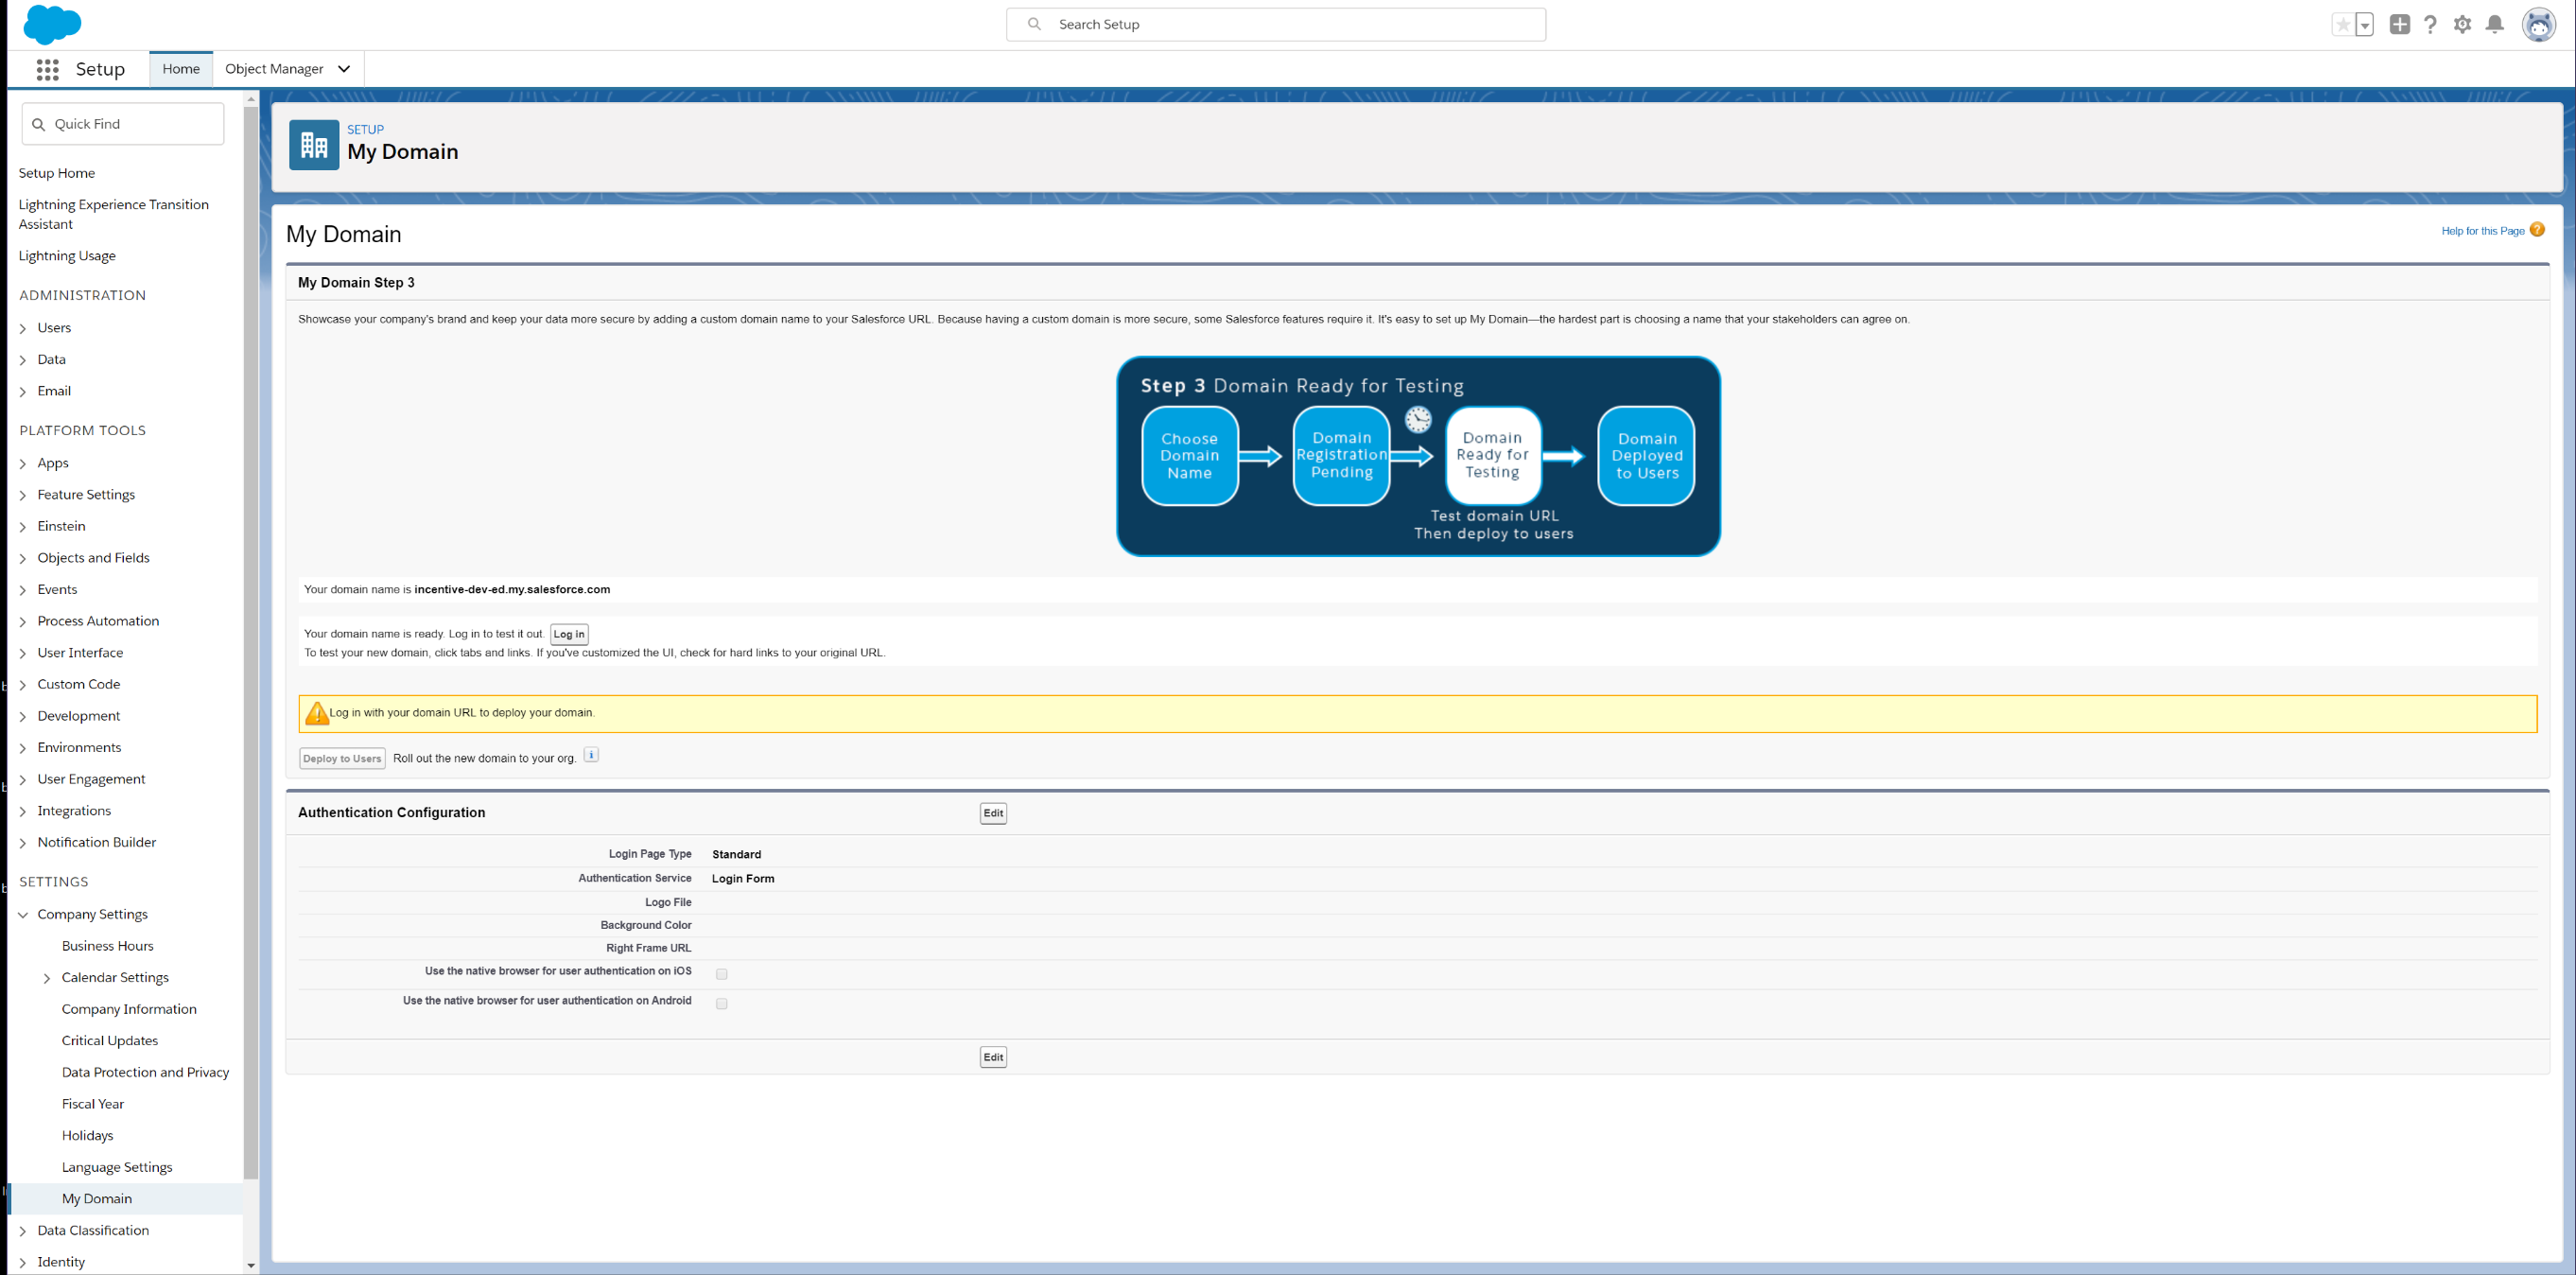
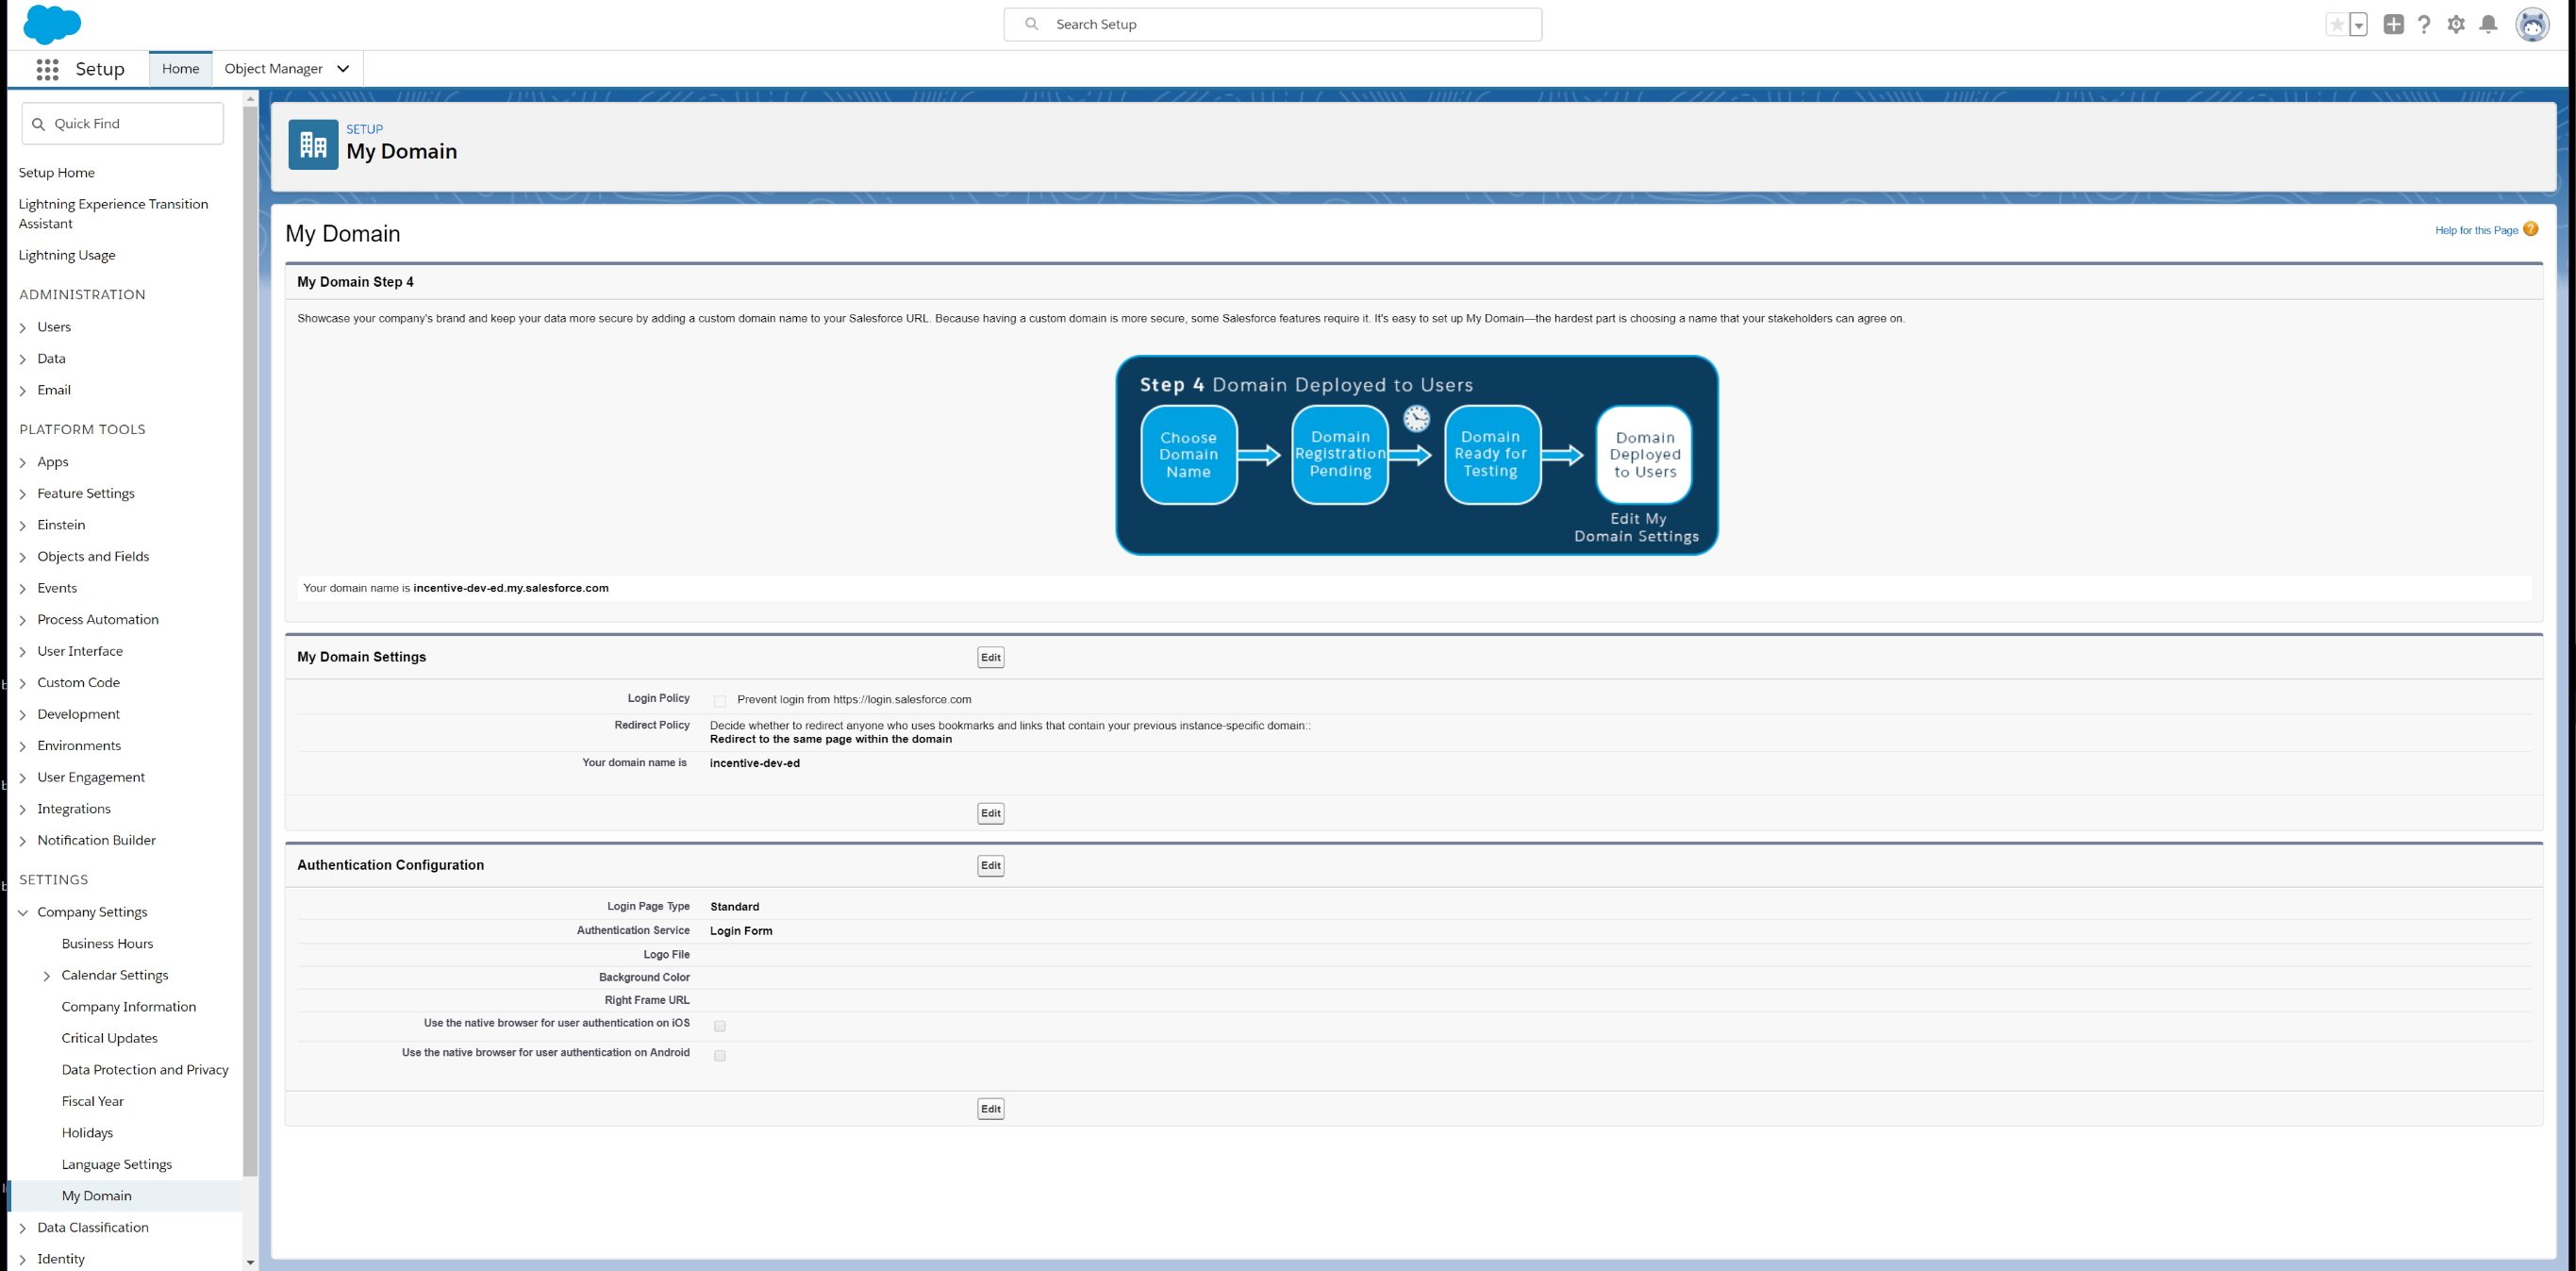
Once you have tested our domain, you are now ready to deploy to your users. The final step is to click Deploy to Users and you have now created your domain.
Ensure Email Deliverability
From Salesforce Setup, navigate to Deliverability. Make sure the e-mail access level is set to All email.
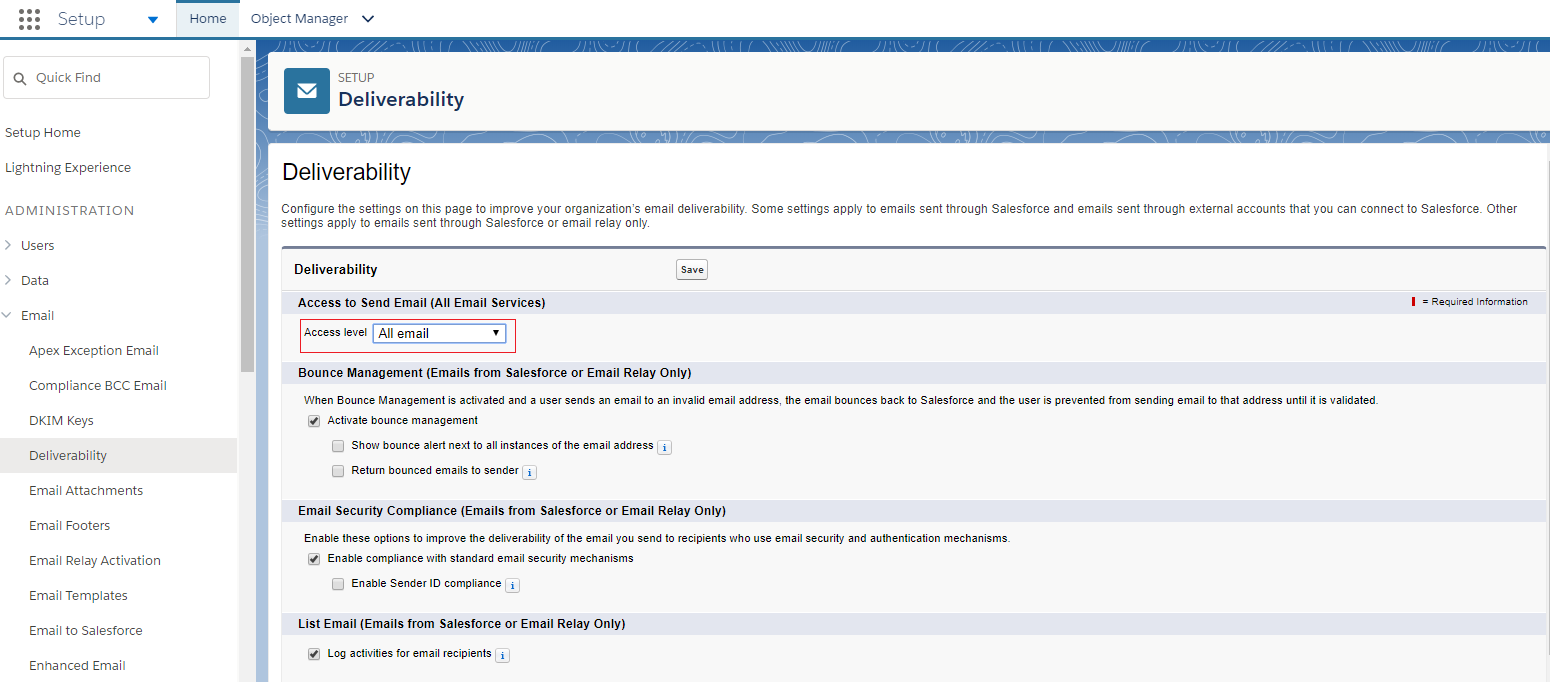
Assign Permission Set
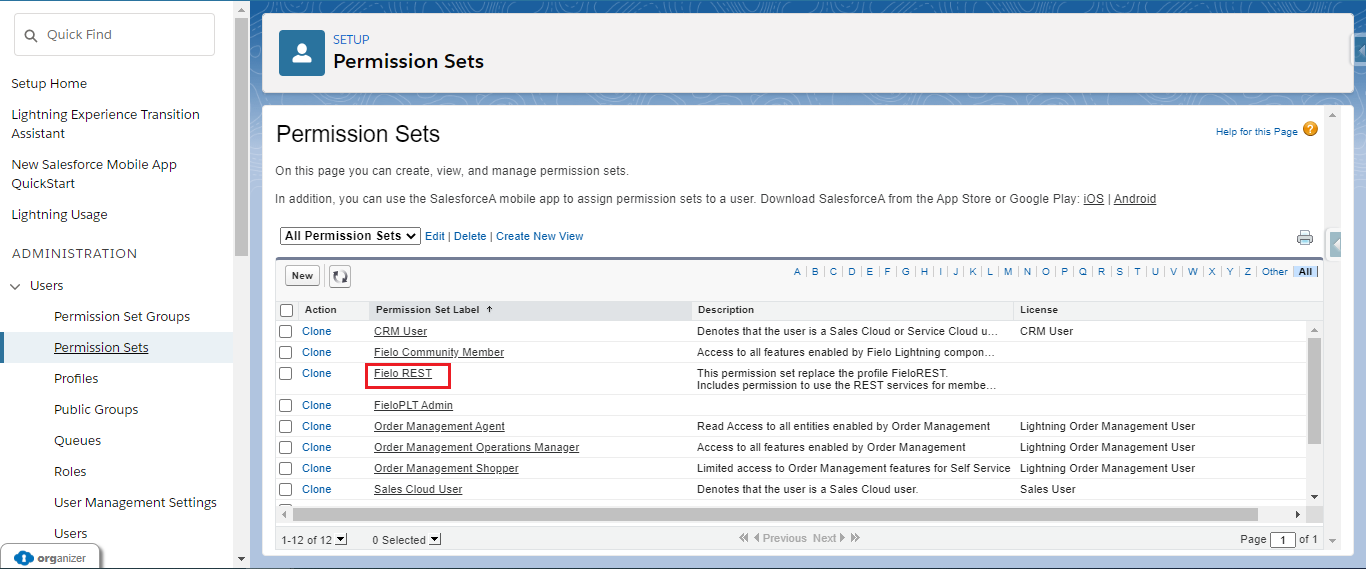
Still on the Salesforce Setup, go to Permission Sets and click on the permission set labeled Fielo REST.
You'll find the button to Manage Assignments on the top of the page. Click it.
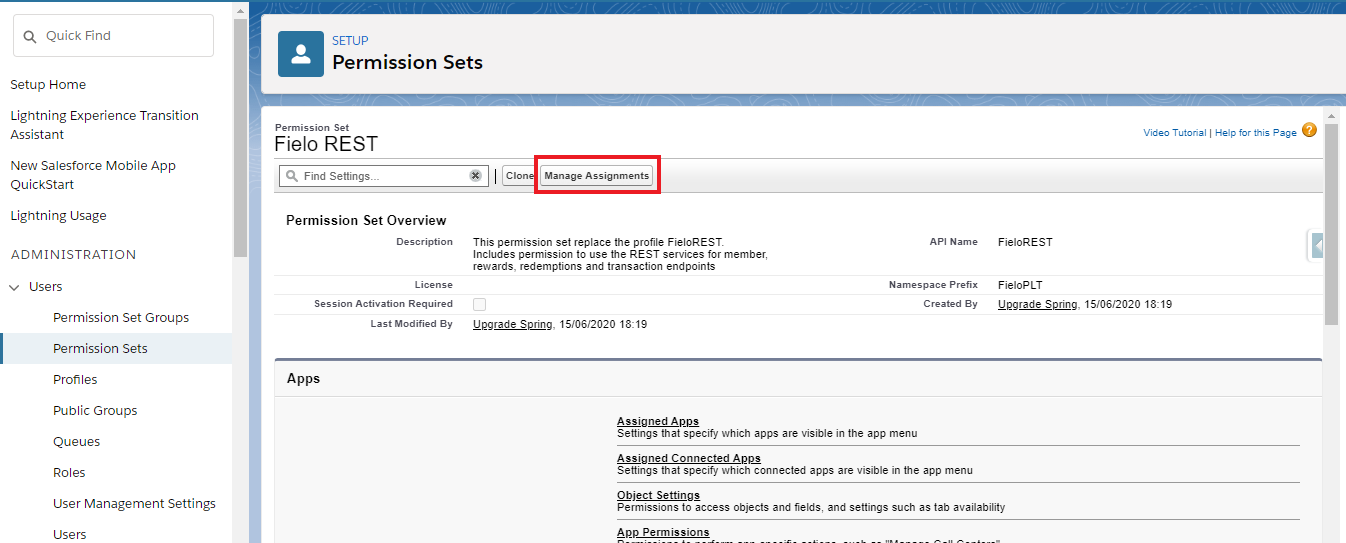
Click on Add Assignments_and select the users who will be using Fielo's REST APIs and click_Assign.
Standard permissionsOther than the Fielo REST, Fielo automatically creates a Permission Set named FieloPLT Admin, which has all the permissions needed to work with Fielo standard objects. Therefore, all users that will work with the platform should have this Permission Set assigned to them.
In case you create your own custom objects to incentivize through Fielo, you'll need to clone the FieloPLT Admin and add the new object(s) permissions to it.
Enable Libraries
After installing, you'll want to activate our full feature set by enabling the FieloPLT library.
Click on the App Launcher and choose Fielo Platform. From the Tools tab, make sure that you are in the Libraries section and click Activate next to FieloPLT.
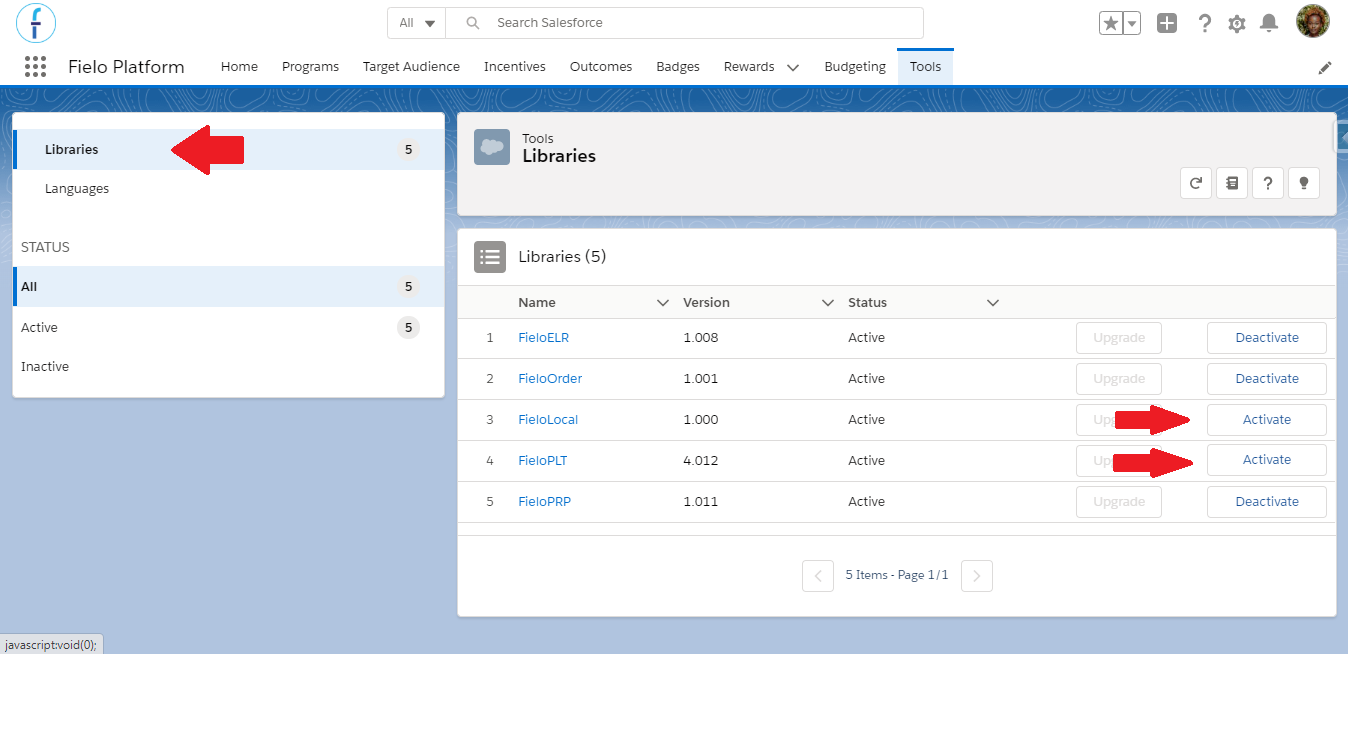
While you're here, go ahead and activate the FieloLocal library, as well. This way, you'll have a place to store any actions, models, or page settings that you create later on.
Great job!You're ready to start using Fielo with our REST API.
Updated over 1 year ago