
Profile
Profile lets your members view and edit basic information like name, email and any other field you may have added to the Member object. In addition, members can upload a photo of themselves to personalize their portal experience and update their preferences (i.e. consents). If you enable it, members can even access their transactions, redemptions and badges in the same space.
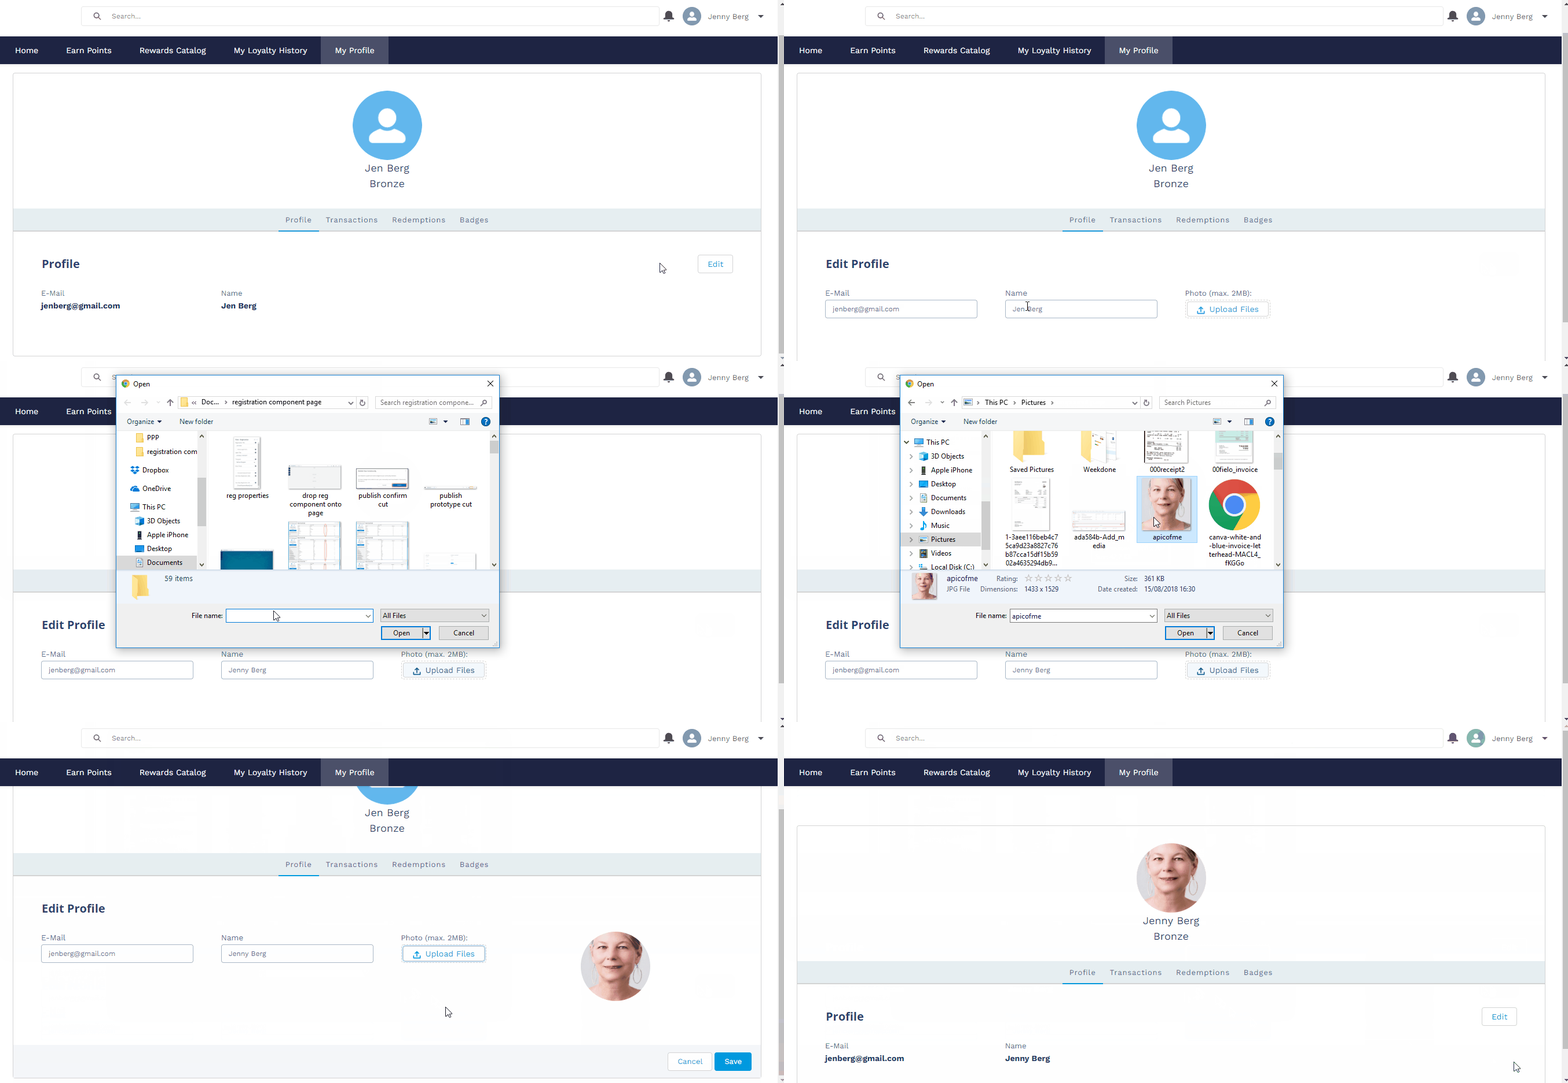
Profile in a program with no consents
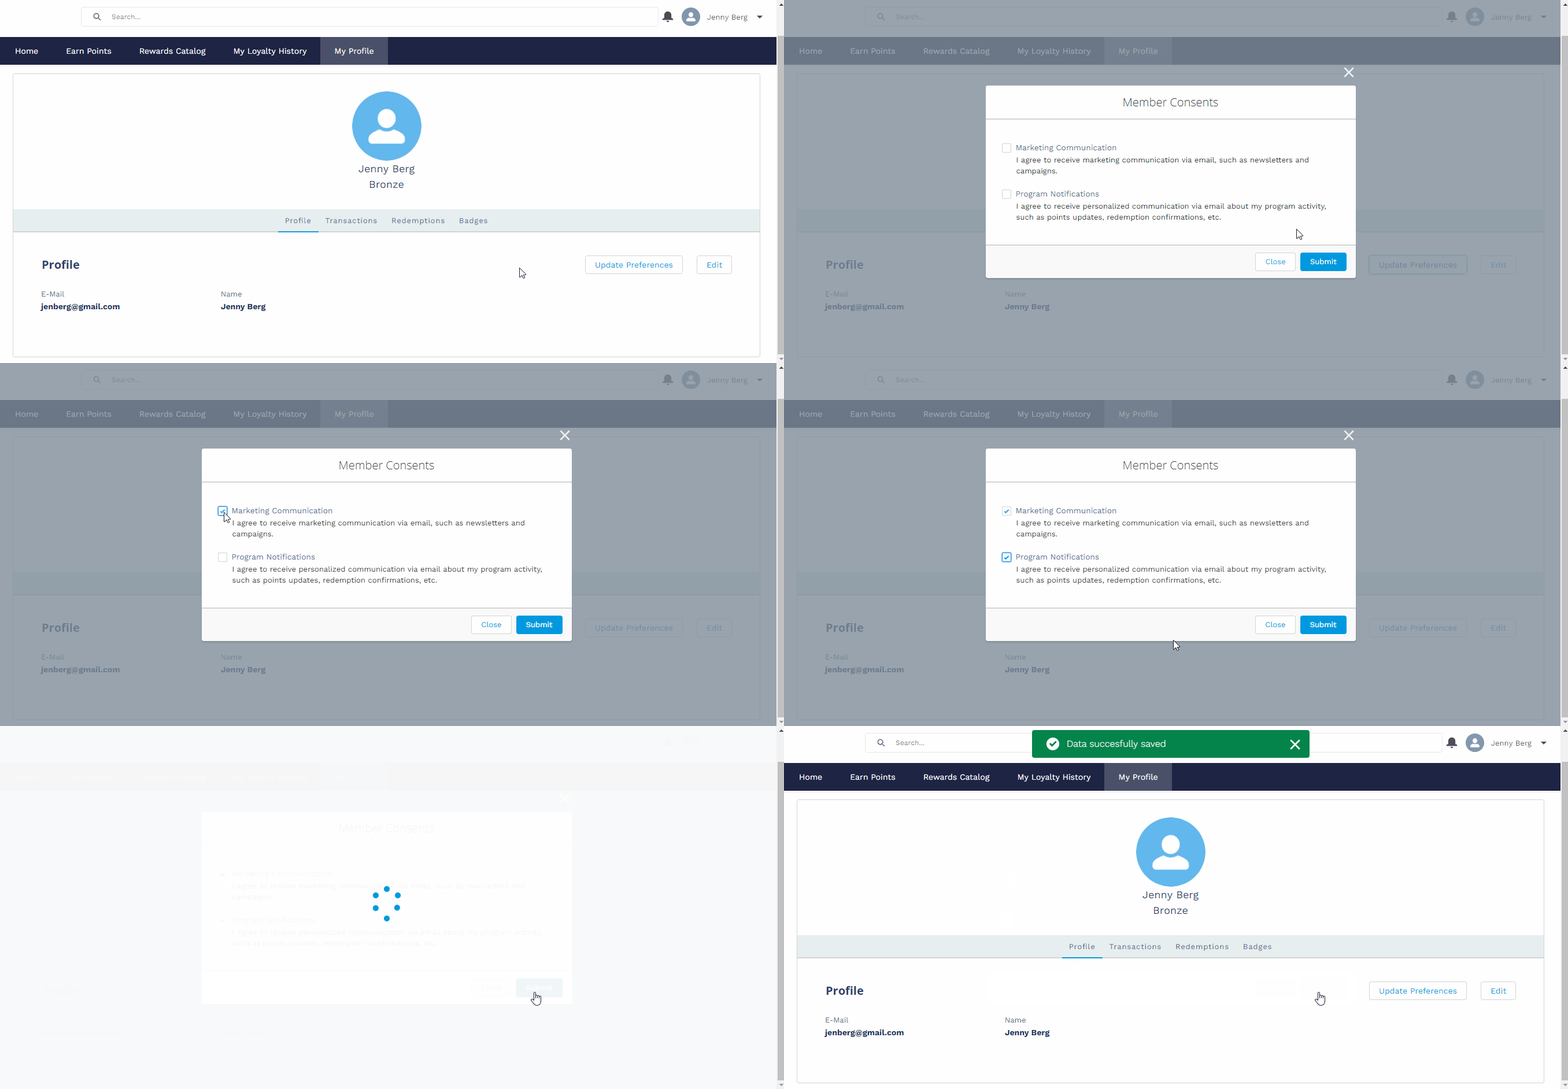
Profile in a program that includes consents
Getting Started with Profile
First, create or navigate to the page you'll use the component on. We recommend using Profile on a page that uses 1 full-width column, 2 columns 2:1 ratio or 2 columns 1:2 ratio layouts.
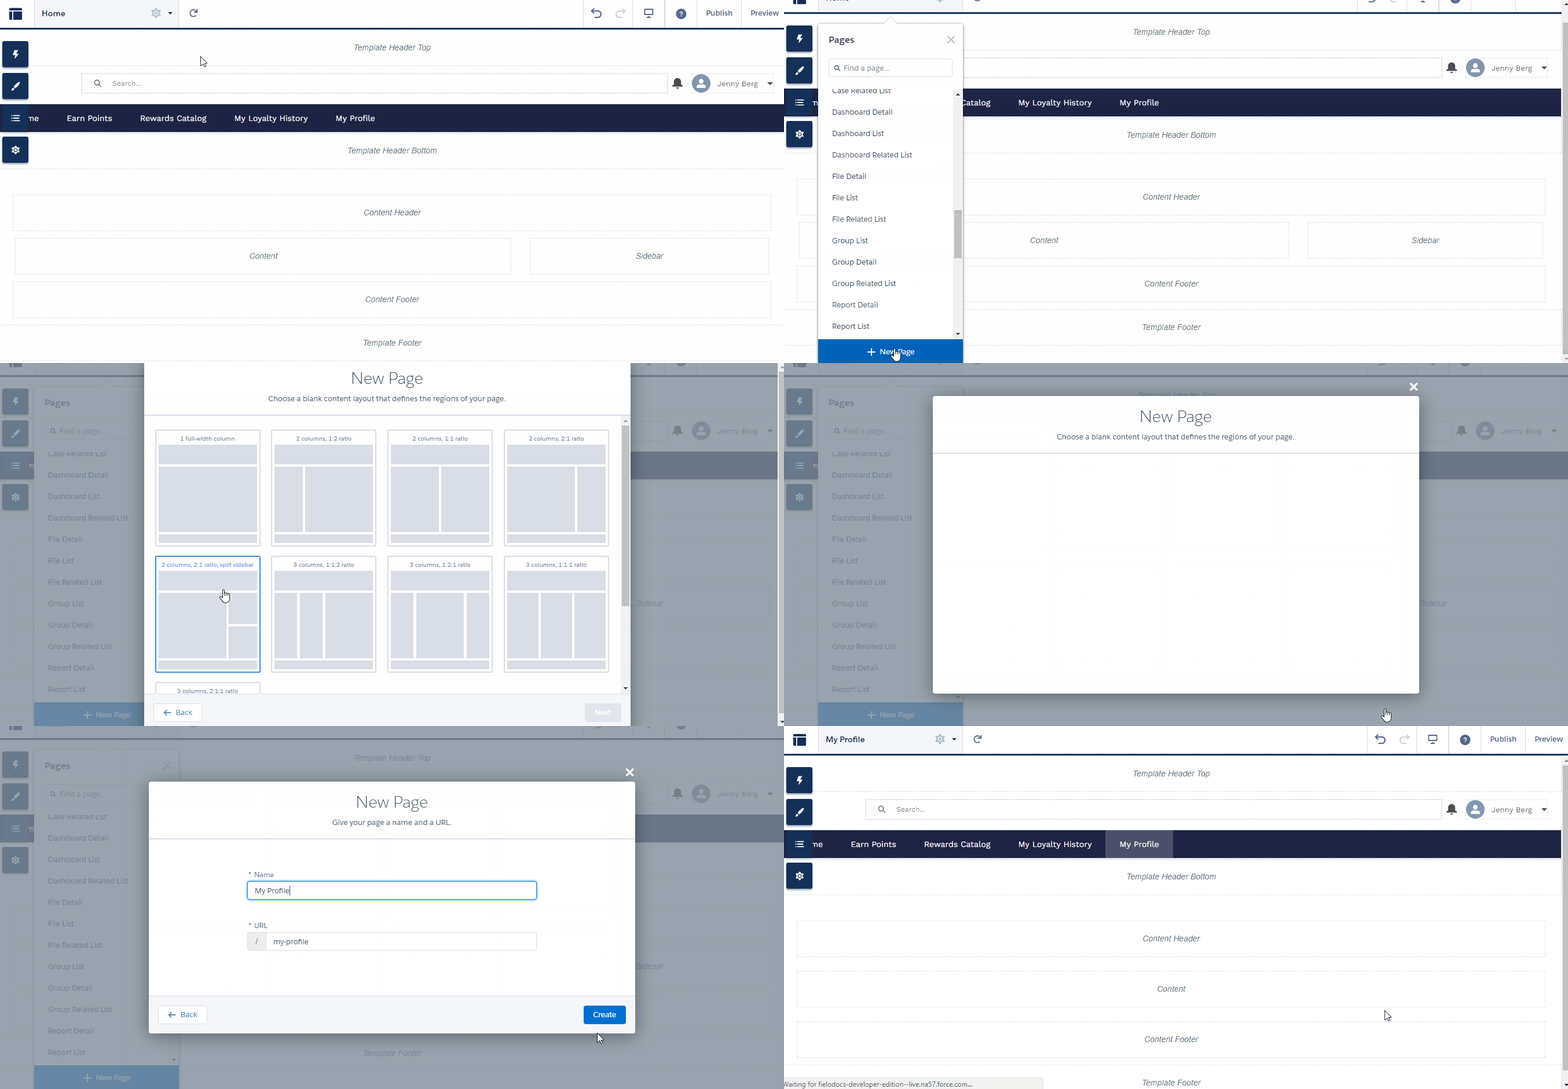
Add Member Selector to the page. You may wish to hide it, as Profile displays similar info.
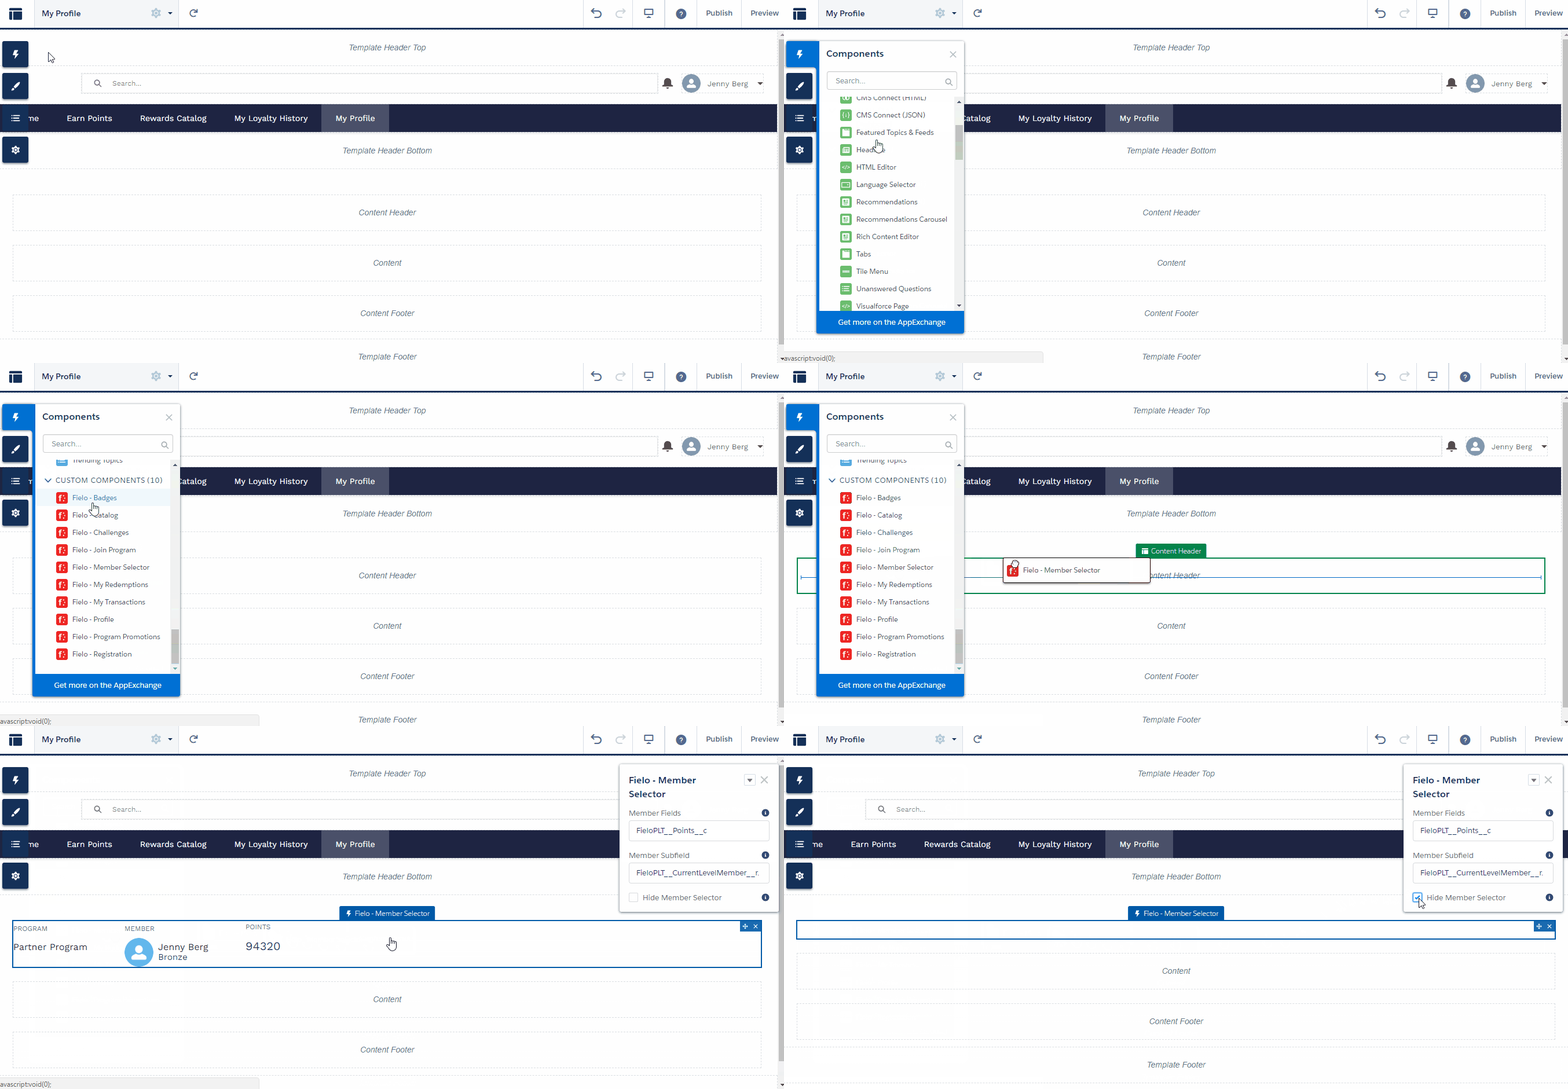
Now, you're ready to add Profile to the page.
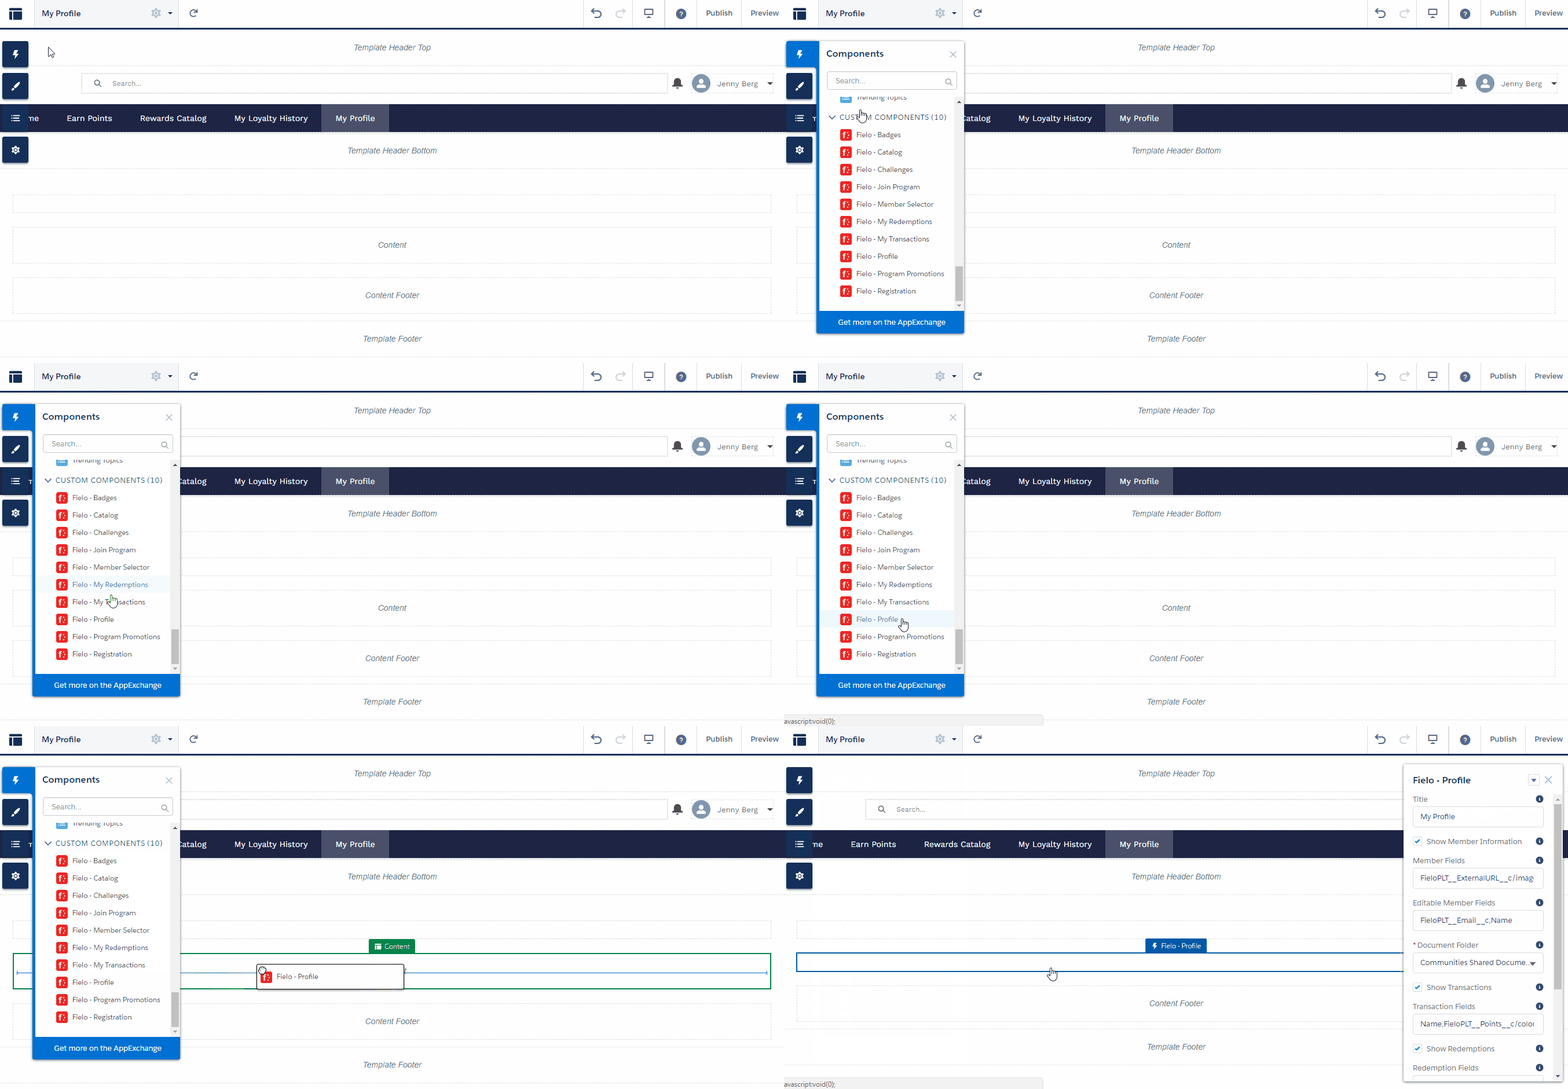
Configuring Profile
Profile comes 100% ready to use, but you can add or remove content to tailor it to the specific needs of your loyalty program.
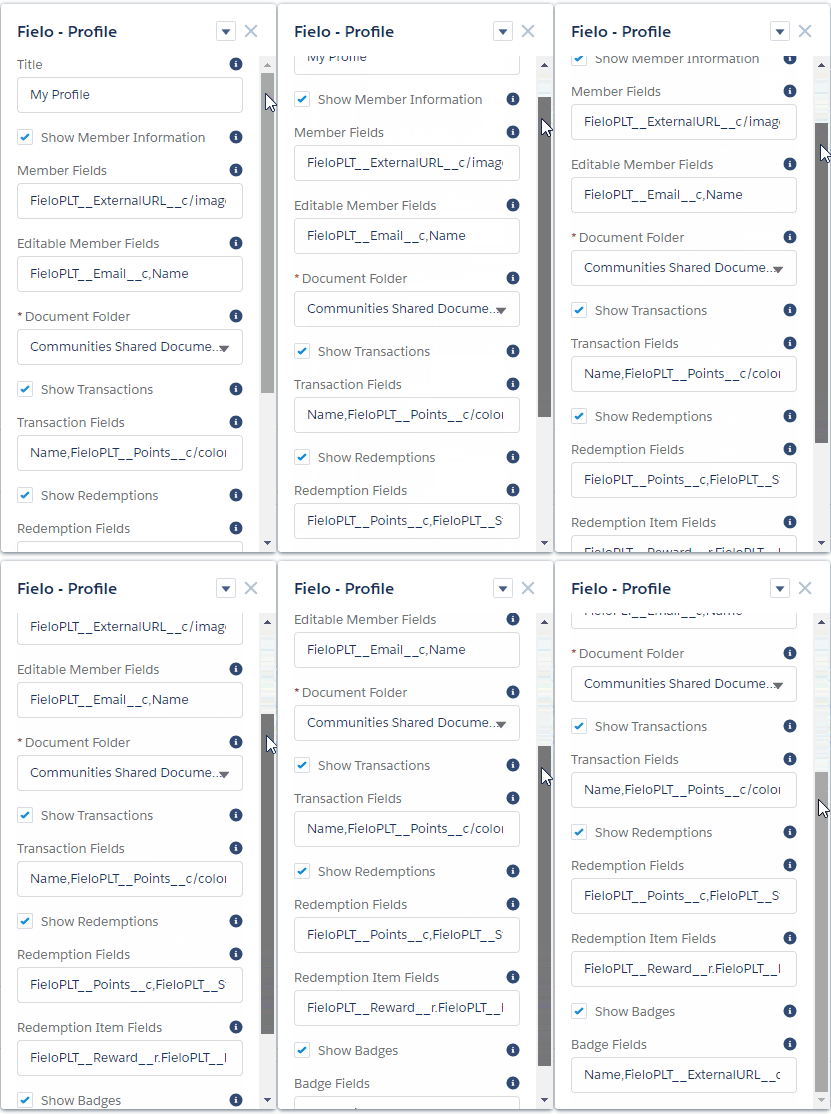
Profile can be customized via the following properties:
- Title: Enter a title to be displayed at the top of the component.
- Show Member Information: Check this box to display member info (i.e. name and level) at the top of the component.
- Member Fields: Type in the API names of any additional Member fields that you want to be displayed, separated by commas. Member image, name, and level are automatically included on the list.
- Editable Member Fields: Type in the API names of the fields from above that you want members to be able to edit, separated by commas. Member name and level are automatically included. Don't worry about image—members will always be able to upload a photo.
- Document Folder: Choose the folder you want member images to be stored to.
- Show Transactions: Check this box to allow members to see their transactions from the component.
- Transaction Fields: If showing transactions, type in the API names of the fields that you want to be displayed, separated by commas. Name, points, date and type are included automatically.
- Show Redemptions: Check this box to allow members to see their redemptions from the component.
- Redemption Fields: If showing redemptions, type in the API names of the fields that you want to be displayed, separated by commas. Points and status are included automatically.
- Redemption Item Fields: If showing redemptions, type in the API names of the redemption item fields that you want to be displayed, separated by commas. Reward names, images and point values are included automatically.
- Show Badges: Check this box to allow members to see their badges from the component.
- Badge Fields: If showing badges, type in the API names of the fields that you want to be displayed, separated by commas. Badge names and images are included automatically.
BadgesRegarding badges rewarded through a promotion rule, the Profile component will display only those that have fixed value as the Badge Mode.
Updated over 1 year ago