
Translating Labels, Field Names and Tabs
Salesforce’s backend services is where the admin will spend most of the time building and managing your successful loyalty program. Salesforce has a global base of users and provides a variety of languages that can be used in the background.
Unfortunately, it will not translate everything, which is the case for managed packages, and many tabs and field names in Fielo will still be shown in English even when your organization is set to display other languages. In this page, we’ll walk you through how the translation can be done in those cases.
Before starting, Change Language in Salesforce or, if your preferred language isn’t available, Add a Language. This is how you will be able to actually see the changes you'll be doing.
Salesforce’s Translation Workbench
You’ll be able to translate most of Fielo’s content, from the app name displayed in your Org to picklist values, just by using the inbuilt Translation Workbench. This is what you are able to translate using it:
- Custom Field names
- Field Label
- Related List Label
- Help Text
- Some tabs
- “Option List” Values
The very first step that you'll need to take in order to be able to use it is to enable the Workbench, which can be done by going to your Setup and looking for Translation Settings in the quick find box. Within this page, click on Enable.
Next, go to Translation Language Settings and click on Add a language. Select one from the Language field and, then, identify who will be doing the translations by adding a user from the Available List to the Selected List.
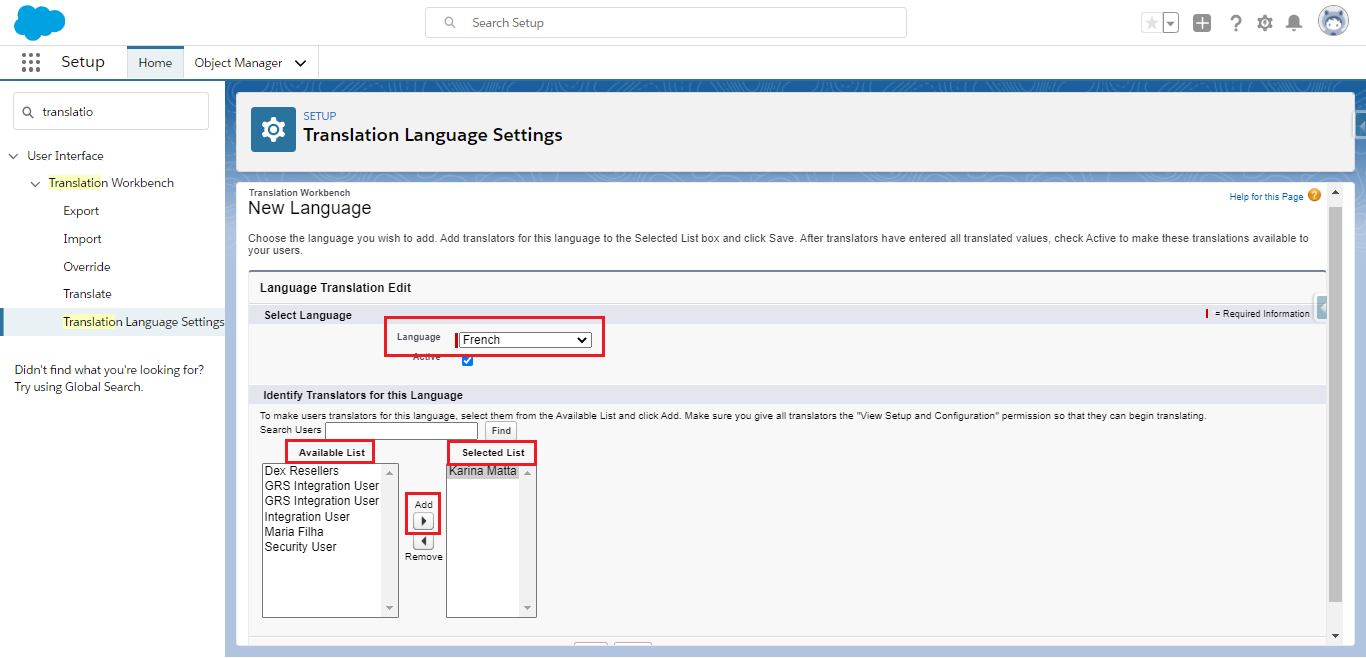
Adding a new language
TipSelecting Active makes the translations available to the users in that language. It is recommended that you only make a language Active when you have finished translating everything that you wanted to.
After doing that, it's time to begin translating! There are a few ways of doing it.
Manual Translation
You can translate Button and Link Label, Layout Section, Custom Field and other components in a manual way through the Translate page - you can also find it in the quick find box through the Setup. Once there, select the Language you'll be translating to, define the Setup Component, choose an Object and Aspect.
Then, all you have to do is double click in the translation column to enter new values. Don't forget to Save afterwards.
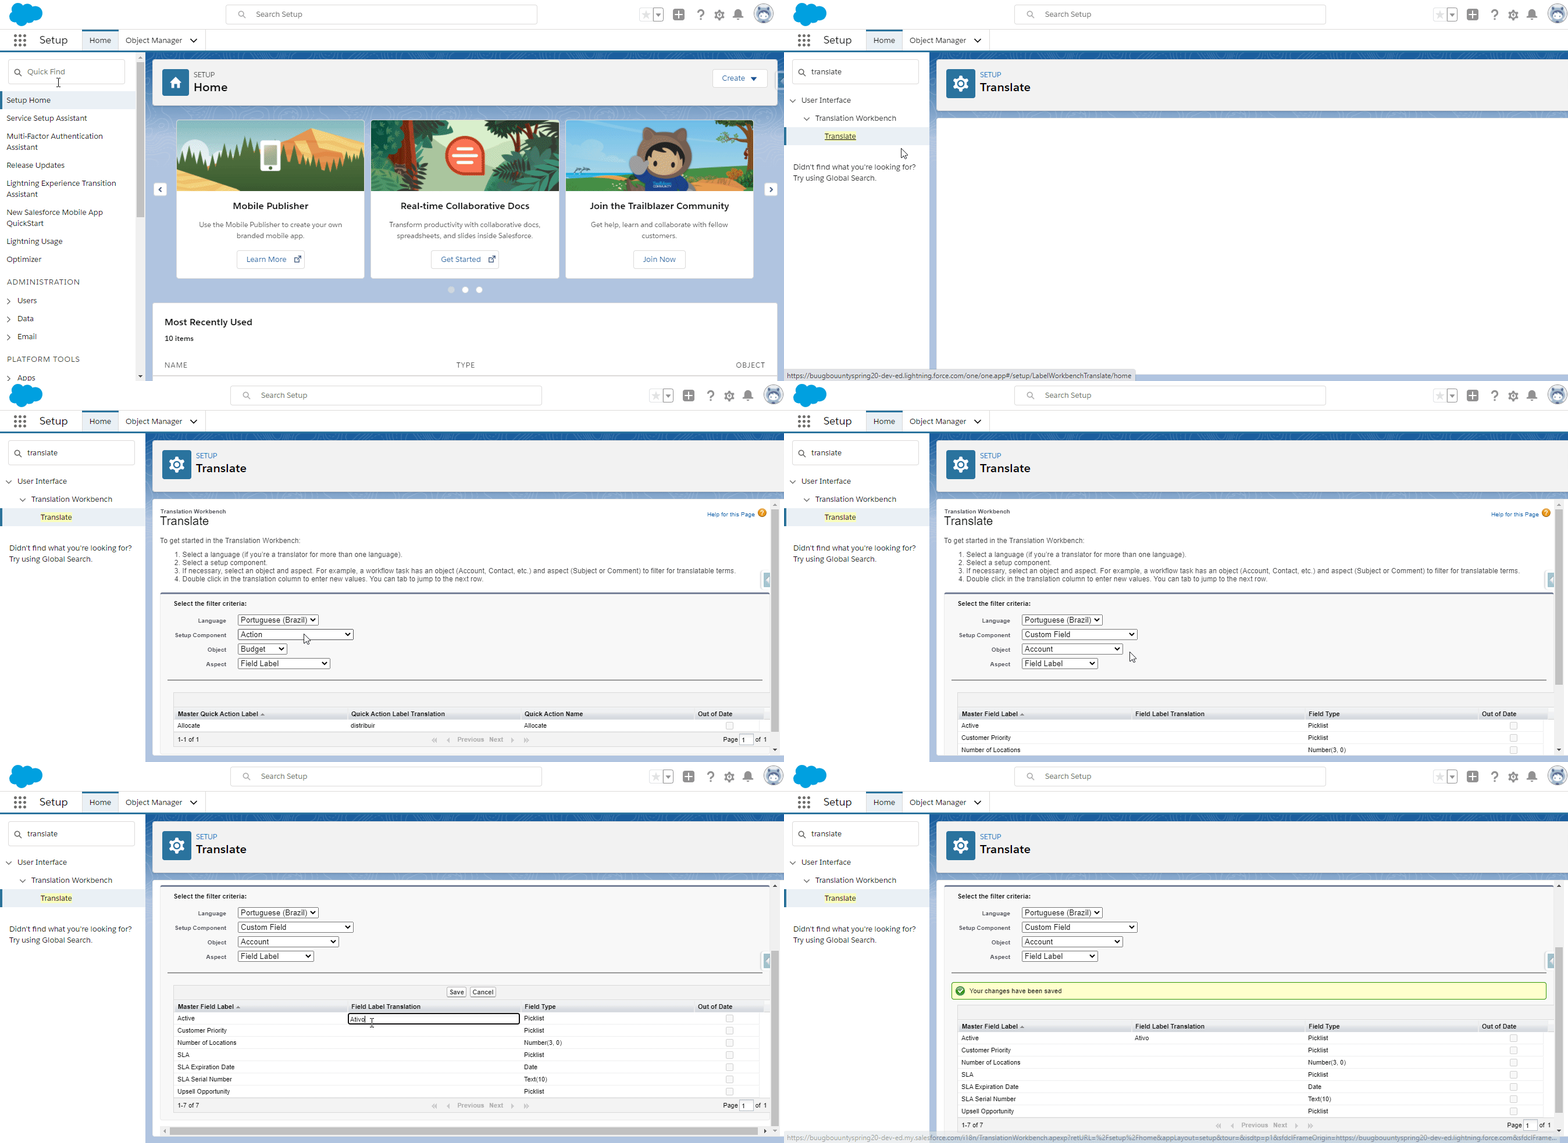
Translating custom fields
When you are finished, access your Custom Labels in order to add translations for them too. Visit this link to learn how to do that.
Export and Import Files to Translate
The second - and kind of more automatic and thorough - way of translating, is to export translation files, replace the default values with the translated ones and import the translated files back to your Org.
For that, go to Setup, quick find and click on Export. Select the Source export type. However, note that these type of file is generally used when this is your first time translating anything, so if you have done this before, it is suggested to use the Bilingual one in order to review and update the translations.
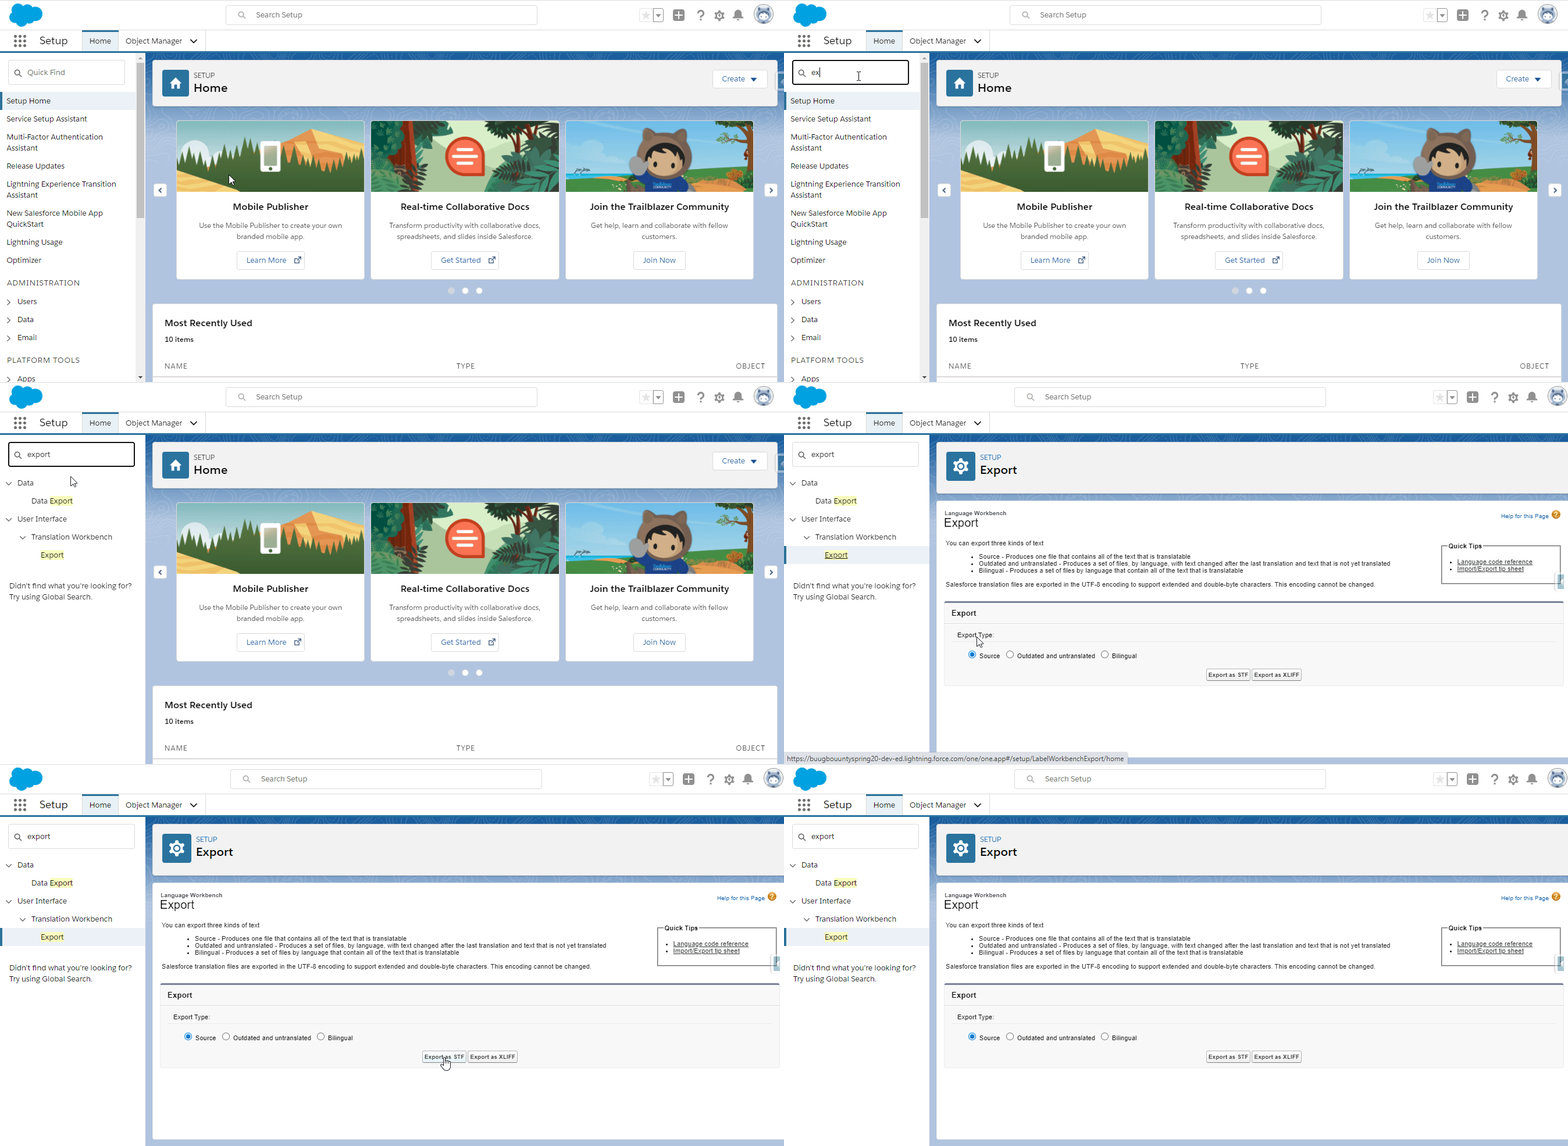
Exporting a file
Open the export file in a spreadsheet and edit the LABEL column by replacing the English texts under it with the translated ones. You can also delete the lines that you don't want to translate, e.g. leave only those that the # KEY value contains "FieloPLT", "FieloELR" and/or "FieloPRP".
When everything has been translated, change the Language code for the one that represents the language you are translating into, save the file, access Import through the Setup and upload it to Salesforce.
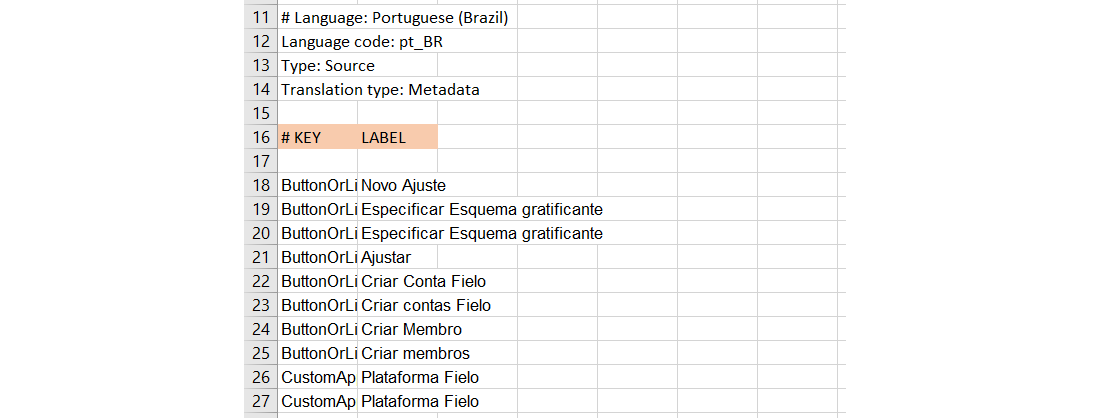
Spreadsheet ready to import, with Portuguese translations
Salesforce accepts only .stf file to import, so make sure to save your file with this extension once you are finished.
Not Translatable Using the Workbench
Even if the Workbench helps us a lot, there are a few things that cannot be translated by using it. In that case, there are 2 features that will help you:
- Rename Object, Tab, and Field Labels - for some of the labels.
- Customize Tabs on Lightning Pages Using the Lightning App Builder - for tabs within the Promotion, Challenge, Member, Teams, Member, Budget and Library pages.
Note that, by doing the latter, you are creating a new version of the page. In order to do it, go to the page that you want to edit, open the Setup menu and click on Edit Page. From there, select the Tabs component where the tabs are at, which will open a menu to the right. In the menu, select the ones that you want to change and enter the new name in the Custom Label field.
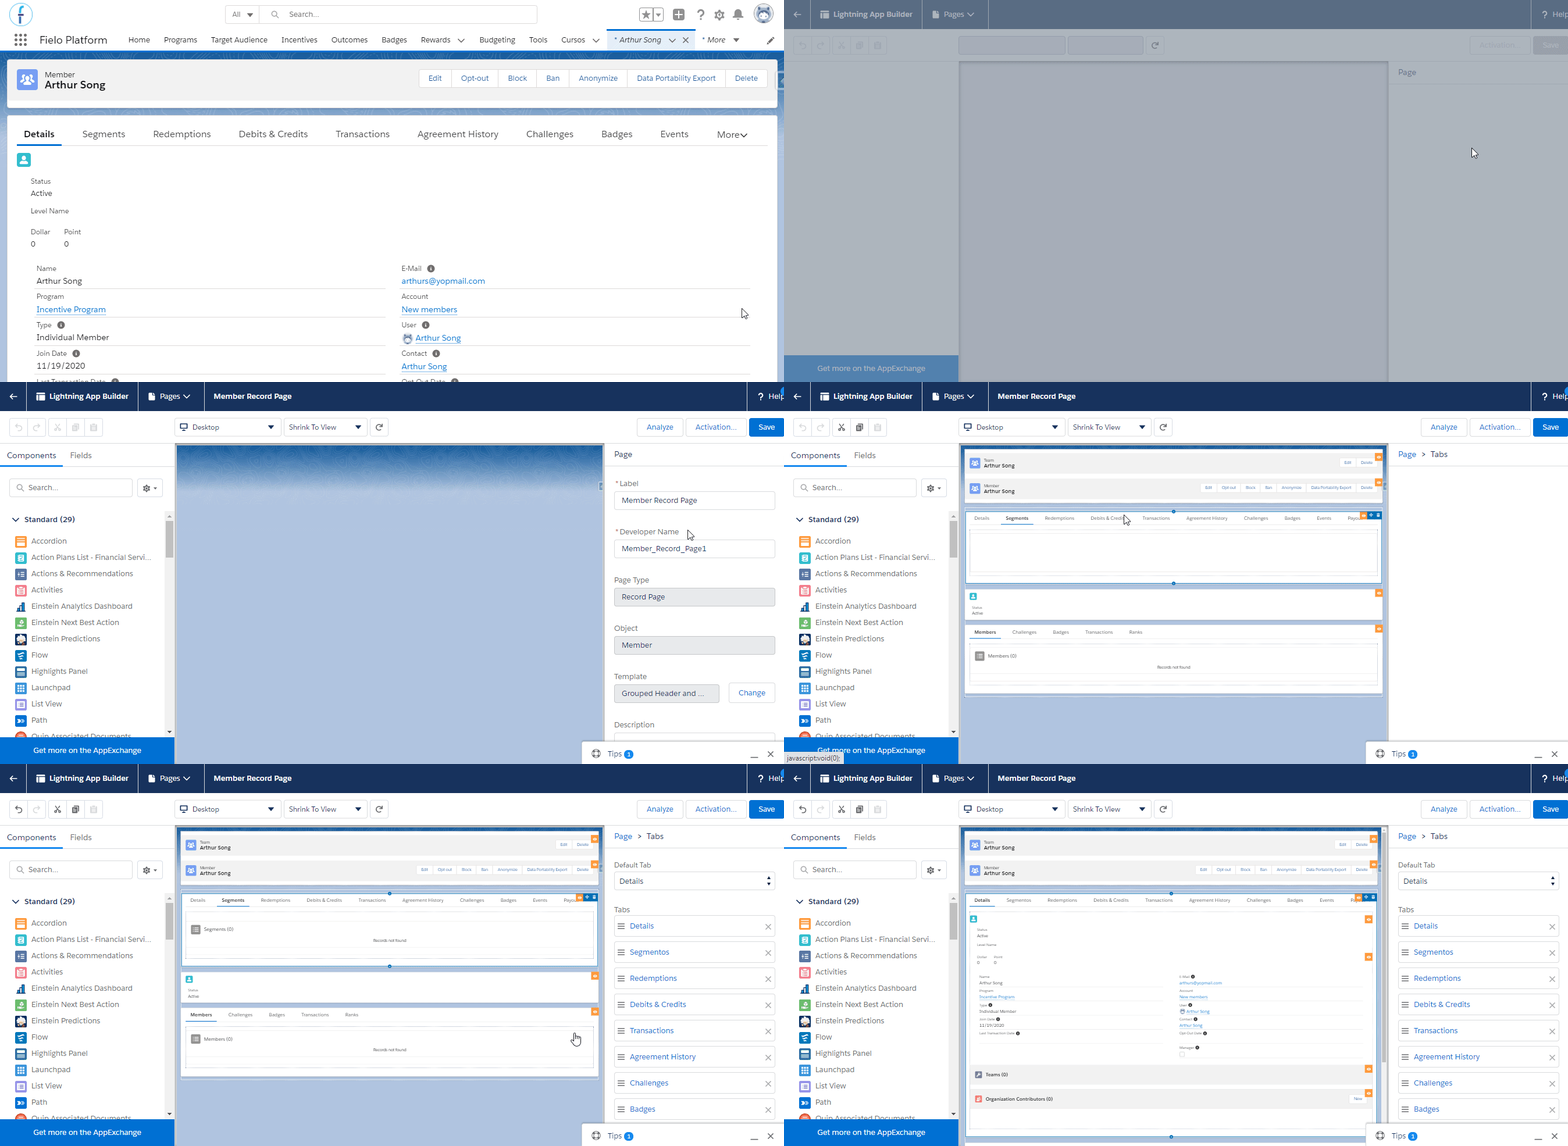
Changing the "segments" (en) tab label for "segmentos" (pt).
As you are not just simply translating those labels, our suggestion is to activate this new page version by assigning the page to a combination of Lightning apps, record types, and profiles, so that only some users will see it.
For that, from the App Builder, click on Activation.... Select the App, record type, profile tab and, next, Assign to app, record type, profile. Go through the steps, selecting an option(s) for everything and Save.
That way, you can define a specific Profile to be enabled to view this page version, and assign that profile to the users who need to see this page in another language.
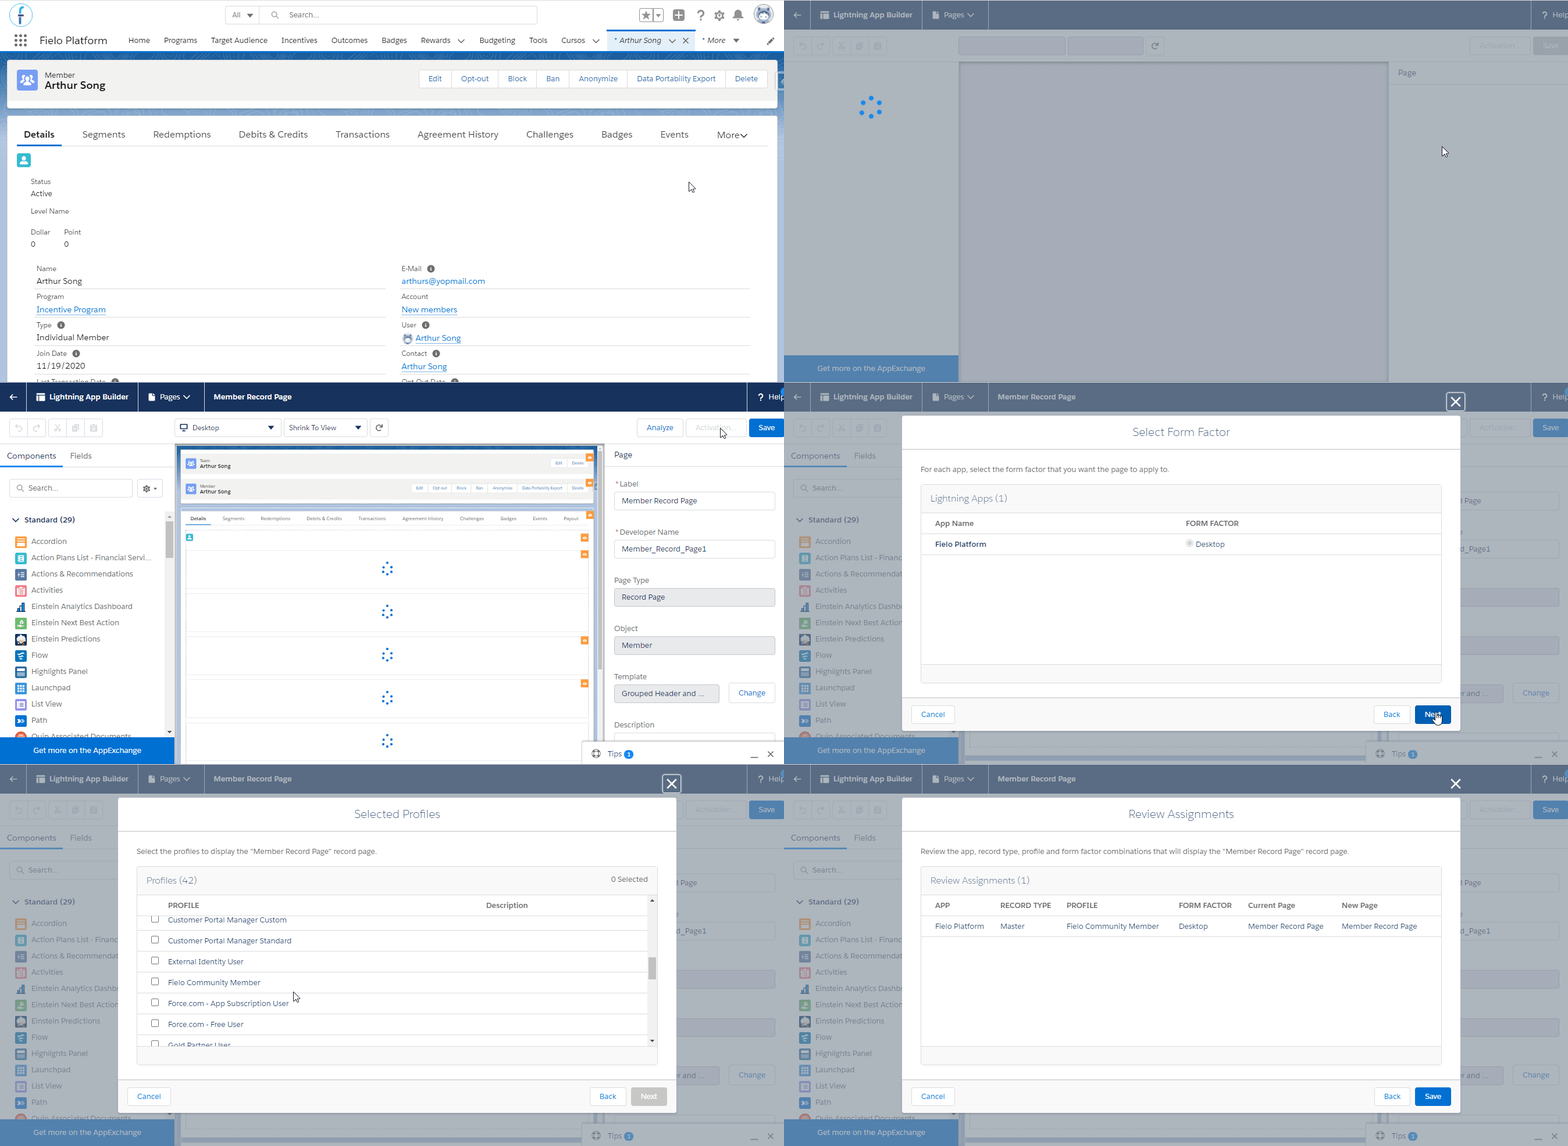
Activating Page
Experience Cloud
When you have an Experience Cloud site (previously known as "community") for members to access your program, keep track of their earnings and rewards redeemed, it is important to offer them a great experience with it - which includes enabling them to see it in their own language. In order to do that, go ahead and create a multilingual site.
After following the necessary steps described in the Salesforce article linked above, you can enter the new language view and change the Fielo Lightning Component's titles, navigation menu items and other texts for the translated version. That's easy to do and members who don't speak English will be able to recognize the components faster.
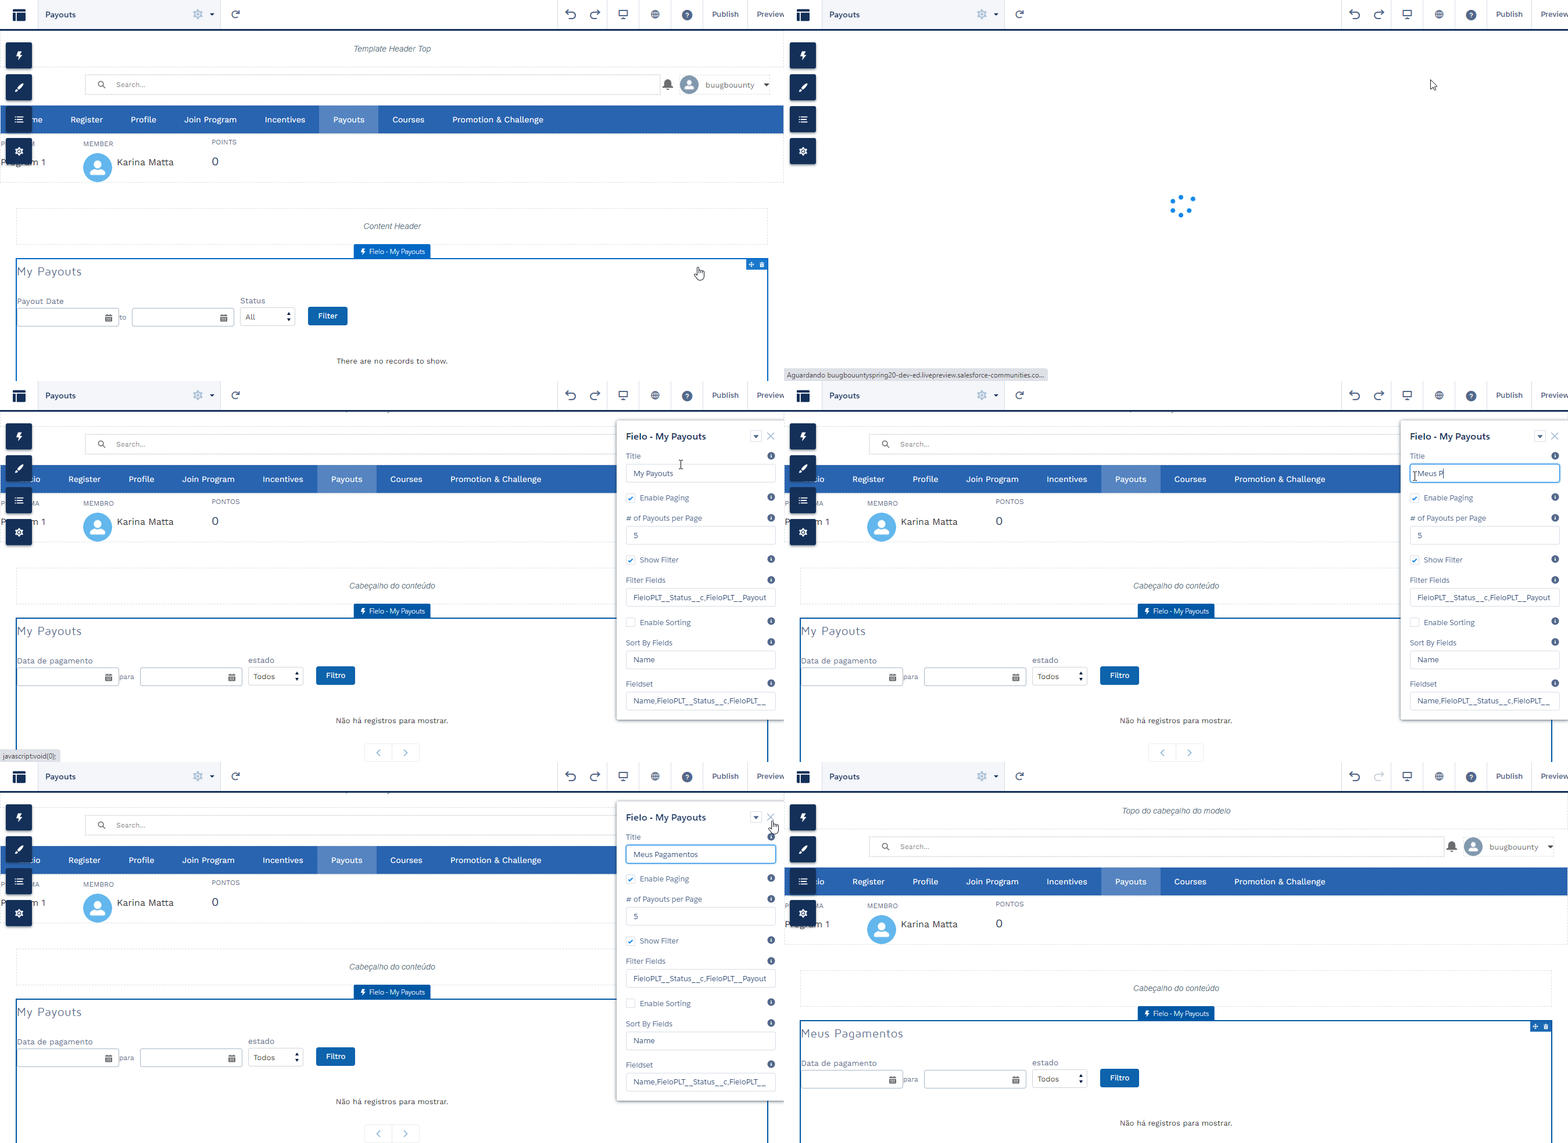
Changing the My Payouts component title
Exceptions
As mentioned before, not every field and label can be translated, but there are only a few of them and you will hardly notice. However, it can be useful to know beforehand which ones they are.
You are able to overview the translatable ones in the exported file that we addressed before. For example, in case you have an Experience Cloud site and you want to know which fields and labels can be translated, you can look for their tag within the # KEY column in the spreadsheet, most of them have this format cc_NameOfLabel such as:
- CustomLabel.FieloPLT__CC_AgreementAccept
- CustomLabel.FieloPLT__CC_Achieved
- CustomLabel.FieloPLT__CC_All
- CustomLabel.FieloPLT__CC_Apply
ReferenceIn order to make part your translation work easier, we provide you with a reference file where you can check all of Fielo's custom labels. You can access it here.
Updated over 1 year ago