
Fielo for a New Salesforce Site
Are you planning to set up Fielo Incentive Automation along with a brand new Salesforce Experience Cloud Site for your members? Fielo's Custom Program Installation Tool gets you there faster!
Our installation tool offers a personalized selection of ready-to-go solutions, including:
- Fielo Incentive Automation
- Fielo Lightning Components for Experience Cloud
- Experience Builder template for Incentive Automation
- Ready-to-use incentives for Salesforce Leads, Opportunities and Orders (Partner Sites only)
- Customer or Partner Community User Profile with Fielo Permissions
- Fielo Invoicing
- Experience Builder Page with Components for Invoicing (if applicable)
- Fielo Learning
- Experience Builder Page with Components for Learning (if applicable)
- GRS Connector
- SendGrid Connector
Salesforce Experience CloudPreviously known as Community Cloud, as of Salesforce Spring '21 release Community is now referred to as Experience Cloud and/or Site.
Before Starting
First thing's first: log into your Salesforce org and make sure you have system administrator permissions. You'll also want to confirm that:
- your org has at least one set of Community User licenses.
- you've enabled Salesforce Digital Experience.
Run the Installation Tool
Click here to access the tool and click Proceed to login. Log into your org and give access permissions to the tool, as prompted.
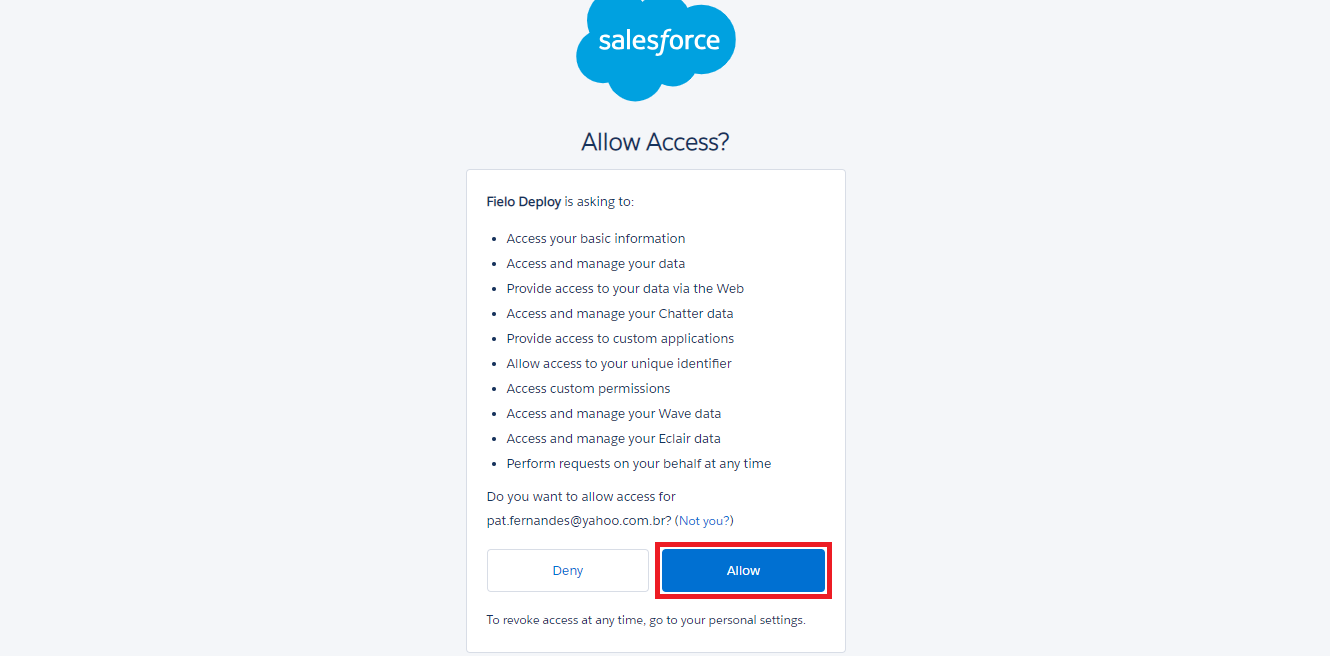
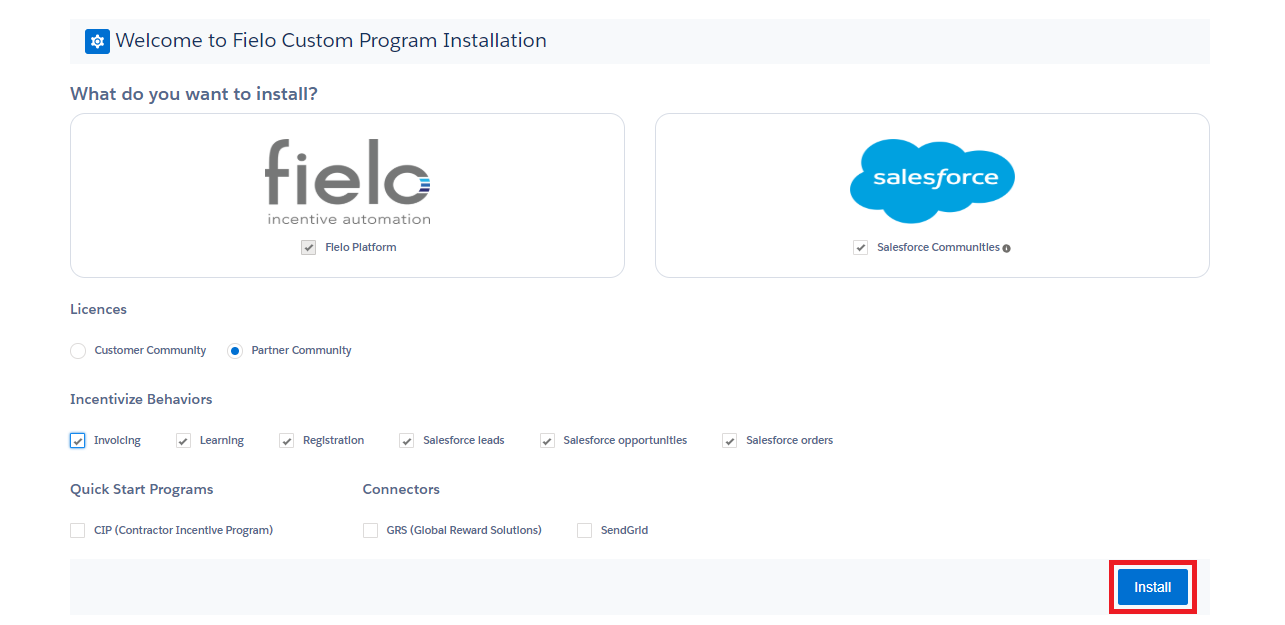
After allowing access, you'll be directed to the installation tool menu, where you can select which Fielo solutions you want to install. Check Salesforce Experience Cloud Sites (Communities) and select whether you'll use a Partner Site or Customer Site.
Partner Site (Community) vs. Customer (Community)Not sure which one to choose? Check out this video guide to learn more.
You can also select the behaviors you want to incentivize. When you're ready, click Install.
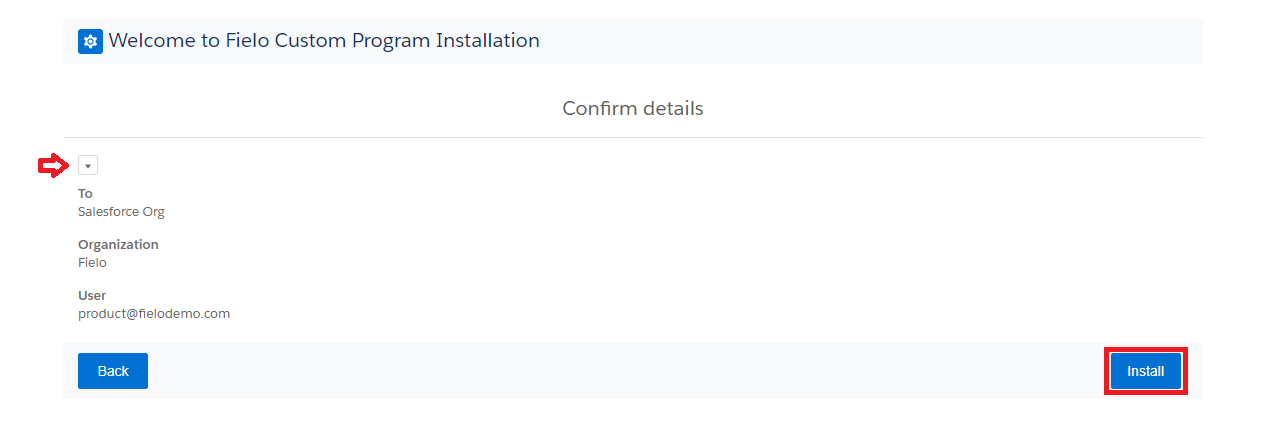
On the confirmation page, you can double check your org details and, by clicking on 🔽, the packages and repositories that will be installed. If you're satisfied, click Install.
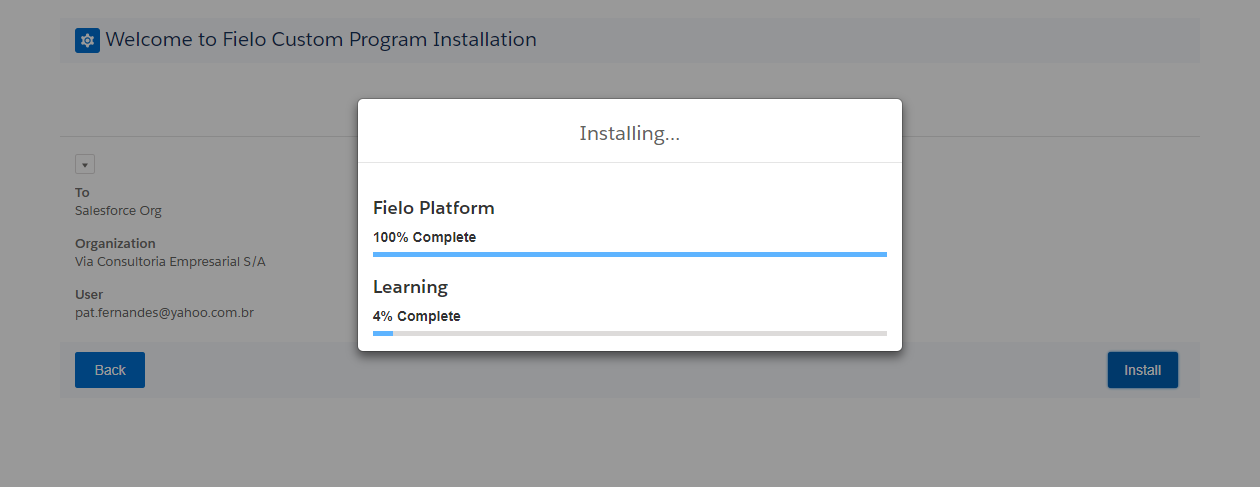
You'll now see your installation progress and be notified when it's complete.
Setting up Domain
In case you created your production ORG in Salesforce Winter ’21 release and later, you can skip this step. The newest ORGs have a My Domain by default.
Go to Setup from the top right. Within the Quick Find menu search for "domain". You will see the category Company Setting and within that, click on My Domain.
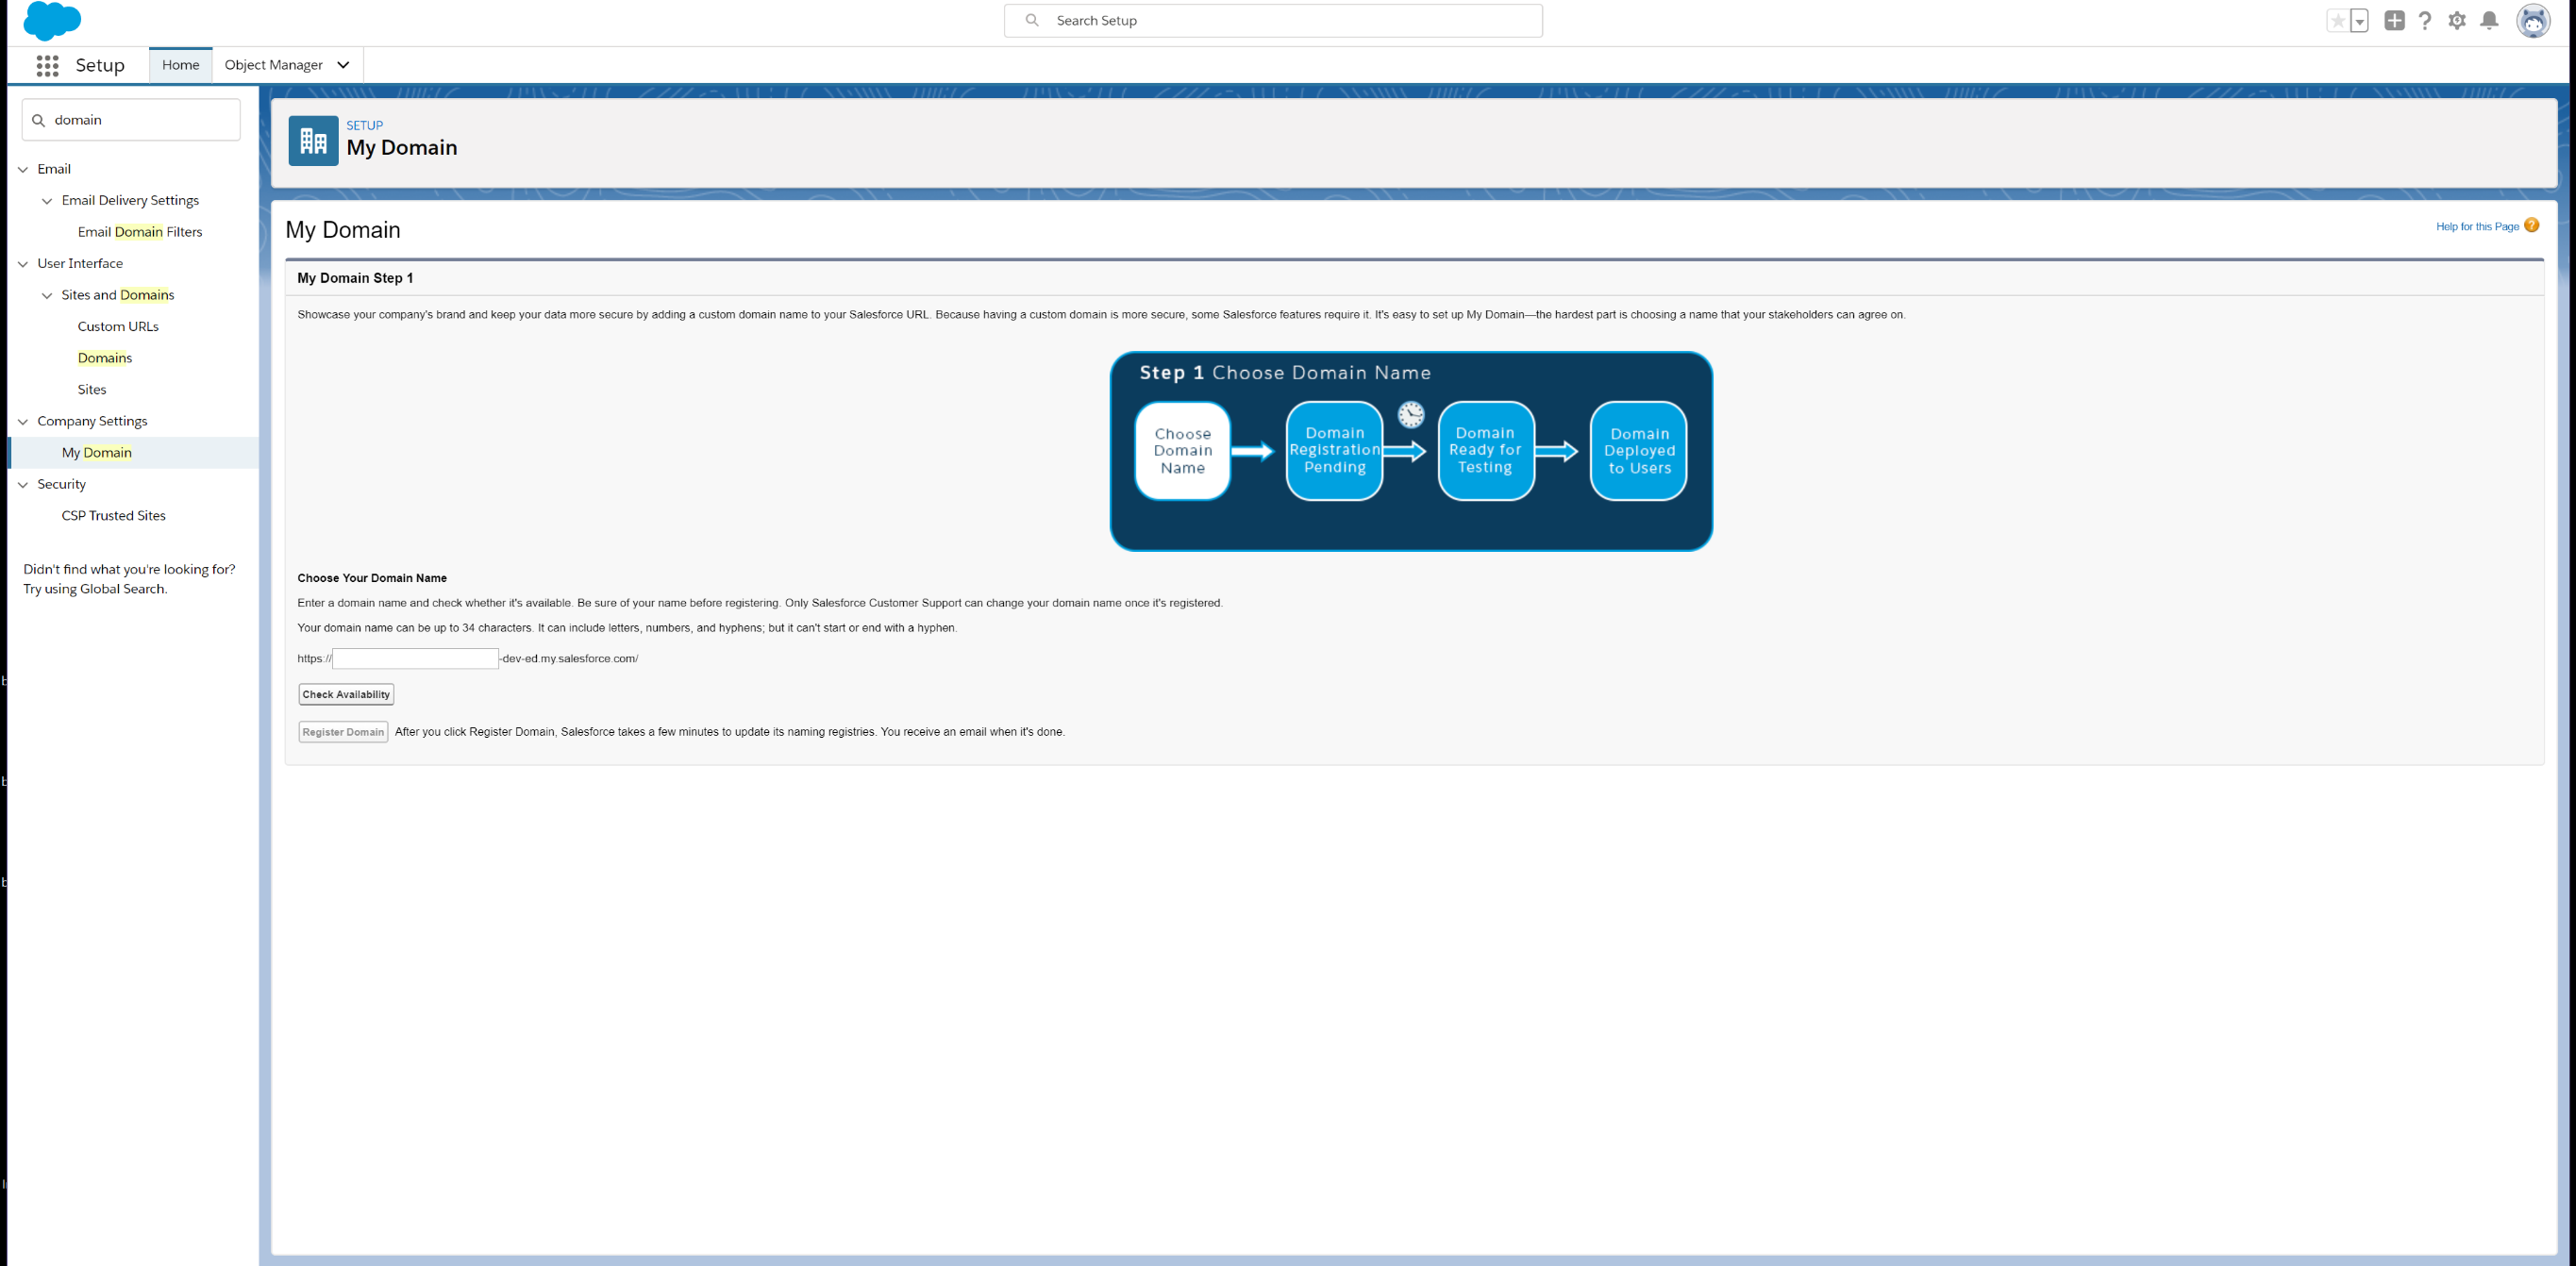
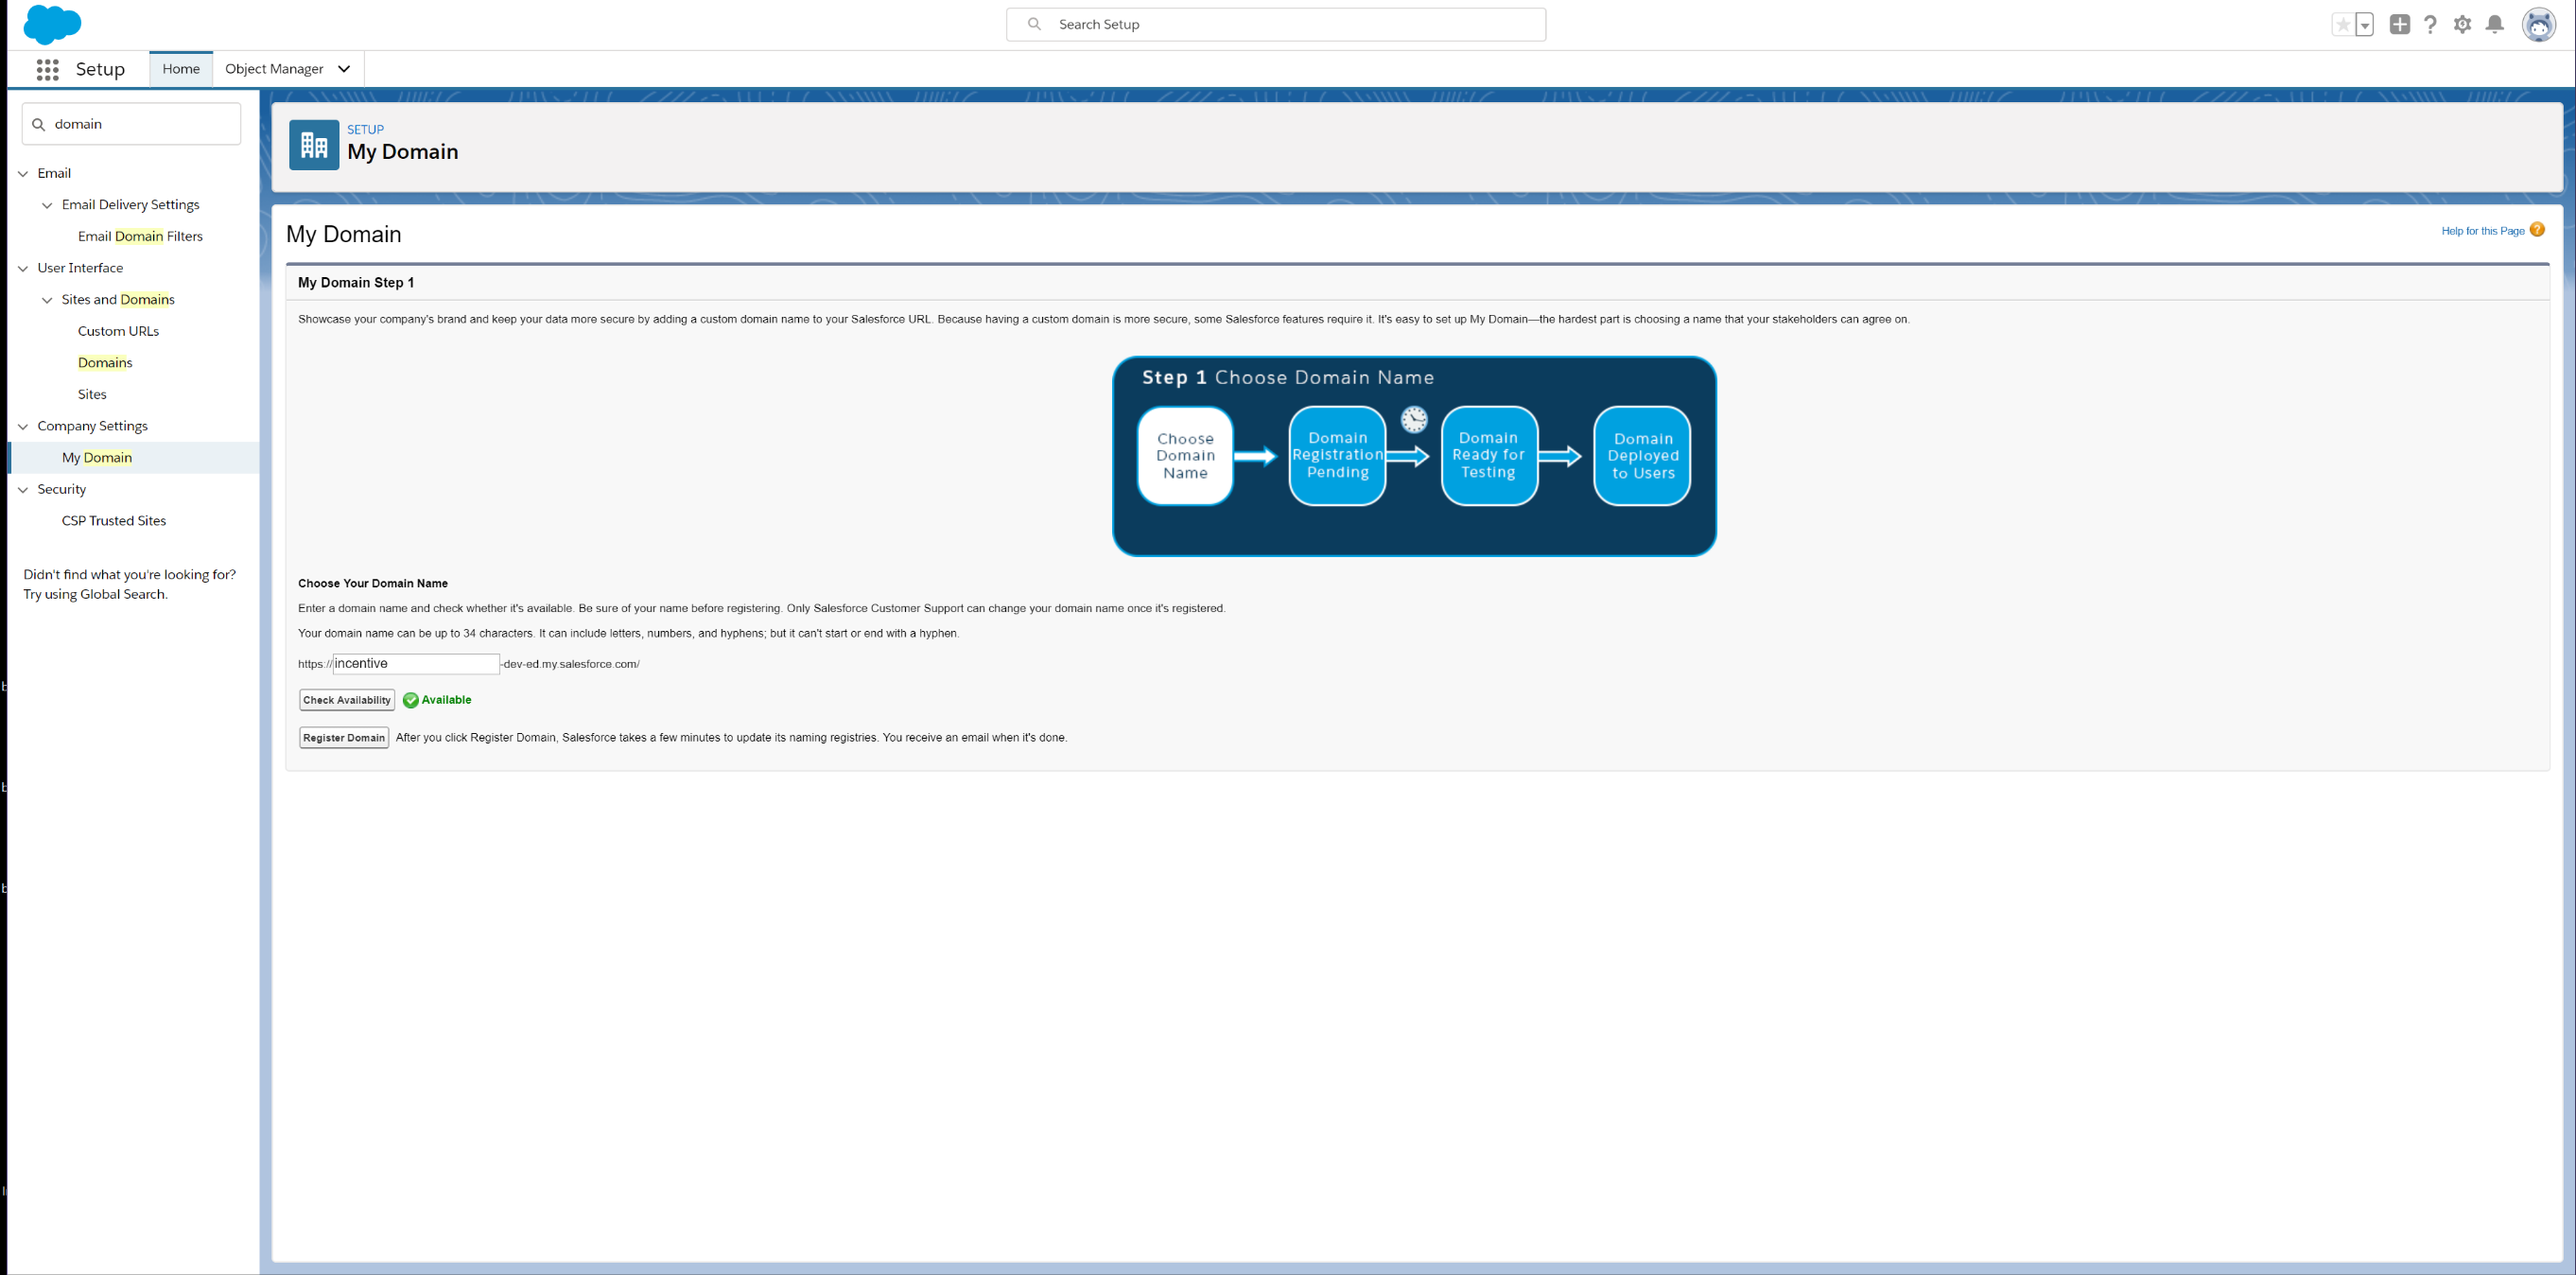
It will ask you to choose your domain name so go to the input field and enter a domain name that works for your program. Once you have entered a name, click the Check Availability button to make sure it able to be used. Once you have an approved domain name, click Register Domain.
The process may take a few minutes to complete but you will receive an email titled "Salesforce domain ready for testing" once your domain has been made. You can either login from the email and go back to the domain section or refresh the original page if it is still open. You will be directed to Log in to test your domain before deploying it to your users.
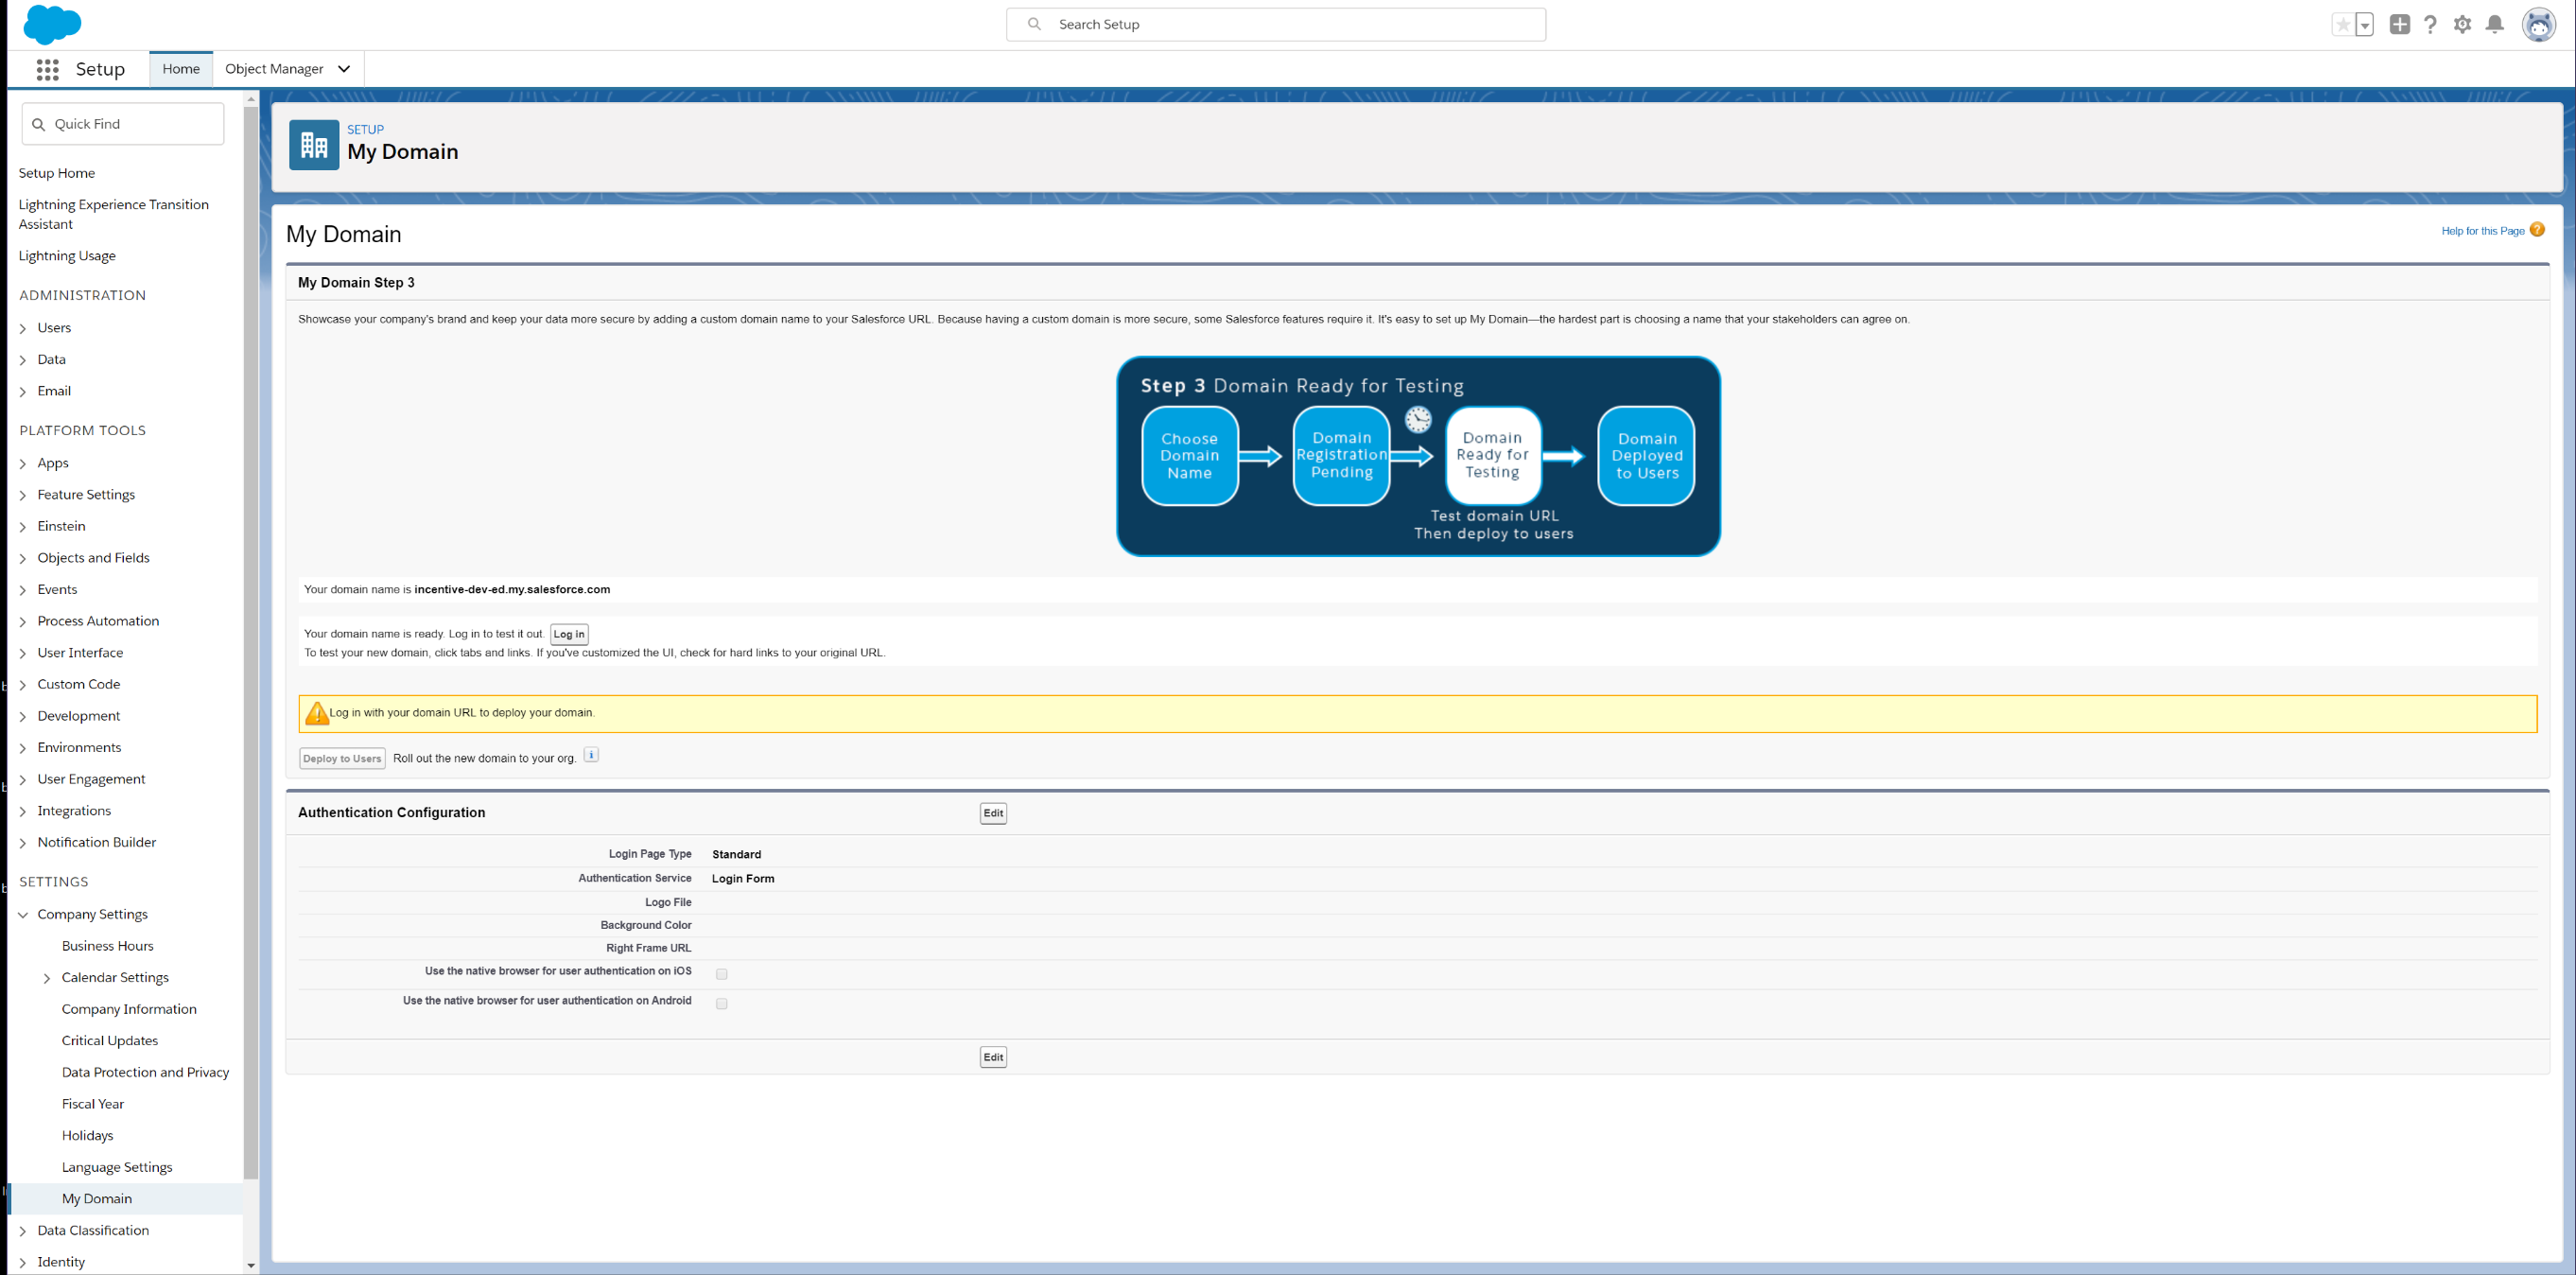
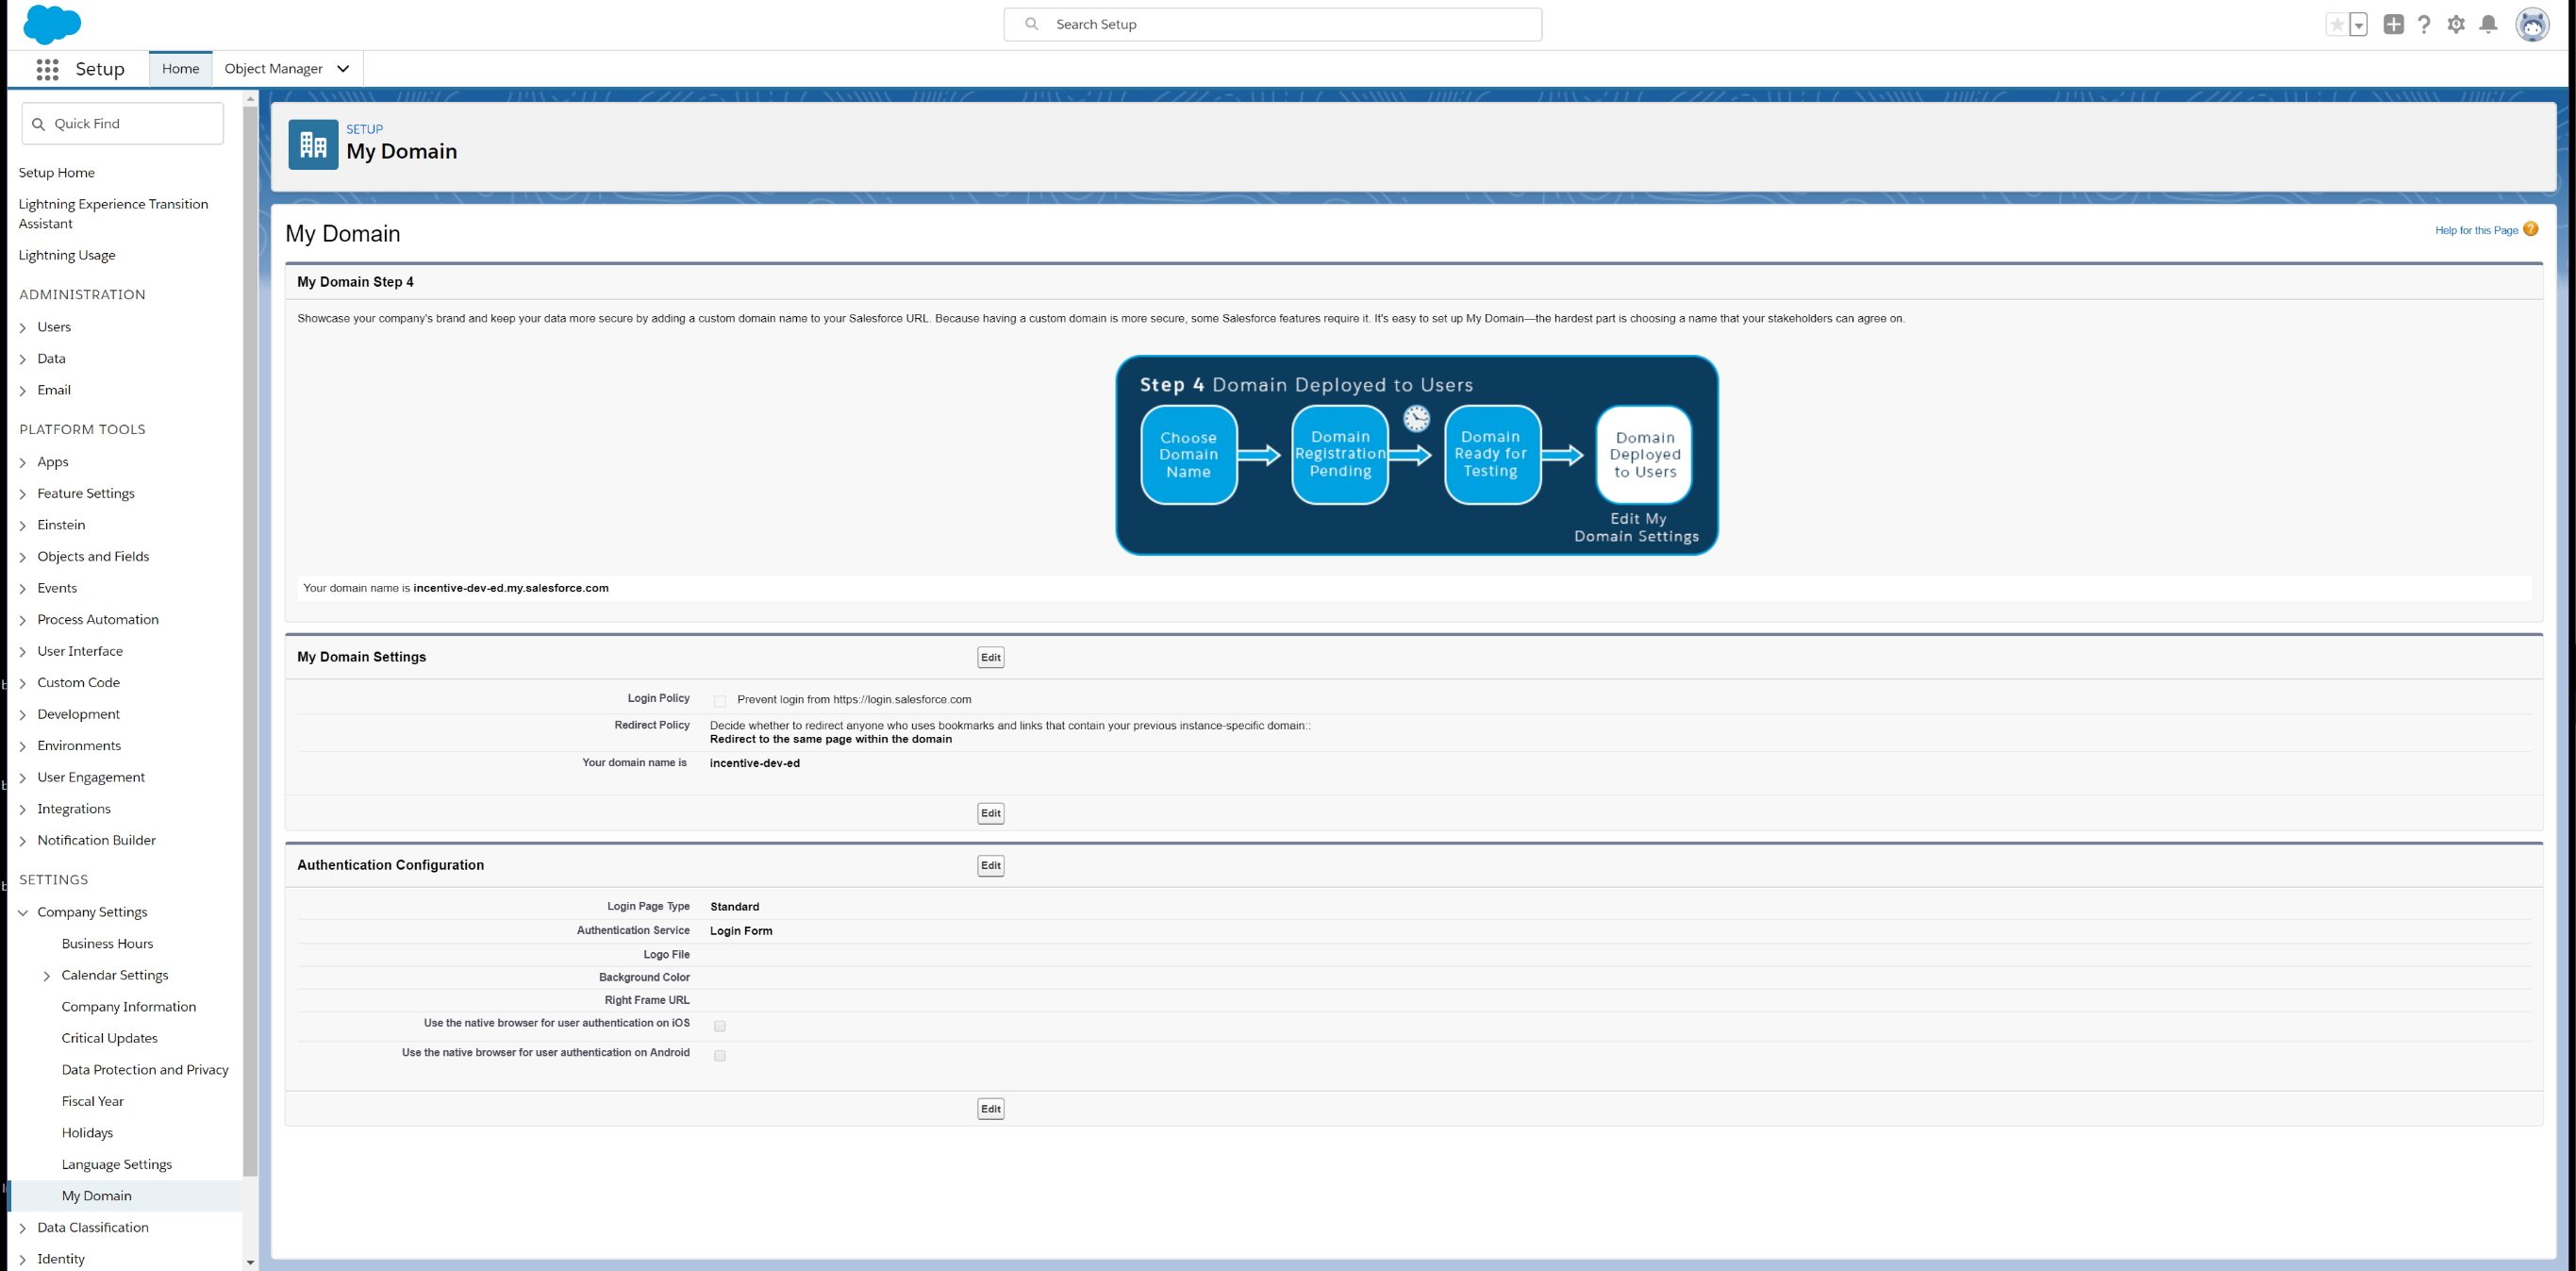
Once you have tested our domain, you are now ready to deploy to your users. The final step is to click Deploy to Users and you have now created your domain.
Once you have tested our domain, you are now ready to deploy to your users. The final step is to click Deploy to Users and you have now created your domain.
Ensure Email Deliverability
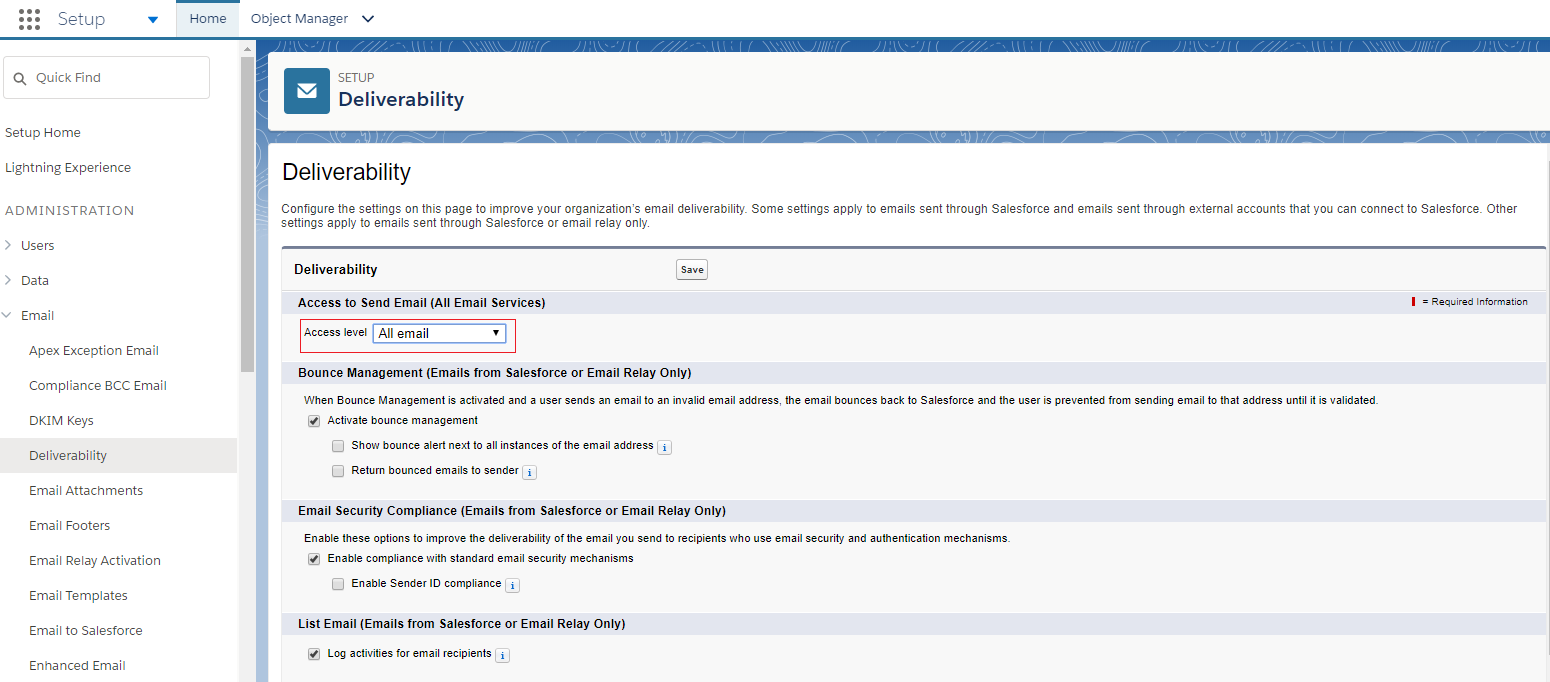
From Salesforce Setup, navigate to Deliverability. Make sure the e-mail access level is set to All email.
Enable Libraries
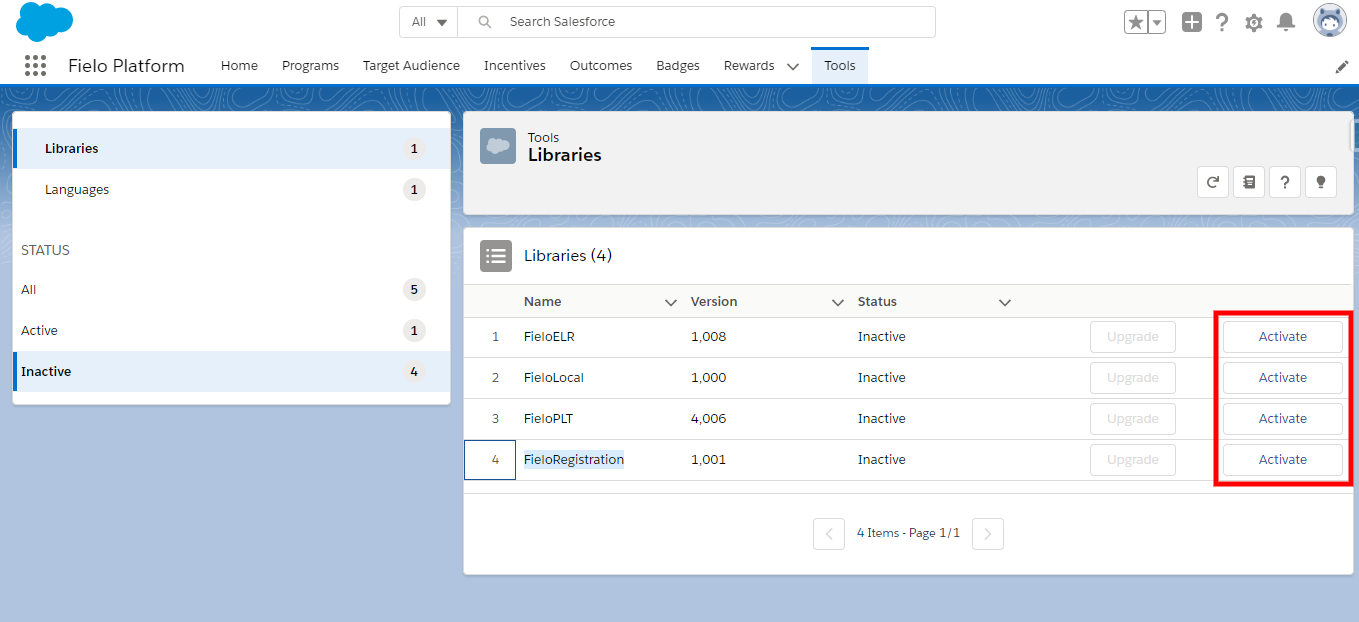
After installing Fielo, you'll want to activate our full feature set by enabling the FieloPLT library and any other app or connector libraries that you selected, such as FieloELR (Learning), FieloPRP (Invoicing), FieloOpportunity, etc.
Click on the App Launcher and choose Fielo Platform. On the Tools tab, go to the Libraries section and hit Activate for all libraries that are set as Inactive.
Add App Tabs (Learning and/or Invoicing Only)
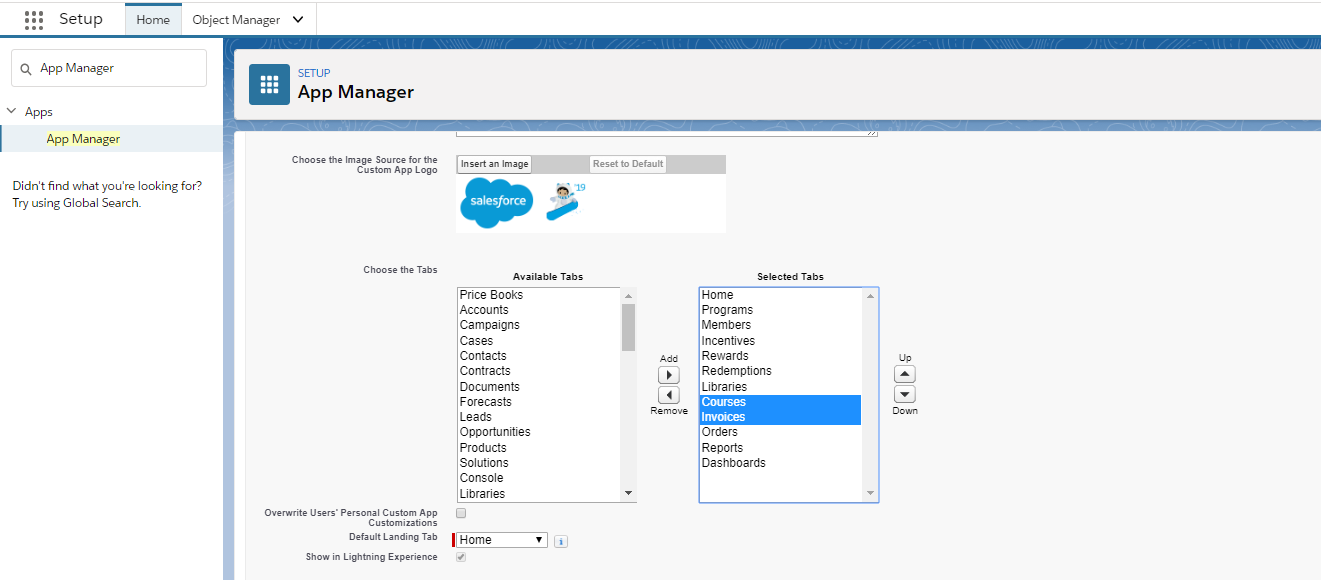
To access Learning and/or Invoicing, you'll need to add tabs to Fielo Incentive Automation.
From Salesforce Setup, search for and select App Manager. In the row corresponding to Fielo Platform, click and choose Edit. Then select Courses and/or Invoices from Available Tabs to add them to the Selected Tabs list.
Create Your First Program
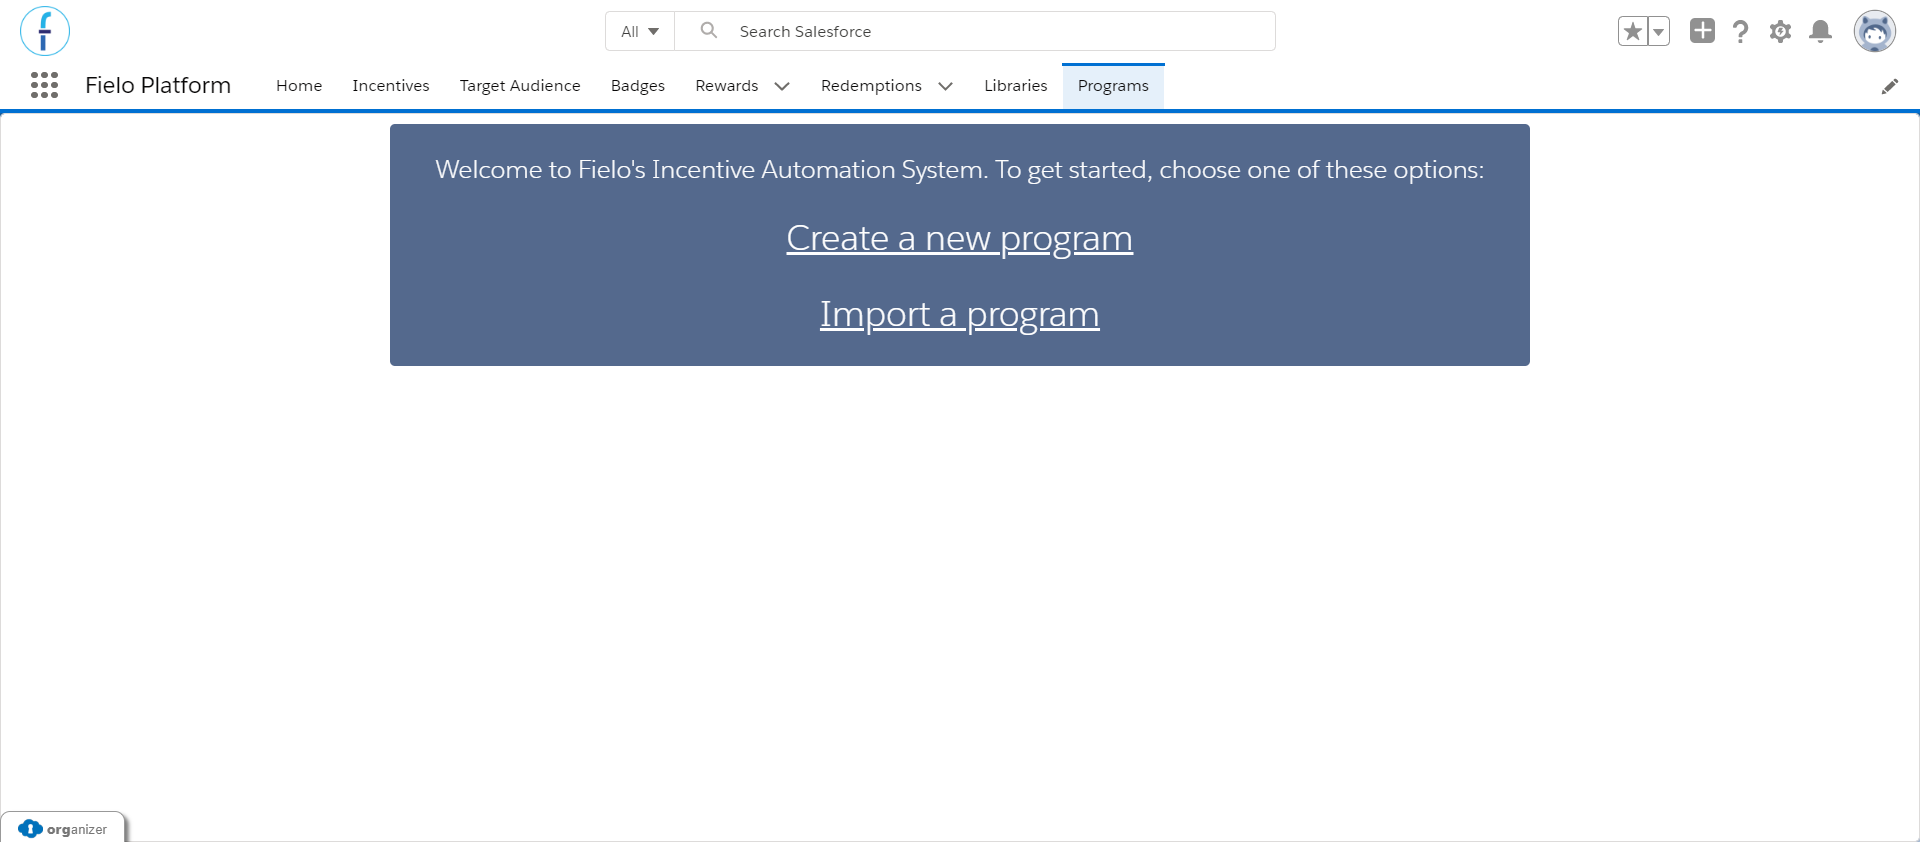
Back in Fielo Incentive Automation (Platform), let's go ahead and create your first incentive and loyalty program! Just click the Programs tab and choose Create a new program.
Then, follow the instructions for Creating a Program.
Create a Site
You can get a quick introduction to Sites in the Community Cloud Basics Trailhead module.
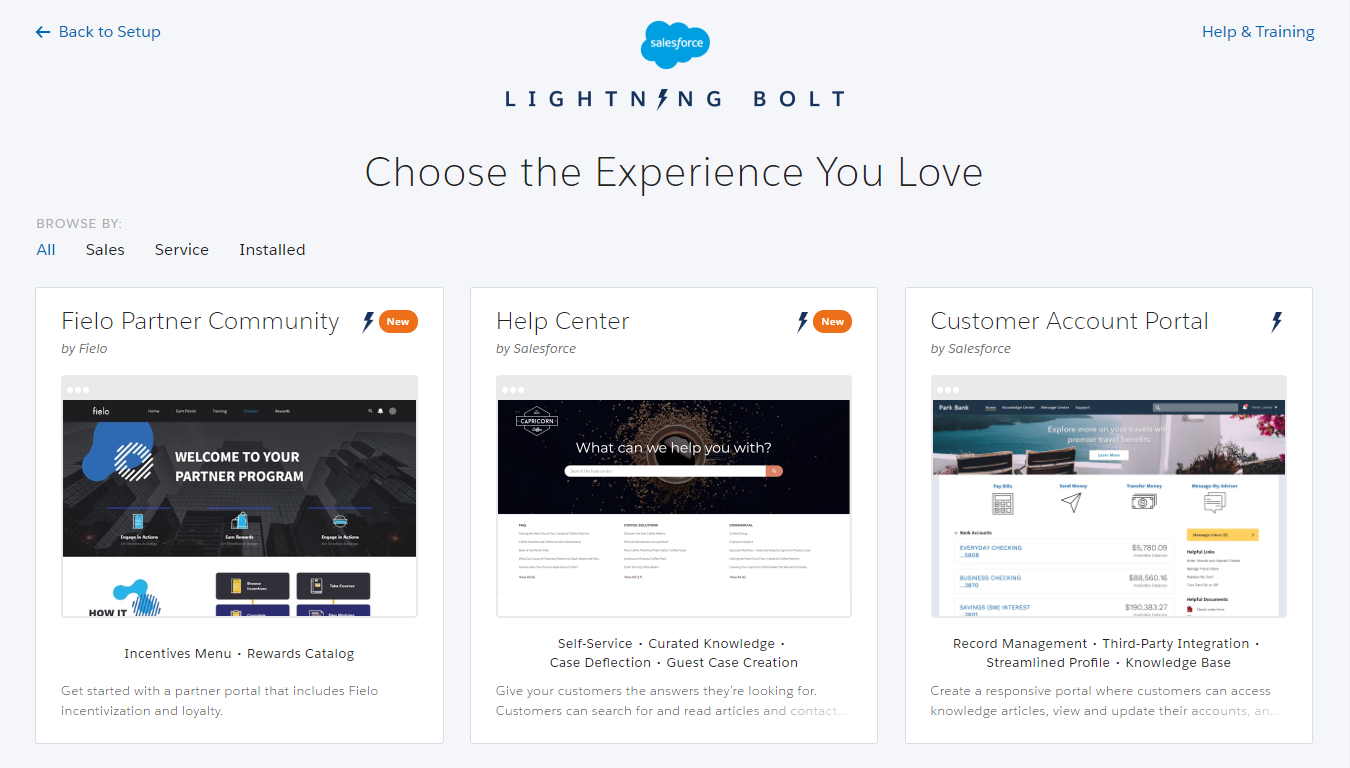
When you're ready, go ahead and create a new site. Feel free to use one of our tailor-made templates to jump start your build-out!
Make sure to read our guide on how to build a an experience cloud site too. There are a few important steps to be followed in order to use Fielo Lightning Components in your site.
Add Lighting Components
Whether you created your site from a Fielo template or a Salesforce template, you can go ahead and add any additional Lightning components you want to your site.
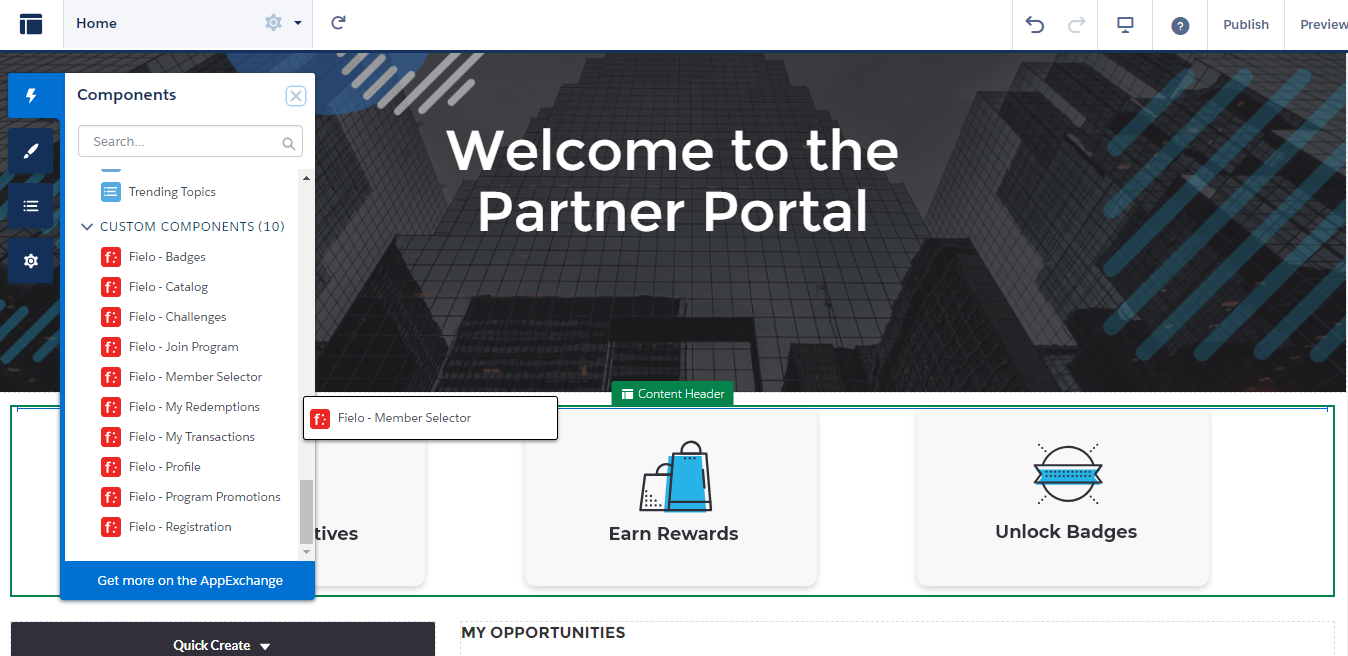
Check out what Fielo Lightning Components you can use in Experience Cloud Sites!
Configure Registration
If you'll be using Fielo's Registration component, set it up as follows:
Configure Courses (Learning Only)
If your installation included Learning, you can go ahead and set up the My Learning suite of components in your Site.
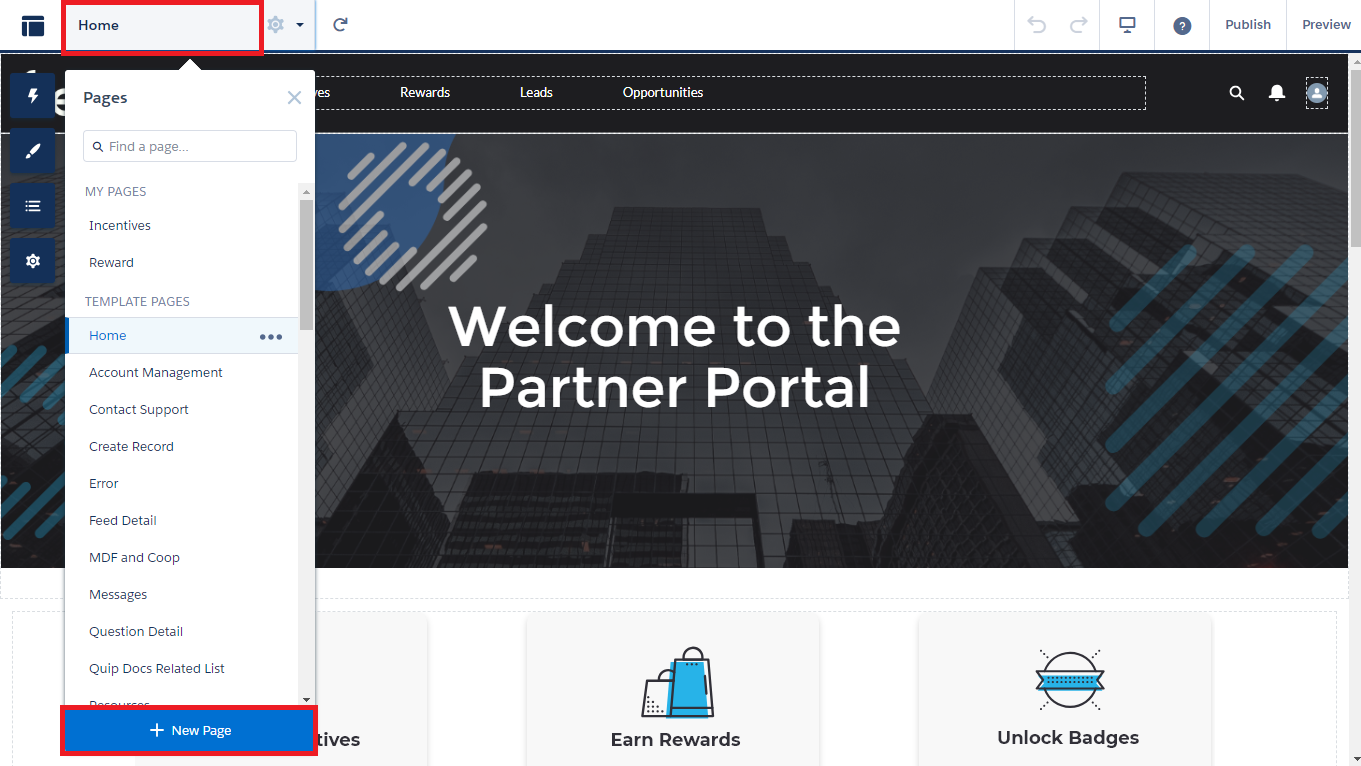
From Builder, access the page menu and select New Page.
Select Object Pages.
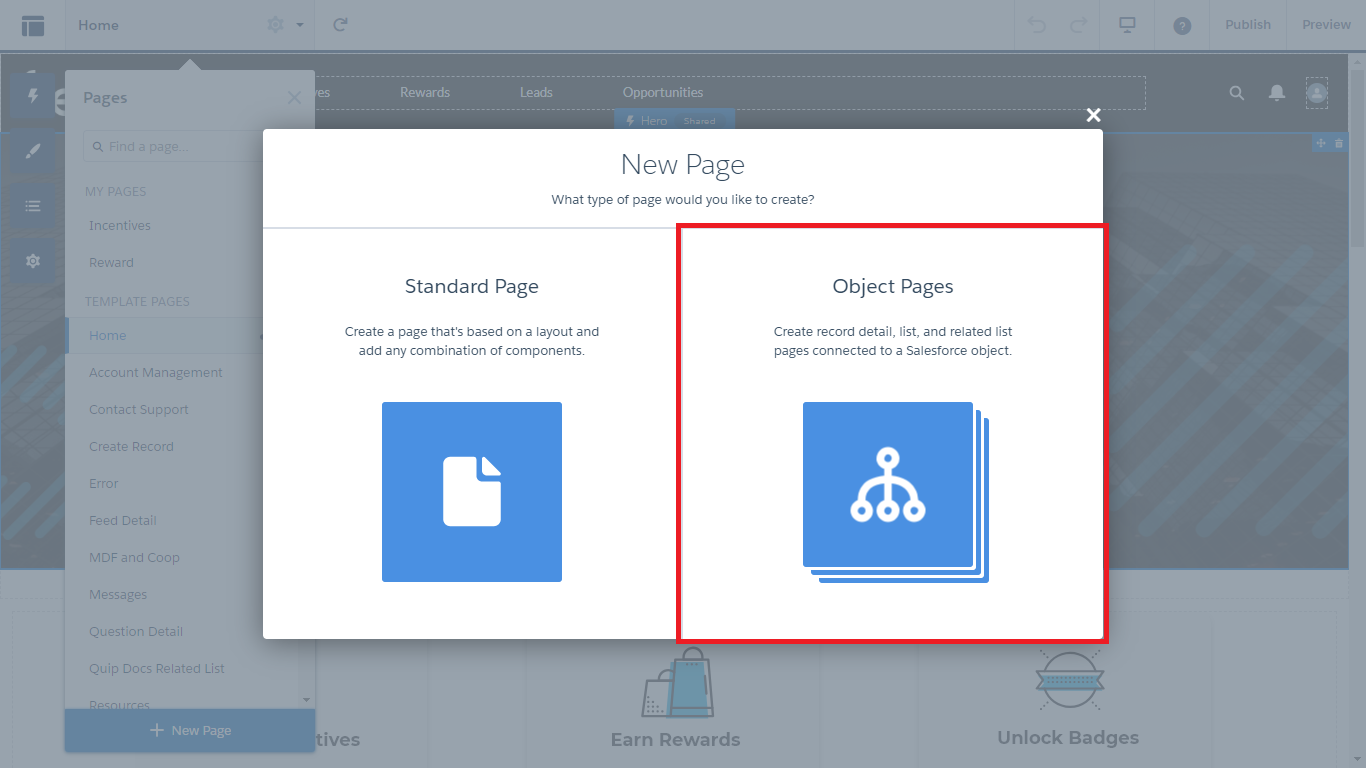
Choose Course and click Next.
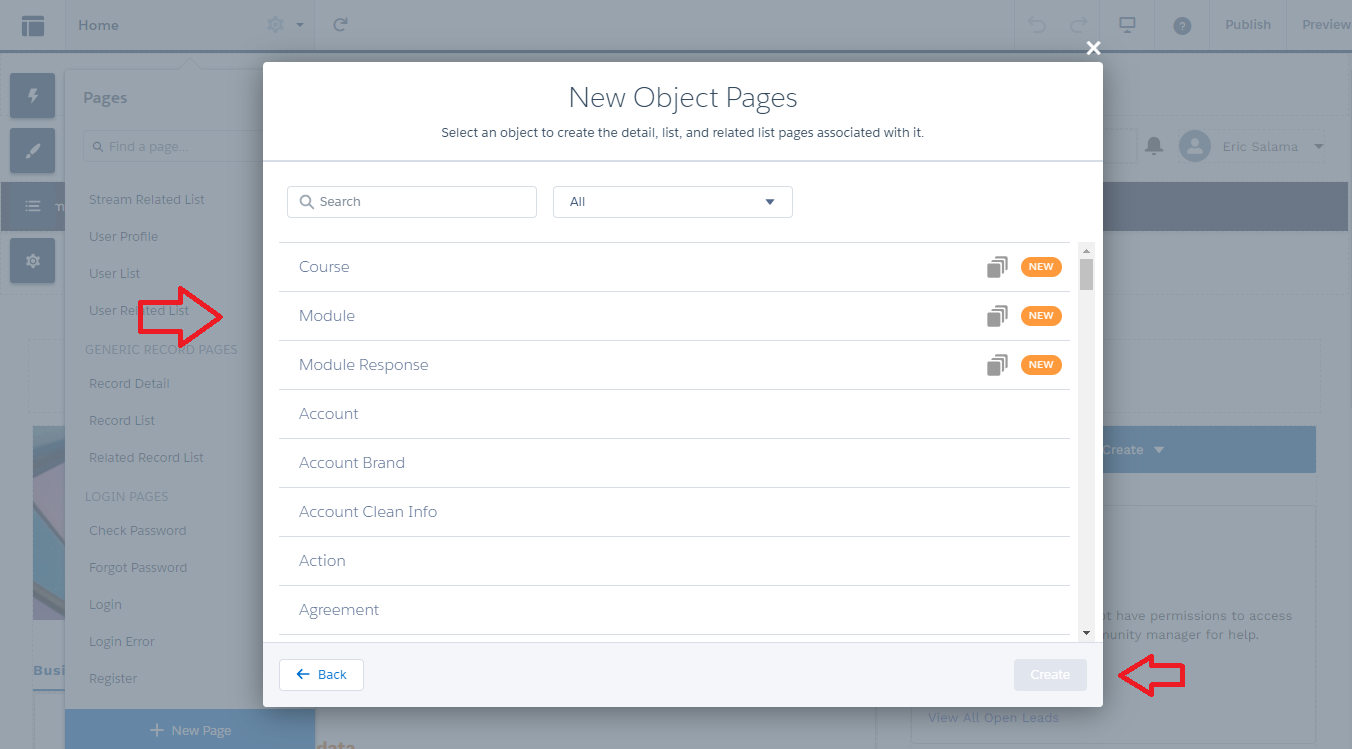
Follow the remaining prompts to create the object pages. Then, repeat the above steps to create the Module and Module Response object pages.
Finally, add Courses to your menu so that your members can access them.
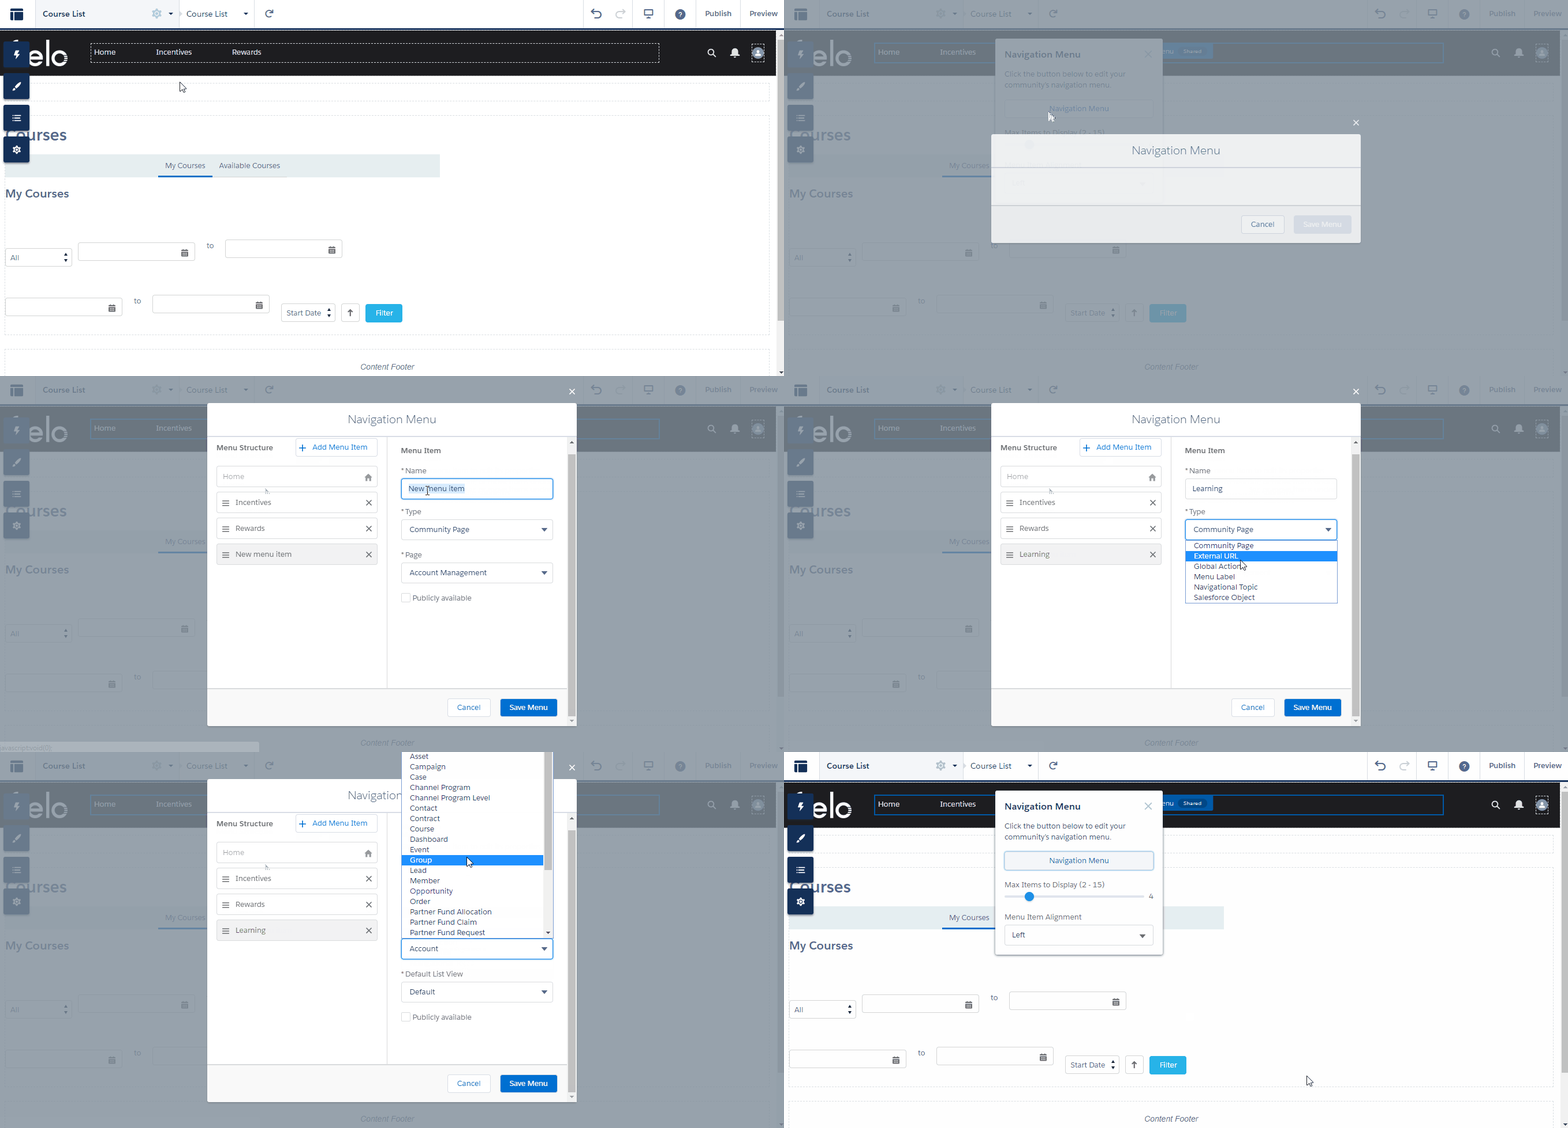
Whenever you're ready, check out Configuring My Learning to see how you can customize the My Learning components.
Configure Invoices (Invoicing Only)
If your installation included Invoicing, you can go ahead and set up My Invoices in your Site.
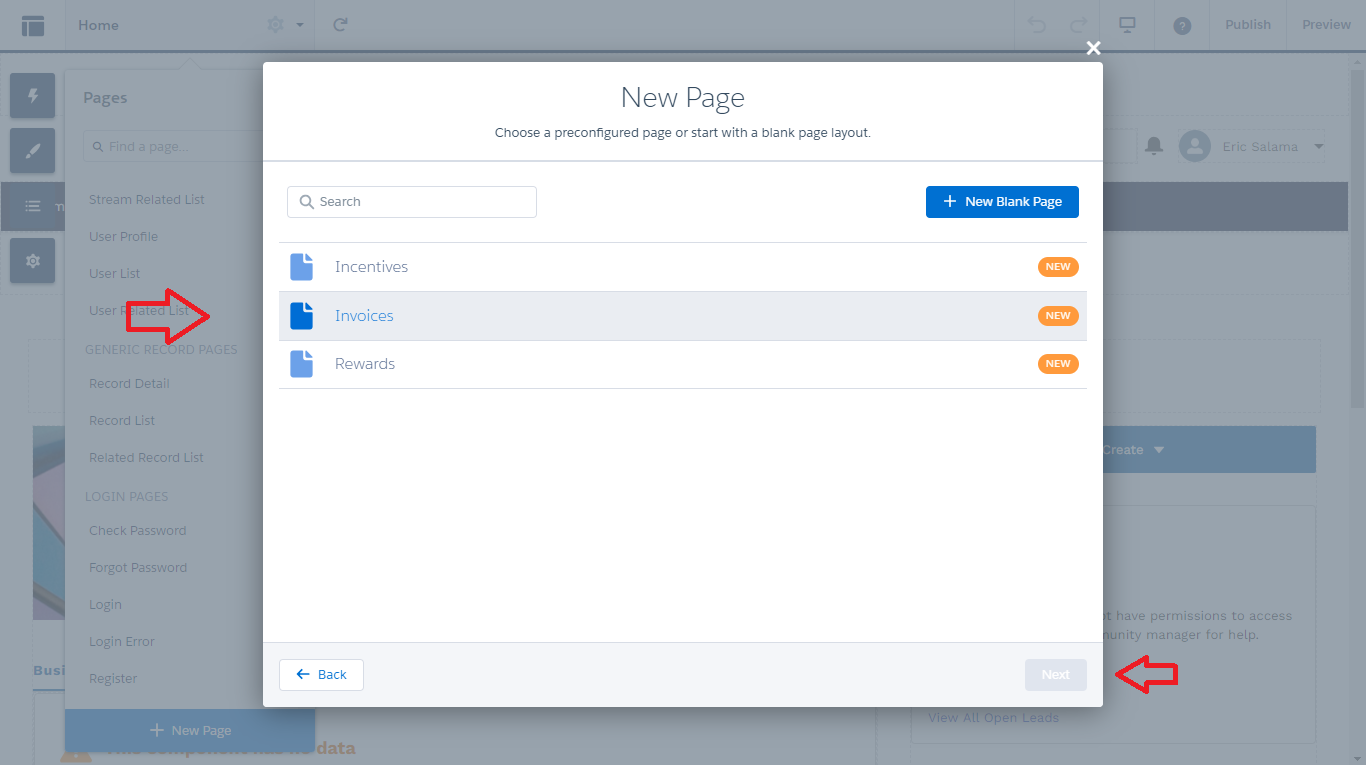
From Builder, access the page menu and select New Page.
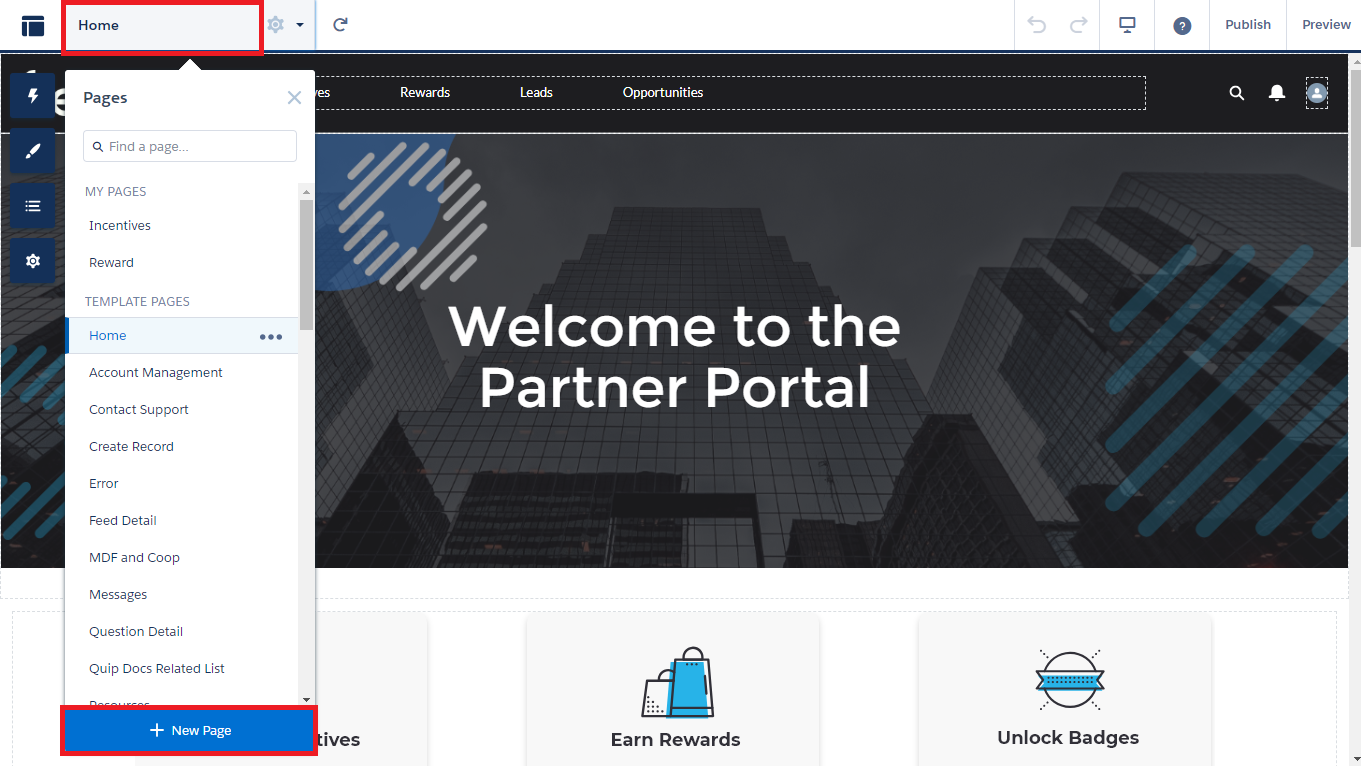
Select Standard Page.
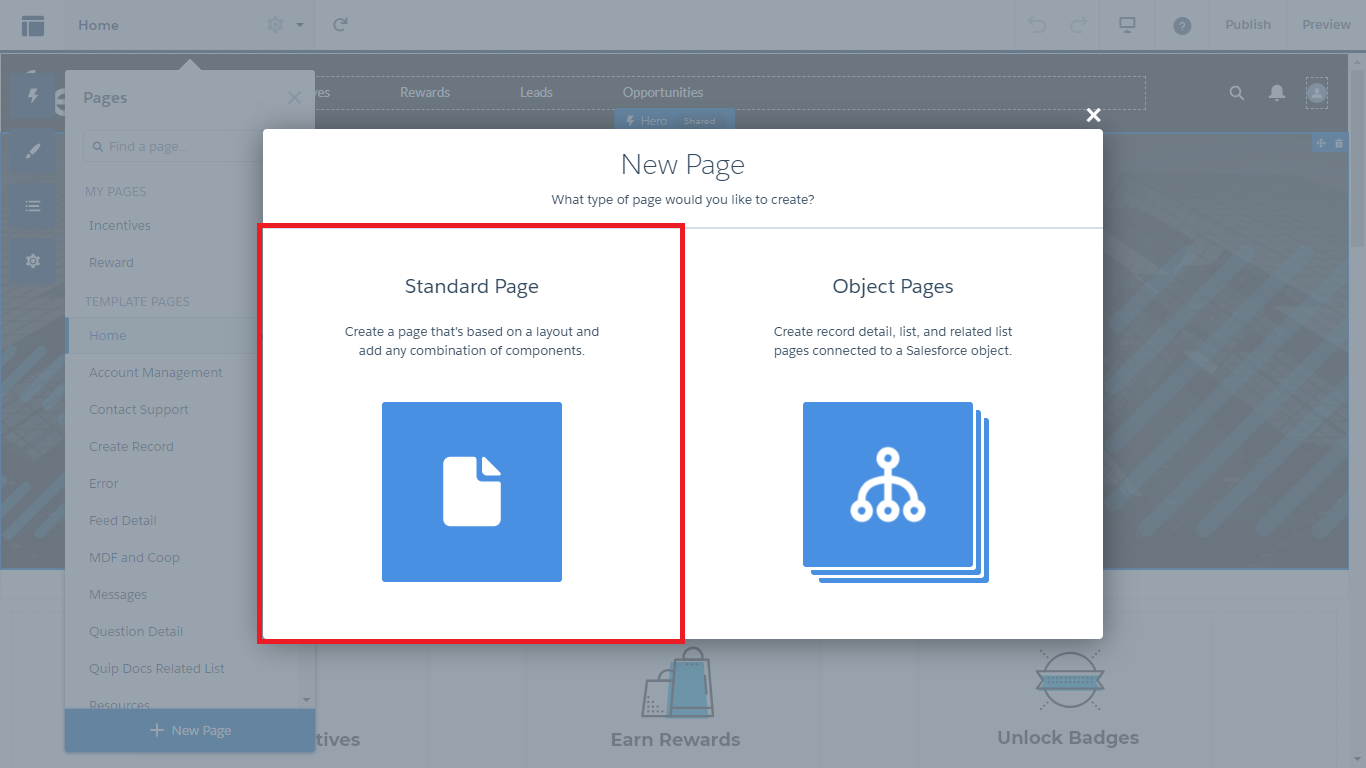
Choose Invoices and click Next.
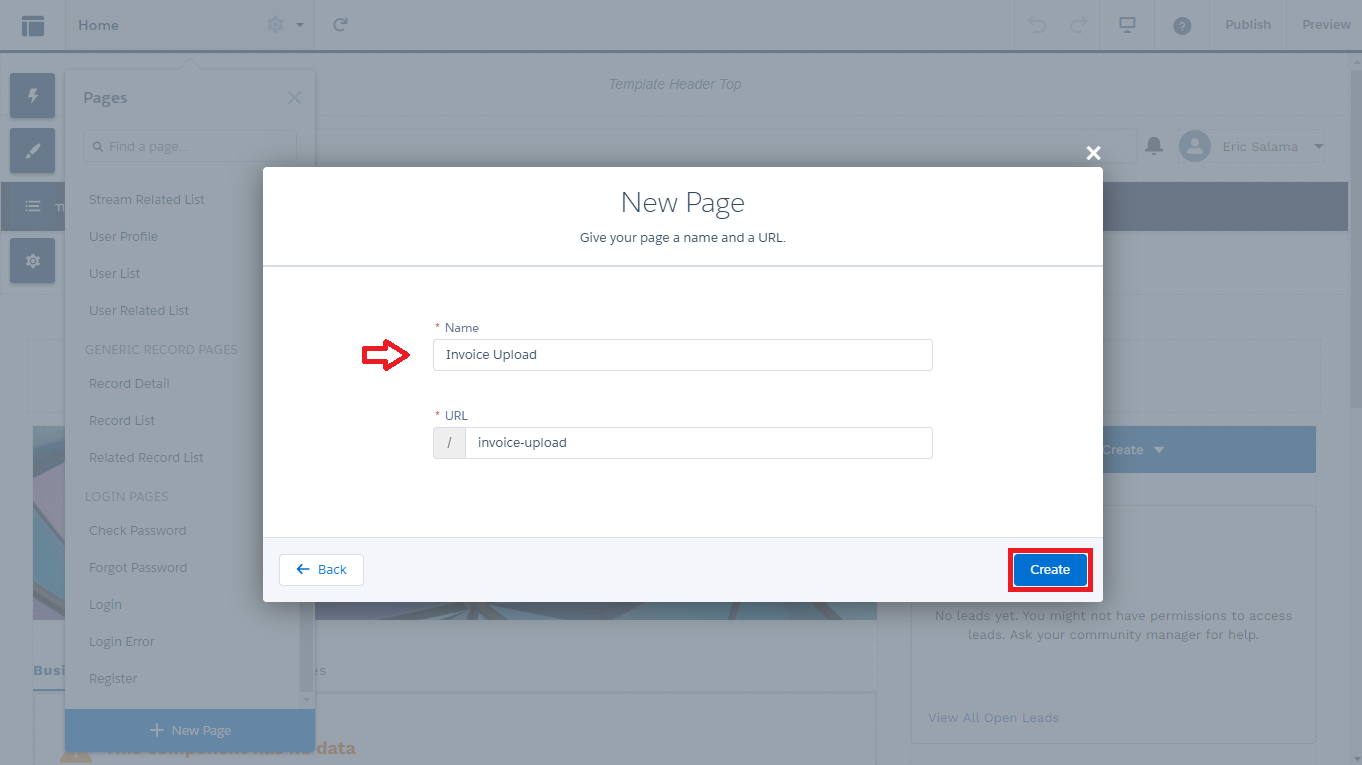
Give your page a name and click Create.
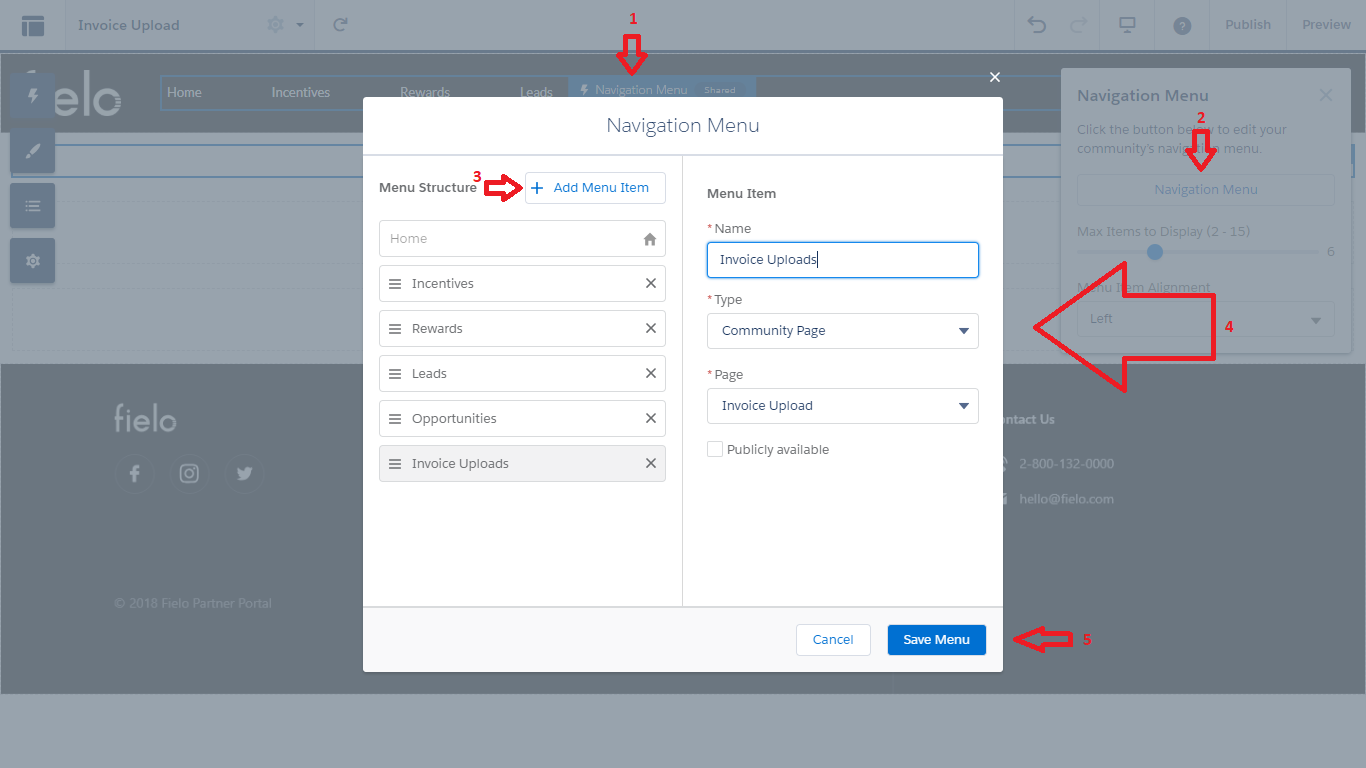
Don't forget to add a menu item so that your members can access your new page!
Whenever you're ready, check out Configuring My Invoices to see how you can customize the My Invoices component.
Activate Your Site
Once you've finished building out your incentive and loyalty program and set up all of the content on your Site, you can take your Site live. See Activate Your Site for details.
Updated over 1 year ago