
Join Program
Where the Member journey begins
Join Program allows users of a preexisting Salesforce Experience Cloud Site to join a program. You can also use it to let registered members enroll in any other programs that you want to make available to them.
Who It's For
Join Program is for loyalty admins who want to include loyalty and incentives in a preexisting Salesforce Experience Cloud site. With this component, registered users can join a program and begin engaging with it in their site via Fielo Lightning Components.
It's also for admins wanting to offer existing program members the chance to join and engage with additional programs within the same site.
What It Does
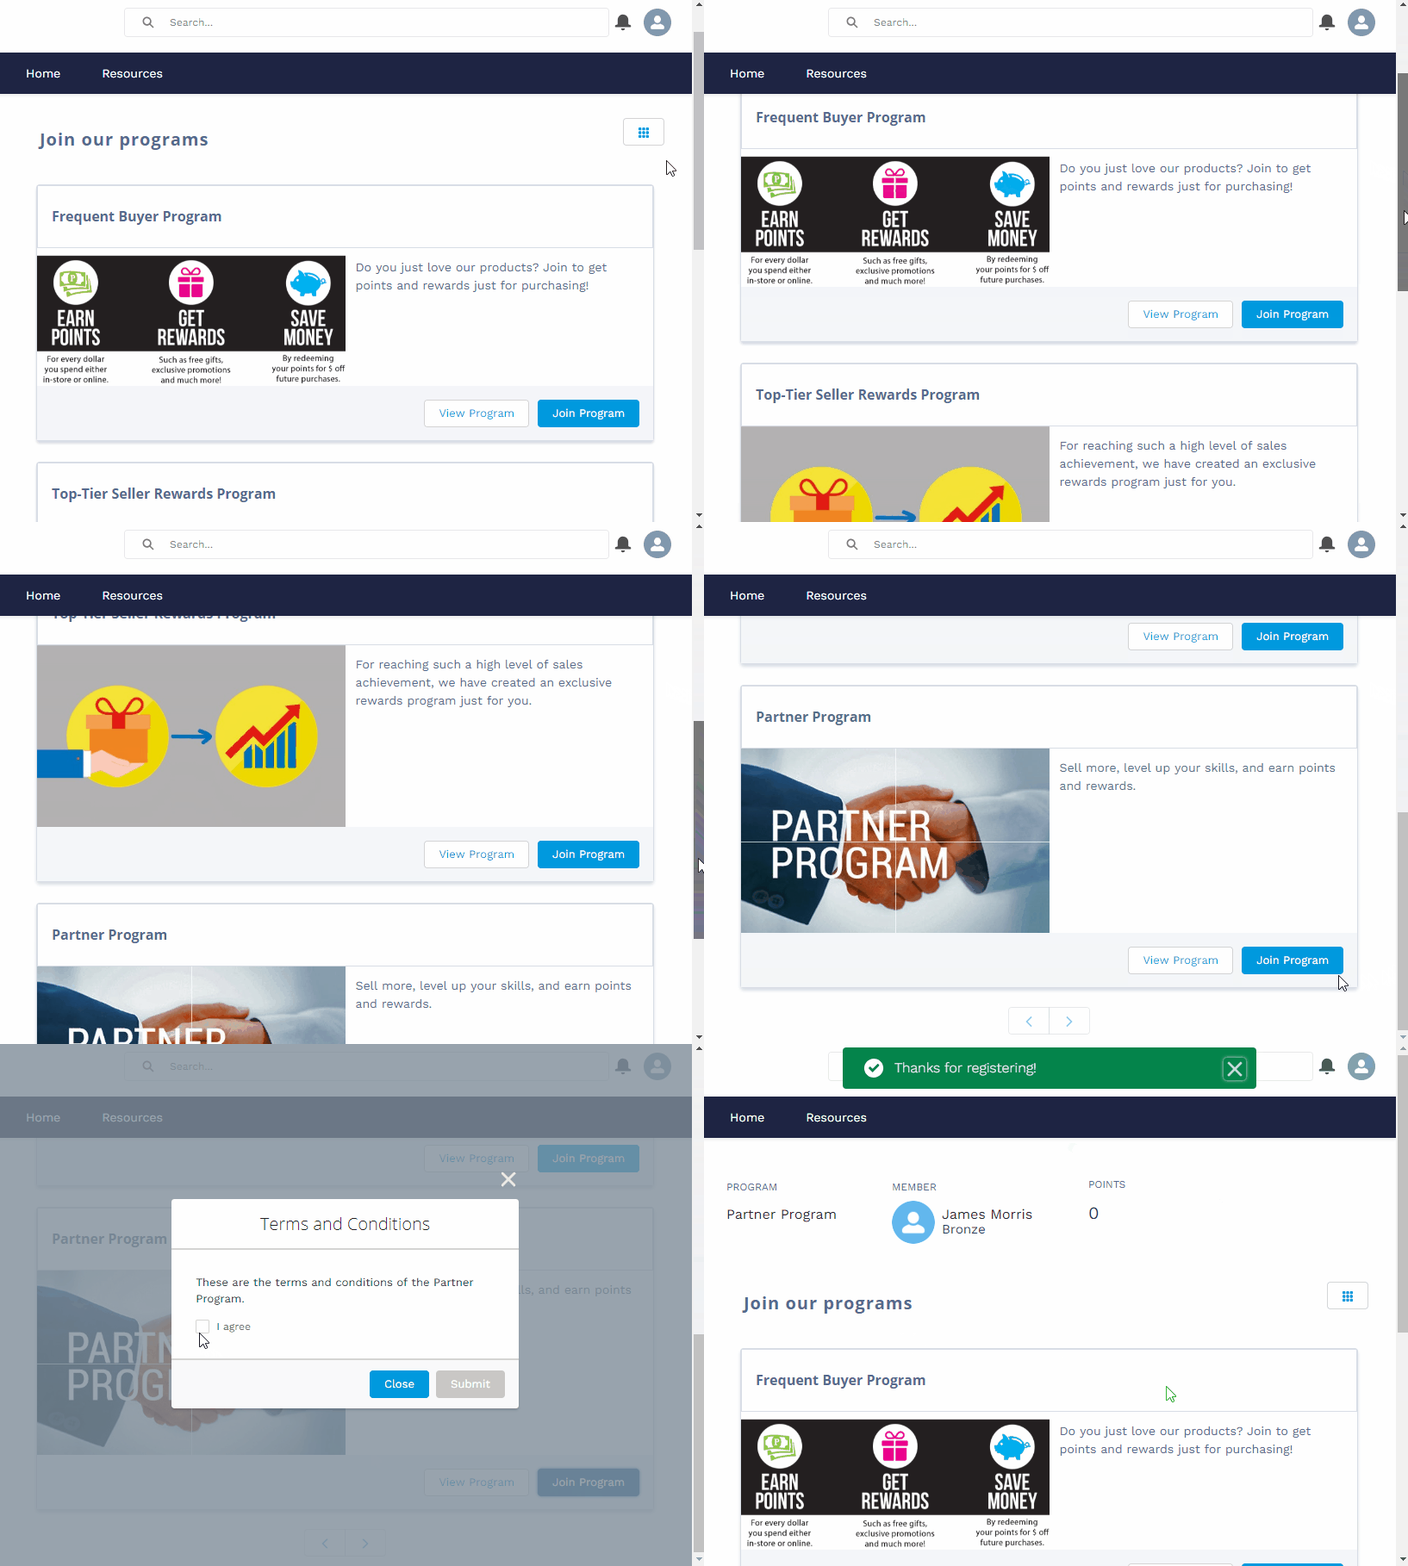
Join Program lists the program(s) available for a community user to join. The user selects the program they want to join from the menu and clicks Join Program.
Once the member accepts the program terms and conditions, a confirmation message appears on the screen and a welcome email is sent to the user. The new member will now be able to begin interacting with their program.
How It Works
When a Community user joins a program, an individual member is created in the program that the user has selected. In order to create the member it is necessary to connect the Community user's contact account and the user with the member. Fielo will use the user's email and search the contact database for an identical email. If this email exists, Fielo will establish a relationship between this contact / account and with the member If the email is not found, Fielo will create a new contact and then establish a relationship with the member.
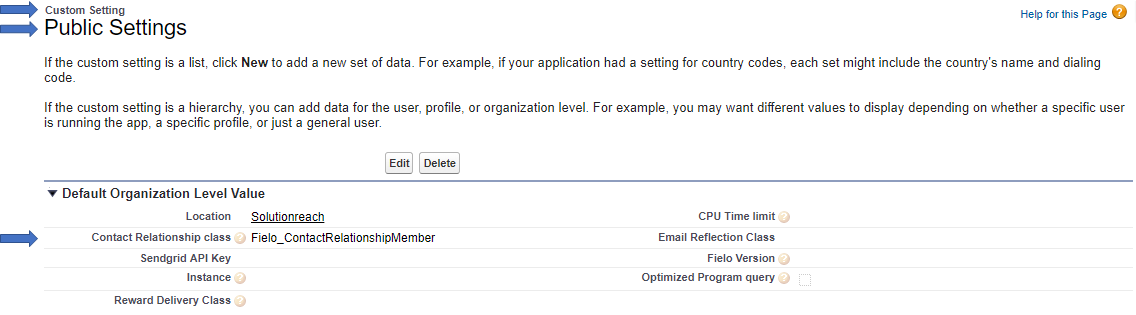
If this standard logic doesn’t apply to your business, it's possible to be changed. All you need to do is create your Custom Class containing the desired logic and do the following:
- Go to Custom Settings
- Select the Public Settings
- Click on Manage button
- Click on Edit and replace the class name in the Contact Relationship class option.
Before Starting
Before getting started with Join Program, you'll need to make sure some things in your org are in proper order.
Give Community Users Fielo Object Permissions
If you're using Join Program to enable preexisting Community users to join their first Fielo program, you'll want to make sure they have the appropriate object permissions and field permissions for Fielo resources.
You'll only need to define who's going to be using what, and you can assign it to a single member or at once to all the members of your Experience Cloud site. You will find it going to Setup > Permission Set with the name Fielo Community Member.
Following, you can find how the Permission Set has been configured so members can use Fielo to the fullest extent possible.
| Objects | Read | Create | Edit | Fields (read access) |
|---|---|---|---|---|
| Agreement | X | ALL | ||
| Badges | X | ALL | ||
| Badge Member | X | ALL | ||
| Challenges | X | ALL | ||
| Challenge Member | X | ALL | ||
| Consents | X | ALL | ||
| Currencies | X | ALL | ||
| Languages | X | ALL | ||
| Members | X | X | X | ALL |
| Member Agreement | X | ALL | ||
| Member Consent | X | ALL | ||
| Missions | X | ALL | ||
| Mission Member | X | ALL | ||
| Payout | X | ALL | ||
| Points | X | ALL | ||
| Program | X | ALL | ||
| Program Consent | X | ALL | ||
| Program Currency | X | ALL | ||
| Promotions | X | ALL | ||
| Redemptions | X | ALL | ||
| Redemption Item | X | ALL | ||
| Rewards | X | ALL | ||
| Reward Item | X | ALL | ||
| Rules | X | ALL | ||
| Segments | X | ALL | ||
| Transactions | X | ALL | ||
| Translations | X | ALL |
In addition, be sure to assign Read permission for objects and fields related to any Fielo Apps you may be using in your org.
Customize Your Welcome Email
When community users join a program, they will automatically receive a welcome email. We recommend that you take a look at this welcome email.
From Setup, search for and select Classic Email Templates. Go into the folder called Fielo Templates and select Welcome Email.
<img
src="https://files.readme.io/9da89ff-check_out_fielo_email_templates_welcome_email.png"
alt="check out fielo email templates welcome email.png"
width=1364
height=660
style={"backgroundColor":"#f0f2f5"}
/>
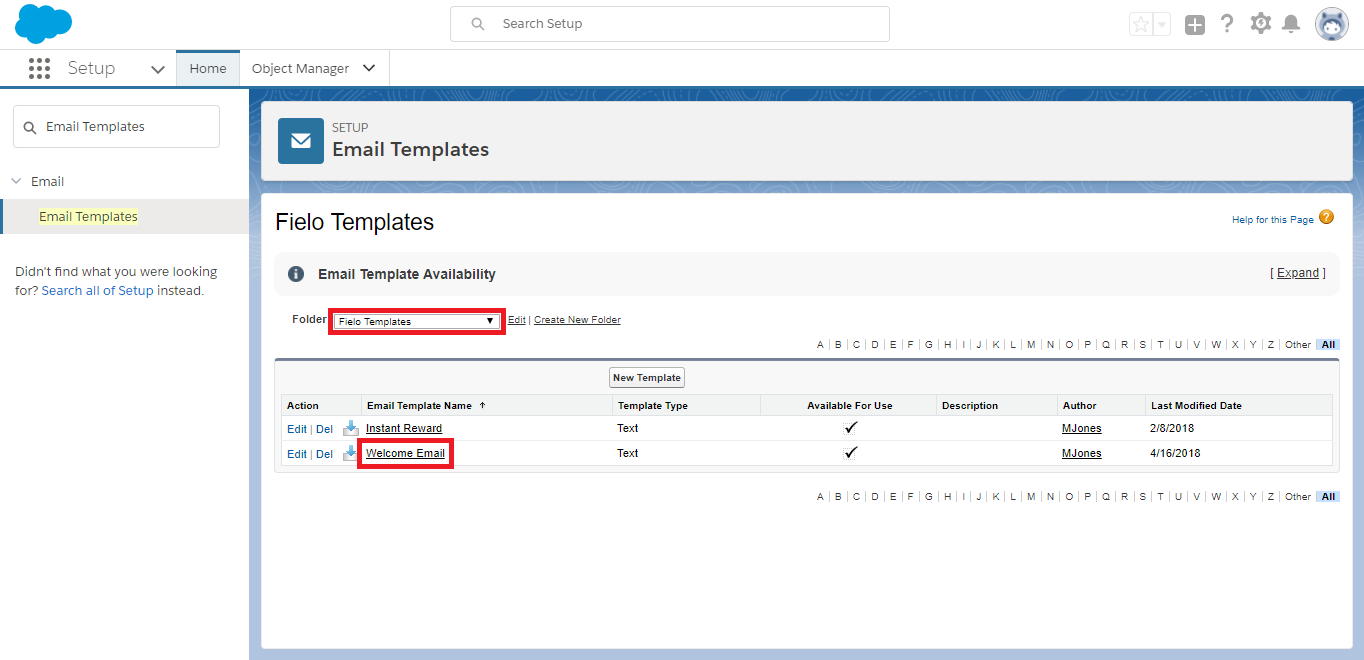
Before adding Join Program to your site, be sure to make any content changes your loyalty program requires, such as company branding and program-specific details.
Getting Started with Join Program
From Setup, access the All Sites page and select Builder for your site. In Builder, create or navigate to the page you'll use Join Program on.
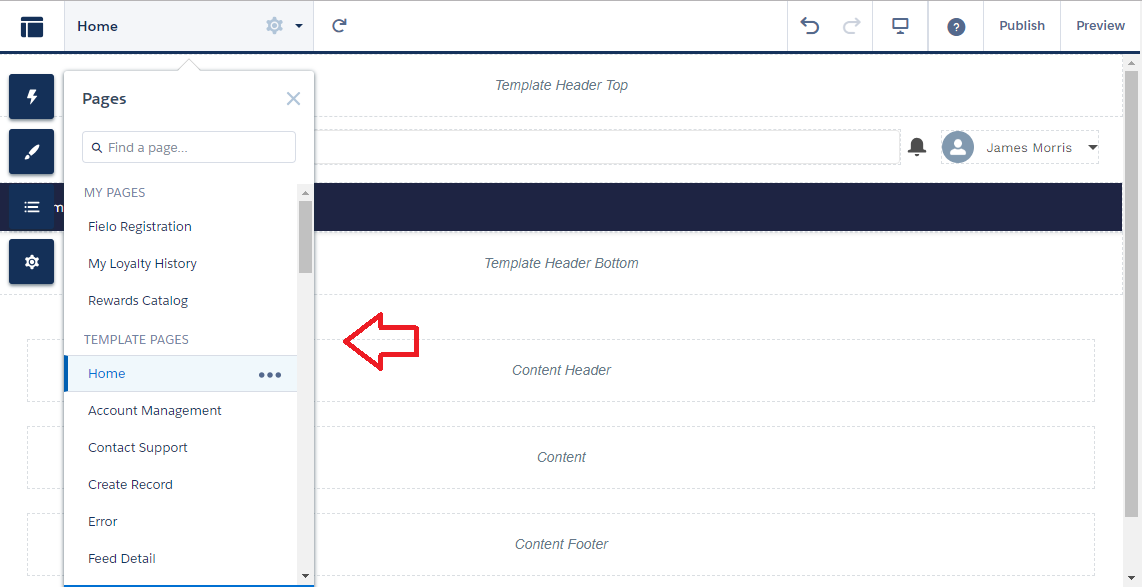
Click and drag and drop the Fielo - Member Selector component onto the Content Header of your page. This component shows existing members' information and is invisible to non-members until they join their first program.
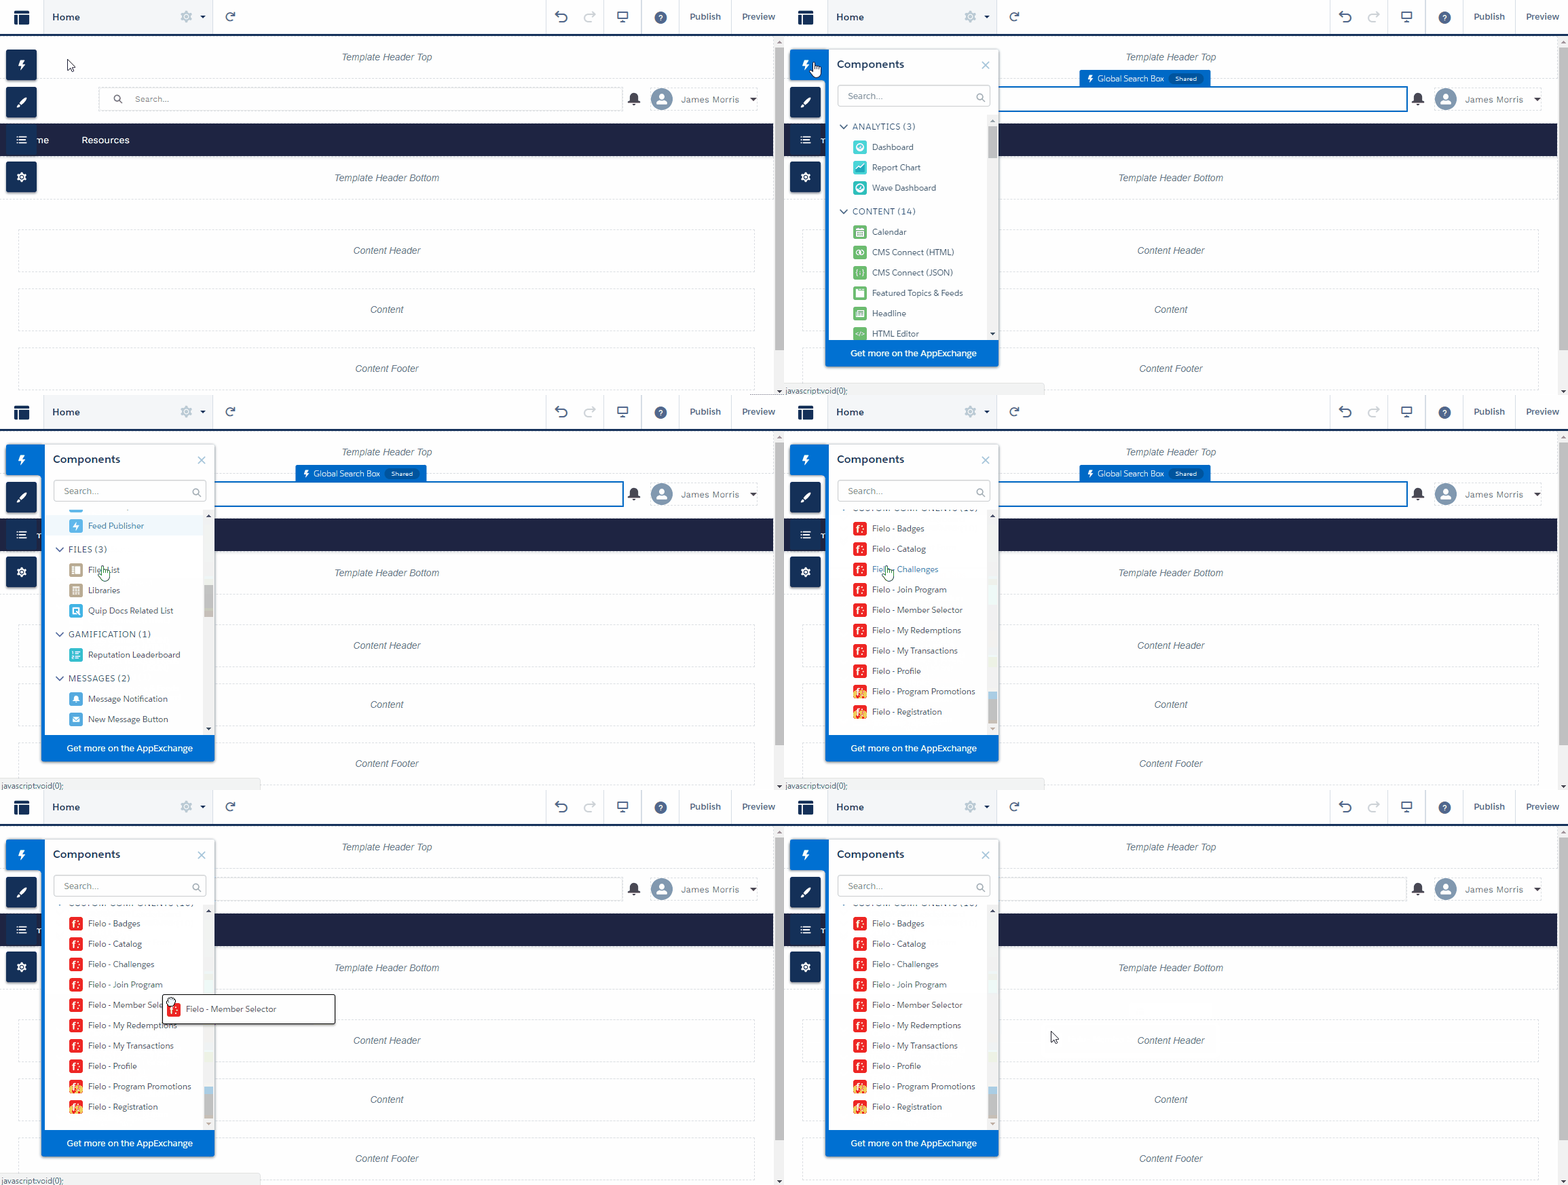
Remember, you can always hide Member Selector if it doesn't fit into the design of your page!
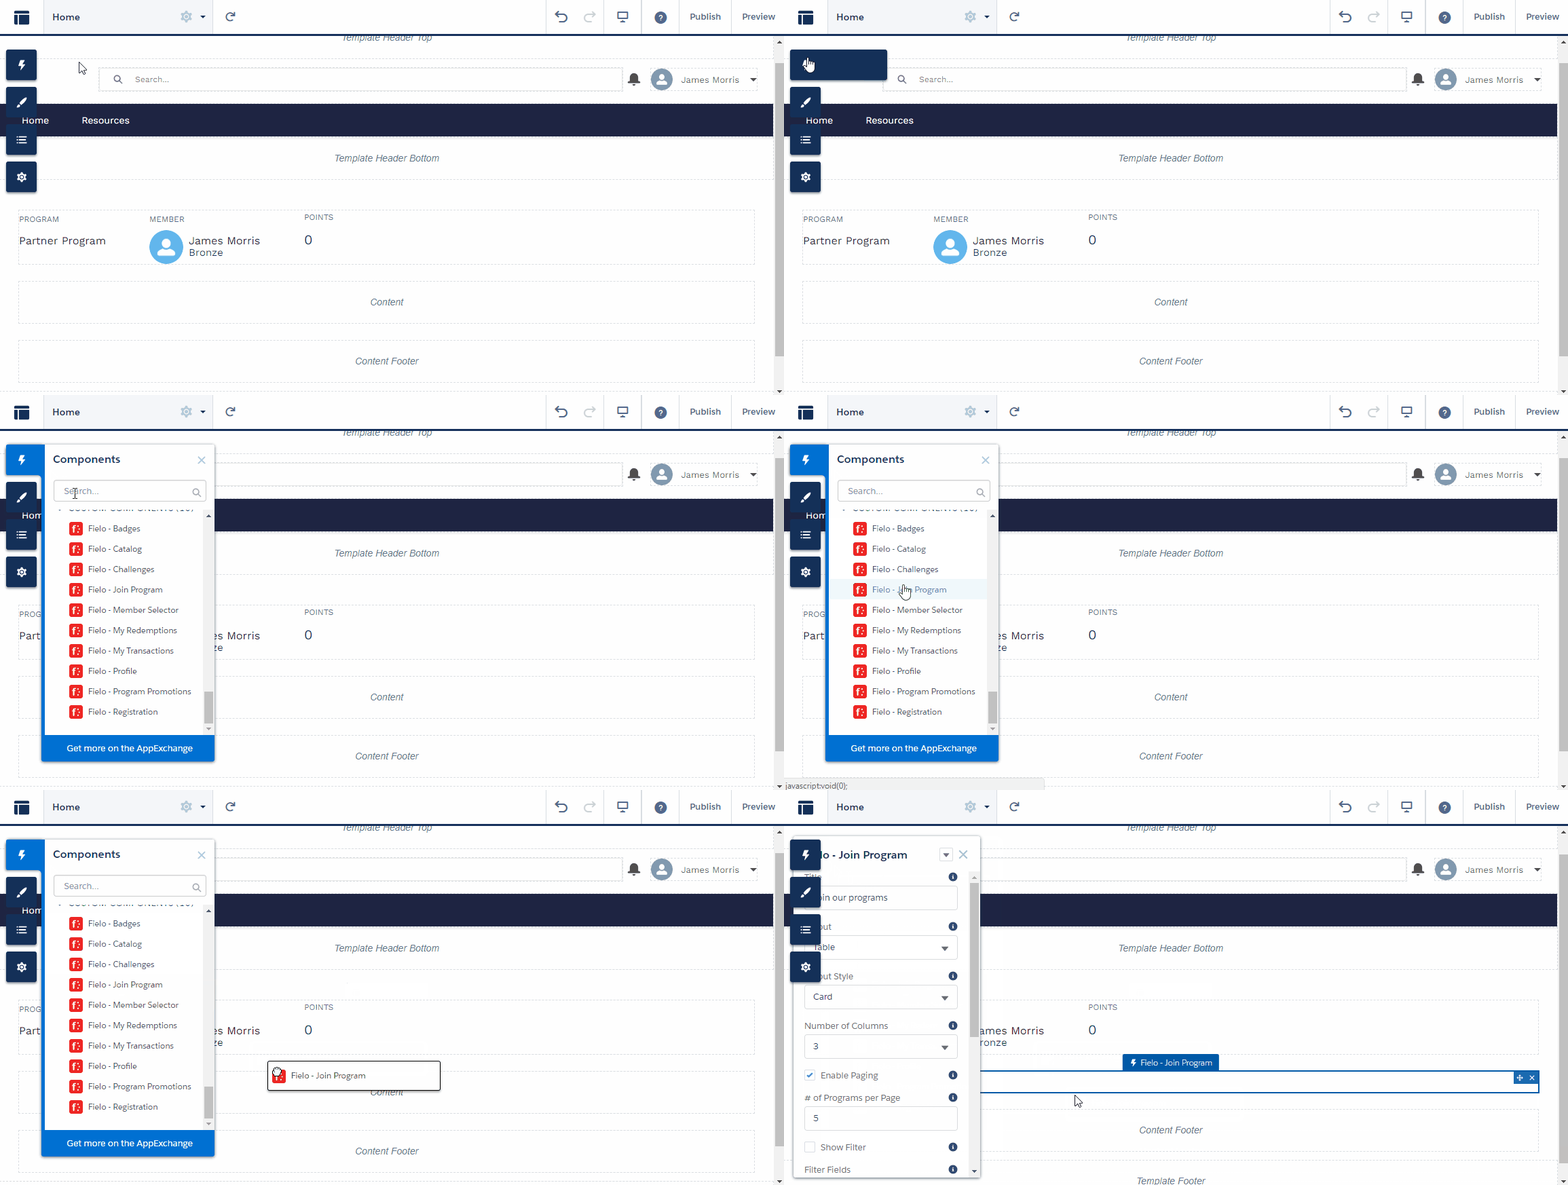
Now, from the same components menu, drag and drop Fielo - Join Program onto your page.
Configuring Join Program
With the component on your page, you can now configure it to meet your loyalty portal's specific needs.
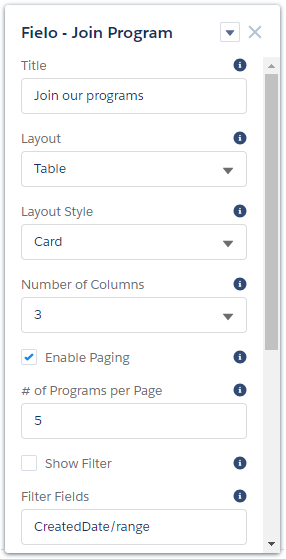
Join Program can be configured via the following properties:
- Title: Enter the title you want displayed at the top of the component (e.g.
Join our programs). - Layout: Choose Table to display programs in list format or Grid to display them in tile format. Don't worry, your members will be able to toggle back and forth between the views.
- Layout Style: Leave this setting at Card for an optimized UI experience or switch to None if you plan to customize the component using CSS.
- Number of Columns: Choose the number of columns to be displayed when programs are viewed in grid format.
- Enable Paging: Check this box to allow programs to be displayed in pages.
- # of Programs per Page: If you've enabled paging, enter the maximum number of programs you want to be shown on a single page.
- Show Filter: Check this box to allow members to filter their available programs.
- Filter Fields: If you've enabled filtering, enter the API names of the fields you want members to be able to filter by, separated by commas. Be sure to append
/rangeif the field involves a range. - Enable Sorting: Check this box to allow members to sort their available programs.
- Sort By Fields: If you've enabled sorting, enter the API names of the fields you want members to be able to sort by, separated by commas.
- Program ID List: Enter the IDs of the programs you want members to be able to join, separated by commas (e.g.
a0Q5000000PP1F4EAL, a0Q5000000NxSh3EAF8). This 18-character alphanumeric ID can be found in the URL of a program detail page. If left blank, members will be able to join any program. - Program Fields: Enter the API names of the fields that you want to be displayed on the available program list, separated by commas. Program names, images and descriptions are included automatically.
- Program Detail Fields: Enter the API names of the fields that you want to be displayed in program detail views, separated by commas.
Updated over 1 year ago