
My Learning
Make training and education a core part of your Experience Cloud portal
Are you using our Learning app with Salesforce Experience Cloud? Take your loyalty portal to the next level! The My Learning component suite puts your Members on the fast track to joining courses, passing modules and developing new skills. Let's see how!
Salesforce Experience CloudPreviously known as Community Cloud, as of Salesforce Spring '21 release, Community is now referred to as Experience Cloud and/or Site.
How It Works
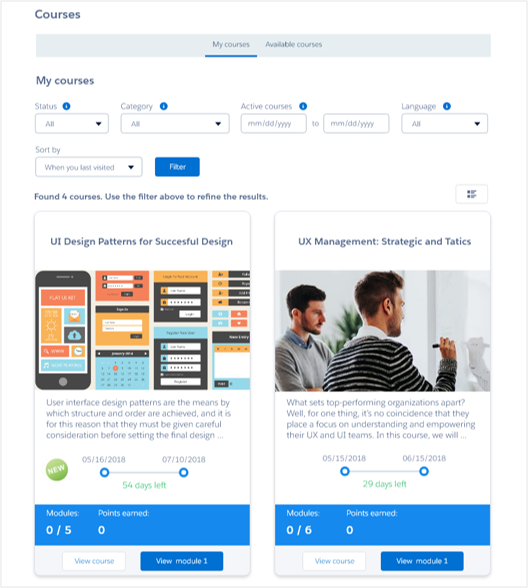
Members navigate to their Courses page to see what they can learn next.
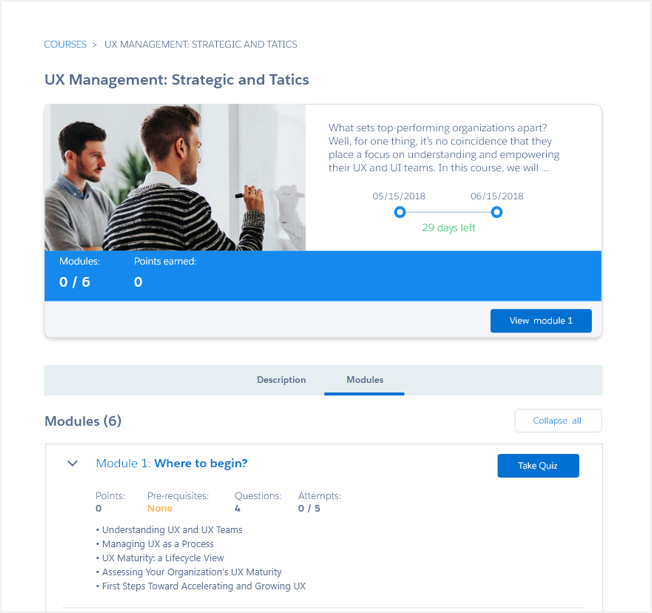
They can check out more information on a course and see what lessons it includes.
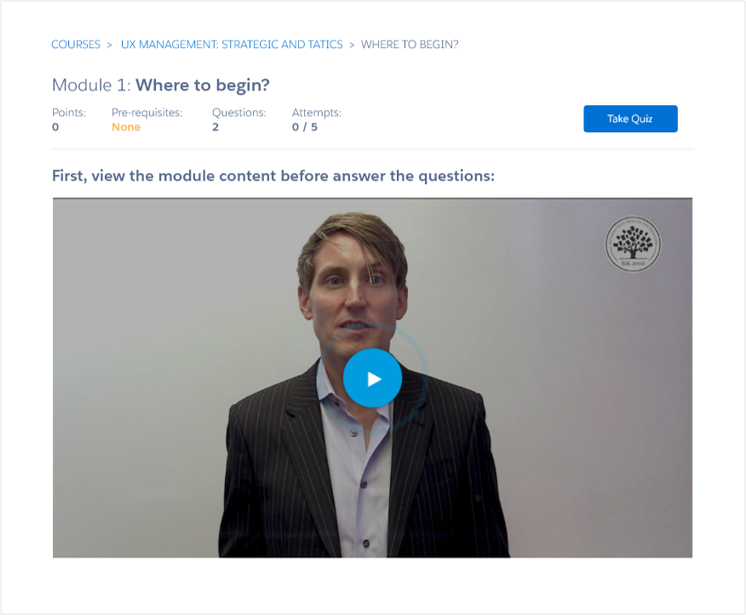
When members are ready to dive into content, they can view a module.
They can then show what they've learned by completing the quiz.
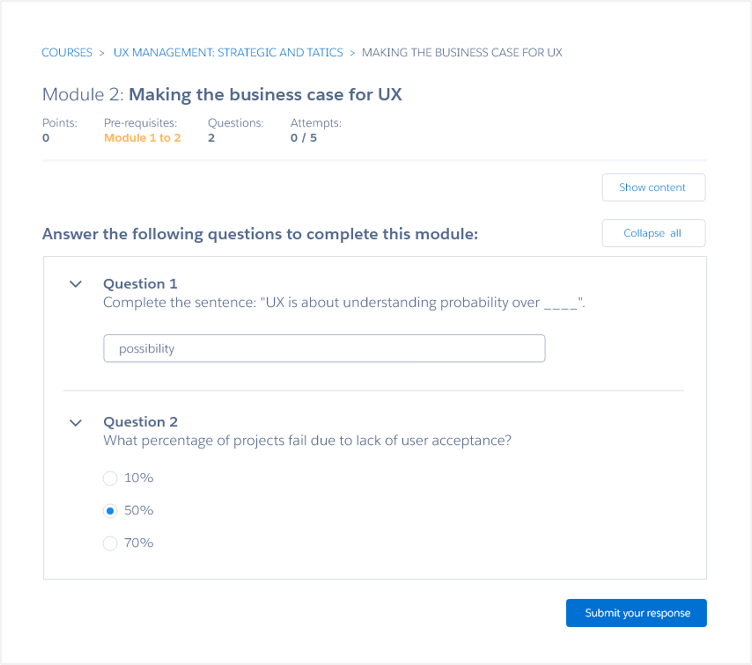
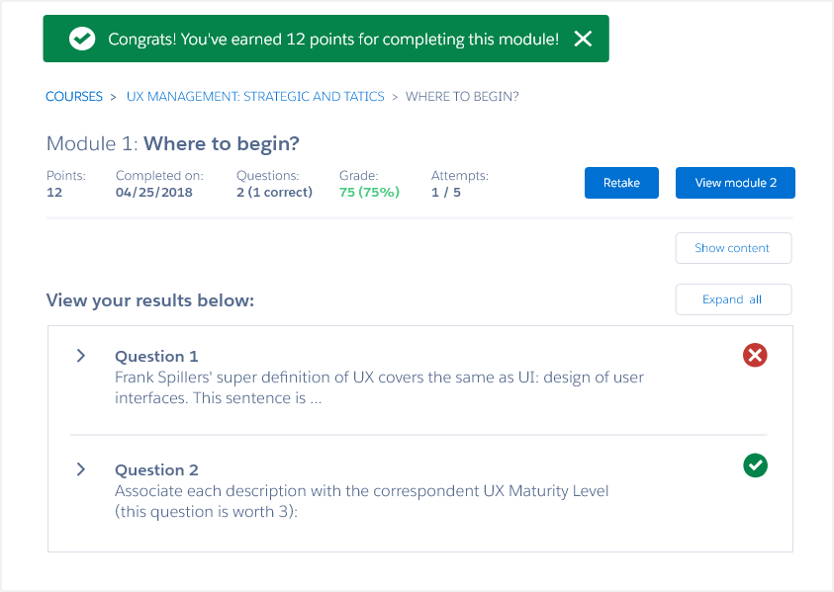
When members submit their quiz, they get immediate feedback on their performance, including if they've earned points on the module.
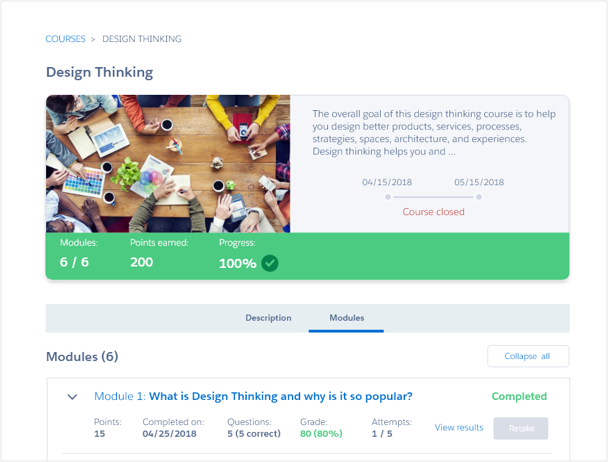
Back on the course detail, members can see their updated progress, including any points they earned for completing the entire course.
Getting Starting with My Learning
First, you'll need to create Object Pages for these objects:
- Course
- Module
- Module Response
This will create a List Page, Detail Page and Related List Page for each object.
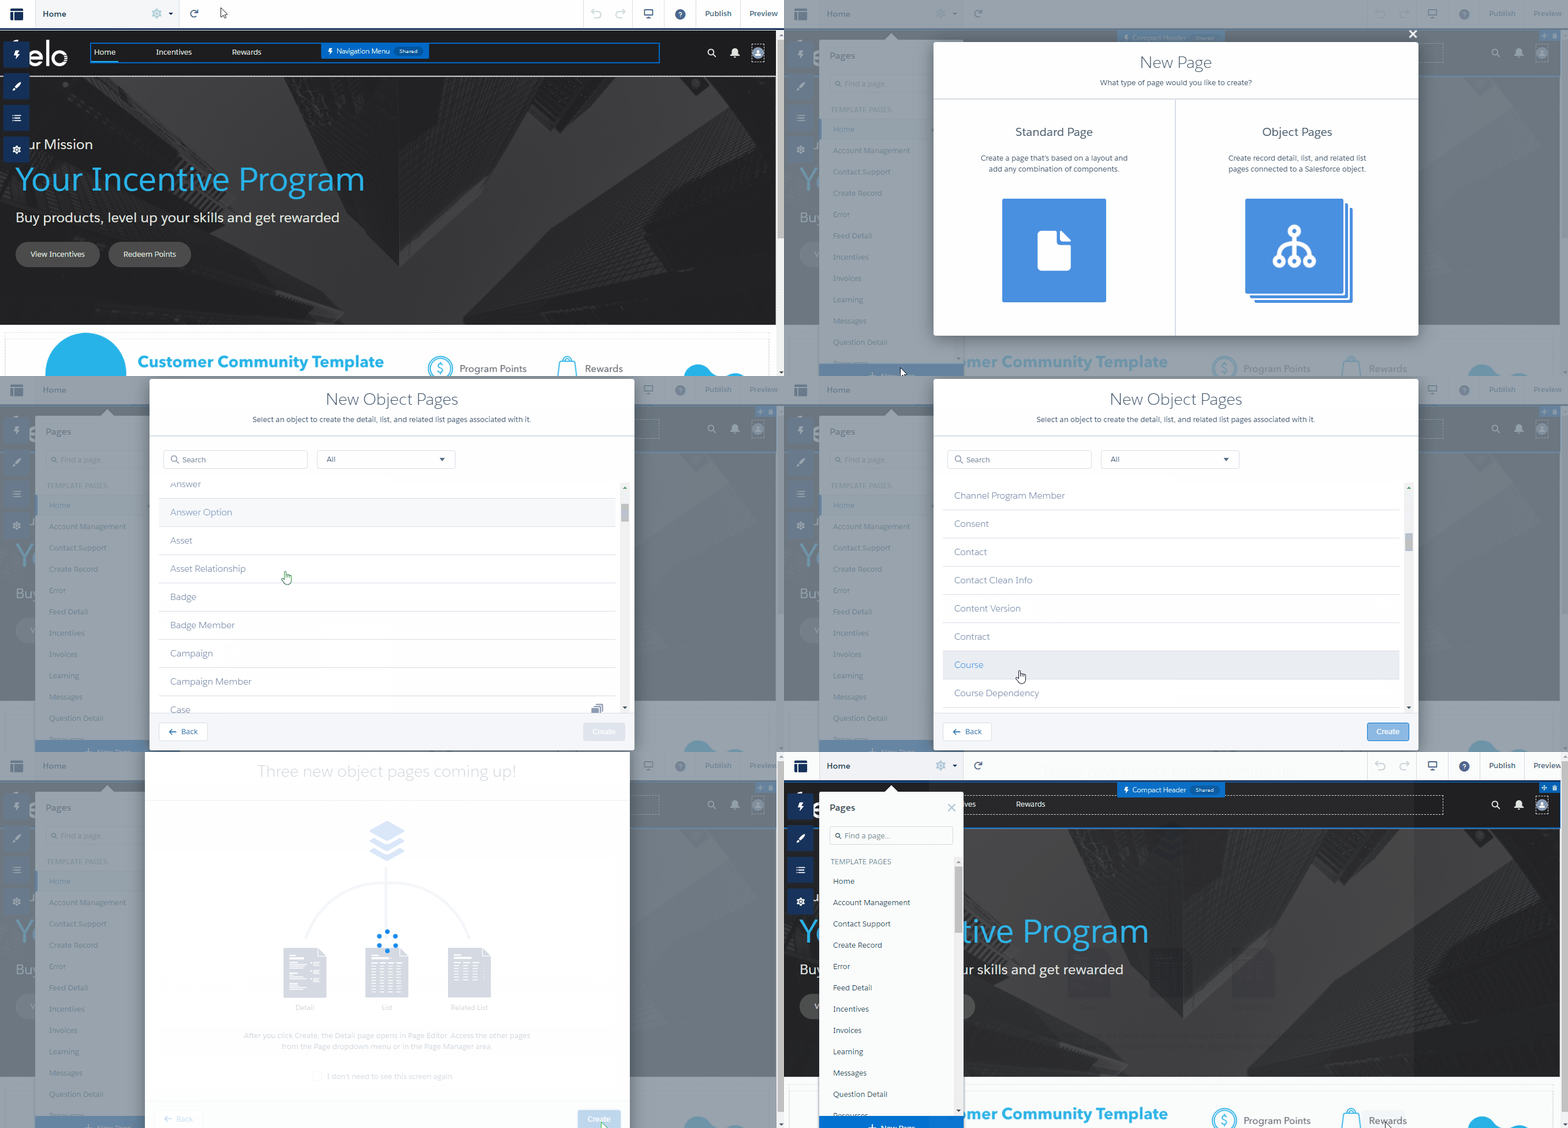
Creating the Course object pages
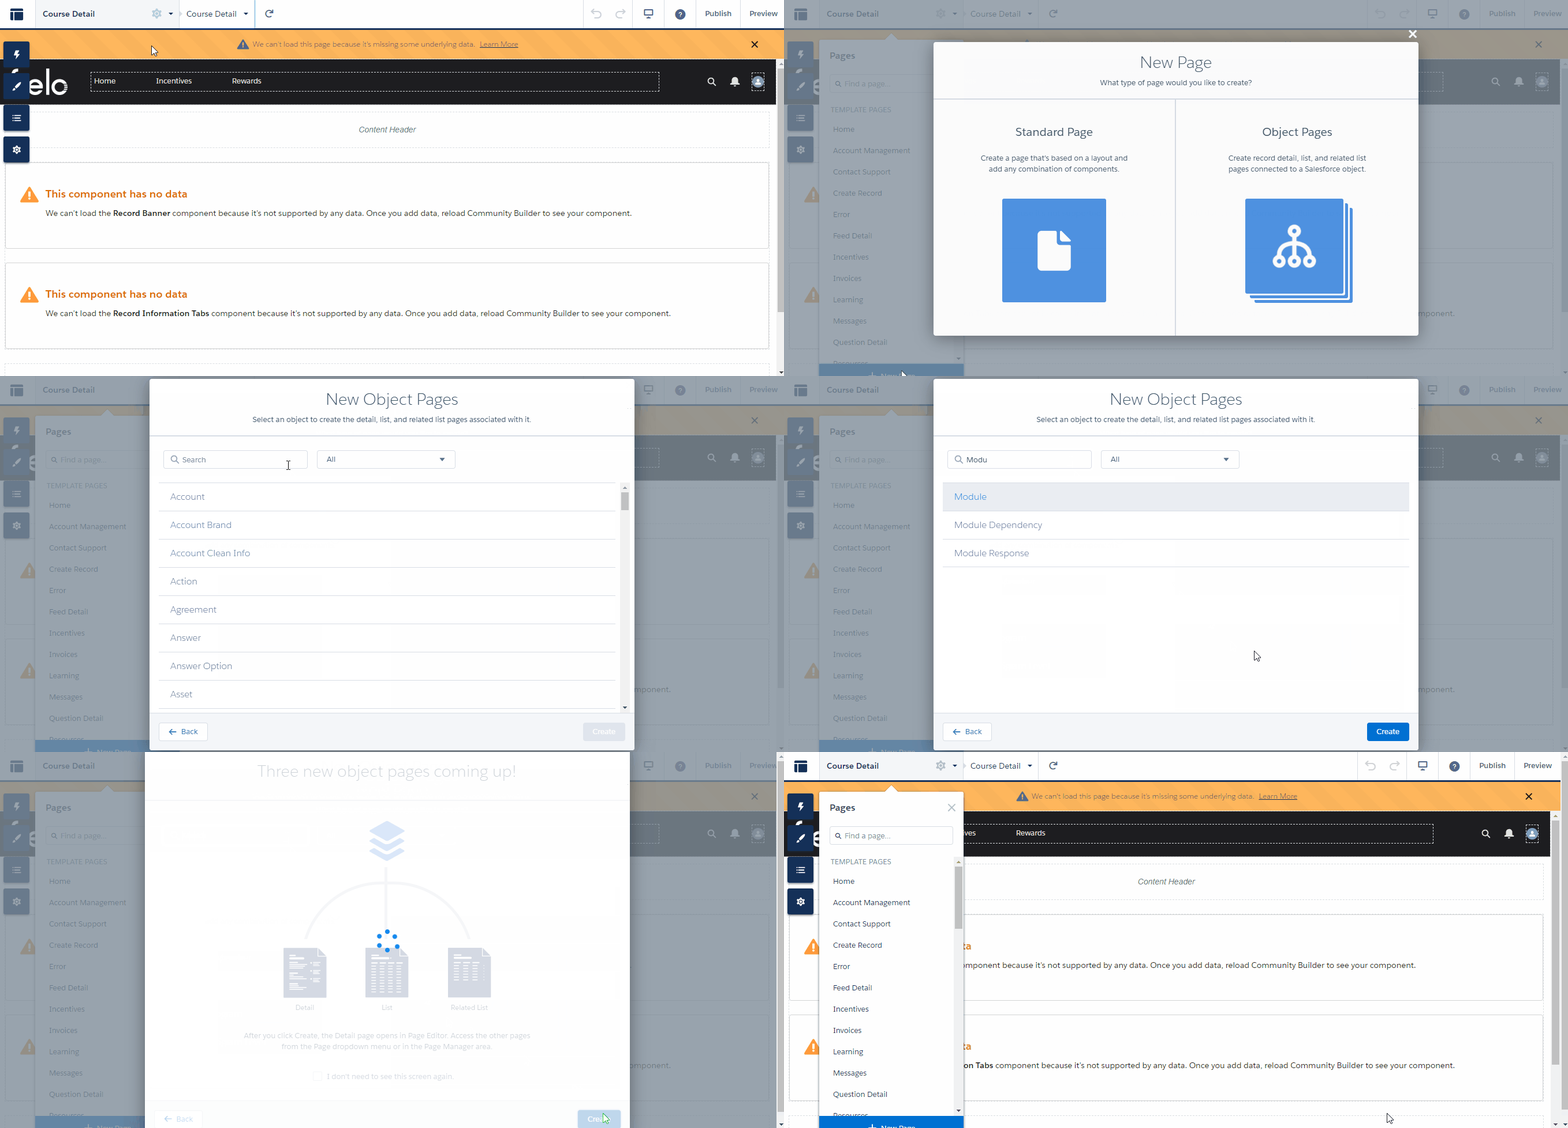
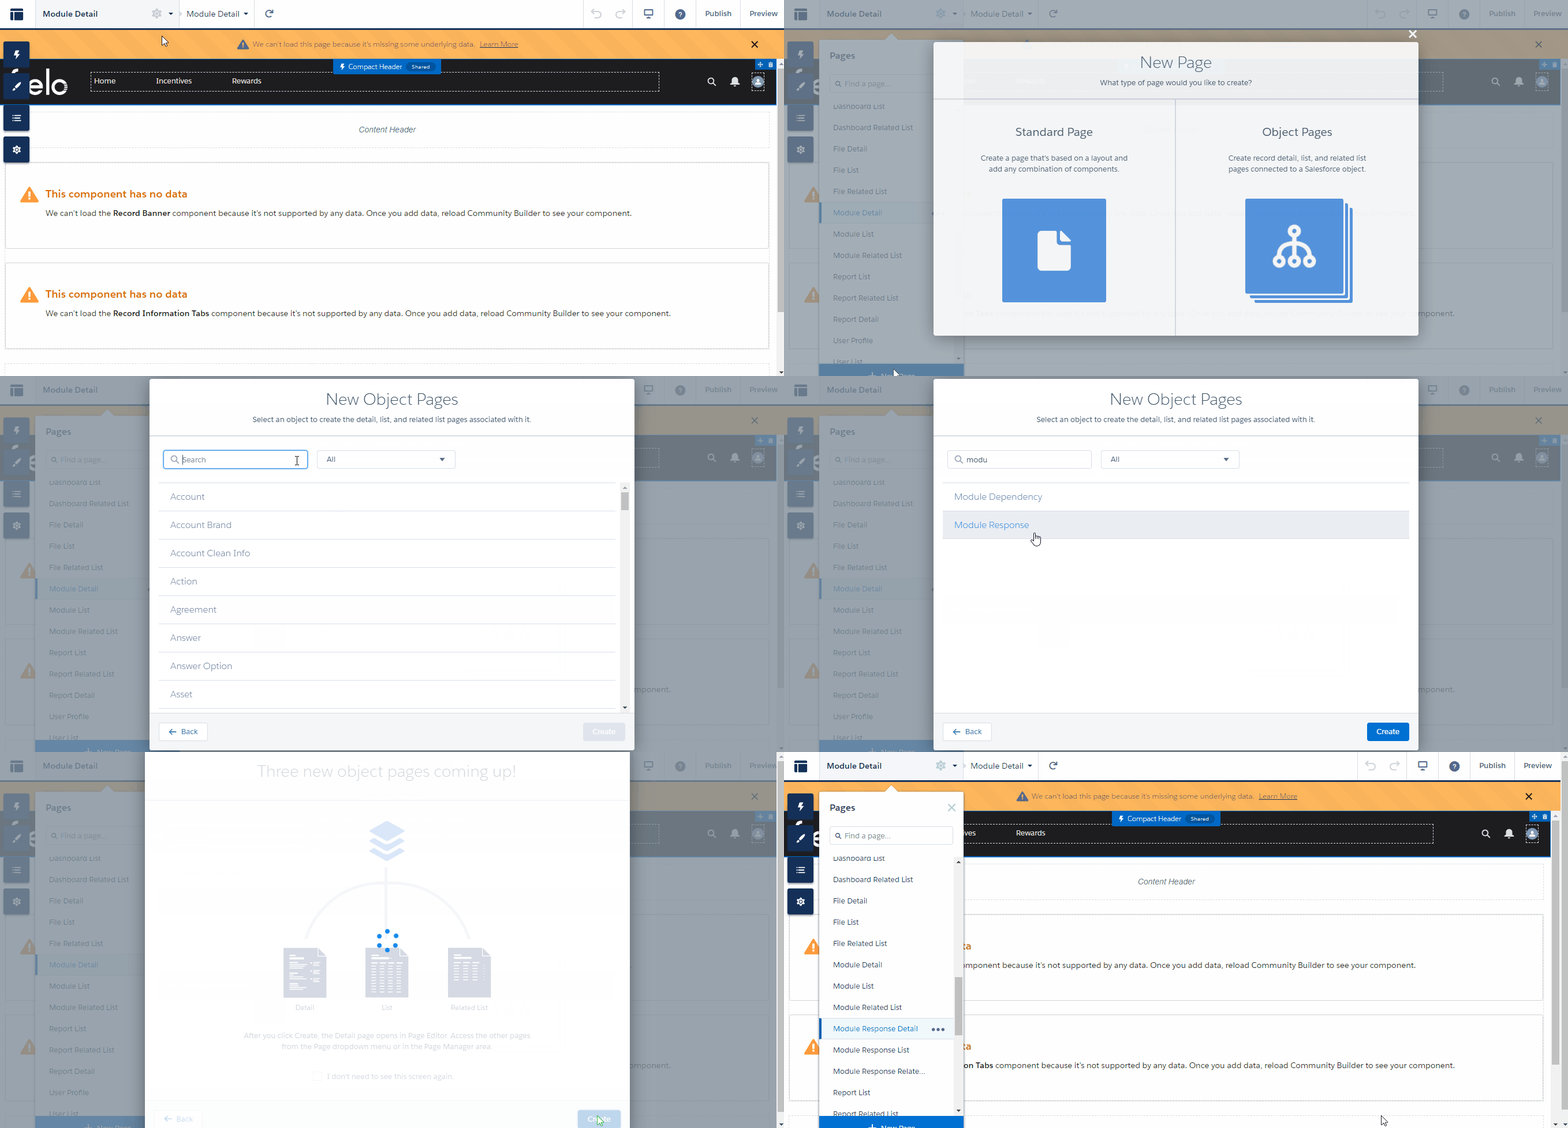
Creating the Module object pages
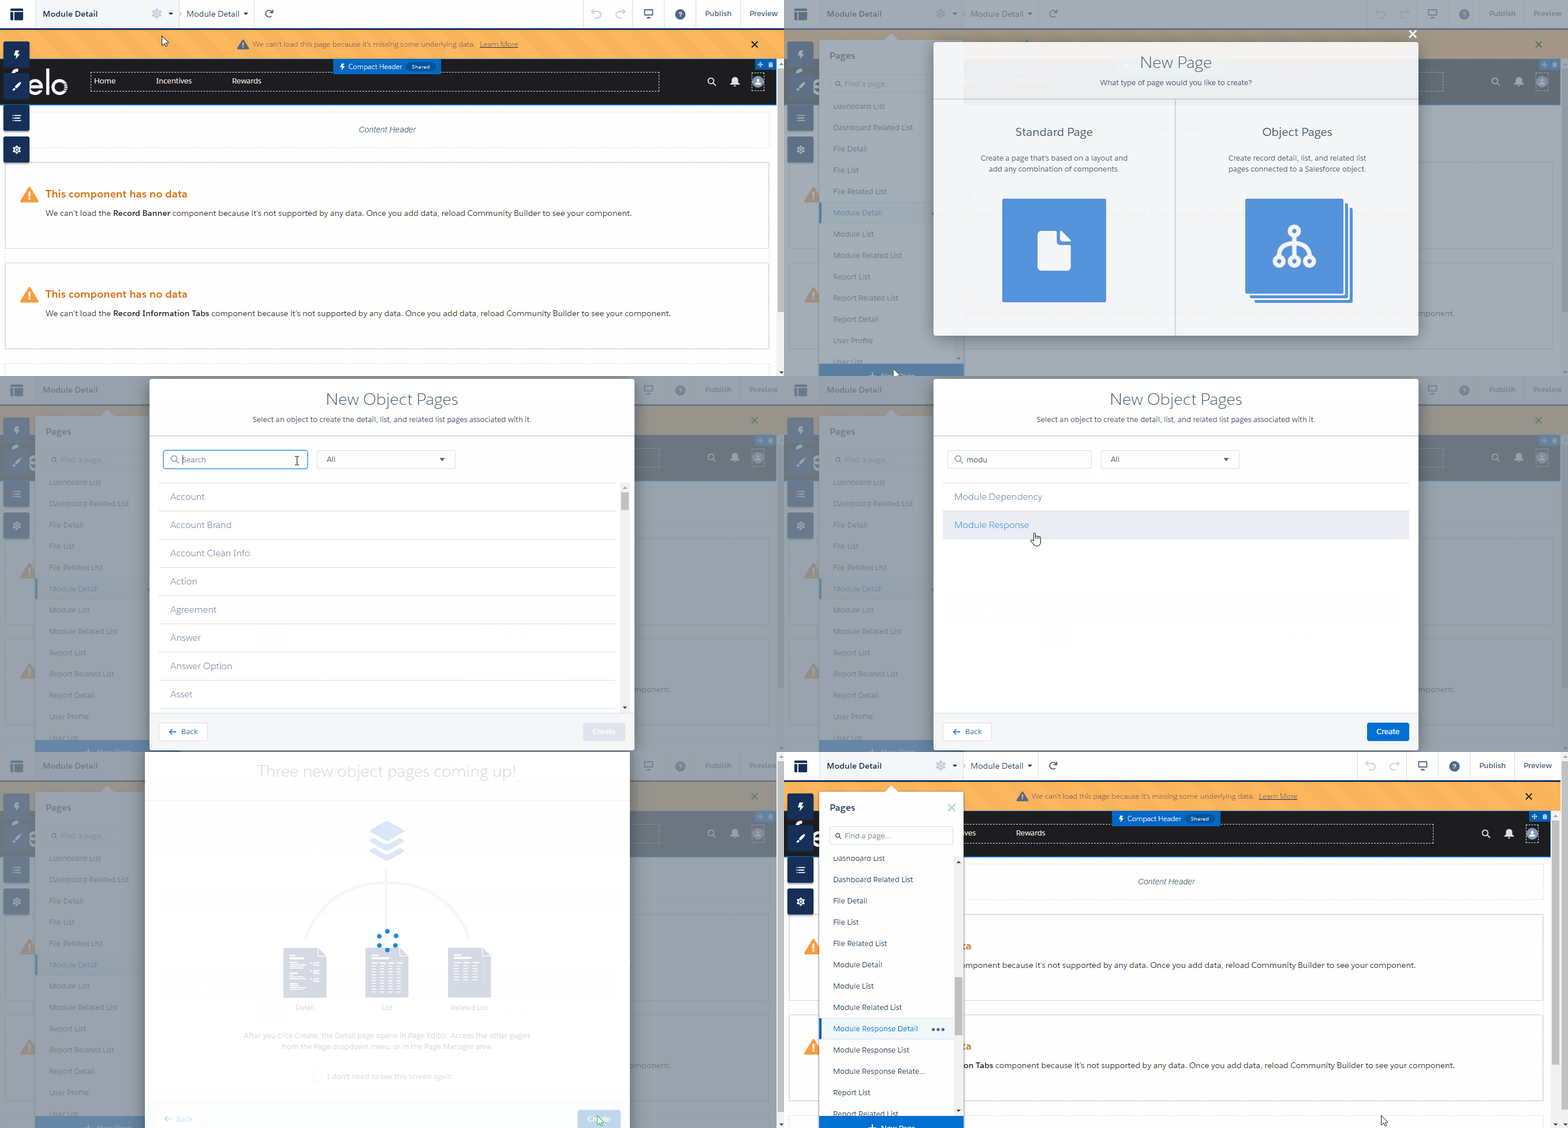
Creating the Module Response object pages
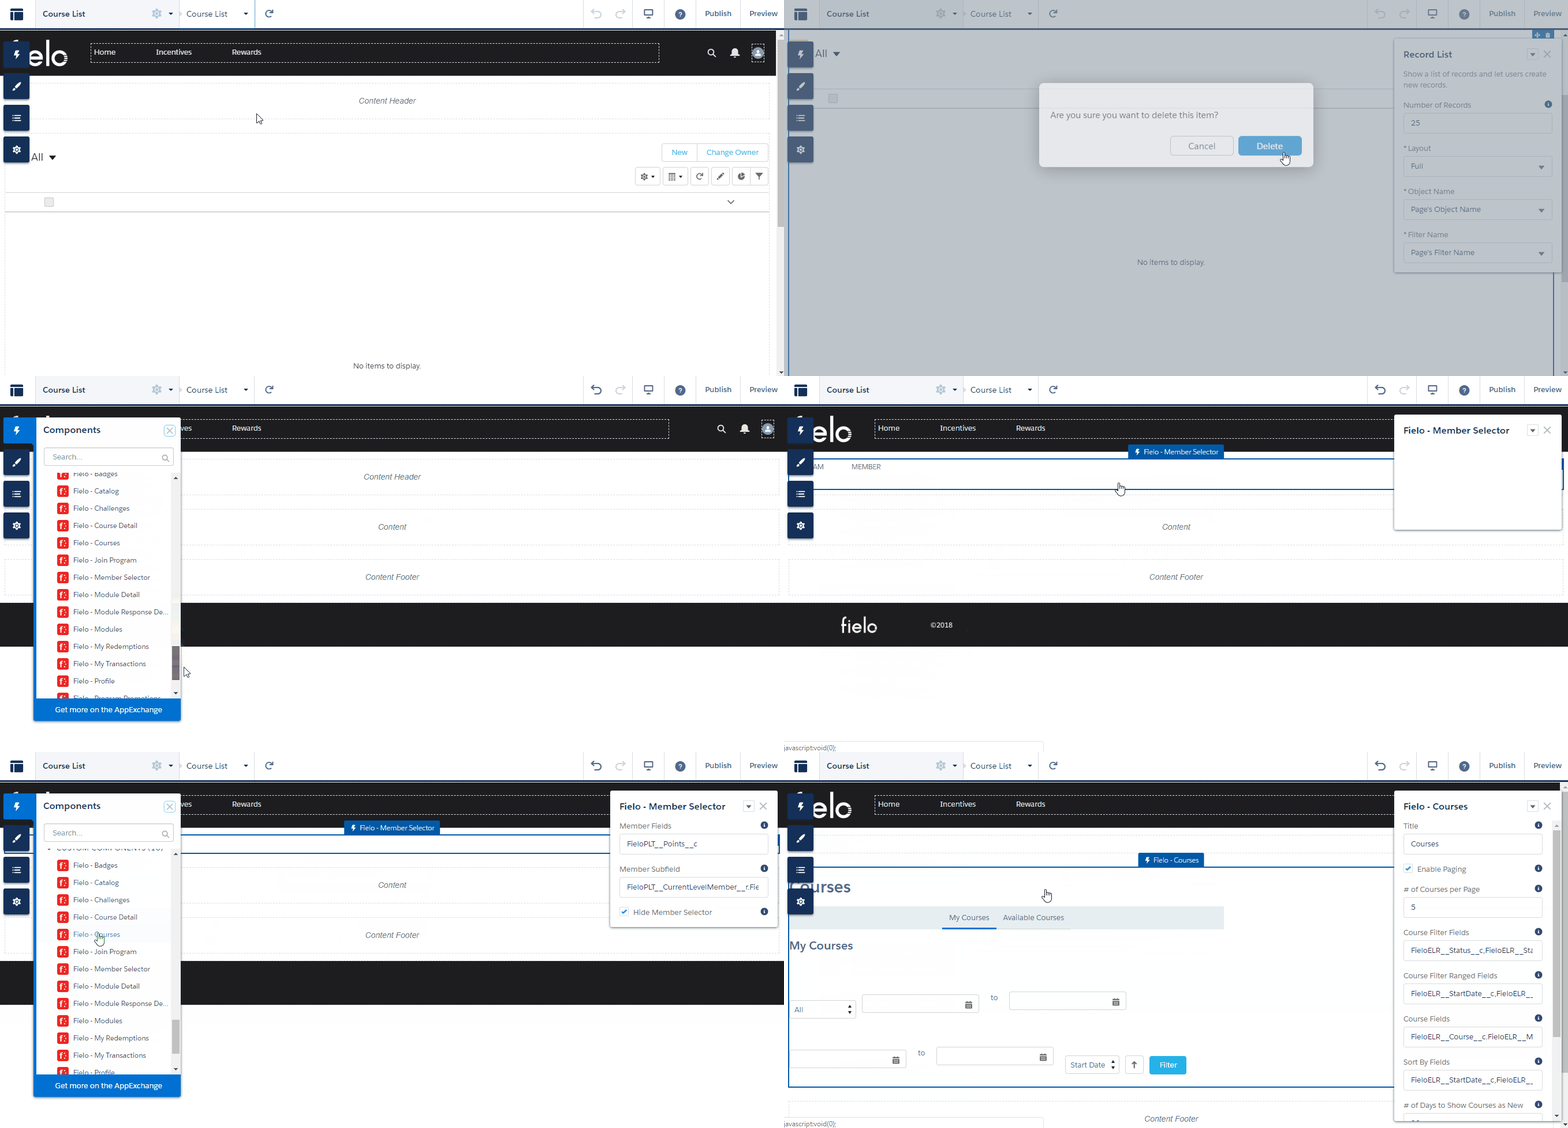
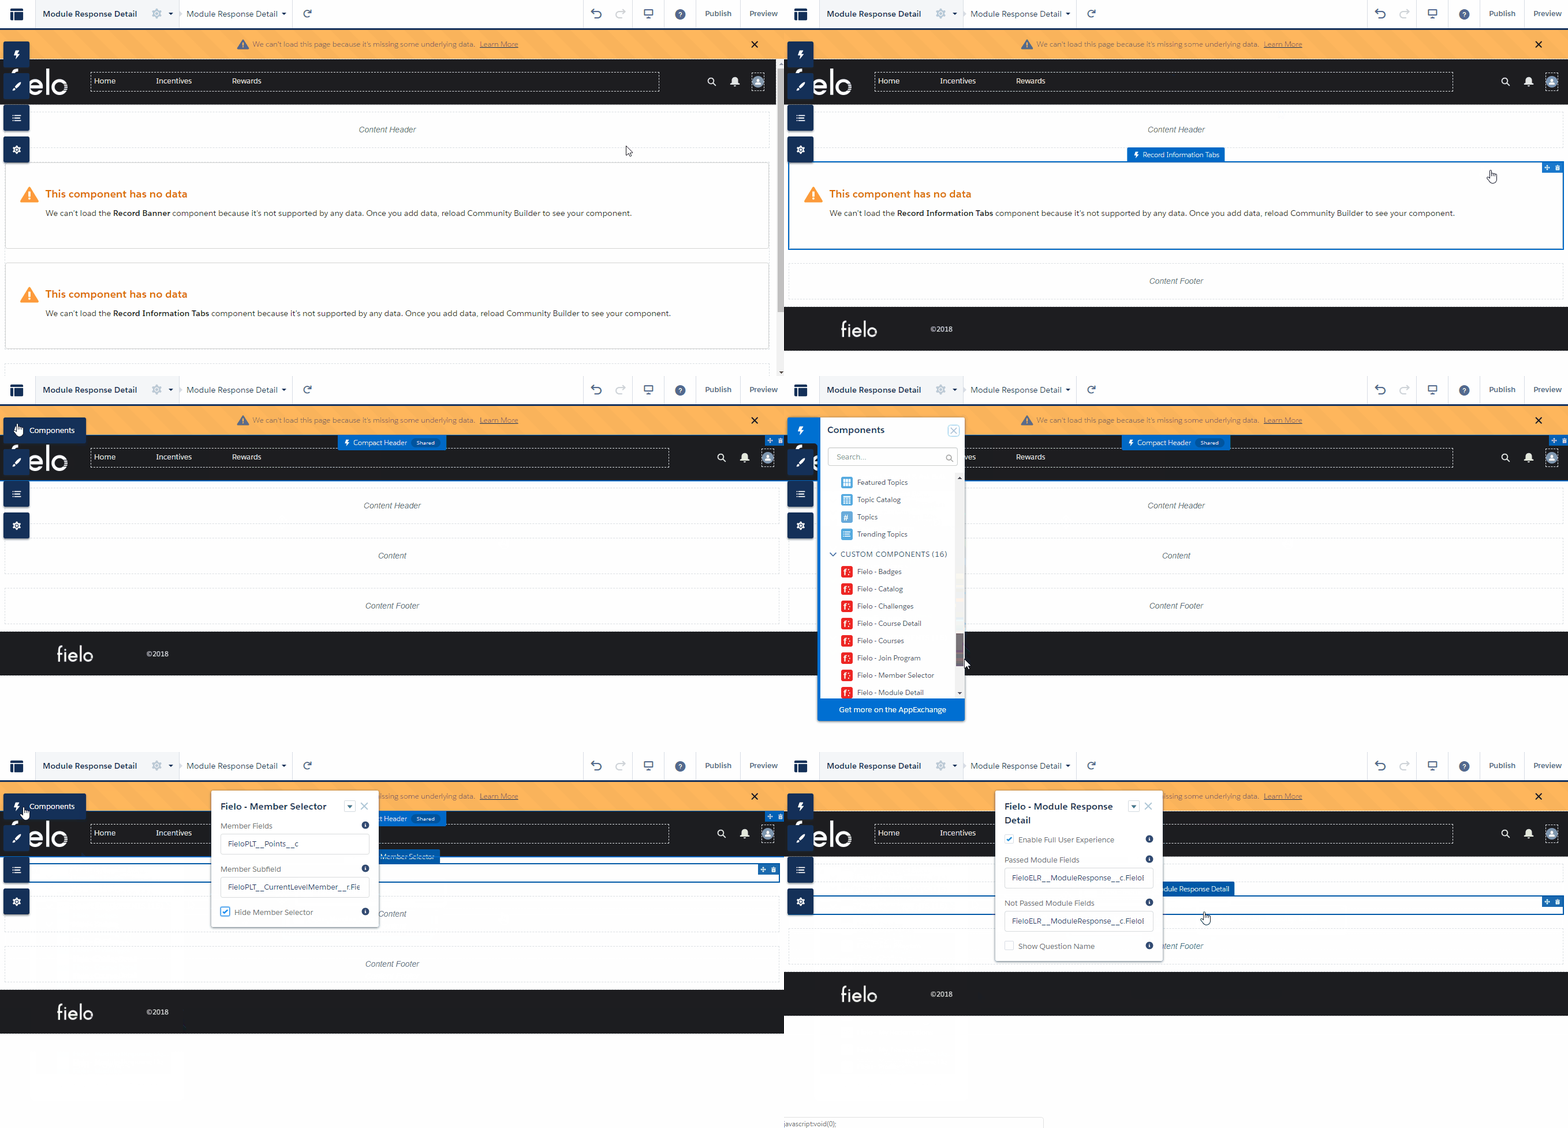
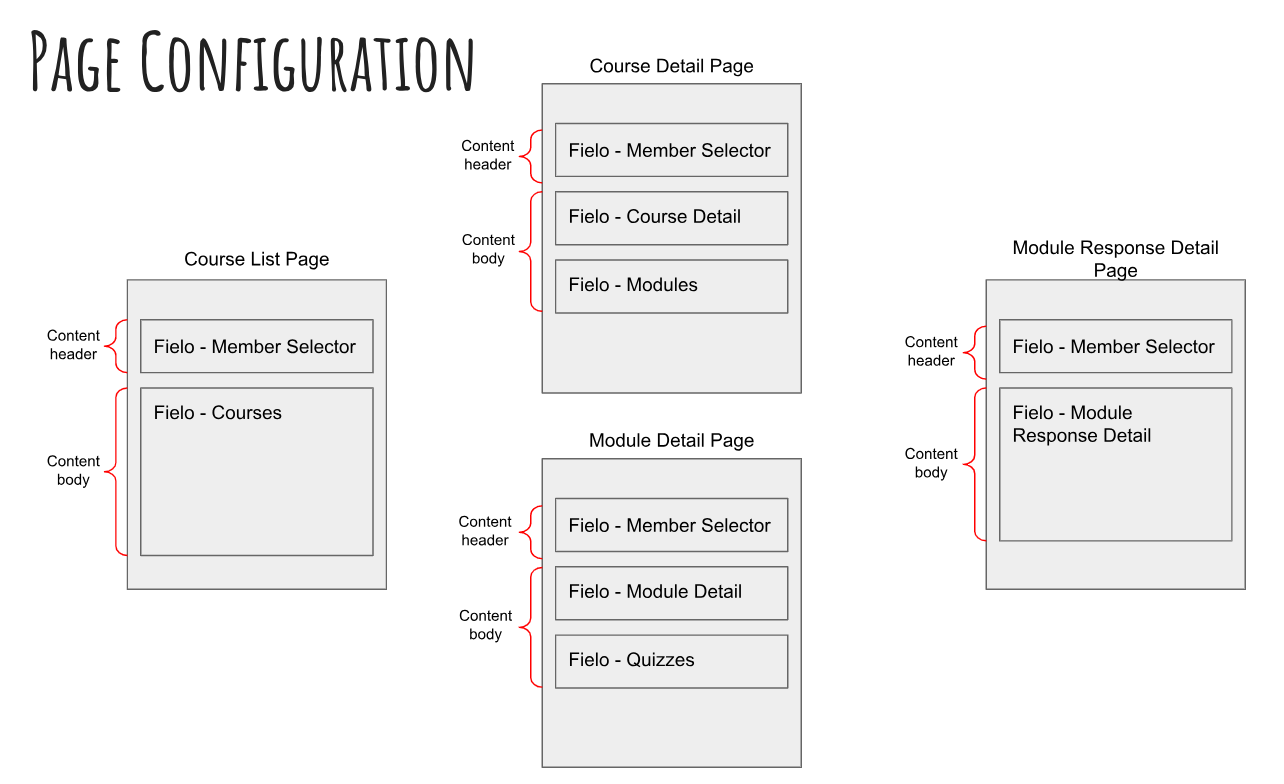
On the Course List page, delete the default Record List component. Then, add Member Selector to the content header and Courses to the content area. You can hide the Member Selector if you'd like.
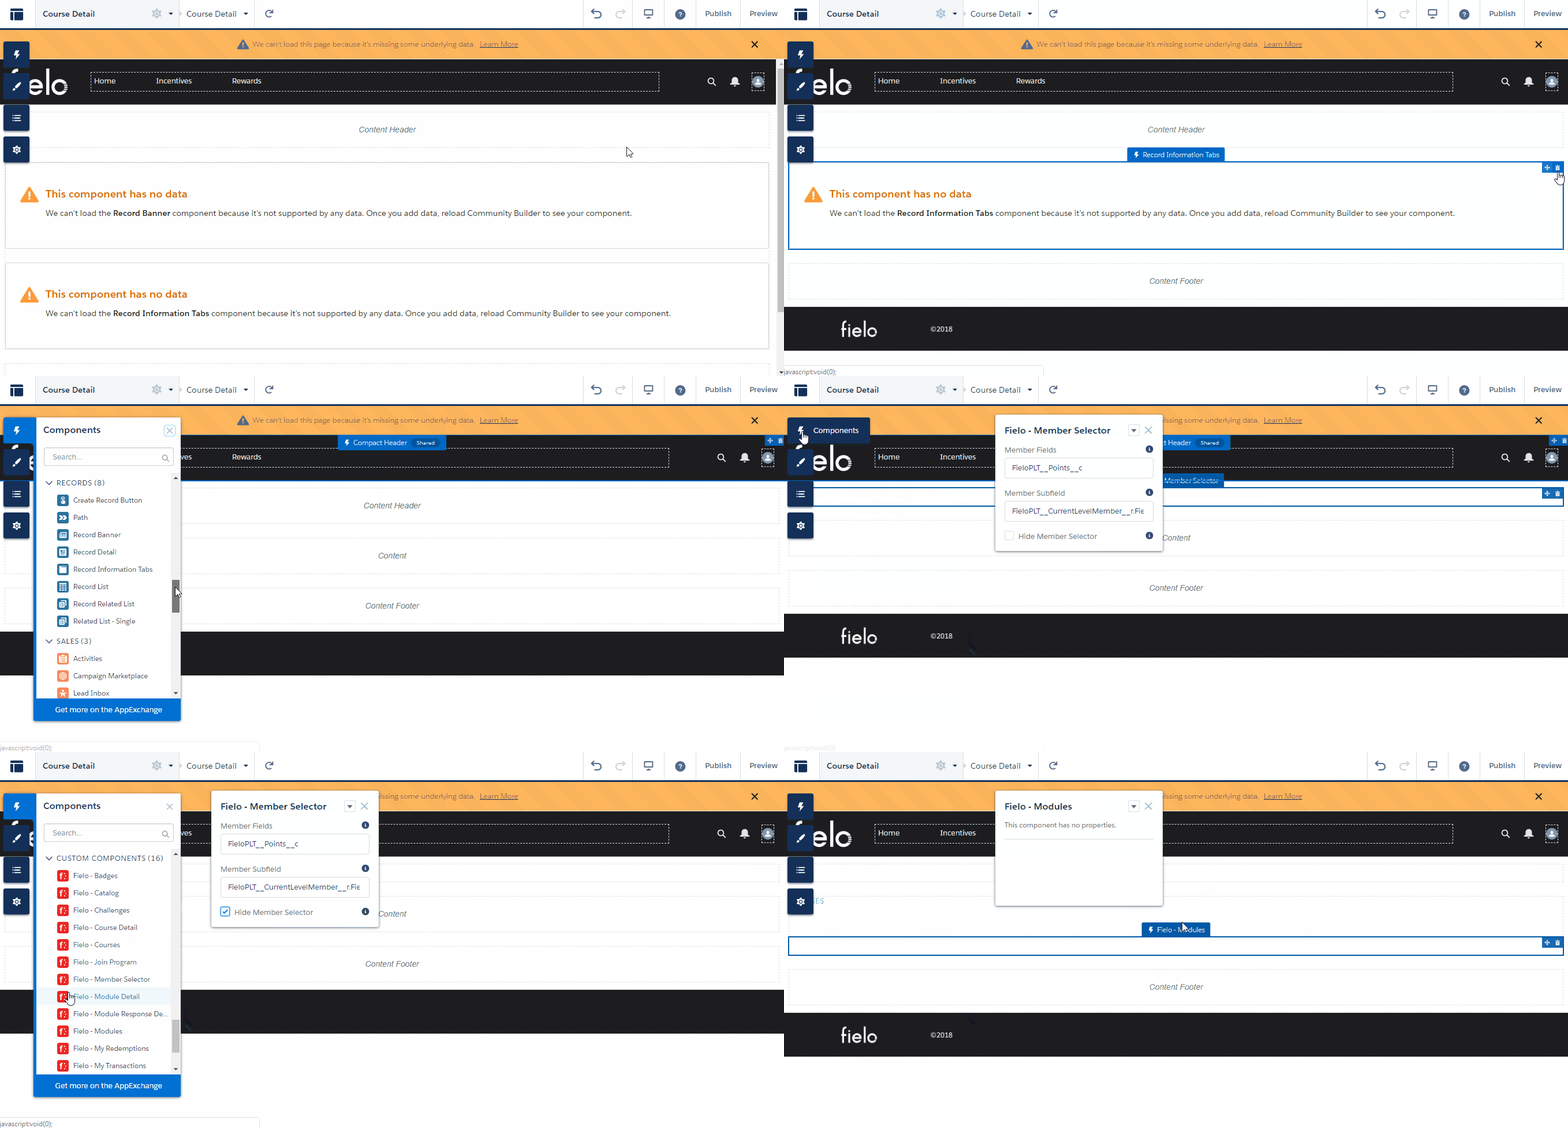
On the Course Detail page, delete the default components and add Member Selector to the content header. Then, add Course Detail and Modules (in that order) to the content area. Again, you can hide the Member Selector if you want.
On the Module Detail page, delete the default components and add Member Selector to the content header. Then, add Module Detail and Quizzes (in that order) to the content area, hiding the Member Selector if desired.
On the Module Response Detail page, delete the default components. Then, add Member Selector to the content header and Module Response Detail to the content area. Hide the Member Selector if necessary.
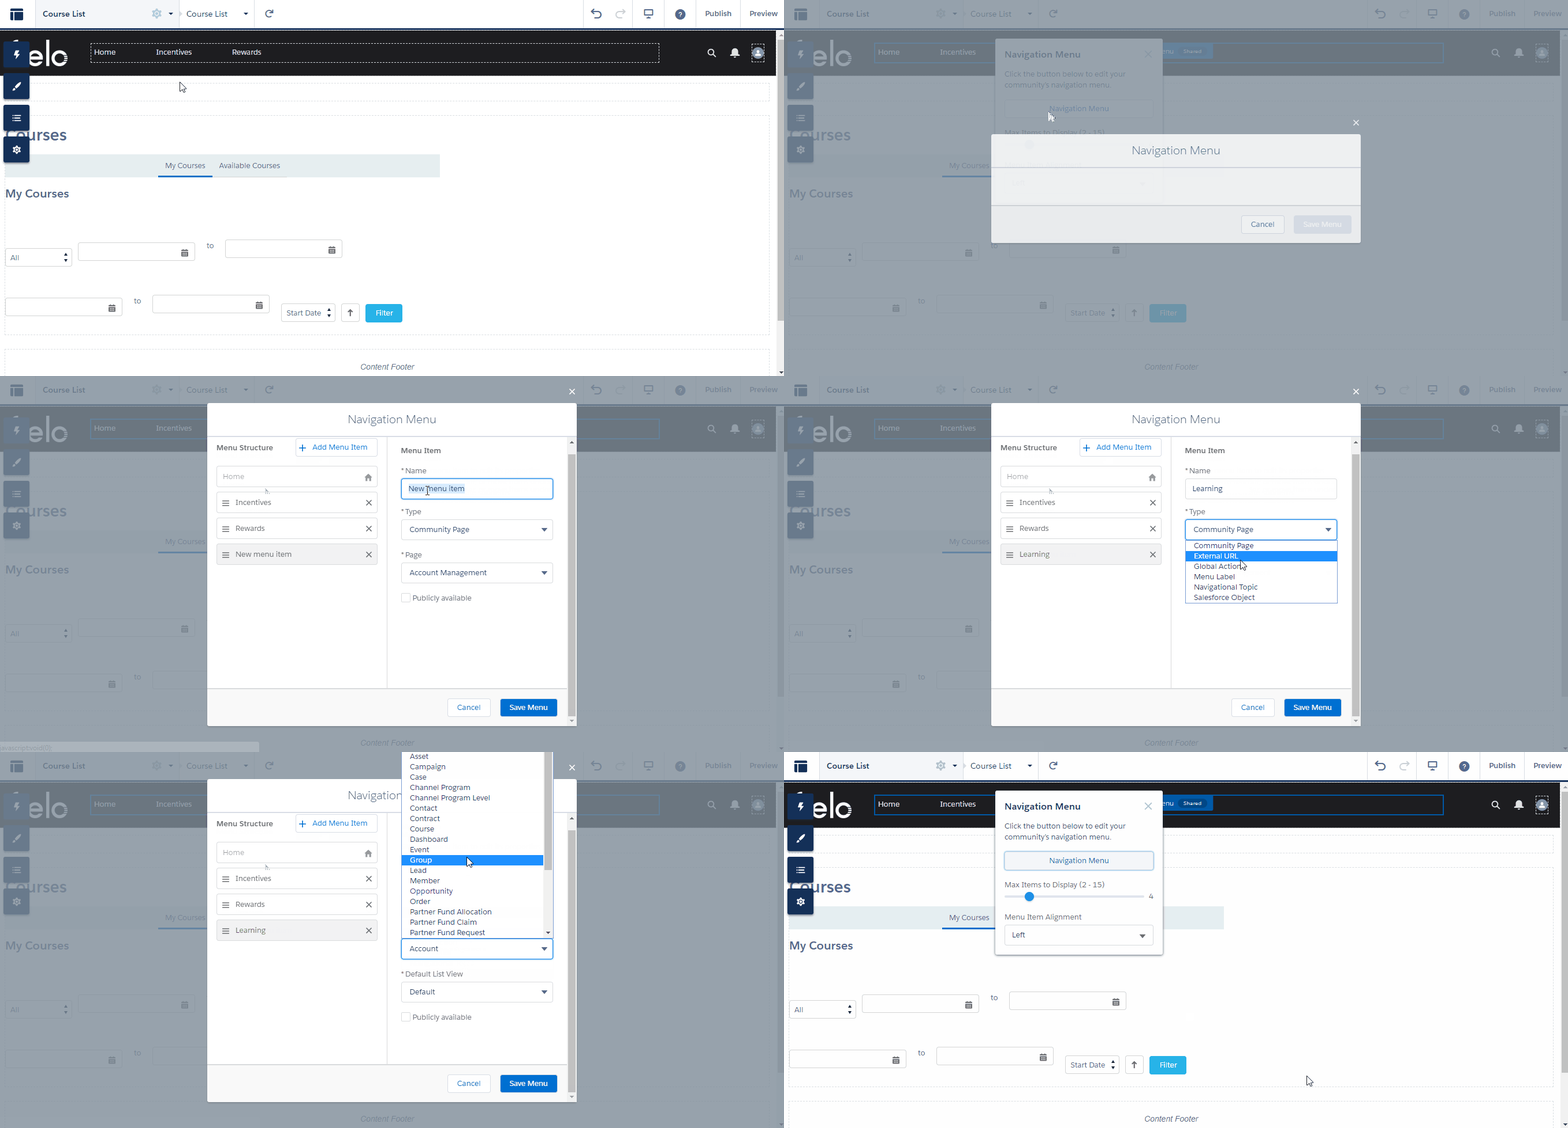
Finally, you'll want to add a menu item so that your members can access their courses from the nav bar. Make this item of type Salesforce Object and set the object to Course.
You did it!You've set up the My Learning components in your Experience Cloud site. Next, see how you can configure the components.
Configuring My Learning
At this point, your components should be placed in your site as shown below.
My Learning components are ready to go preconfigured for standard Fielo implementations. However, if your implementation requires it, you can customize your members' learning experience using the properties on each component.
Course Properties
Courses can be configured via the following properties:
- Title: Enter the title you want displayed at the top of the component.
- Enable Paging: Check this box to allow courses to be displayed on more than one page.
- # of Courses per Page: If Enable Paging is , enter the maximum number of courses you want to be displayed per page.
- Course Filter Fields: Enter the API names of fields you want to use for course filtering, separated by commas.
- Ranged Course Filter Fields: Enter the API names of any Course Filter Fields that involve a range of values, separated by commas.
- Course Fields: Enter the API names of fields that you want to include on the course list, separated by commas.
- Sort By Field: Enter the API names of the fields you want members to be able to sort by, separated by commas.
- # of Days to Show Courses as New: Enter the number of days after the start date that you want courses to be shown as new. This will display a "New" badge next to the course period. If left blank, no courses will be shown as new.
- # of Days to Warn Course Ending Soon: Enter the number of days before end date that you want to start warning members that a course is closed soon. During this period, "__ days left" text will be displayed in yellow.
- Point Field: Enter the API name of the Transaction field to be used for the calculation of points earned.
Course Detail Properties
- Course Detail Fields: Enter the API names of fields that you want to be displayed in course detail views, separated by commas.
- Point Field: Enter the API name of the Transaction field to be used for the calculation of points earned.
Module Detail Properties
- Enable Full User Experience: Leave this box checked to enable Fielo's full user experience, or uncheck it to use only module fields in the component.
- Passed Module Fields: Enter the API names of fields that you want to be displayed when a member has passed a module, separated by commas.
- Not Passed Module Fields: Enter the API names of fields that you want to be displayed when a member has not yet passed a module, separated by commas.
- Not Attempted Module Fields: Enter the API names of fields that you want to be displayed when a member has not yet attempted a module, separated by commas.
Quiz Properties
- Question Display Mode: Deprecated. This field will only apply if the Question Display Mode field of a module record is not filled in.
- Show Question Name: Check this box to display the name of the question next to the question number. (Don't worry, question text is always displayed.)
Module Response Detail Properties
- Enable Full User Experience: Leave this box checked to enable Fielo's full user experience, or uncheck it to use only module response fields in the component.
- Passed Module Fields: Enter the API names of fields that you want to be displayed when a member passes a module.
- Not Passed Module Fields: Enter the API names of fields that you want to be displayed when a member completes a module without passing, separated by commas.
- Show Question Name: Check this box to display the name of the question next to the question number. (Don't worry, question text is always displayed.)
Updated over 1 year ago