
Activity Plans
Activity plans are where you outline the activities you expect your users to perform over a given period. They can include simple done-or-not-done activities, as well as status items. Activities can include reference links to aid users in understanding or executing them.
Create an Activity Plan
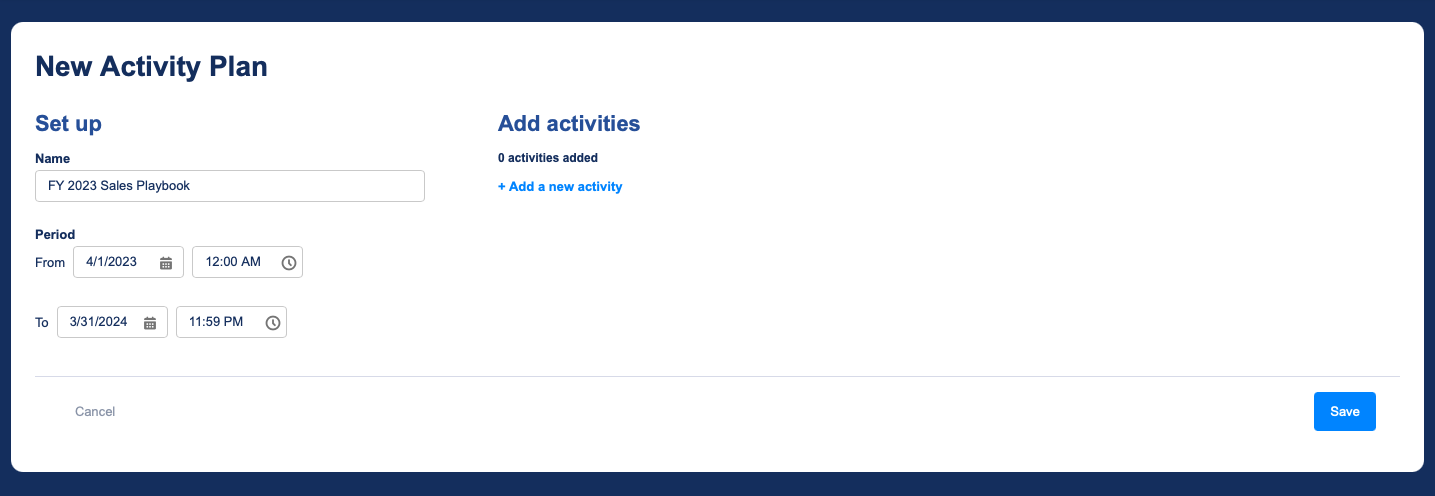
To create an activity plan, go to the Activity Plans tab and click New Activity Plan. Alternatively, you can navigate to the Import Plans tab to import a previously-exported plan.
Give your plan a name and, optionally, a timeframe. Individual activities can have their own timeboxes within the overall plan's timeframe.
Object
When using Roles & Hierarchies, you can create a plan for Accounts, Opportunities, Leads, Contacts, Cases, and custom objects. If you decide to use RevOps with Enterprise Territory Management, your plan will be for Accounts.
Custom ObjectsTo create a plan for a custom object, you must first create lookup fields to that object on the
FieloRO__Activity__candFieloRO__ActivityScoring__cobjects.
SOQL Filter
You can narrow down which subset of records will appear on the plan by entering a SOQL WHERE clause. For example:
Industry IN ('Banking', 'Finance')The above expression will limit the plan to accounts in the banking or finance industries. Notice that there's no need to include the preceding WHERE. To learn more about SOQL WHERE clauses, check out Salesforce Developer docs.
If you leave the SOQL filter blank, all records to which the logged-in user has access will be shown on the plan.
Add Activities
Now, add activities to your plan. Activities are what you expect your users to do while the plan is active.
Keep Your Users FocusedAs a best practice, keep your plan down to 5 to 7 activities. You can always create additional plans for different goals or target audiences.
Give each activity a descriptive name that your users will easily understand.
Period
You can optionally set a period in which you expect the activity to be completed. This period must fall within the overall timeframe of the plan. If you leave it blank, the activity can be completed anytime during the active period of the plan.
Fill in only through automation
By default, activities can be marked as complete either by the user or through automation. If this option is enabled, the activity will only be completable through automation and will be read-only for end users.
Learn more about Automating Your Plans.
Set Statuses & Scoring
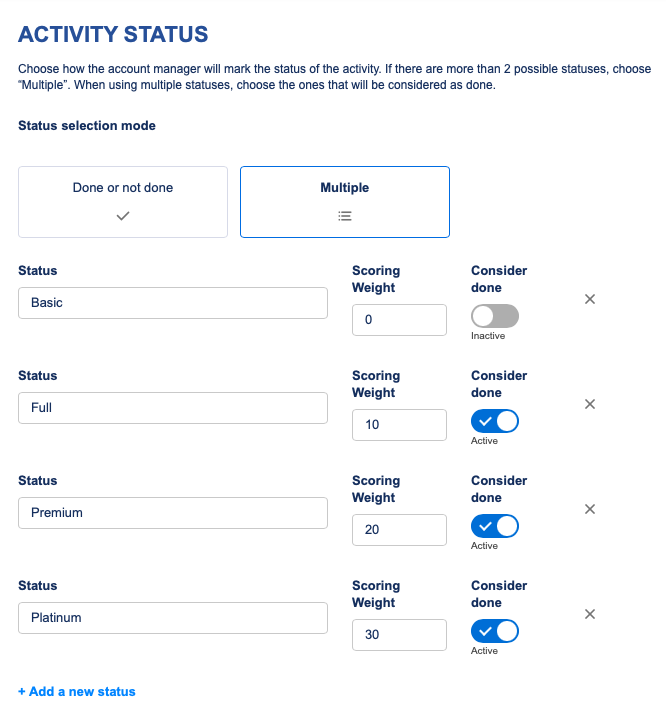
Next, choose how users will mark activities as done. Choose Done or not done for a simple checkbox, or Multiple if the user will have options to select.
When Done or not done is selected, you can optionally set a frequency, such as quarterly or semiannually. If you set a frequency and a period, be sure that the period encompasses the entire timeframe in which you expect the activity to be completed.
When Multiple is selected, you can enter the statuses that users will select on the activity. The first one should represent the state of the activity while not done, while the others should represent ways in which it can be completed.
In either mode, you can set a scoring weight for the done status(es). The scoring weight represents the contribution to the account score that the activity will make when completed. For activities that repeat, each completion will add the score according to the weight you set.
Add References
Optionally, you can add up to three references that help users understand or complete the activity. Reference links can point to any URL. References will be shown on the Activity Tracker component.
When you're ready, save. Feel free to follow these steps again to create additional activities.
Activate Your Plan
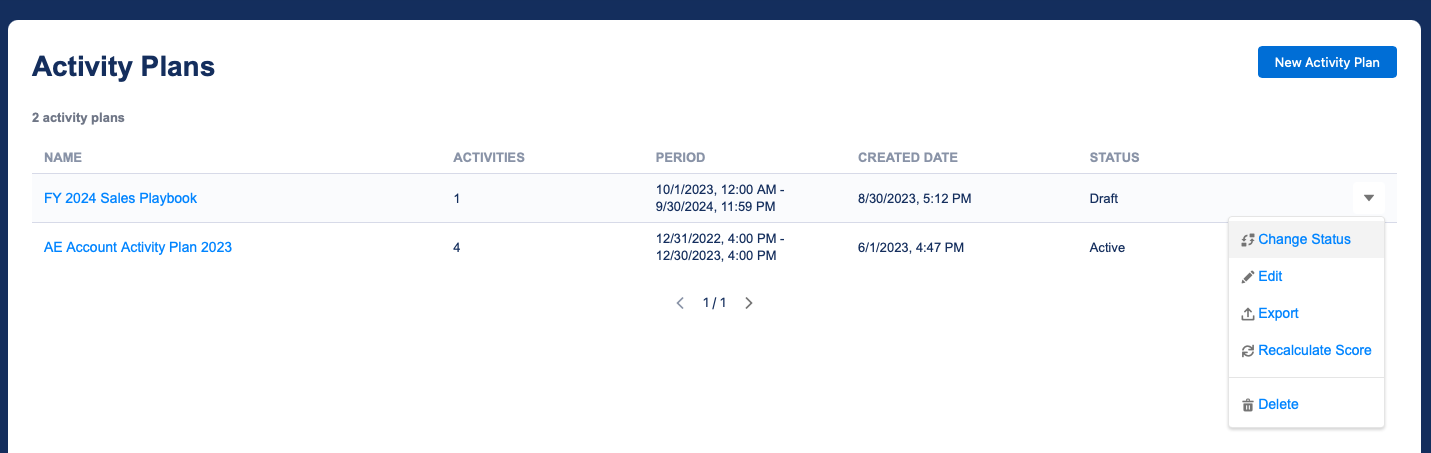
Once you're satisfied with your plan, go ahead and activate it.
Enable Users to Log Activities
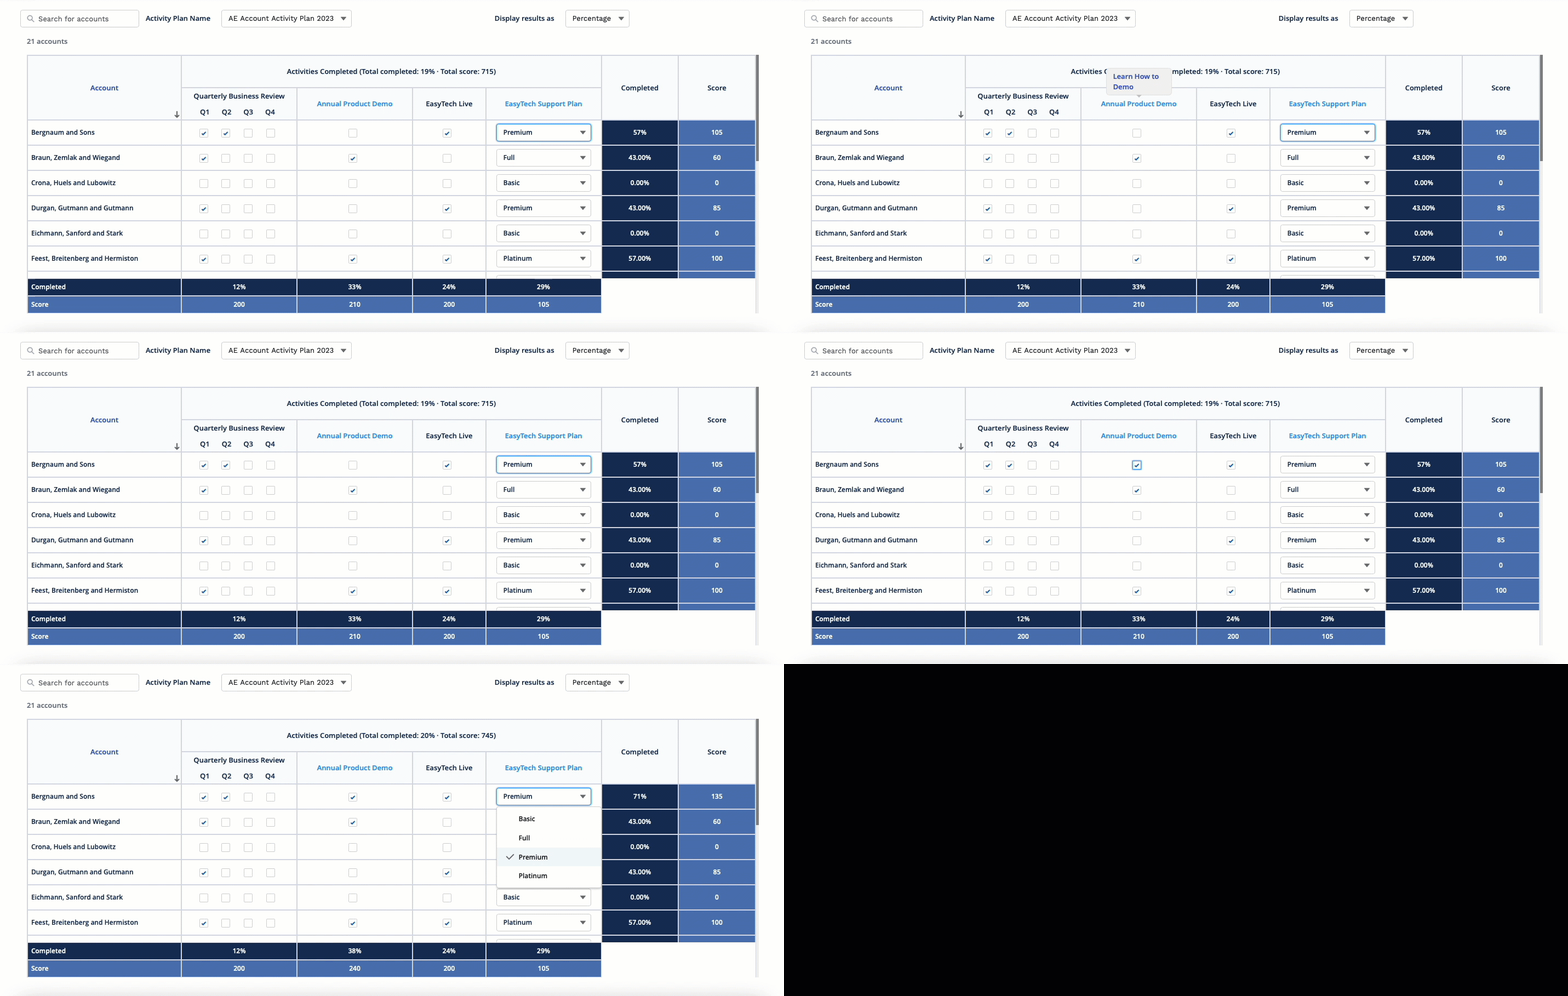
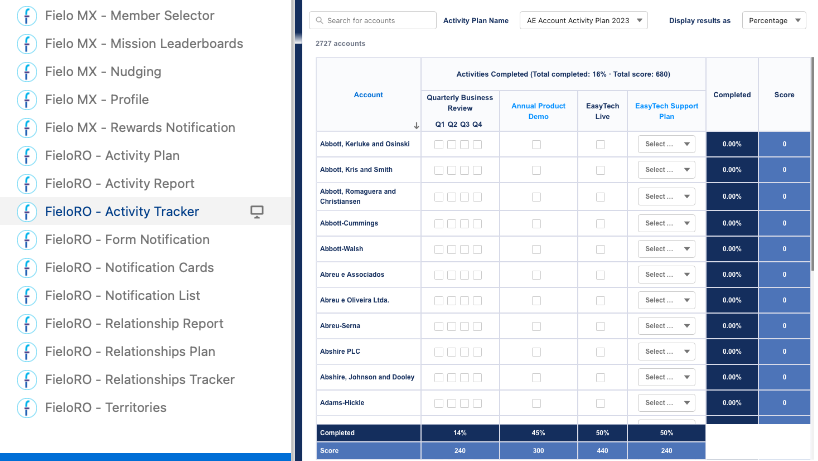
The Activity Tracker component presents the activity plans applicable to the logged-in user, allowing the user to mark activities as done and check their progress (including score). We recommend placing it in a wide area on a page that your users are accustomed to visiting.
To add it to a page, go to the Lightning App Builder or Experience Builder and open the component menu. Drag and drop FieloRO - Activity Tracker onto the desired area, then save or publish.
Enable Managers to Monitor Activities
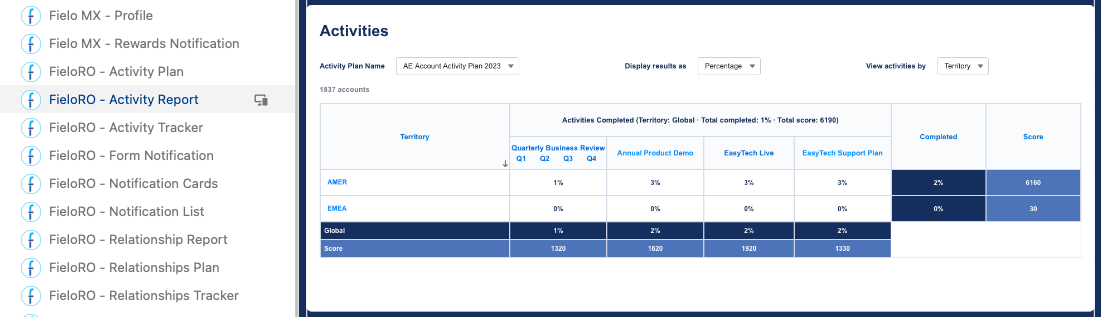
The Activity Report component allows sales managers to monitor activity progress at every level of the role or territory hierarchy, including aggregated progress and scoring data. We recommend placing it in a wide area on a page that your managers are accustomed to visiting.
To add it to a page, go to the Lightning App Builder or Experience Builder and open the component menu. Drag and drop FieloRO - Activity Report onto the desired area, then save or publish.
Updated about 1 year ago