
Rewards Catalog
The Rewards Catalog, or Catalog, offers a complete rewards shopping experience to your members.
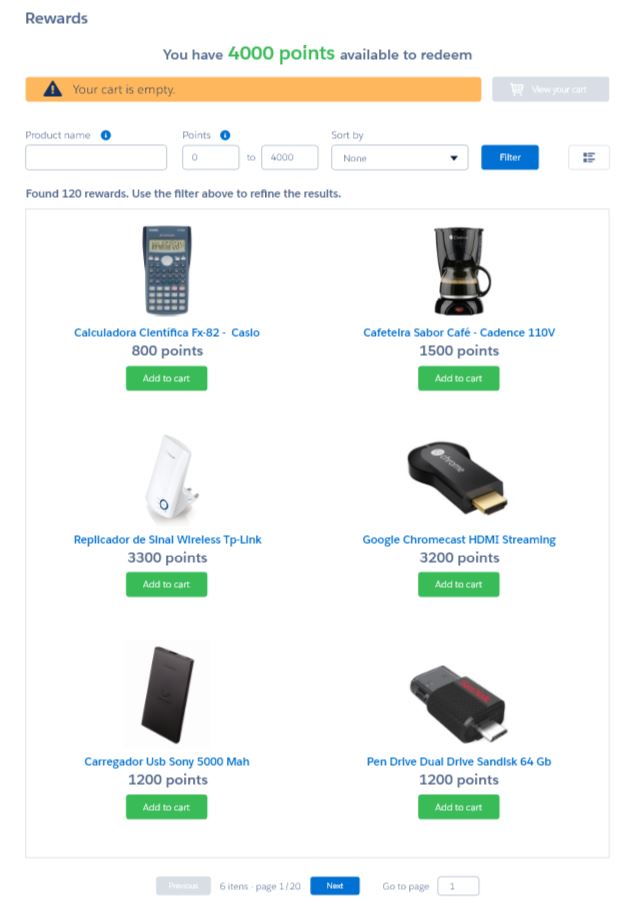
Members can browse all of the rewards available to their segment(s) and add rewards to their cart.
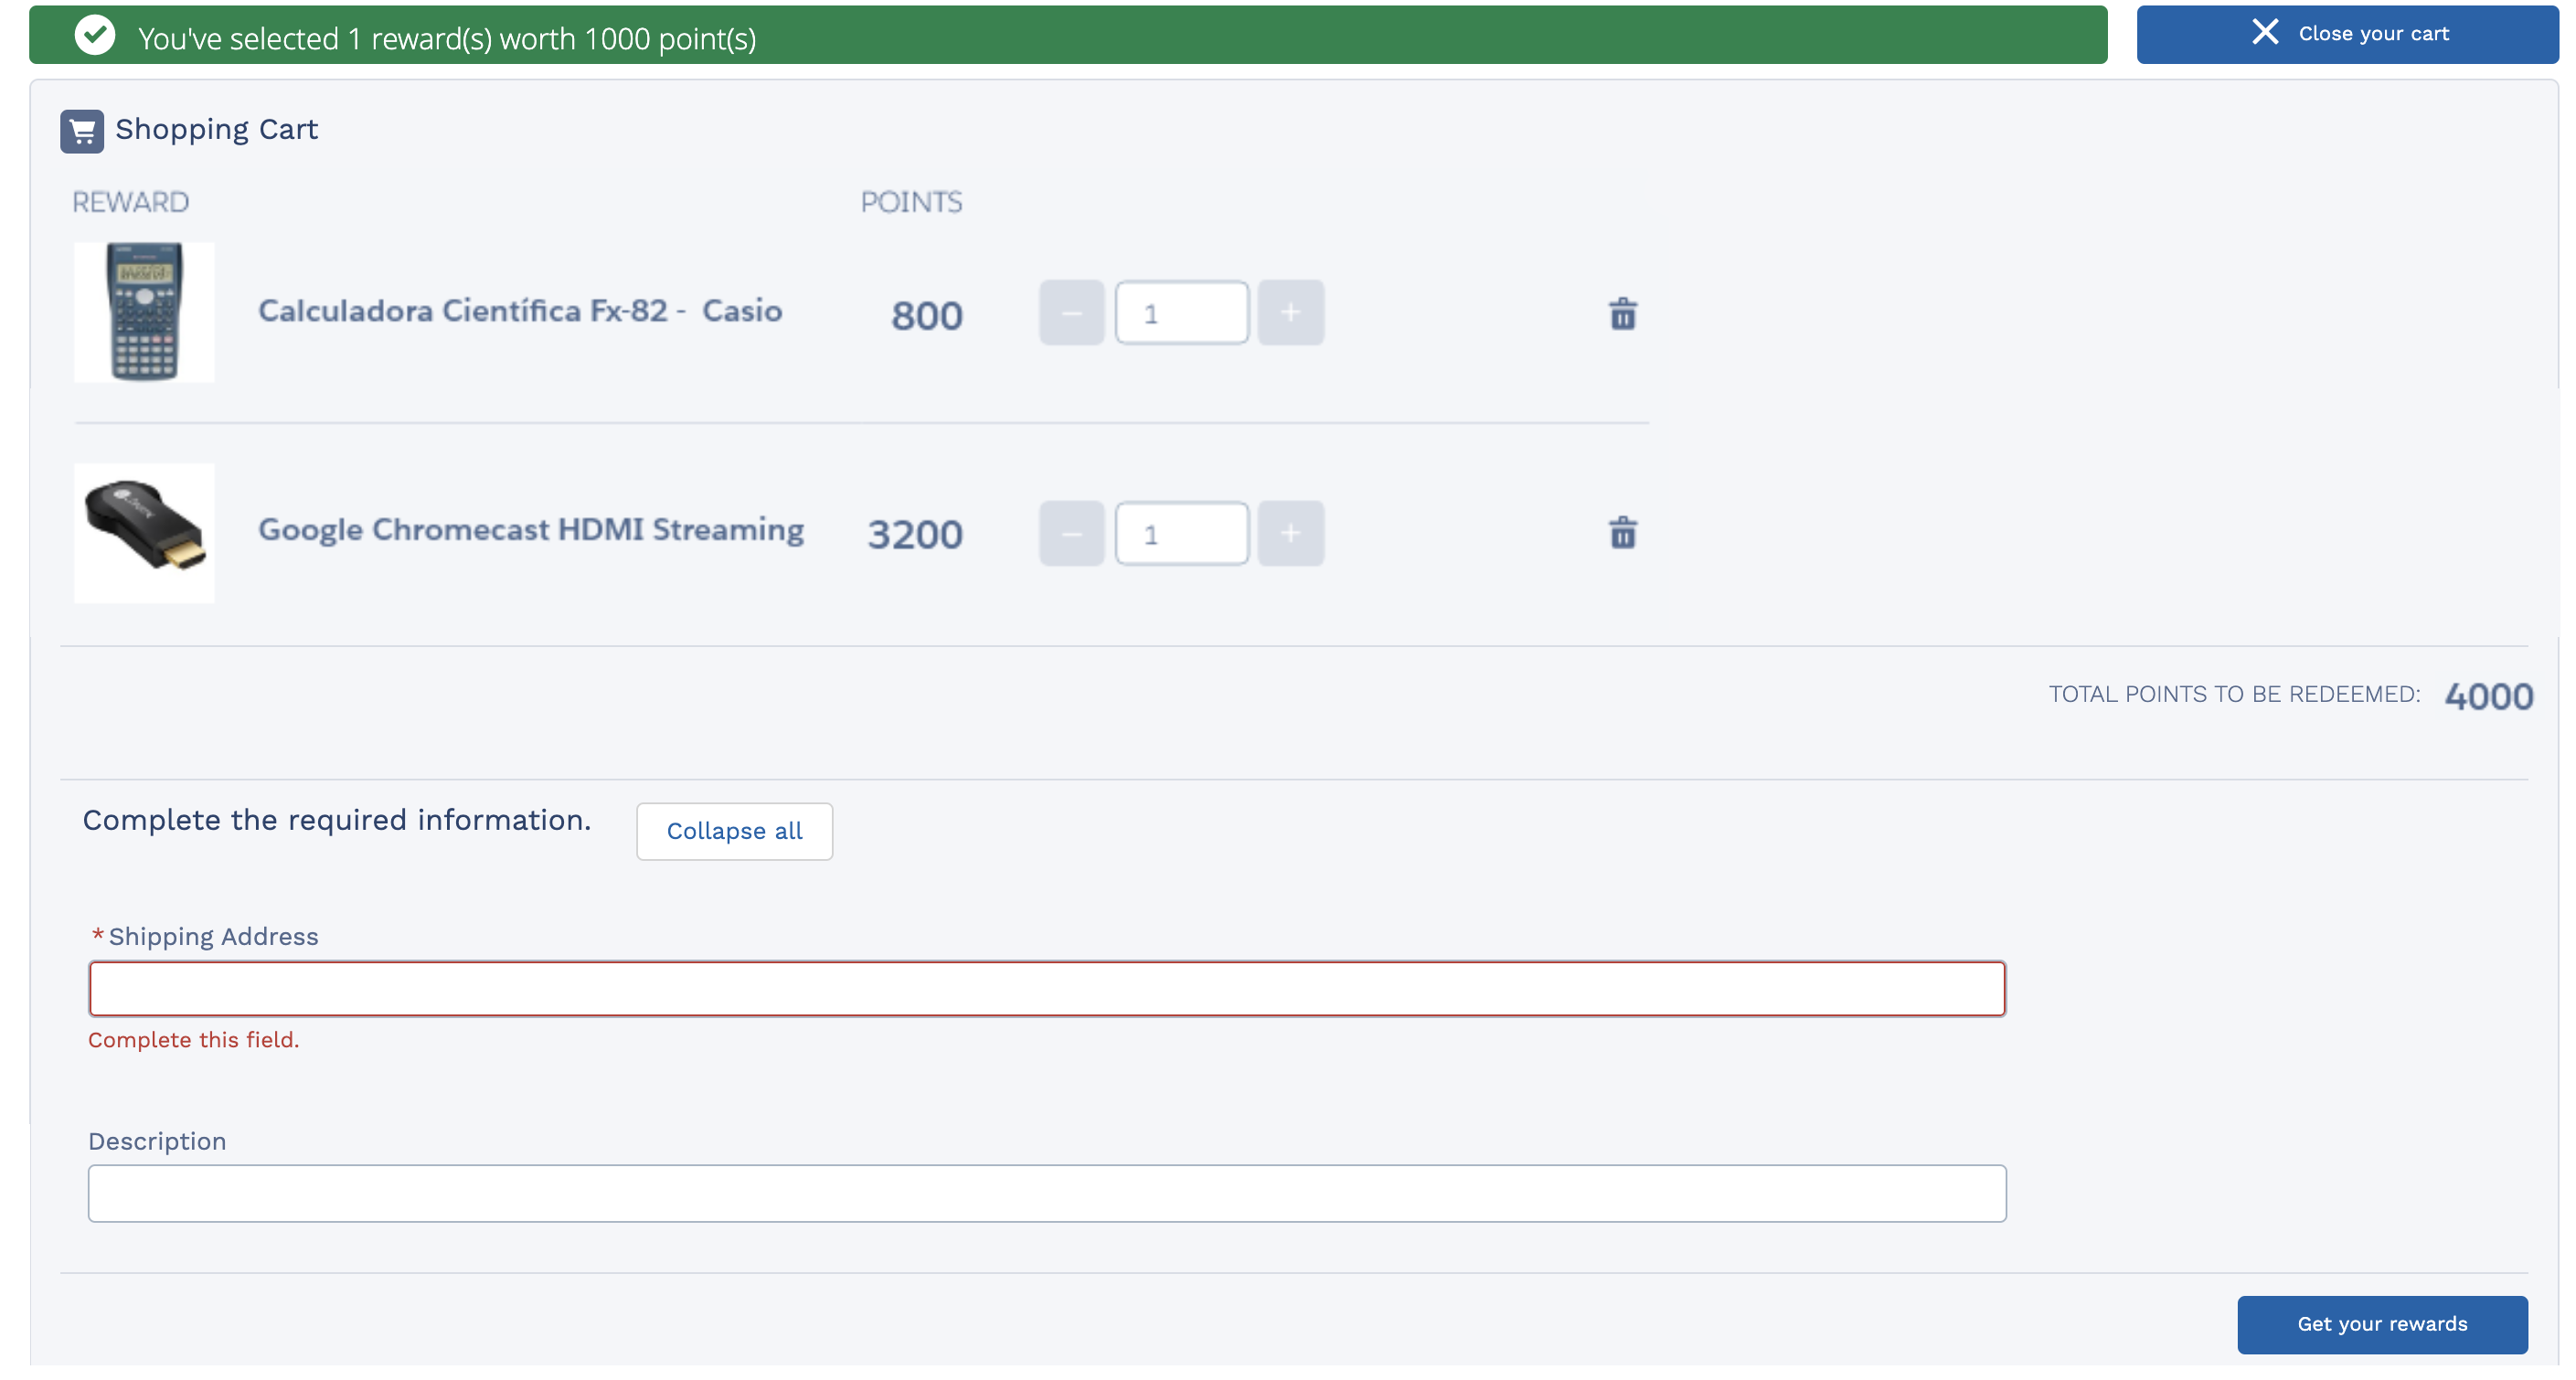
When they're ready, they complete the checkout process and see that their redemption order has been confirmed.
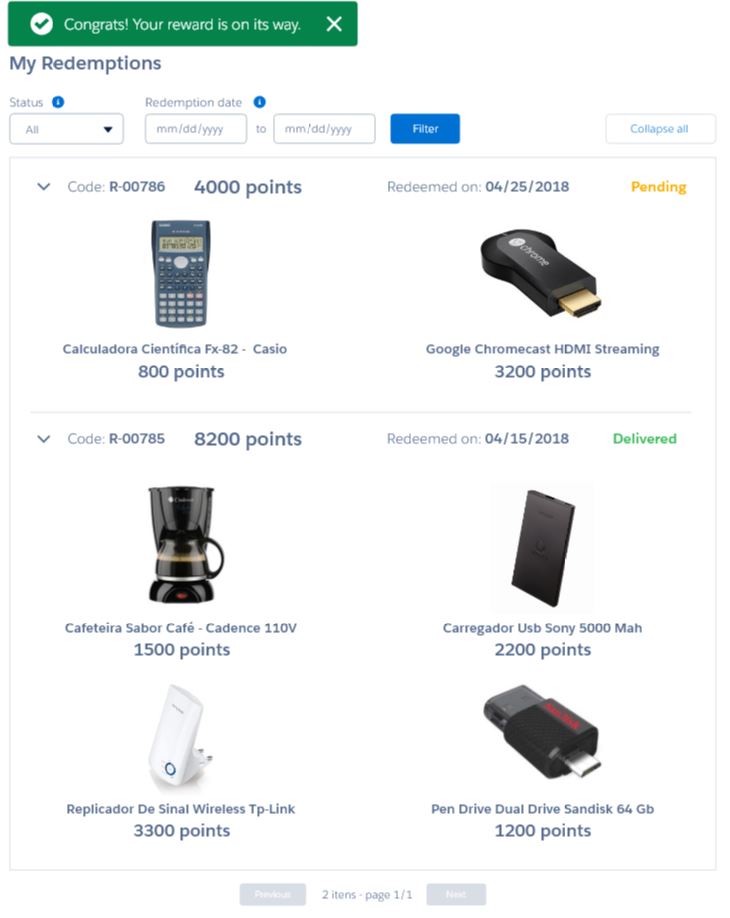
With Catalog, your members' sustained program engagement is rewarded and a virtuous incentive and loyalty cycle is reinforced.
Configuring Catalog
Once you've added Member Selector and Catalog to your page, you can customize what data is shown and how it is shown.
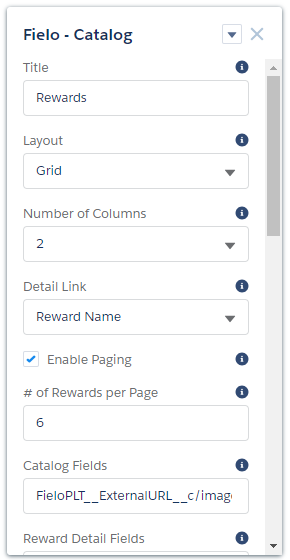
Catalog comes 100% ready to use, but you can add or remove content to tailor it to the specific needs of your loyalty program.
Catalog can be configured via the following properties:
- Title: Enter the title you want displayed at the top of the component.
- Layout: Choose Table to display items in list format or Grid to display them in tile format. Don't worry, your members will be able to toggle back and forth between the views.
- Currency Custom Label: Enter a custom label that will override the default AvailableRedeemPoints label used in the Catalog to show to members the quantity of available Points that they have. If left blank, the default value will be shown. See custom currencies for more information.
- Rewards Custom Label: Enter a custom label that will override the default RewardsSelectedMessage label used in the Catalog, which displays a message within the cart page after the member selects a reward. If left blank, the default value will be shown. See custom currencies for more information.
- Number of Columns: Choose the number of columns you want to be displayed in grid layout.
- Detail Link: Choose the field you want to use as text for reward detail links.
- Enable Paging: Check this box to allow items to be displayed in pages.
- # of Rewards per Page: If paging is enabled, enter the maximum number of rewards to be displayed per page.
- Catalog Fields: Enter the API names of the fields you want to include in the catalog, separated by commas.
- Reward Detail Fields: Enter the API names of the fields you want to be displayed in reward detail views, separated by commas.
- Enable Sorting: Check this box to allow members to sort rewards in the catalog.
- Filter Fields: Enter the API names of the fields you want to make available for reward filtering, separated by commas.
Long Text fields are not filterableCareful! Long Text fields, such as Description, are not queryable on the Salesforce platform, and therefore cannot be used for filtering.
- Redemptions Input Fields: Enter the Redemption fields' API names in order to allow members to add information to the redemption that is going to be generated at the moment of the checkout, such as Shipping Address.
- My Redemptions - Title: Enter the title to be displayed at the top of the component after a member has made a redemption in the Catalog.
- My Redemptions - Layout: Choose how you want members' redemptions to be displayed after they've made a redemption in the Catalog.
- My Redemptions - Number of Columns: If using grid layout for the redemption view, choose the number of columns you want to be displayed.
- My Redemptions - Enable Paging: Check this box to allow redemptions to be displayed in pages.
- My Redemptions - # of Redemptions per Page: If paging is enabled for redemptions, enter the maximum number of redemptions you want to be displayed on a single page.
- My Redemptions - Enable Filtering: Check this box to allow members to filter their redemptions.
- My Redemptions - Filter Fields: If filtering is enabled for redemptions, enter the API names of the fields you want members to be able to filter by.
- My Redemptions - List Fields: Enter the API names of the fields you want to include in the redemption list, separated by commas.
- My Redemptions - Detail Fields: Enter the API names of the fields you want to be visible in redemption detail views, separated by commas.
- My Redemptions - Show Redemption Items: Check this box to display redemption items in redemption detail views.
- My Redemptions - Redemption Item Fields: If showing redemption items, enter the API names of the redemption item fields you want to be displayed in redemption detail views, separated by commas.
Using Custom Currencies with Catalog
If you're using custom currencies in your program, it's easy to display them in Catalog.
The first step is to make sure that you custom currencies will appear in all of the places within the Catalog component that displays the currencies amount. For that, you need to add the custom currency's API name in the following properties (separated by commas):
- Catalog Fields
- Filter Fields
- My Redemptions - List Fields
- My Redemptions - Redemption Item Fields
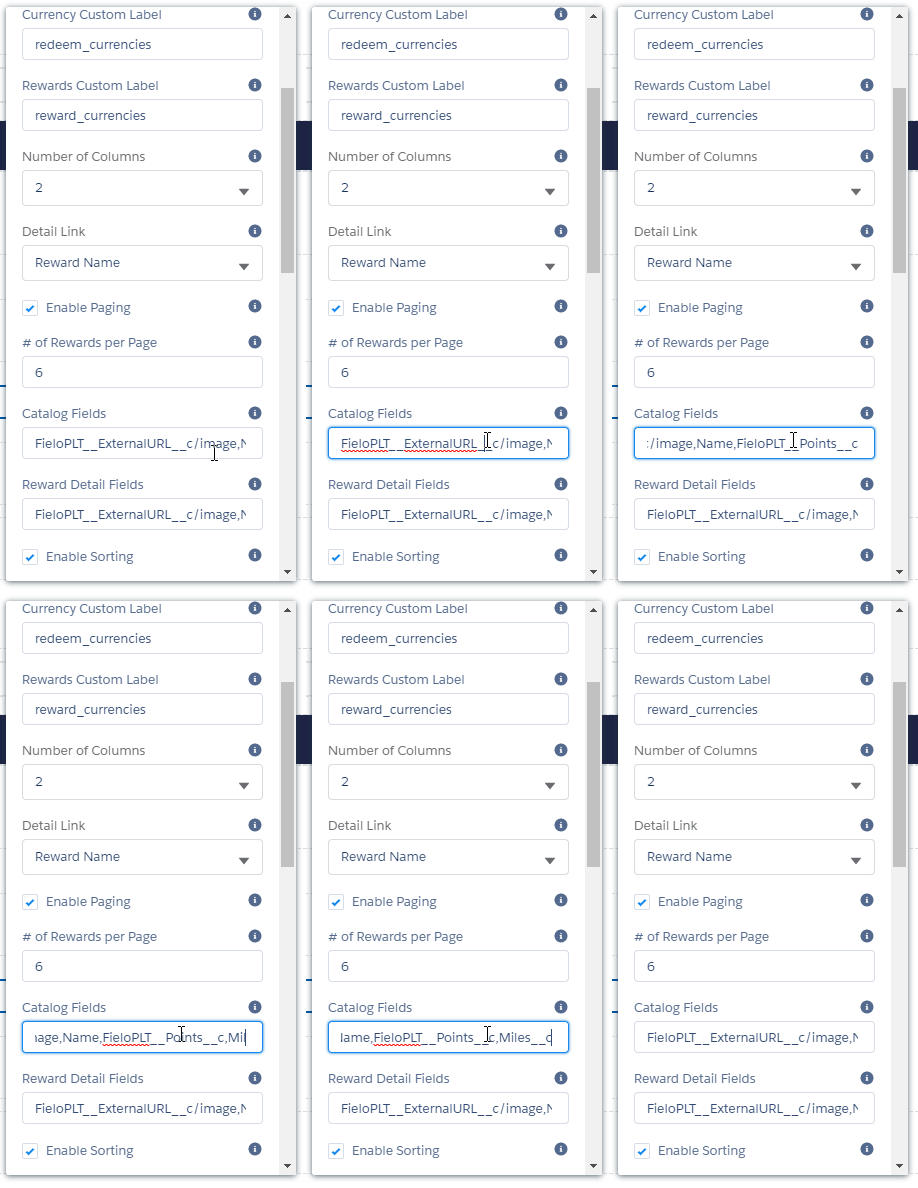
Adding Miles to 'My Redemptions - Redemption Item Fields' property
After doing that, the next step is to create new Custom Label, which will replace one or both of our default labels.
Go to Salesforce Setup, quick find and select Custom Labels. Click on New Custom Label and go through the steps to create a new one: choose a name that will work the best for you and, in the value field, add the message.
Don't forget to Save afterwards.
Fielo's Default LabelsAs a reference (so that you can base your messages on them), check the default labels below. You would just need to add the API names of your custom currencies to them.
- AvailableRedeemPoints - which has this value: "You have {!FieloPLT__Points__c} points available to redeem"
- RewardsSelectedMessage - which has this value: "You've selected {!quantity} reward(s) worth {!FieloPLT__Points__c} point(s)"
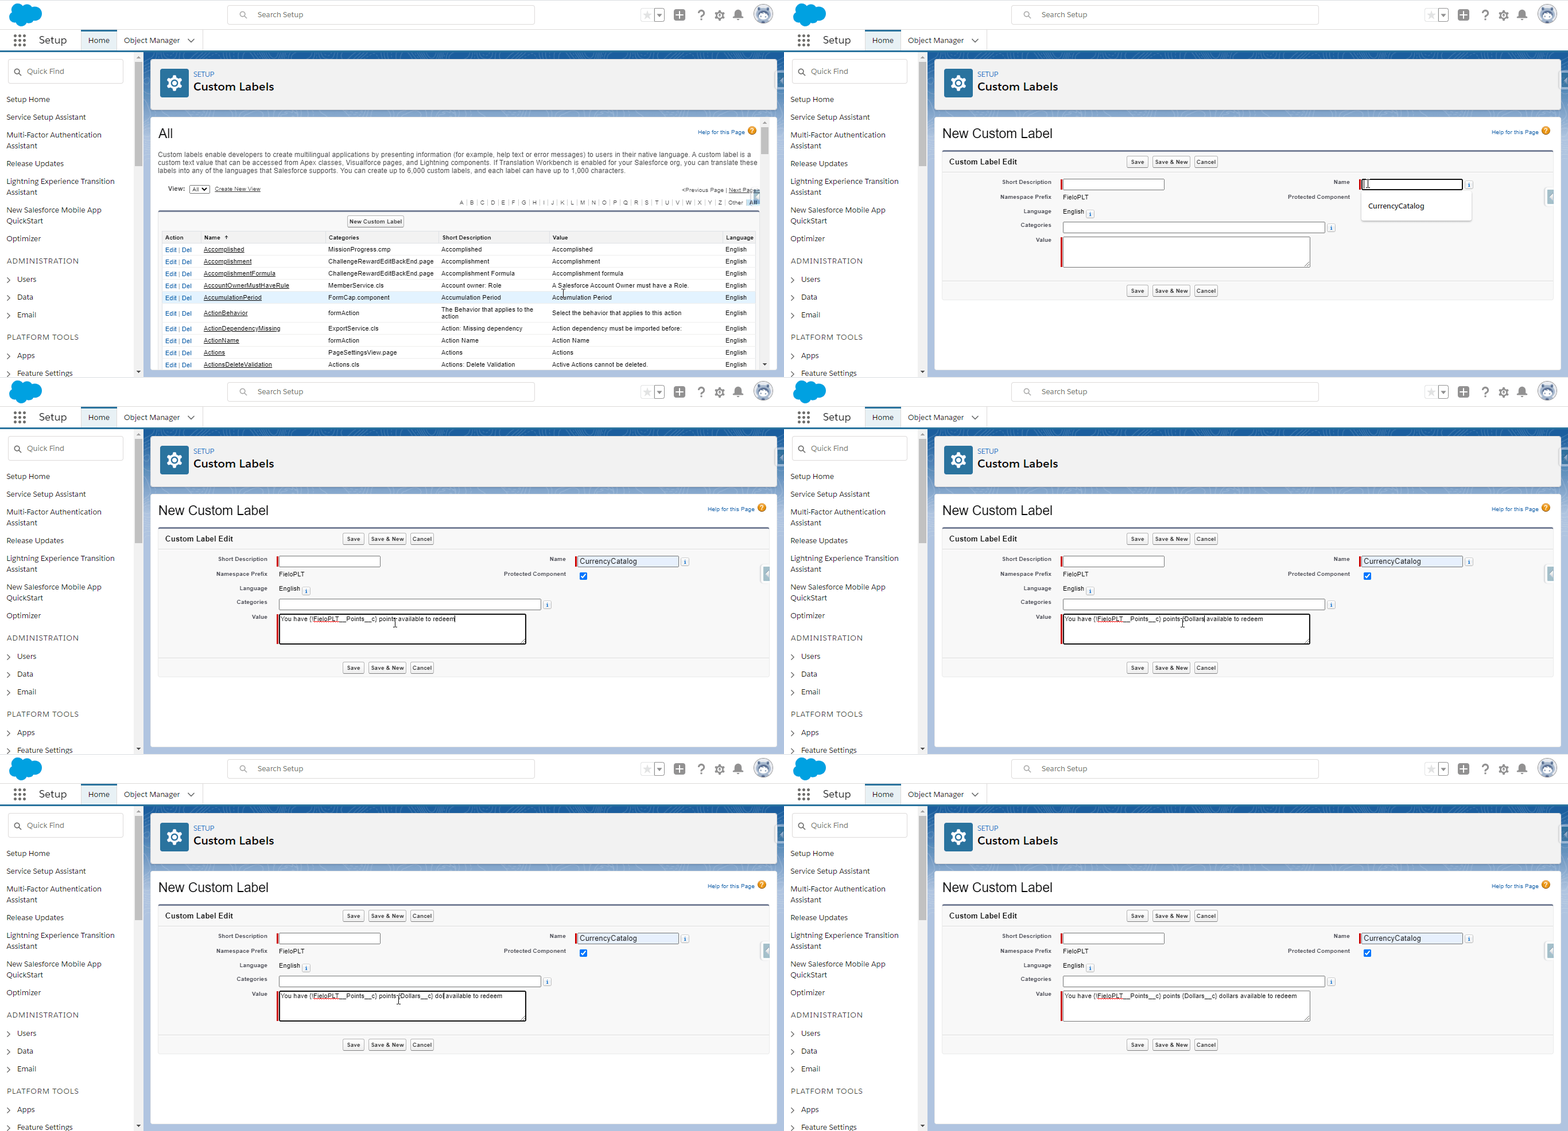
Creating a custom label to override the AvailableRedeemPoints Label
Next, go to Experience Cloud builder. In the Catalog component configuration form, enter the name that you gave to the custom labels you just created within the Currency Custom Label and Rewards Custom Label fields. When the member accesses the Site, they will see the message that you wrote for the new labels.
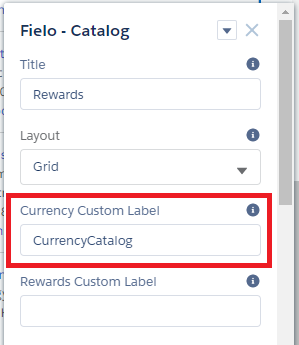
Currency Custom Label field updated.
The power of being able to add a Custom Label instead of changing the existing ones, is that you can have several labels for different uses. Such as it is the case when you need to use the Catalog component in a Site that has more than one page versions - for different audiences - and each one has to display different information.
Currency that generates payoutRewards Catalog doesn't work with currencies that generate payout. You won't be able to add it as a Custom Currency.
Points Totals during CheckoutCustom currencies used in your program will be shown on the totals list during checkout only when the reward(s) selected request them. This is automatic and cannot be modified.
Updated over 1 year ago