
Create your Members' Site (CMS Only)
Configure your CMS Site for your Members to upload Invoices
Are you using Fielo CMS for your loyalty portal? You may well want to create a Site for your Members. This is where Members can Upload Invoices and keep track of their Invoice History. To create your CMS Site, and all of its Pages, follow these simple steps:
Creating your Site
To create your Site, start by reading Getting started with Content and then refer directly to information in Sites.
Setting up the Invoice Pages
There are four Invoice-related Pages you need to create for your CMS Site:
- My Invoices: This is the page from which your Members will be able to see a list of all of their uploaded Invoices. This is what it looks like from the Site:
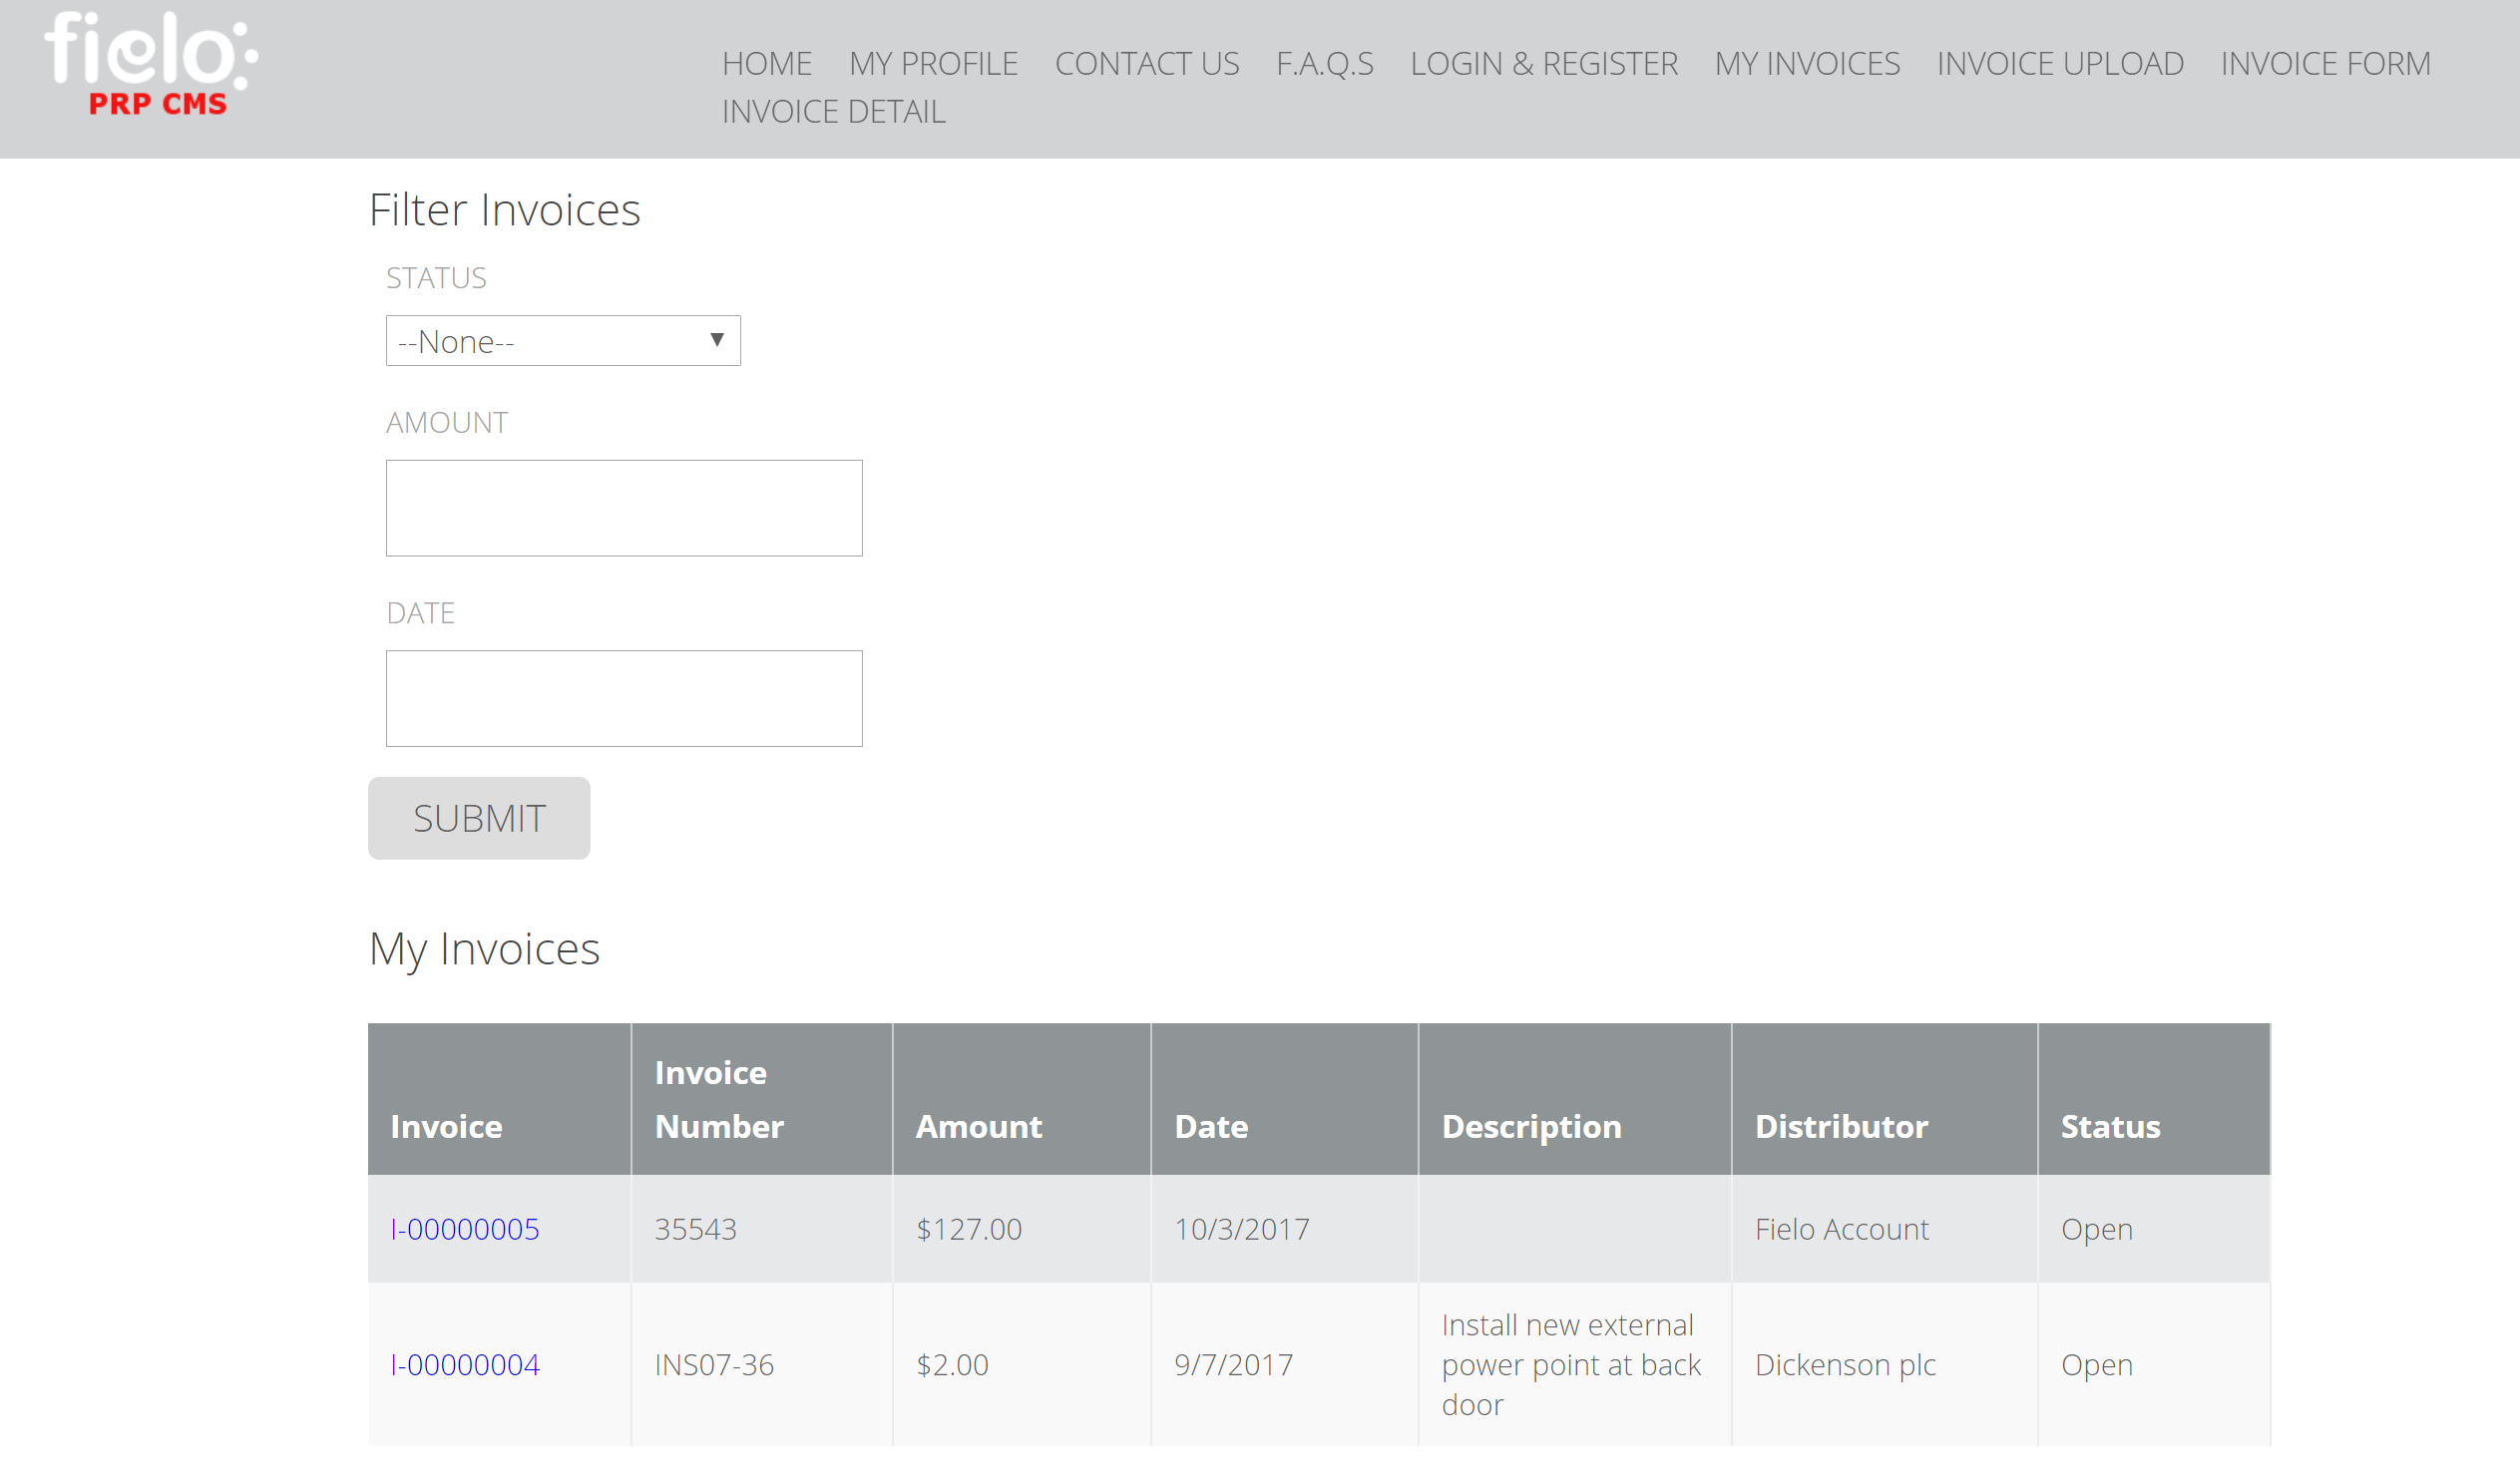
My Invoices
- Invoice Detail: This is the sub-page of My Invoices. When a Member clicks on a given Invoice entry on My Invoices he or she will be taken to the Invoice Detail page. This is what your Members see:
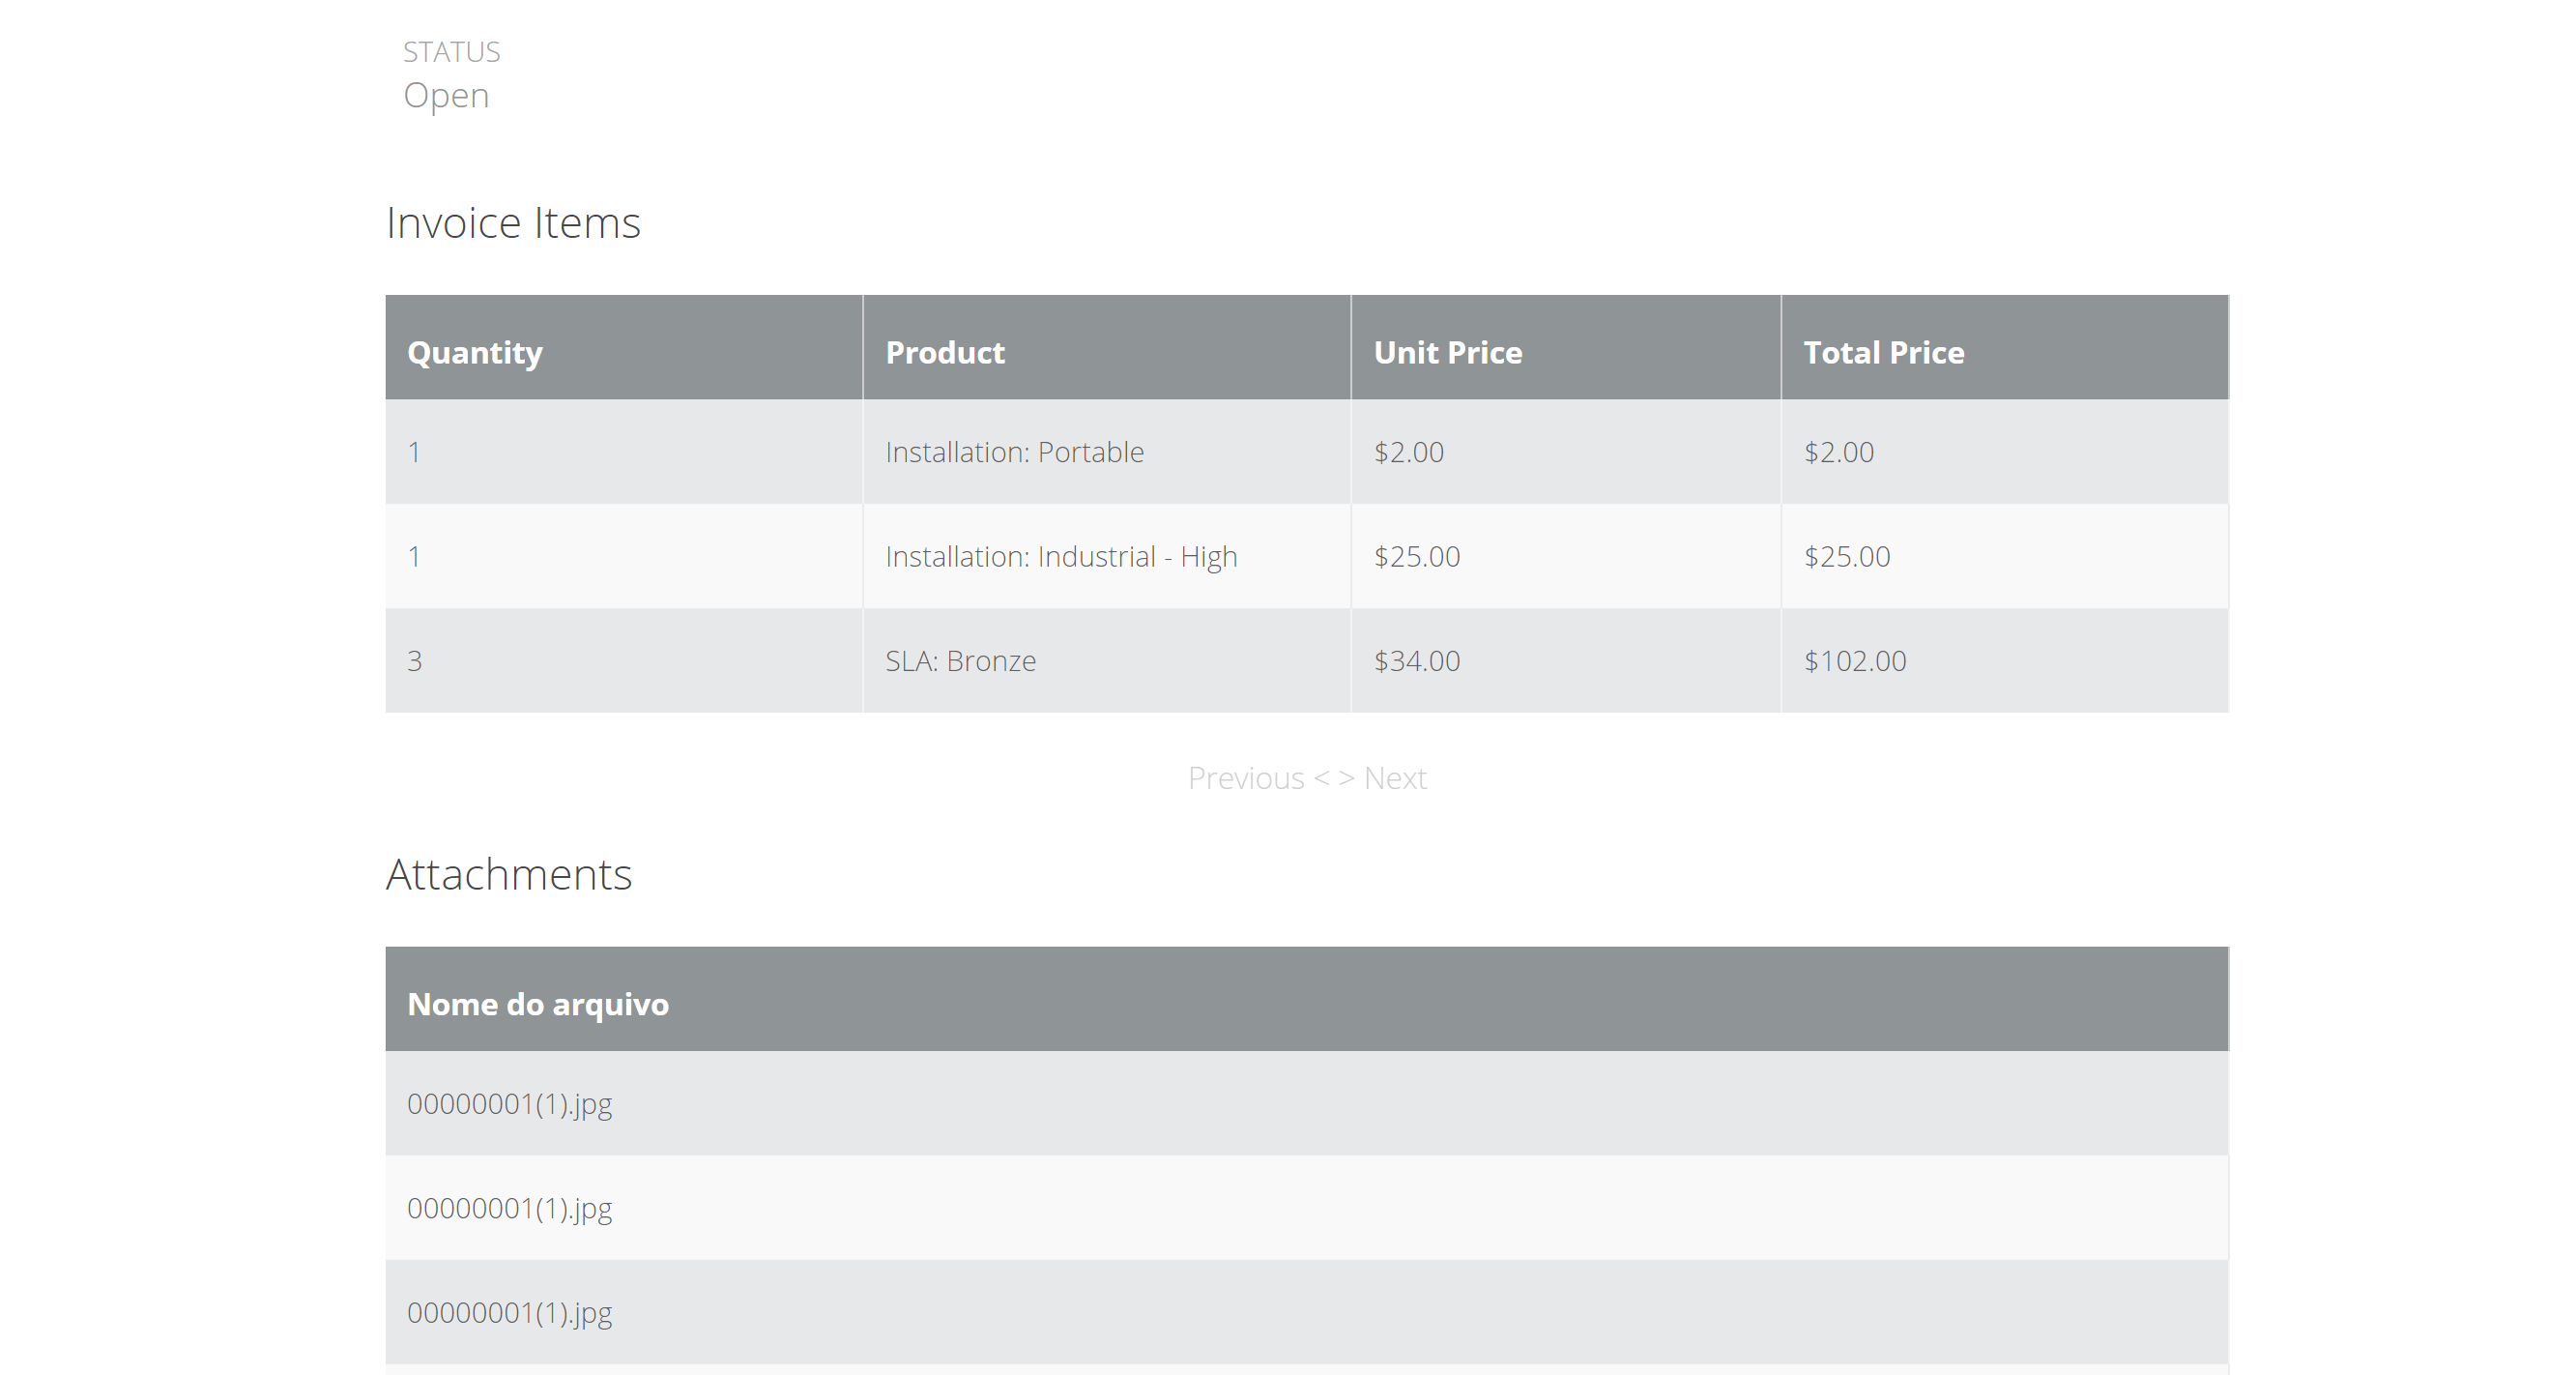
Invoice Details
- Invoice Upload: This is the page from which your Members will be able to upload their Invoices. This is how it looks:
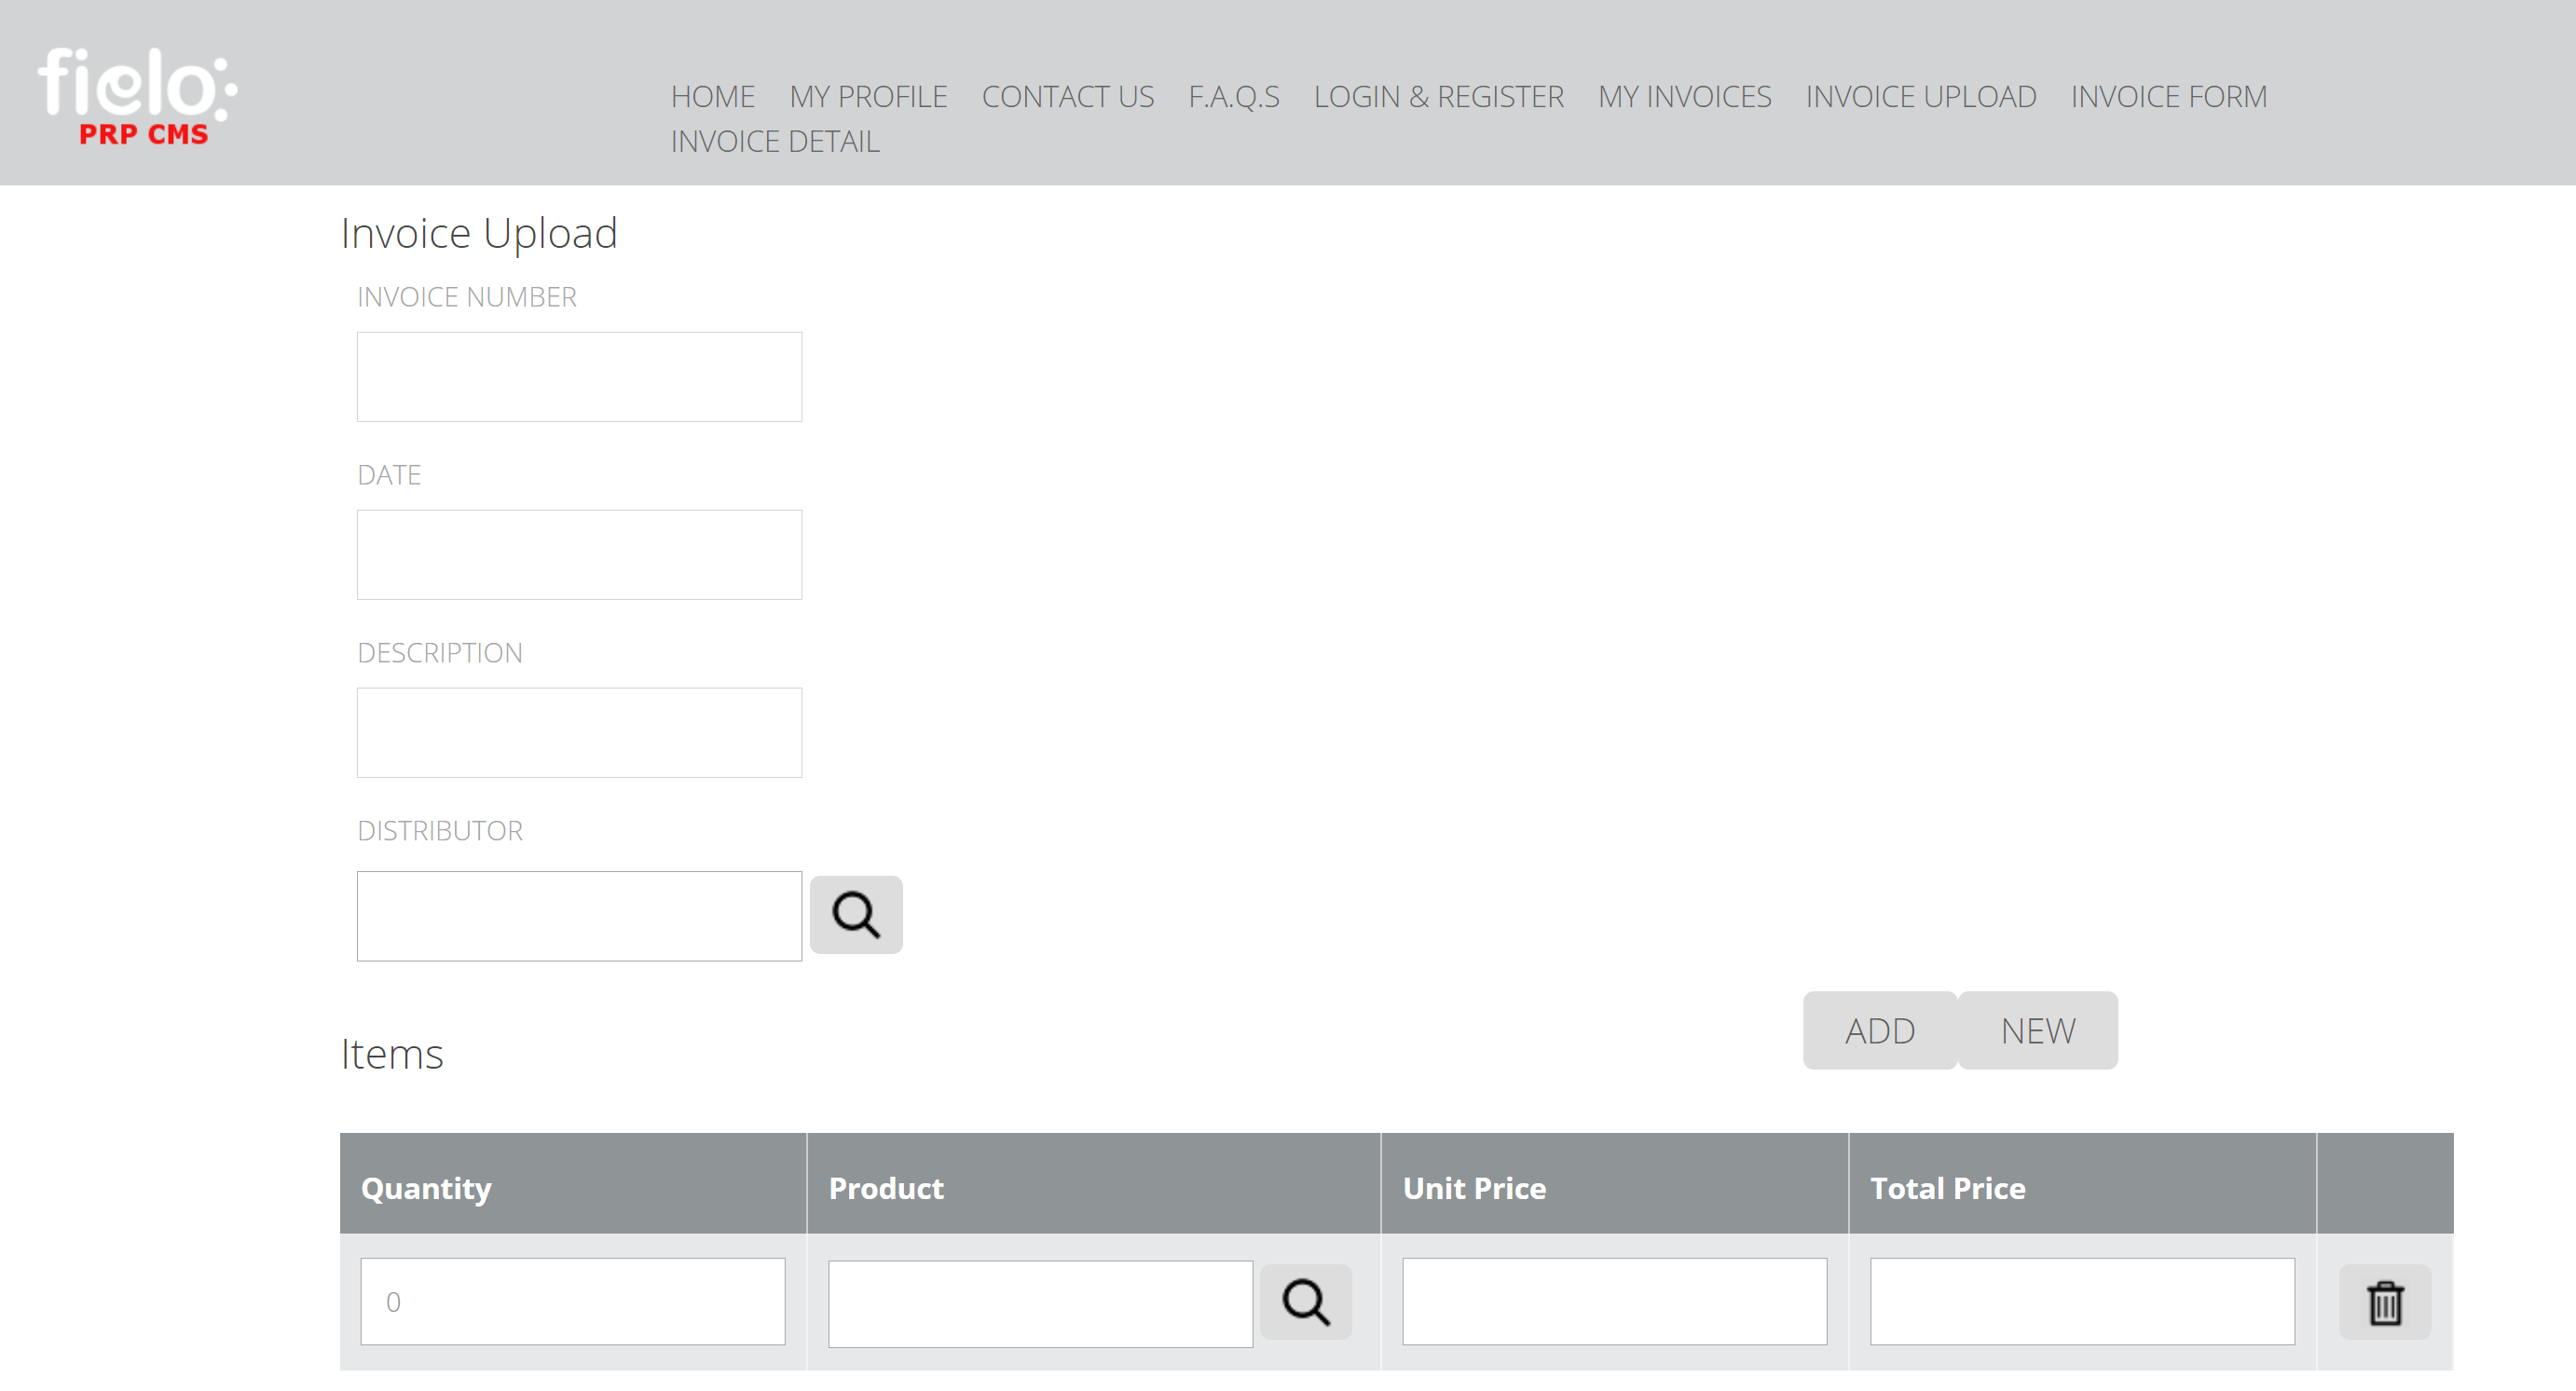
Invoice Upload
- Invoice Upload Settings: This is not visible from the Site (or to your Members). It is where you will configure your detailed site settings.
Let's get started. To create your first page, press New in Pages. Fortunately, there are already Models set up for you.
My Invoices
Select the Model My Invoices and enter the same name: My Invoices. Then press Save. This page comes fully configured so you do not necessarily need to change anything. However, if you want to, you can enter either My Invoices or Filter Invoices to adjust the settings. You do this by pressing Edit in the top left of the box for each.
Check Record View Settings (see image below)It is important to check that the Record View settings are correct. Make sure that Internal Page is selected.
For the Detail component choose Invoice Detail > Invoice Record.
For the Detail Parameter choose Id
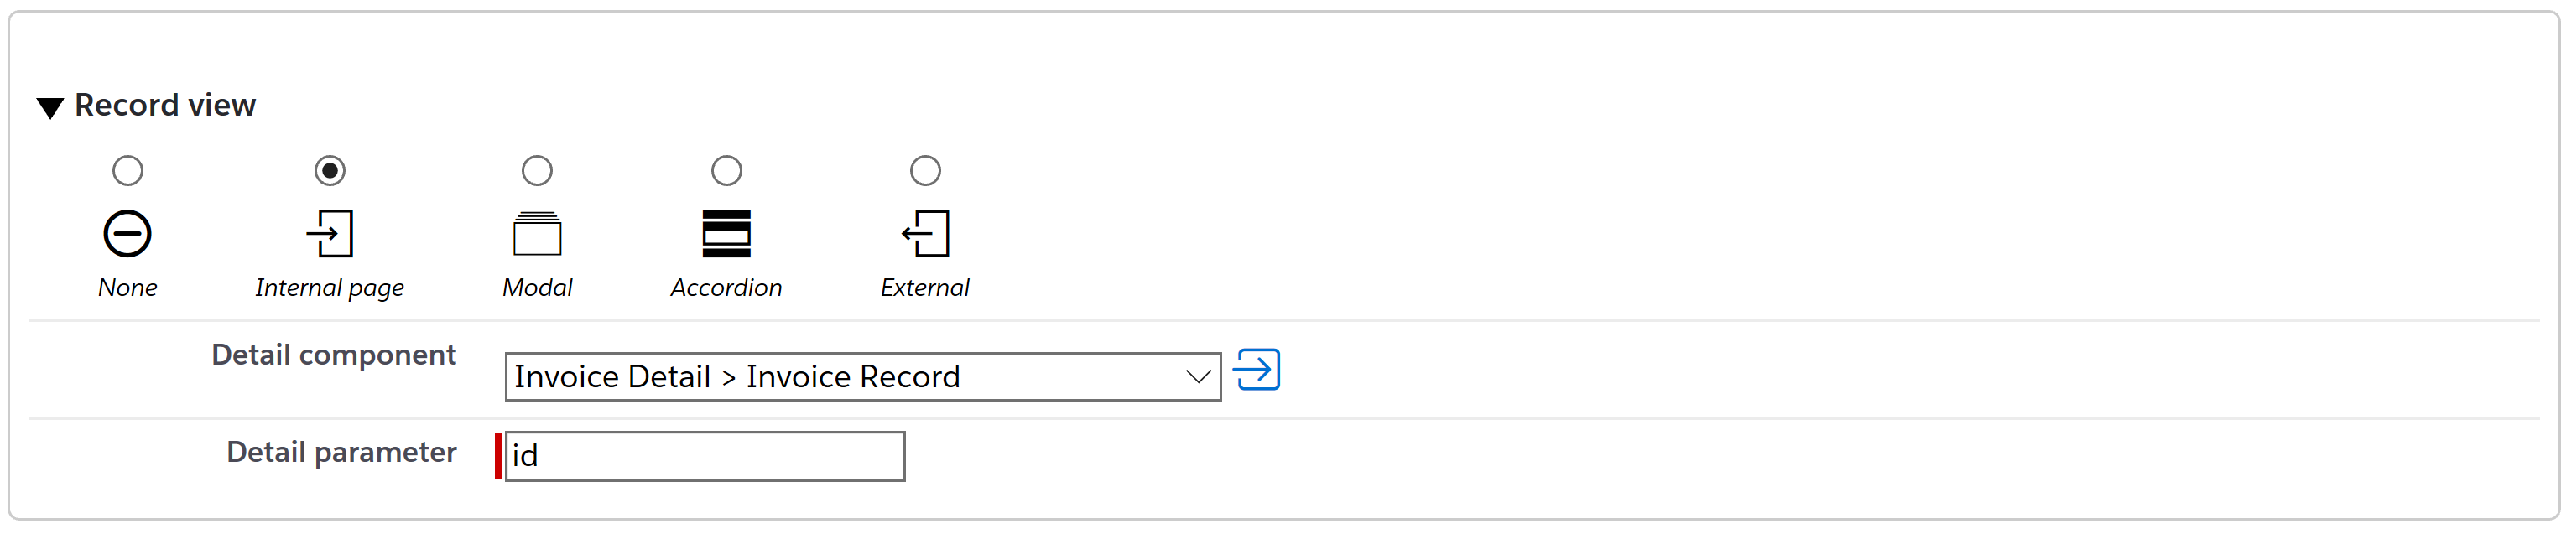
Record View Settings
You can then make changes to any of the Fields, and save the changes by clicking Save in the top right corner.
By clicking Preview you can see what it will look like for a Member who is logged in.
Invoice Detail
Create this Page the same way you created the My Invoices Page, making sure to select the correct Model and input the same Name. This also comes fully configured so you do not need to make any edits unless you want to.
By clicking Preview you can see what it will look like for a Member who is logged in.
Invoice Upload
Create this Page the same way you created the My Invoices and Invoice Upload pages, making sure to select the correct Model and input the same Name. This Page does not come fully configured so you will have to do some of the work.
Click on Edit in the top right corner. Scroll down to Invoice Upload and select Edit. In the Invoice Upload widget of this page, you need to fill out the information in the following way:
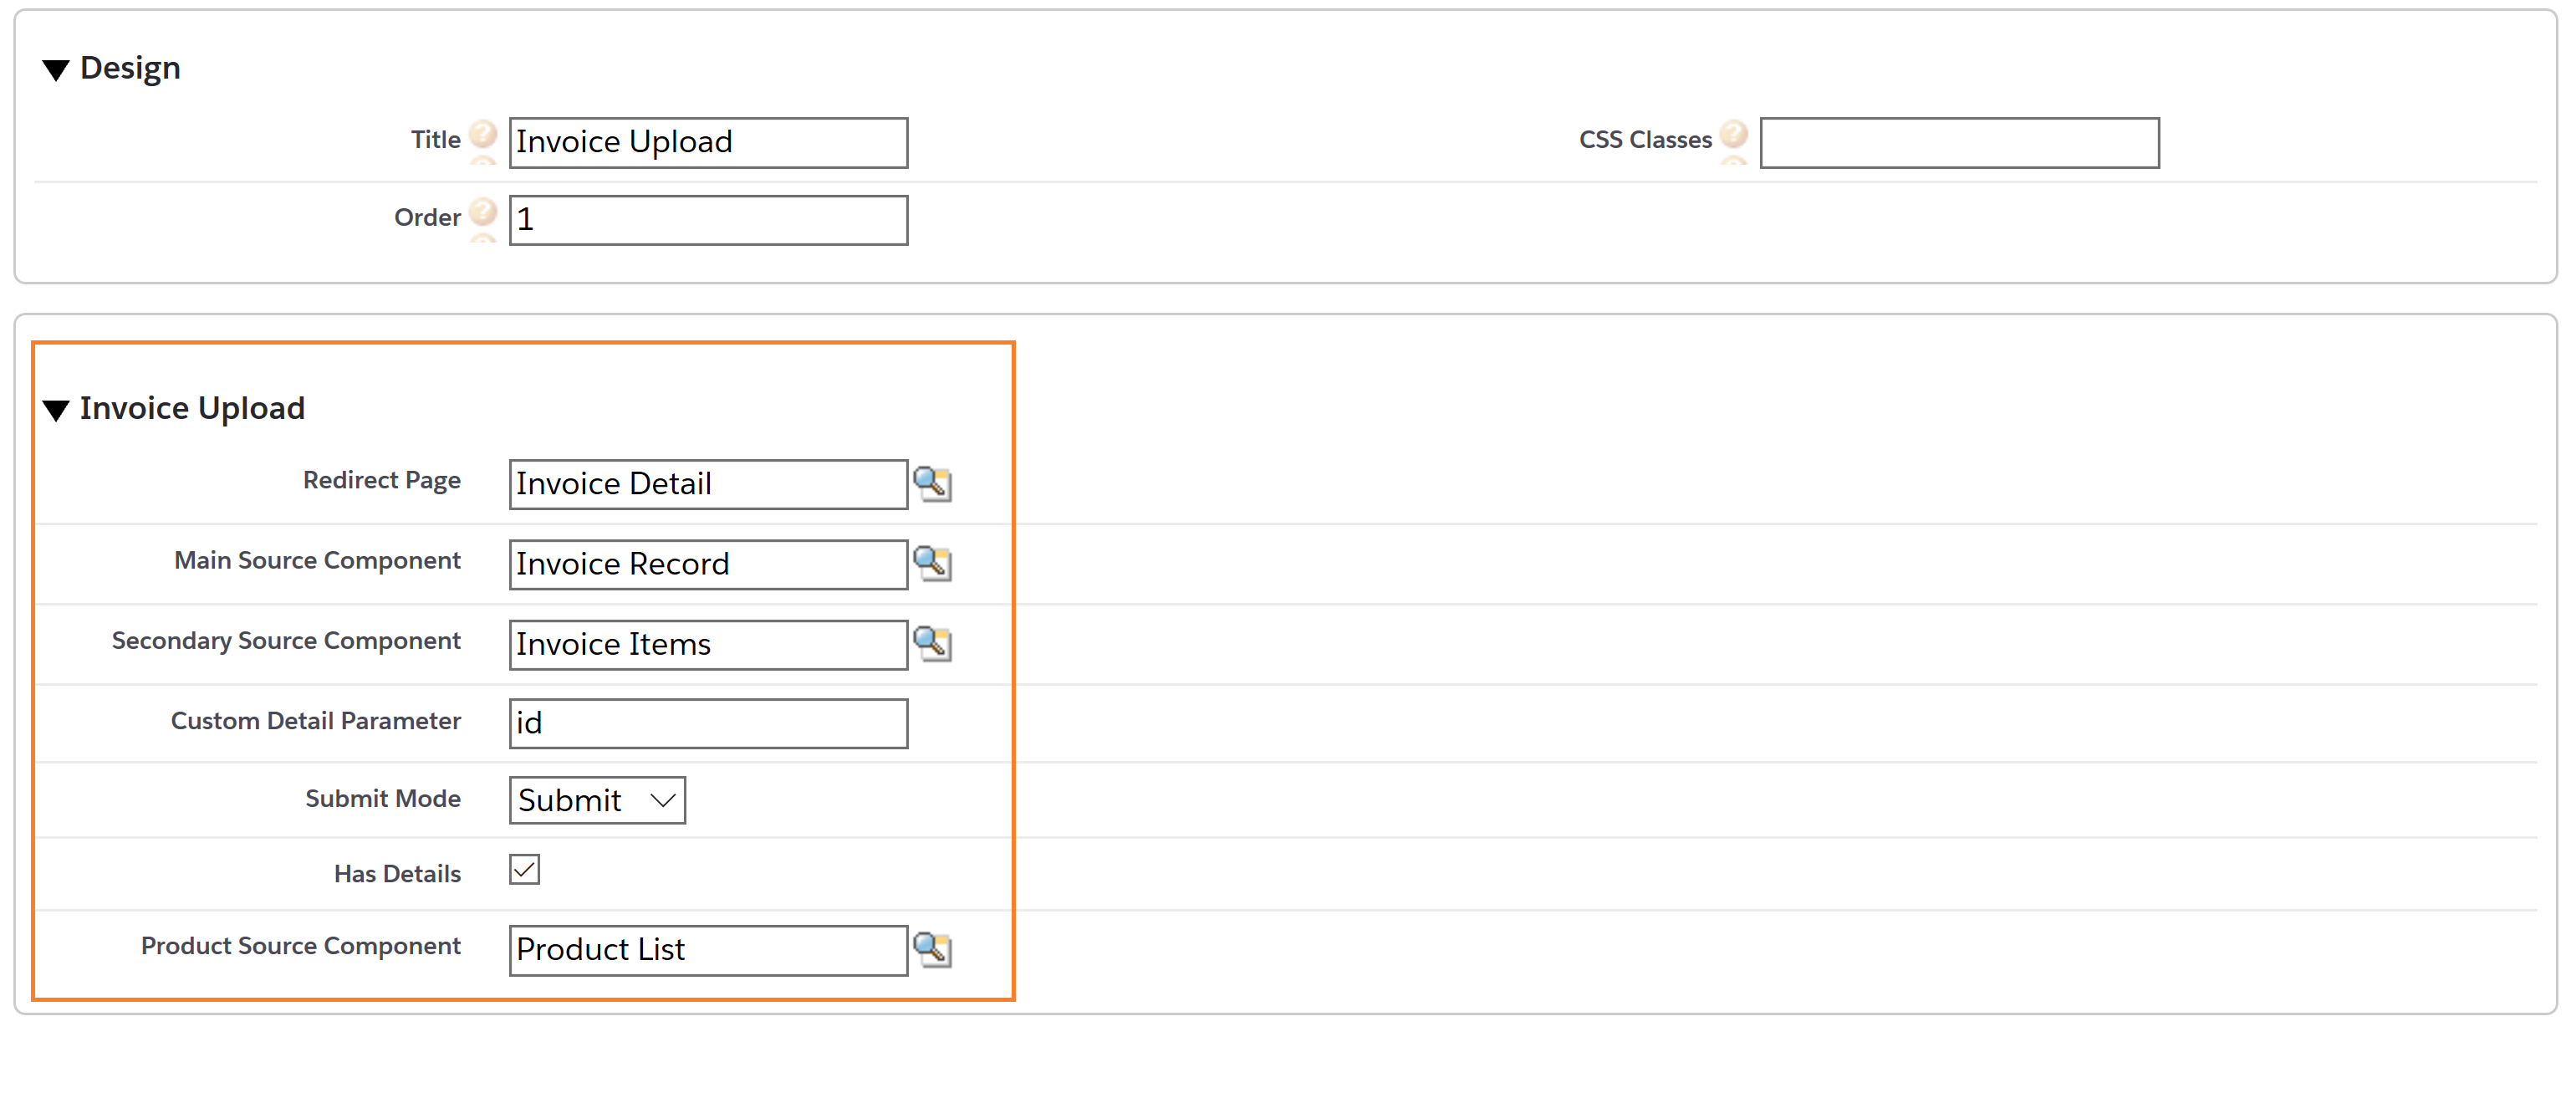
Invoice Upload Settings
Added detailFor Main Source Component you need to make sure you select Description: Invoice Record Src, not just Invoice Record
For Secondary Source Component you need to make sure you select Description: Invoice Items Src, not just Invoice Items
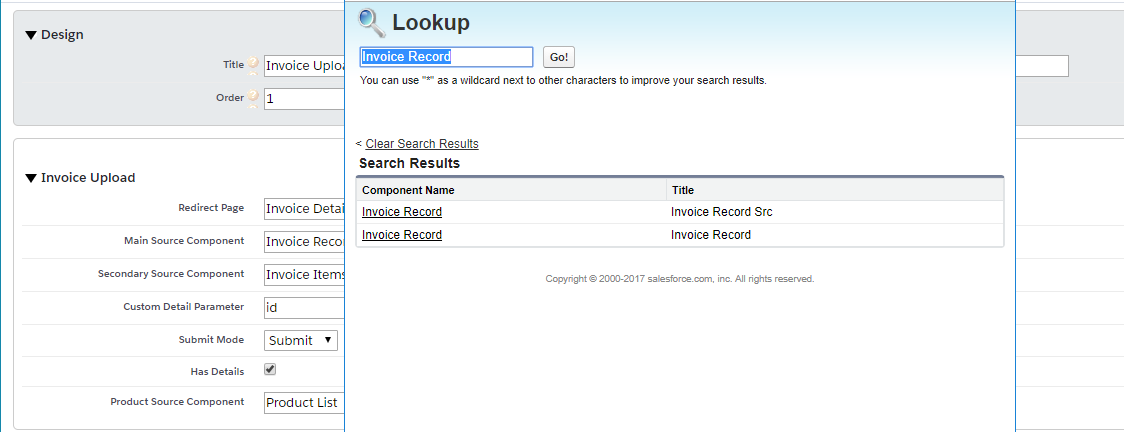
Not able to see any fields?If you are not able to see any of these fields go to the Component Object configuration or to your Profile configuration and check the field's permissions.
Invoice Upload Settings
Create this Page the same way you created My Invoices making sure to select the correct Model and input the same Name. This comes fully configured so you do not need to make any edits unless you want to.
Invoice file types may be GIF, JPG and PNG. Note that BMP and PDF files cannot be read.
Site Navigation
This is the part where you determine the way that Members will navigate around your Site. Go to the Sites tab. In the Recent Navigation widget, click Main
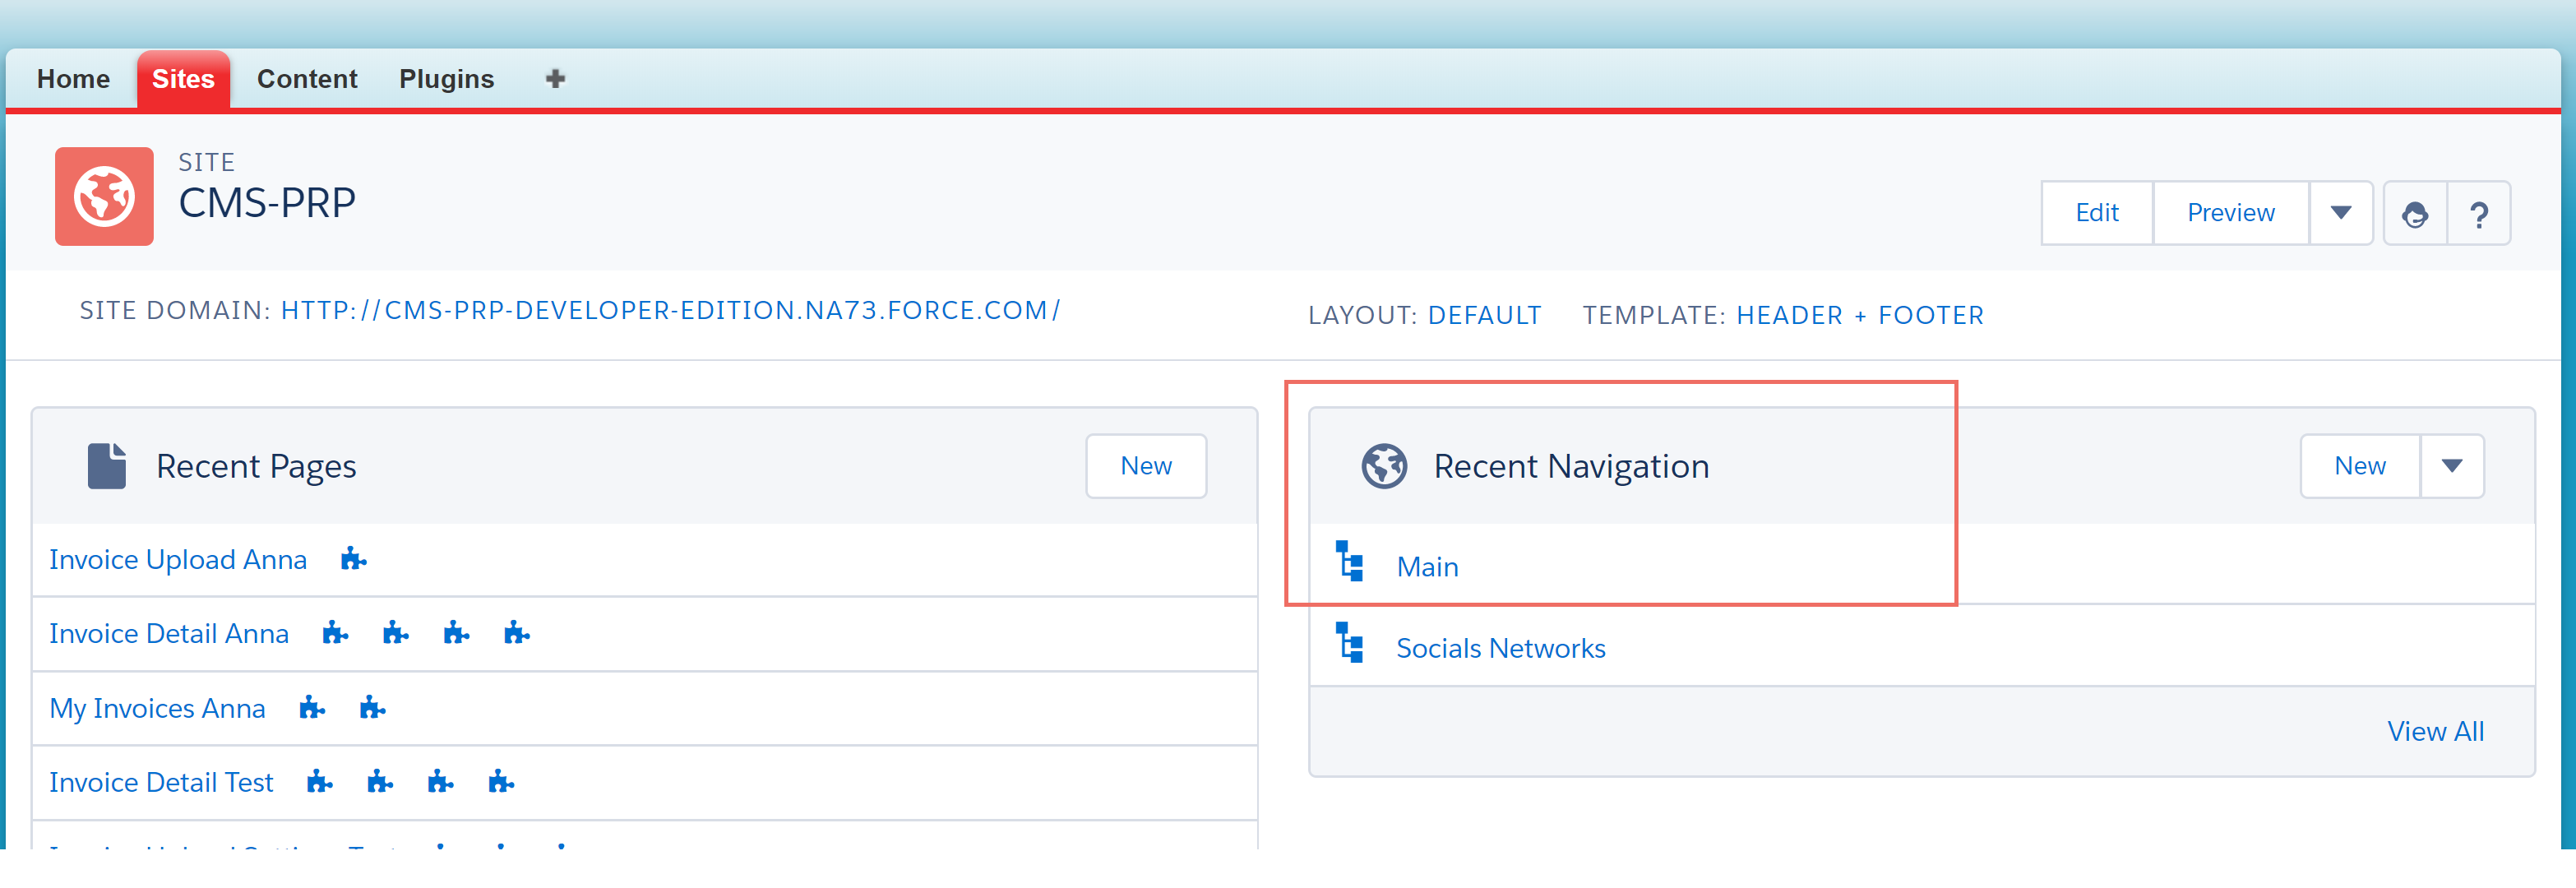
Site Navigation
Click on Add Existing Page in the Navigation Tree widget and add the following pages:
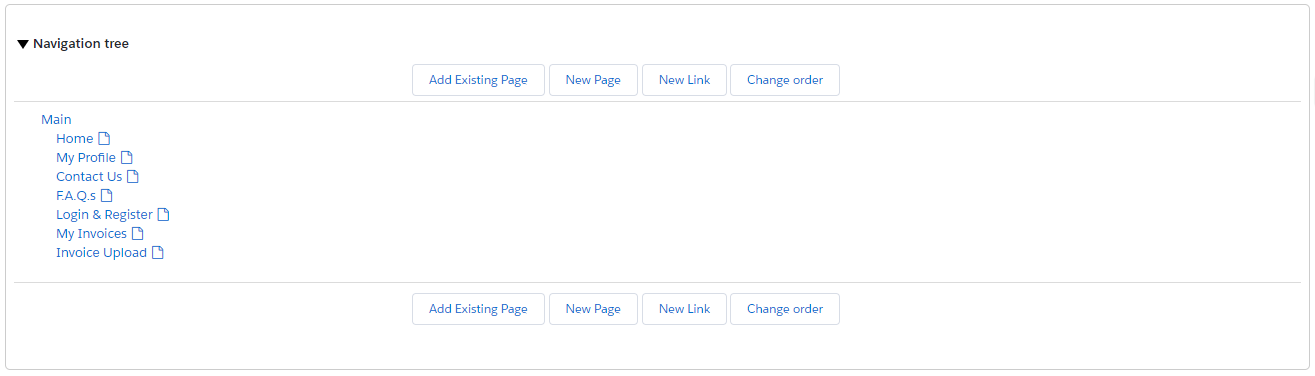
Updated over 1 year ago
What's next
Now that you or your Members have uploaded their Invoices, you can start creating Incentives to encourage and award them for their purchases