
Platform & CMS packages
Install and configure our Platform and Content Management System together
Prerequisites
Salesforce User
System Administrator permissions.
License
Authenticated Website.
1. Installing Platform Package
Upgrading Fielo PlatformIf a previous package of Fielo PLT is already installed in your ORG, check Upgrades to know if some specific steps must be followed.
- After logging into your Salesforce ORG, click here to access Platform installation package.
- Select Install for Admins only and click Install. When the installation process ends, the ORG Administrator is notified by email.
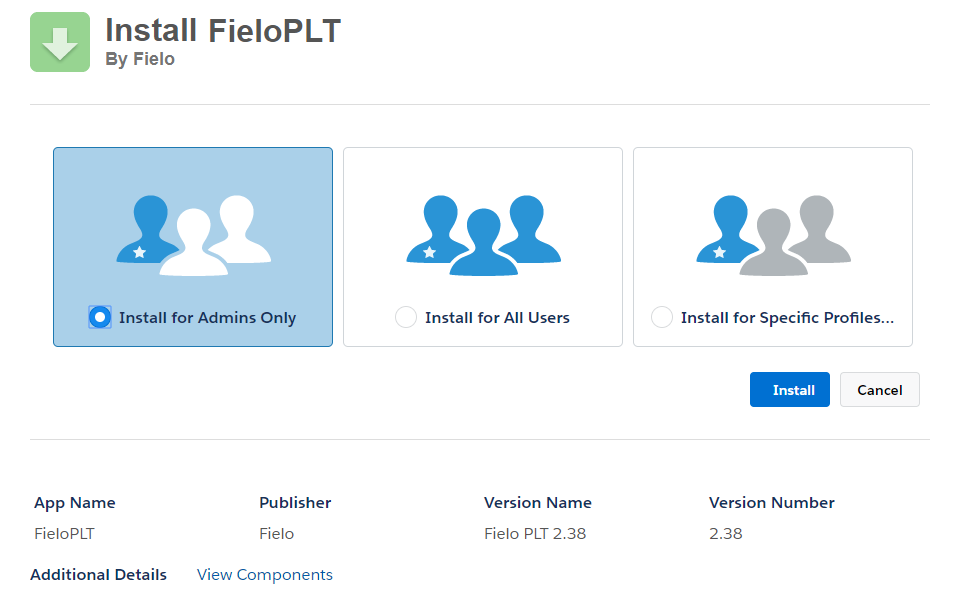
Install Platform for Admins only
2. Installing Fielo CMS Package
- Navigate to the Content Management System installation package using the link provided by your Fielo account executive.
- Select Install for Admins only. and click Install. When the installation process ends, the ORG Administrator is notified by email.
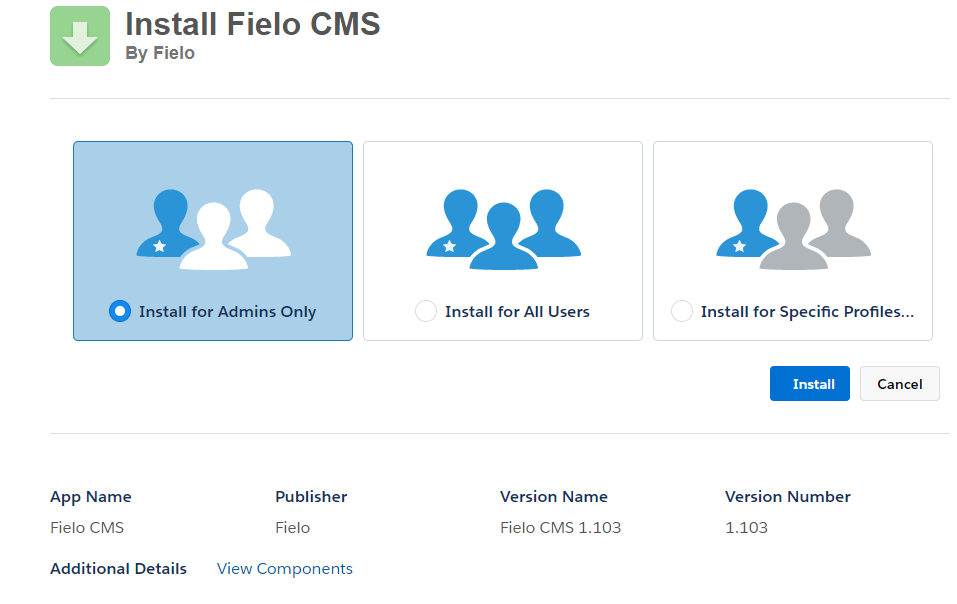
Install CMS
3. Creating a Community
First, you need to enable Communities. From Sites, you should enter and check your domain name. After checking its availability, you can hit Save.
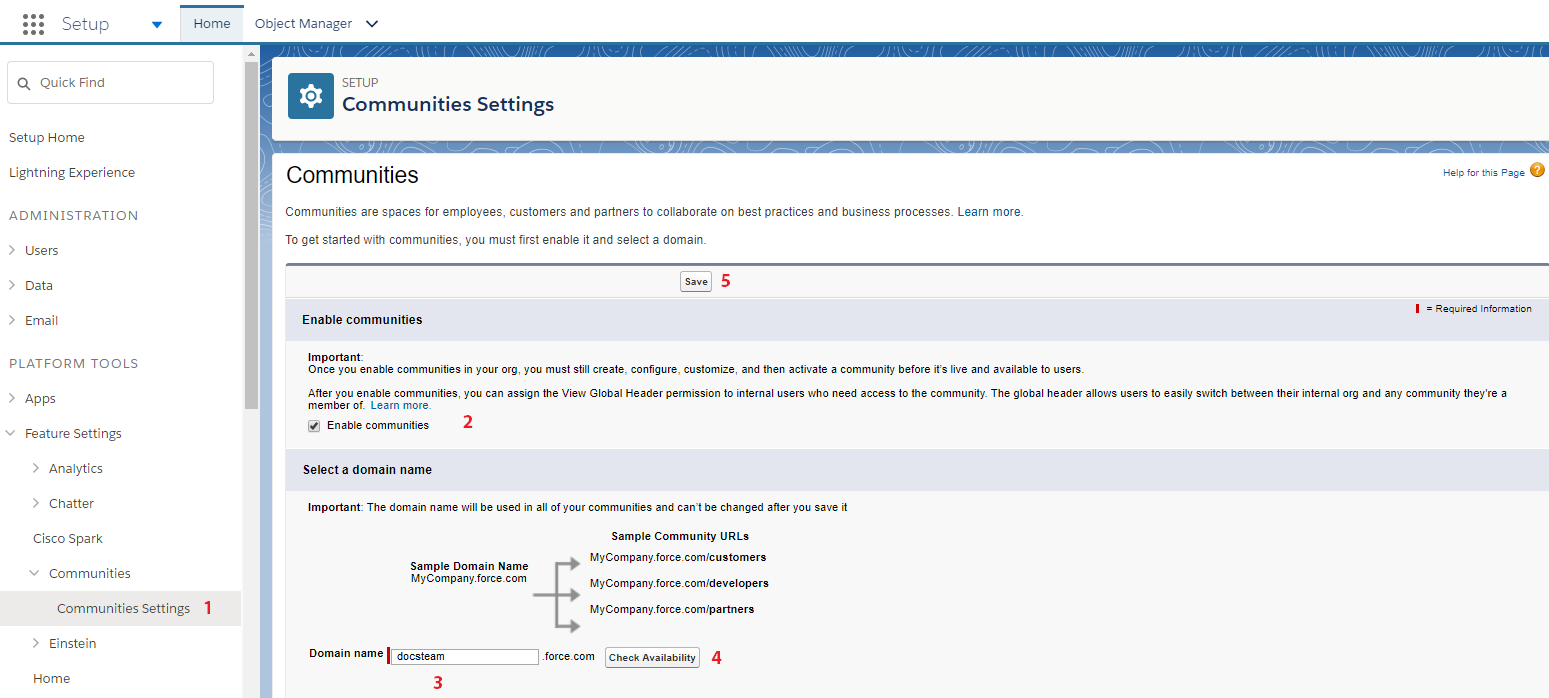
Enable, enter and save your settings for Communities.
When finished, you can click New Community. From Lightning Bolt, choose Customer Account Portal:
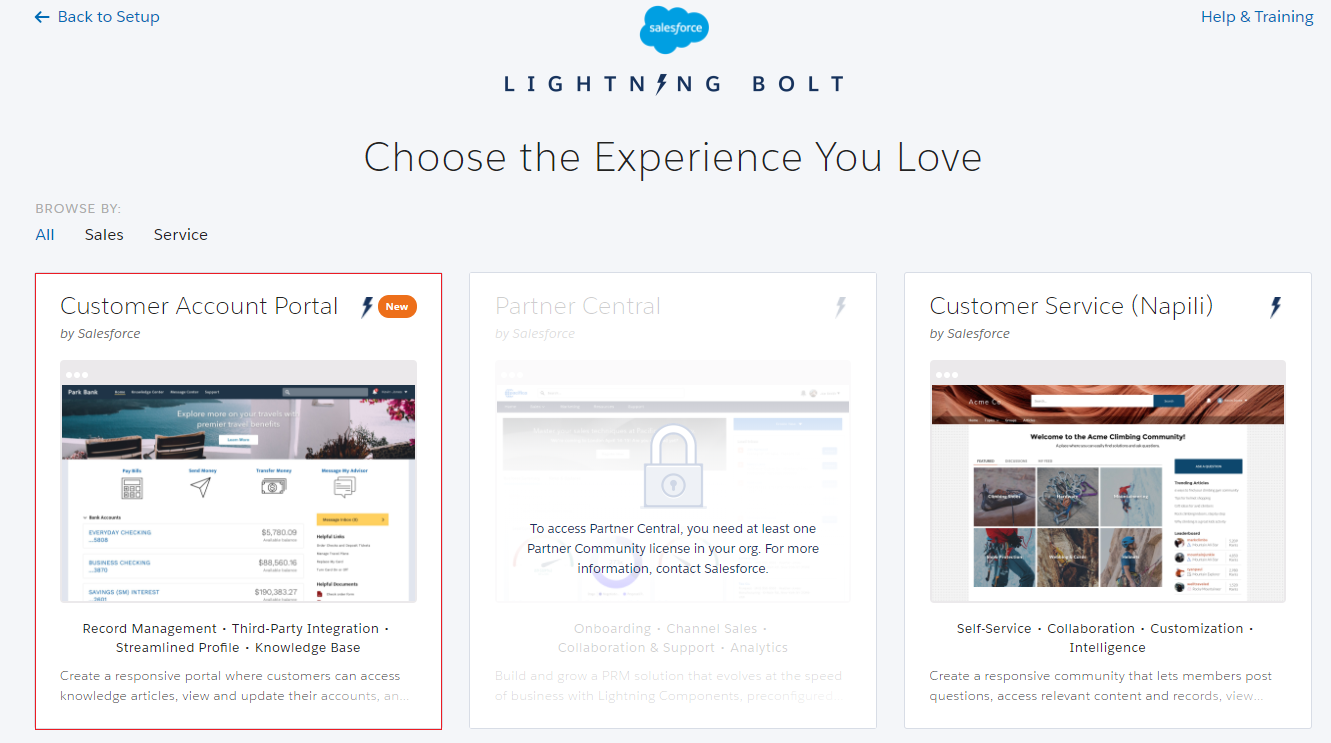
Customer Account Portal
After clicking Get Started, enter the name for your Community and hit Create:
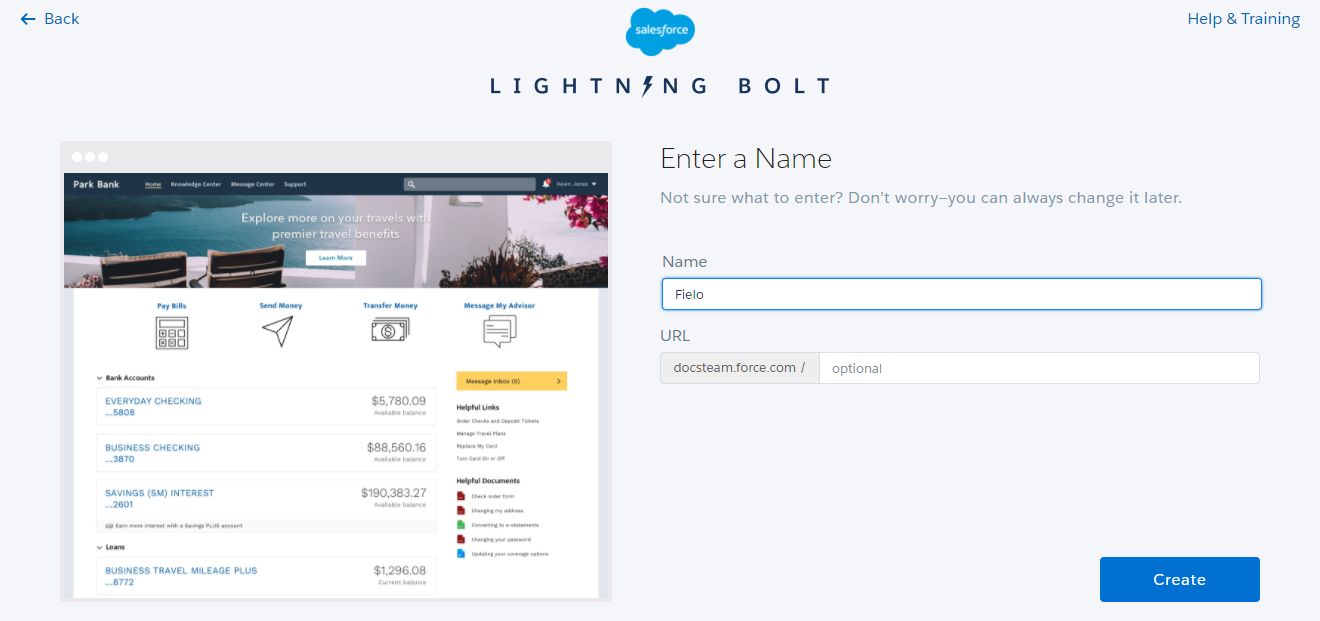
Creating a Customer Portal
4. Deploying Fielo CMS - PLT Plugin
Fielo Member Site is created when successfully deploying Fielo CMS - PLT Plugin.
First, access Fielo CMS - PLT Plugin public repository on Github and click Deploy to Salesforce at the bottom of the page.
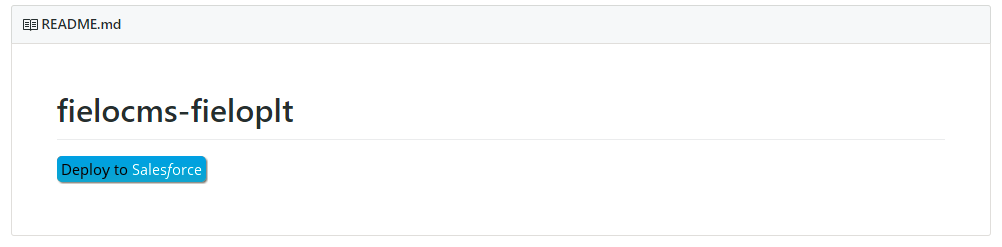
Fielo CMS - PLT Plugin
In Branch/Tag/Commit write the version number tag from Fielo CMS - PLT Plugin that is shown in Lastest Release (E.g. v2.6.0) and click Login to Salesforce:
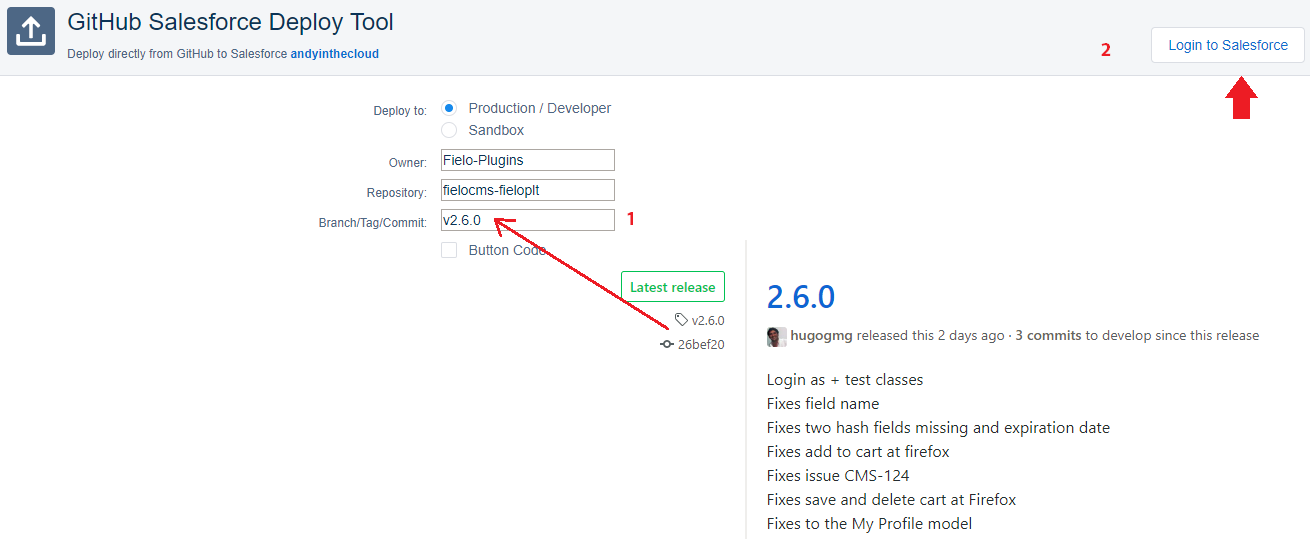
Github deploy
If you are already logged in to Salesforce, click Allow to enable Github Salesforce Deploy Tool to access your Salesforce ORG.
If you are not logged in to Salesforce, enter the username and password of the ORG where Fielo PLT and Fielo CMS packages were installed. Click Allow to enable Github Salesforce Deploy Tool to access Salesforce ORG.
Now, sign in to Github or create a Github account. After authorizing the application, click Deploy.
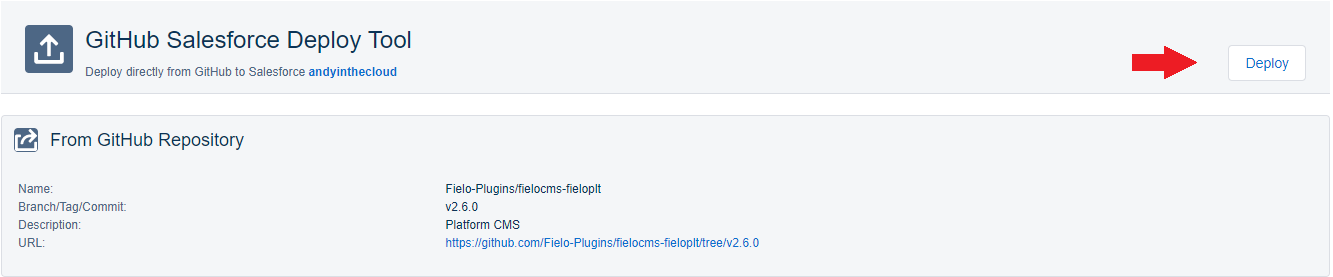
Deploy
Your deployment should be confirmed at the bottom of the page.
Deployment FailureIf after the message Deployment Complete some Failures arise, please contact Fielo Support including the following information:
Subject: CMS - PLT Plugin Failures.
Message:
- Select and copy all the failures messages (e.g. classes/MediaAPI.cls(20,195): Variable does not exist: MemberService).
- Include your credentials.
- Include Paltform and CMS version numbers. In order to obtain them, go to:
Setup> Platform Tools> Apps> Installed packages.
Copy the Version numbers from Platform and CMS (e.g. CMS: 2.20.1; Platform: 1.67.1).
Do not continue with the installation process until further instructions are given by Fielo Support. Failure during Fielo CMS - PLT Plugin deployment will result in future configuration issues.
5. Configuring a Site
From Sites, first enter and check your domain name for your Site. After checking its availability, you can hit Save.
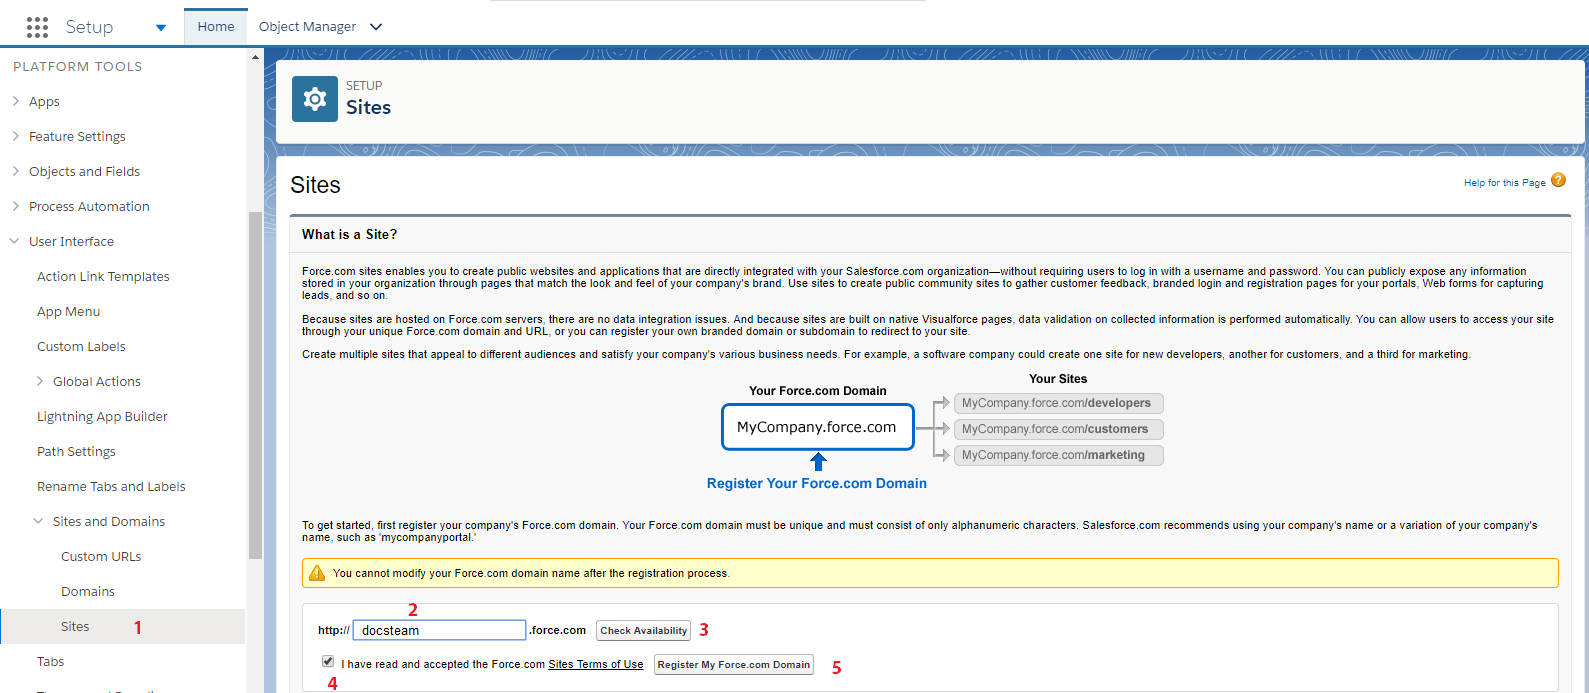
Configuring a Site
If you already have a domain set or when the previous step is completed, your Community Site is ready. You can see that your previously set Community is automatically related to the newly created Site.

Community and Site
After clicking on Fielo - i.e. the Site Label Name- click Edit and include the following information:
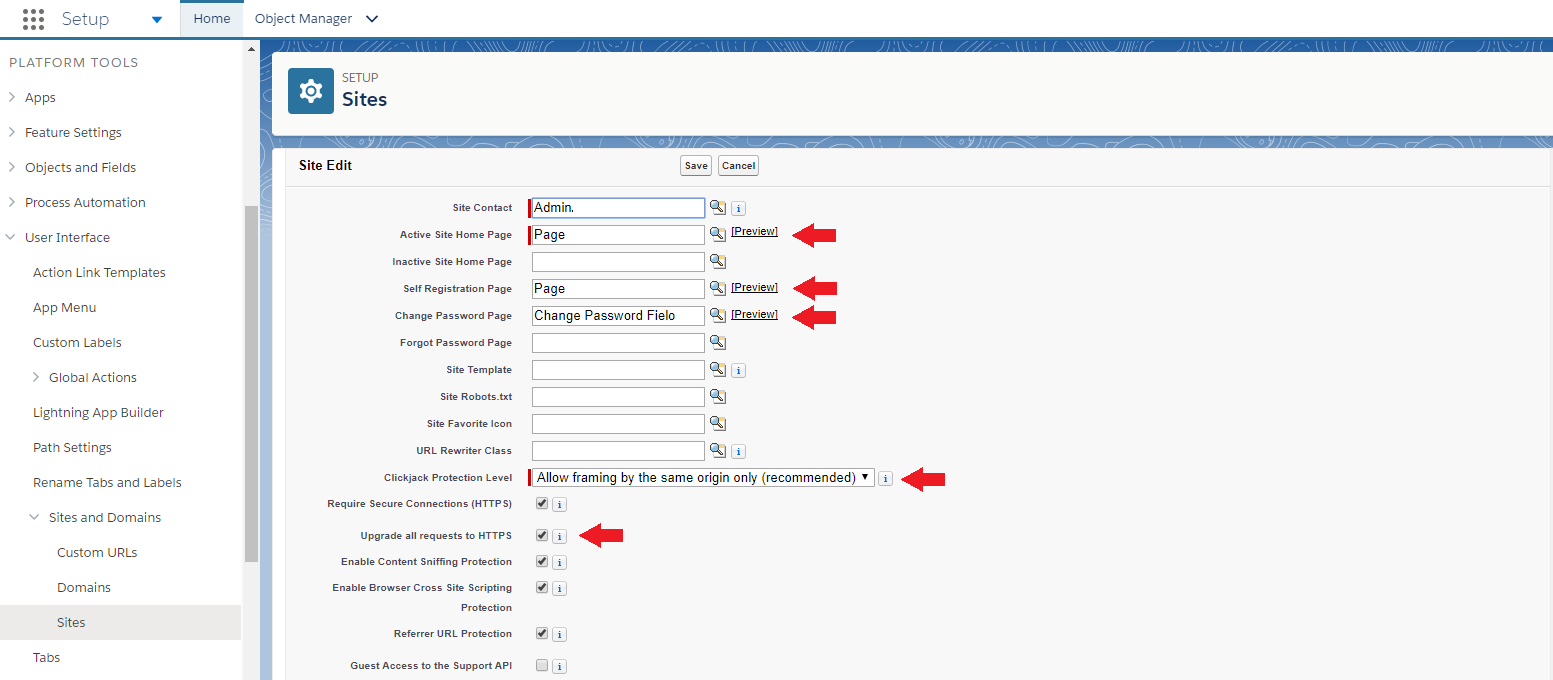
Fielo Site: Details
We advise you to scroll down to pick the values for Self Registration Page and Change Password Page.
Self Registration Page and Change Password PageWhen choosing Self Registration Page and Change Password Page, check that they include the prefixes in their names FieloCMS__Page and FieloCMSPLT__ChangePasswordFielo.
Lastly, on Custom URL press the Edit link and enter Fielo as URL.
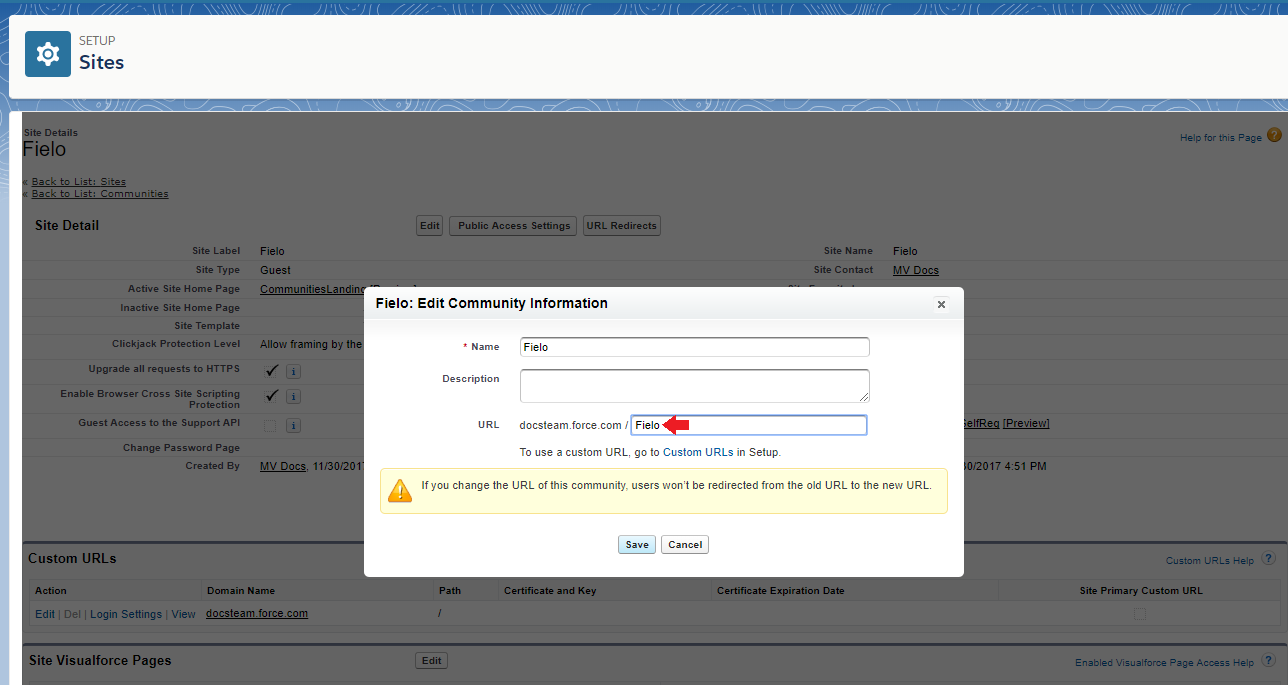
Fielo Site: Custom URL
Salesforce Sites and CMS SitesFor each CMS Site, a new Salesforce Site must be created.
6. Enabling Visualforce Page Access
Now it's time to enable some new available Visualforce Pages. From Sites, choose your previously created Fielo:
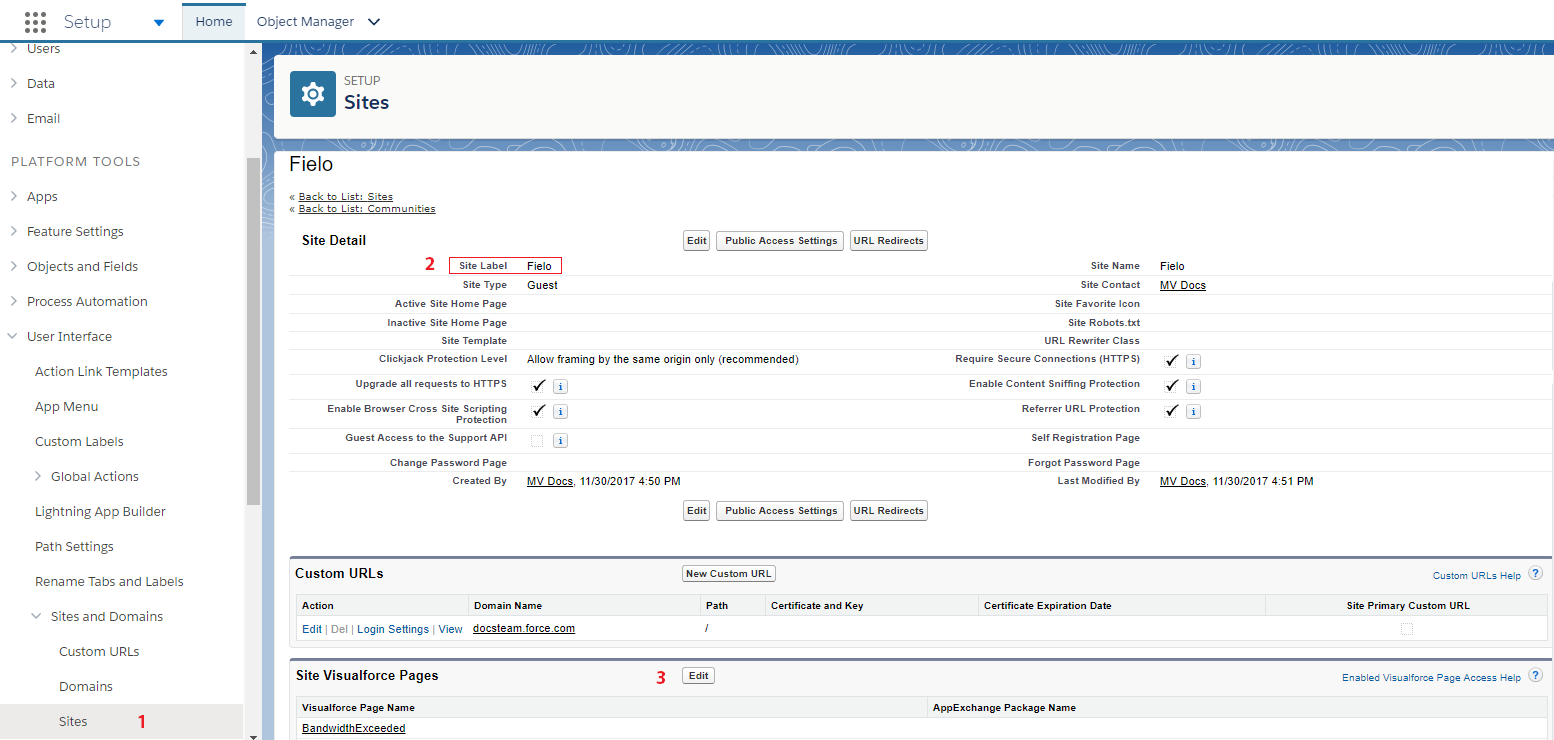
Fielo Site: Visualforce Pages
By clicking Edit on Site Visualforce Pages, add the selected pages from Available Visualforce Pages to the Enabled Visualforce Pages listbox:
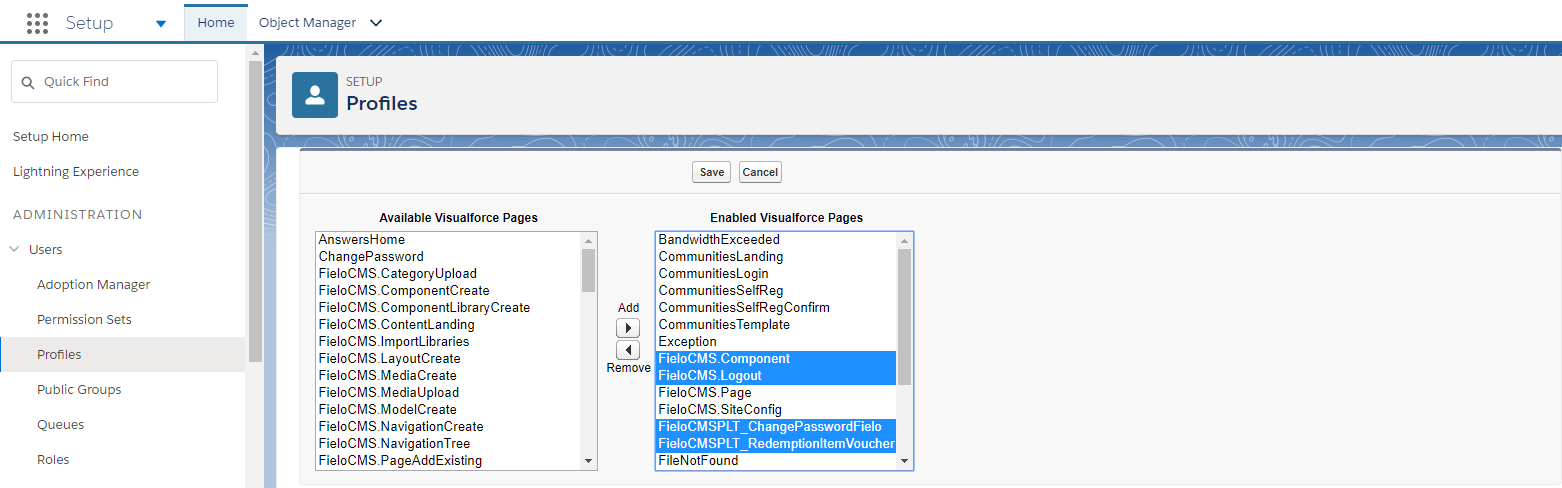
Enabled Visualforce Pages
Missing Visualforce PagesIf any of the previous Visualforce Pages are not available, it means Fielo CMS - PLT Plugin has not been corrrectly deployed.
7. Configuring Guest User Profile
From Sites, choose your previously created Fielo Site to modify the Public Access Settings.
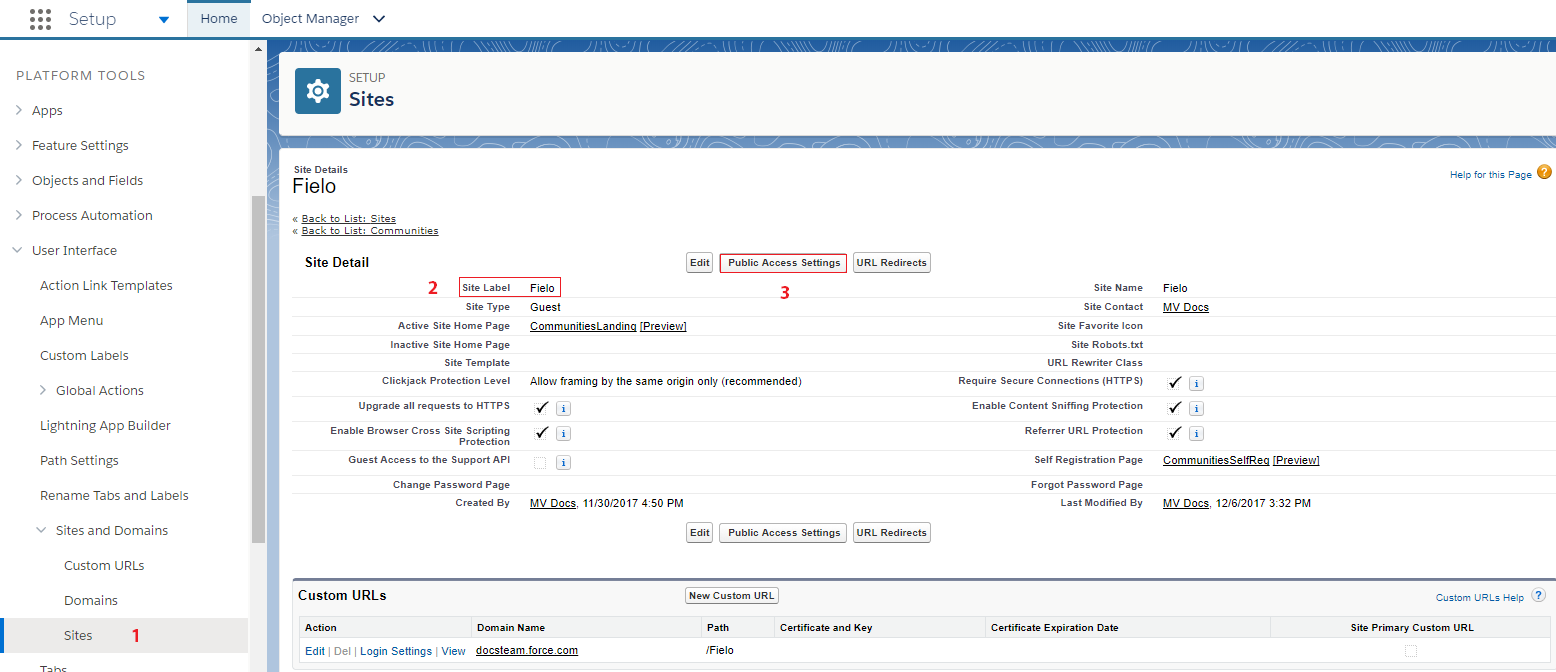
Fielo Site: Public Access Settings
The following settings are displayed that way when Enable Enhanced Profile User Interface is . You can enable it from Platform Tool> User Interface.
Once you've accessed Public Access Settings, go to Apps sections and select Object Settings.
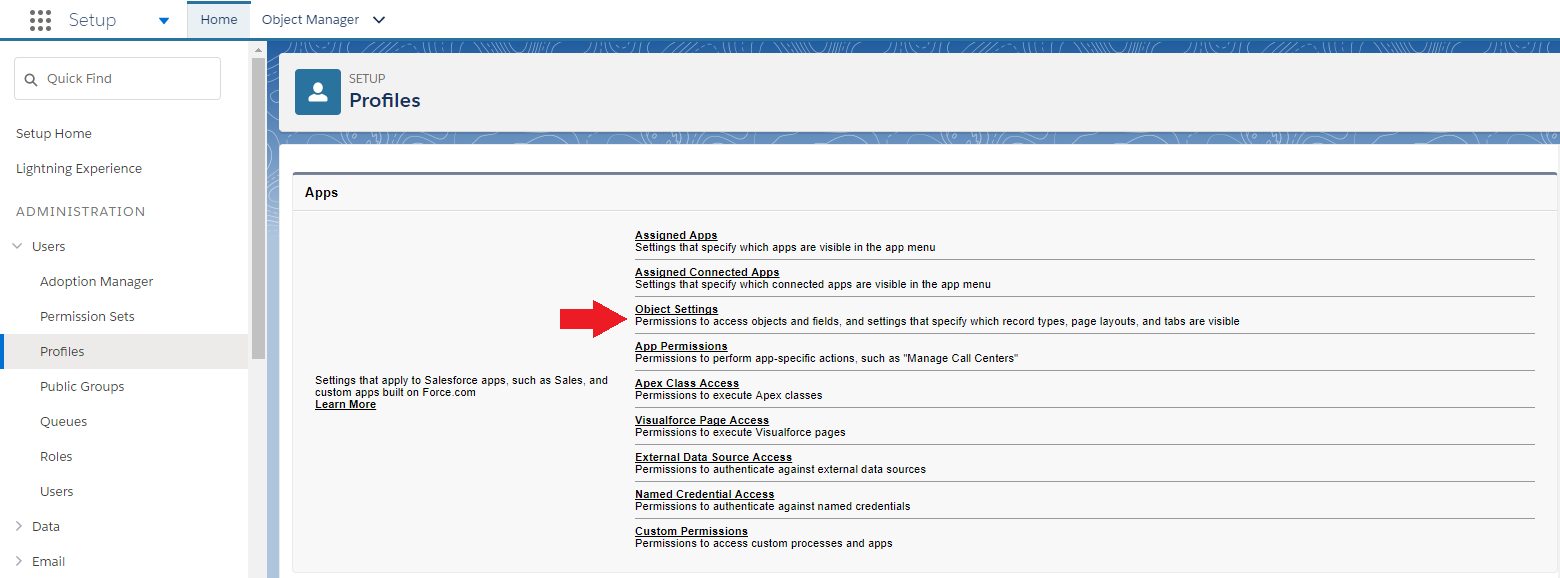
Profile: Object Settings
For each of the objects below, click Edit to enable the following Object Permissions:
| Object | Permission Name |
|---|---|
| Agreement | Read. |
| Contacts | Read. |
| Documents | Read. |
| Categories | Read. |
| Components | Read. |
| Component Library | Read. |
| Layouts | Read. |
| Media | Read. |
| Members | Read, Create and Edit. |
| Navigations | Read. |
| Pages | Read. |
| Posts | Read. |
| Programs | Read. |
| Rewards | Read. |
| Reward Items | Read. |
| Sections | Read. |
| Segments | Read. |
| Sites | Read. |
| Tags | Read. |
For those same objects, tick all Read Access and Edit Access (if available) checkboxes from Field Permissions.
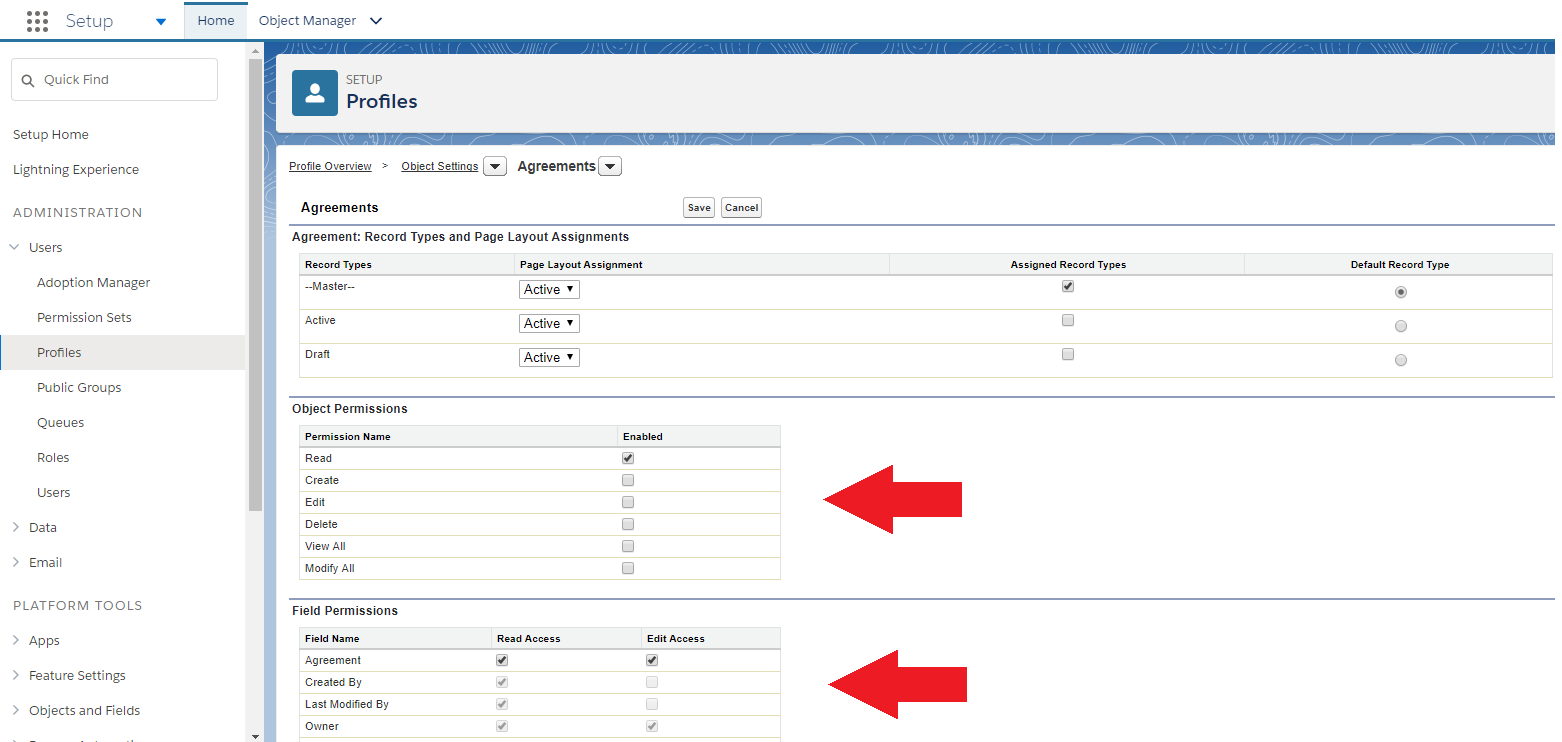
Object and Fields Permissions for Agreements
8. Configuring Login Settings for Community Site
From Sites, choose your previously created Fielo Site to modify the Login Settings on Custom URLs section.
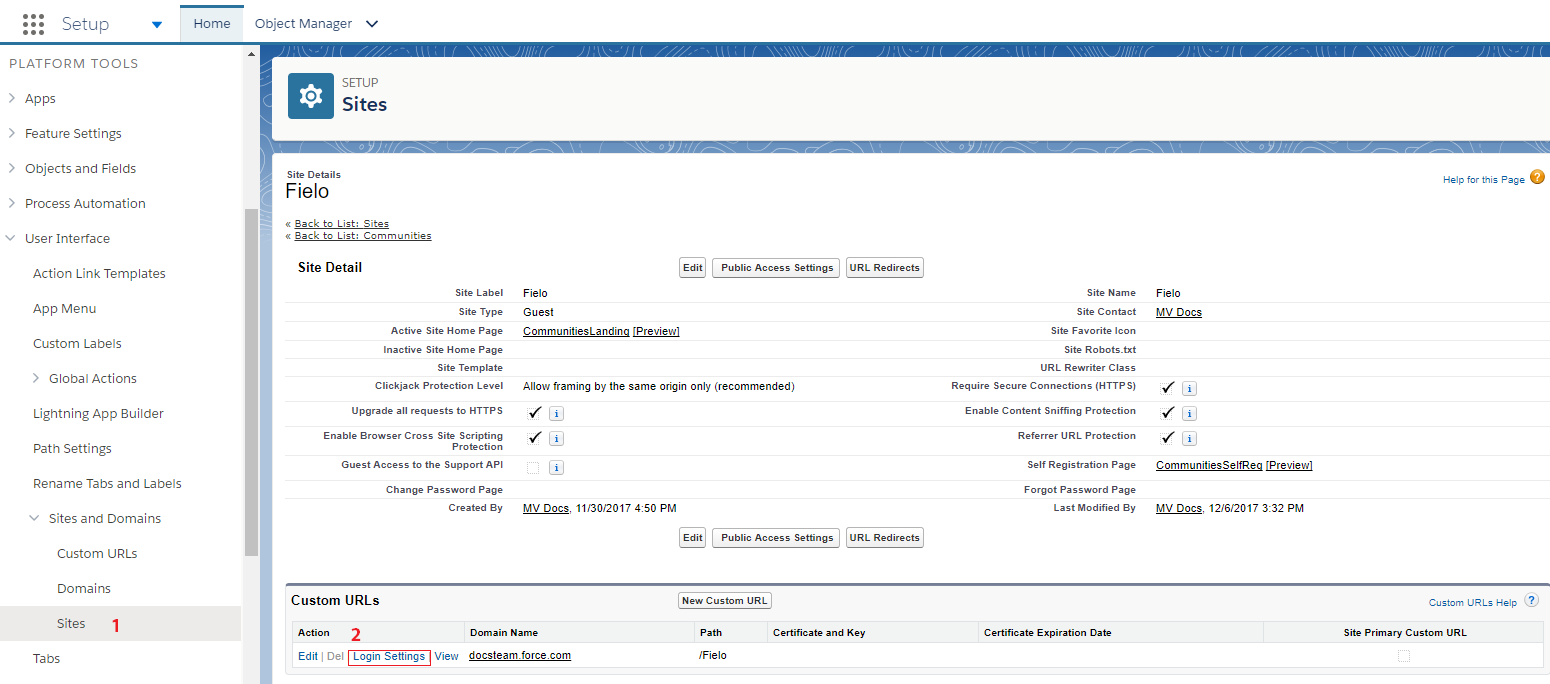
Custom URL: Login Settings
Click Edit and complete the following information before hitting Save:
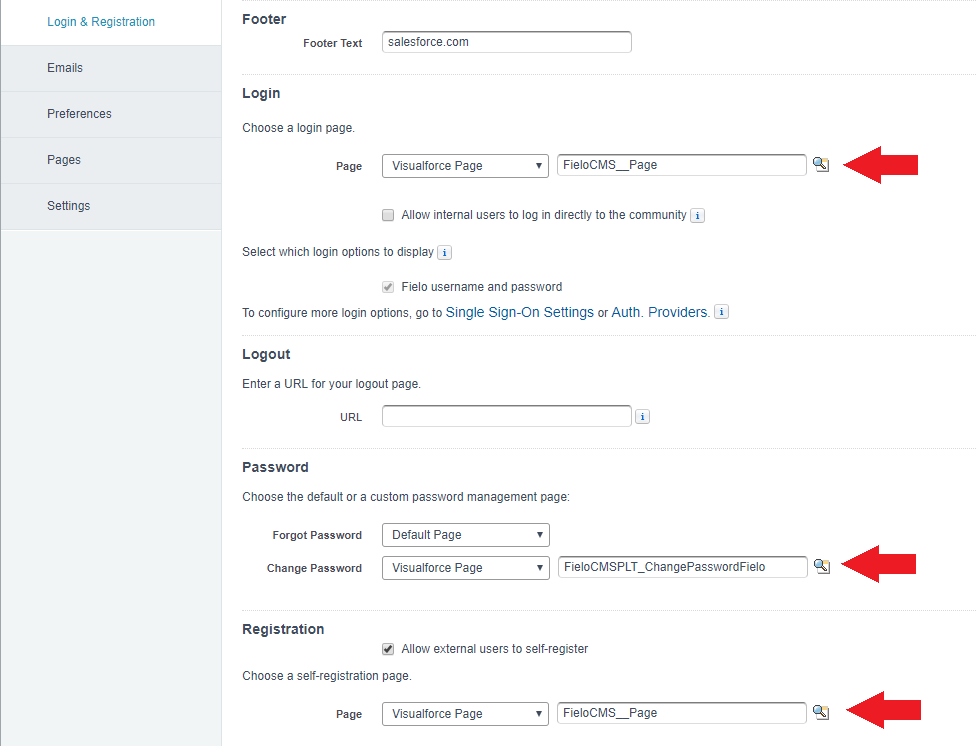
Login Settings: Login, Password and Registration
9. Email Deliverability
From Deliverability, set e-mail access level to All email.
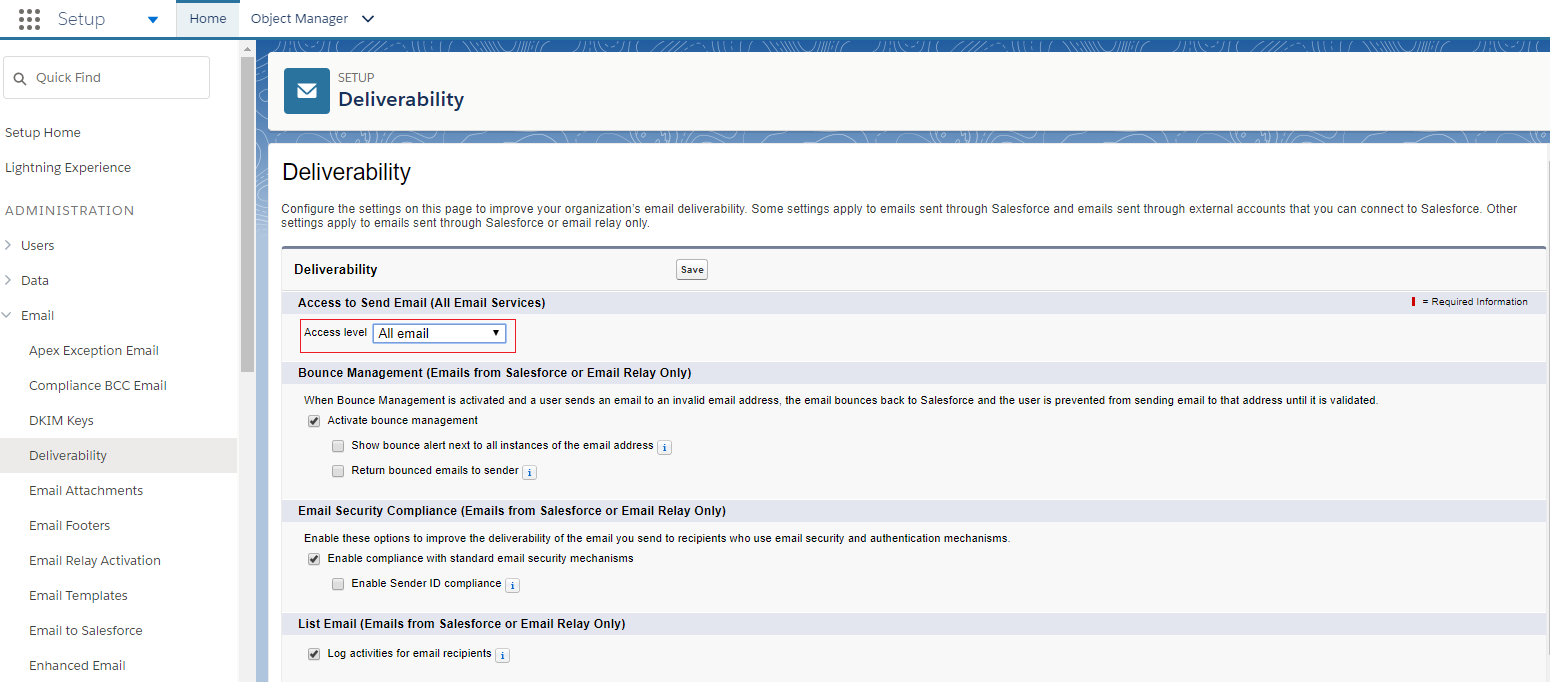
Email access Level
10. Welcome Email
From Workflow Rules, check that Welcome Email is disabled. Otherwise, click Deactivate.
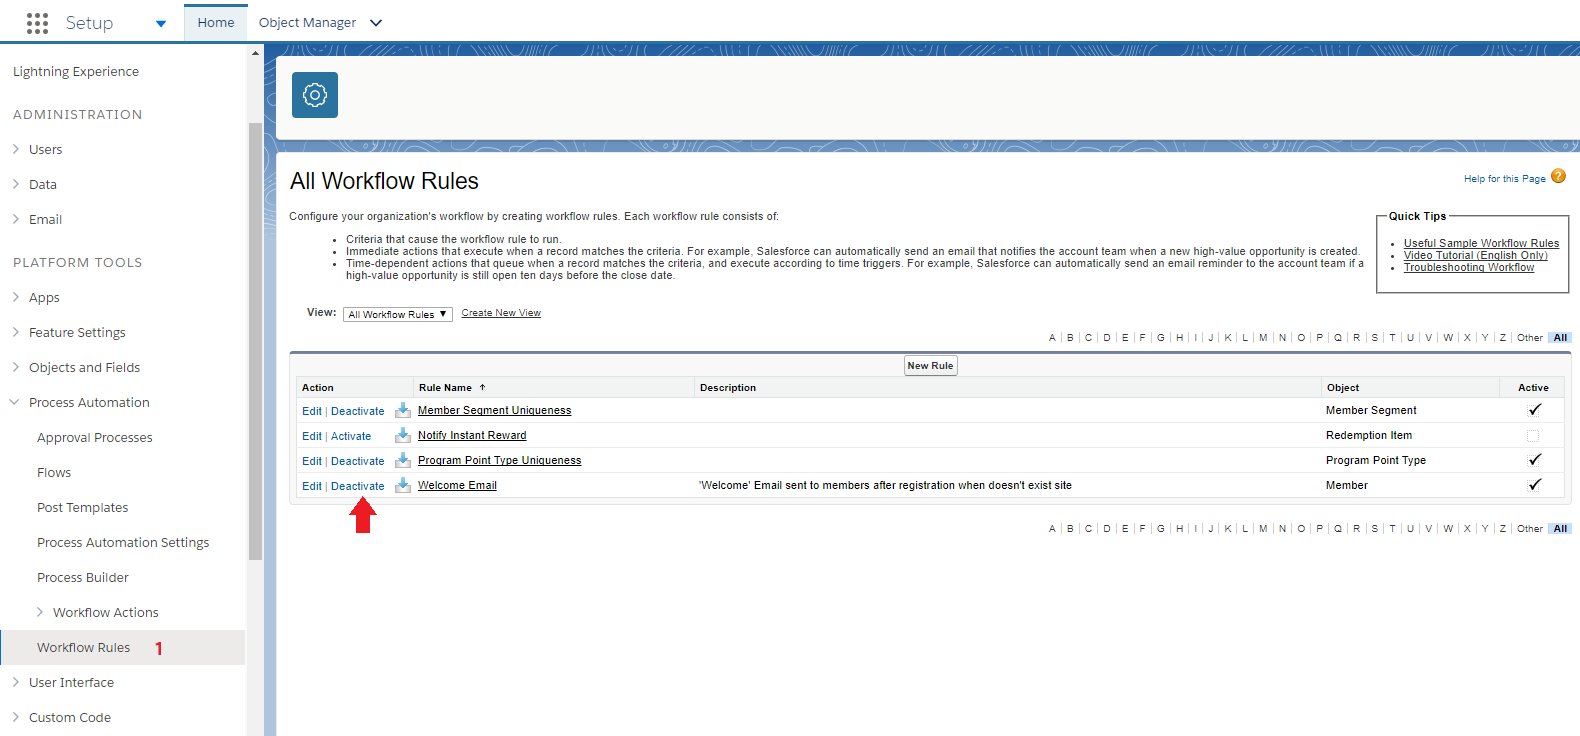
Welcome Email
11. Enabling Fielo PLT Library in Platform package.
After installing Platform package, you need to activate Fielo PLT Library so that Event Action and all required Page Settings are enabled.
For that, just go to the App Launcher () and choose Fielo Platform. From Libraries tab, click Activate to enable FieloPLT.
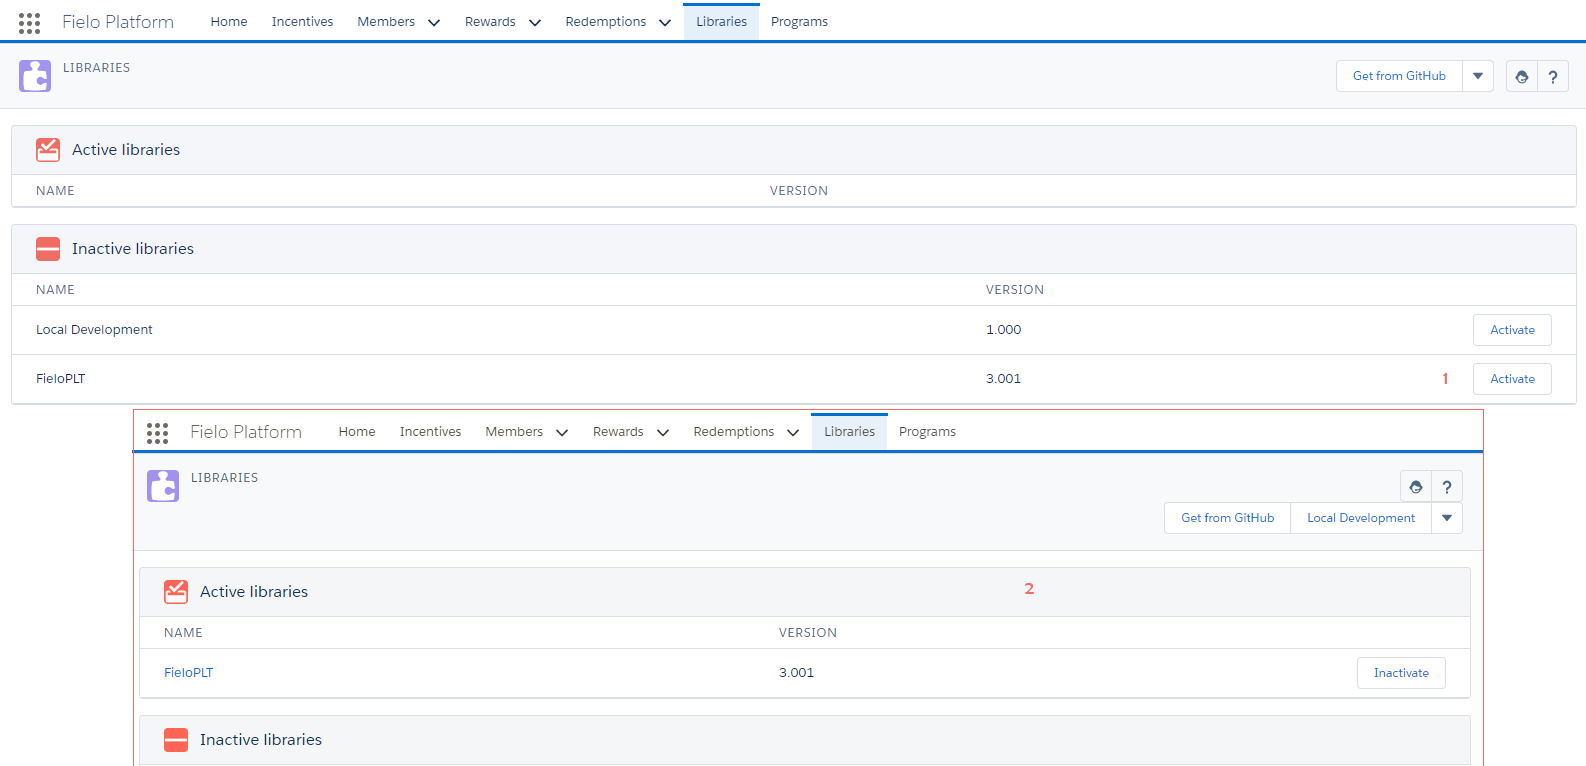
Activate FieloPLT Library
Local Development LibraryIf you'll create some custom Actions, Models or Page Settings, you can enable Local Development Library as well.
12. Create Segments
Now, you must create Private and PublicSegments* so that you can segment your Content, Pages and Navigations in your Site.
After creating a Program, check how to create Public and Private Segments.
13. Enable Segments for CMS
Once you've created your Private and PublicSegments*, you need to enable Segments for Content and Navigations in CMS.
Switch to Salesforce Classic as Salesforce Lightning Experience does not support Field Sets configuration.
- From Setup choose the following Objects:
Media.
Navigation.
Post. - For each object, go to Field Sets section and click Edit.
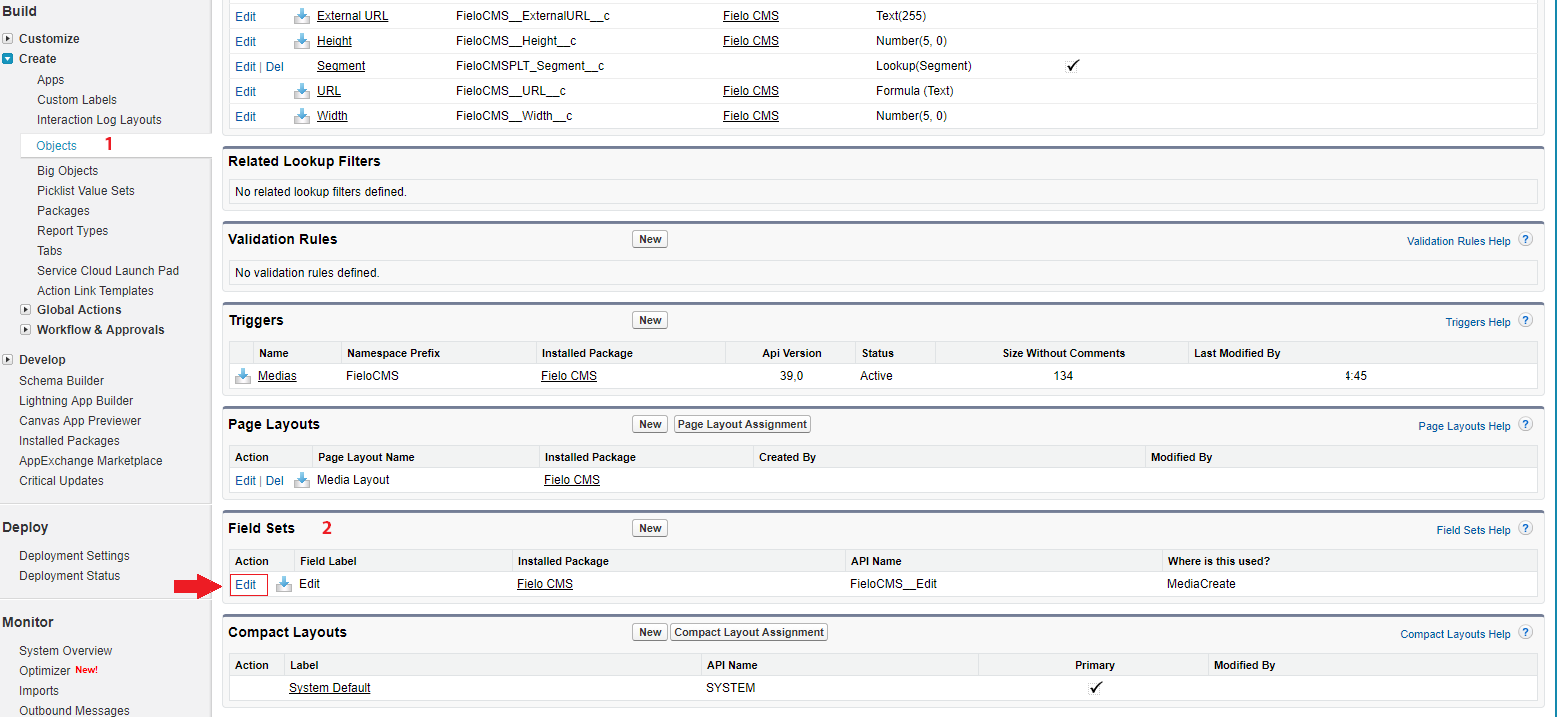
Media: Editing Field Sets
- Drag and drop Segment field into the Field Set listbox.
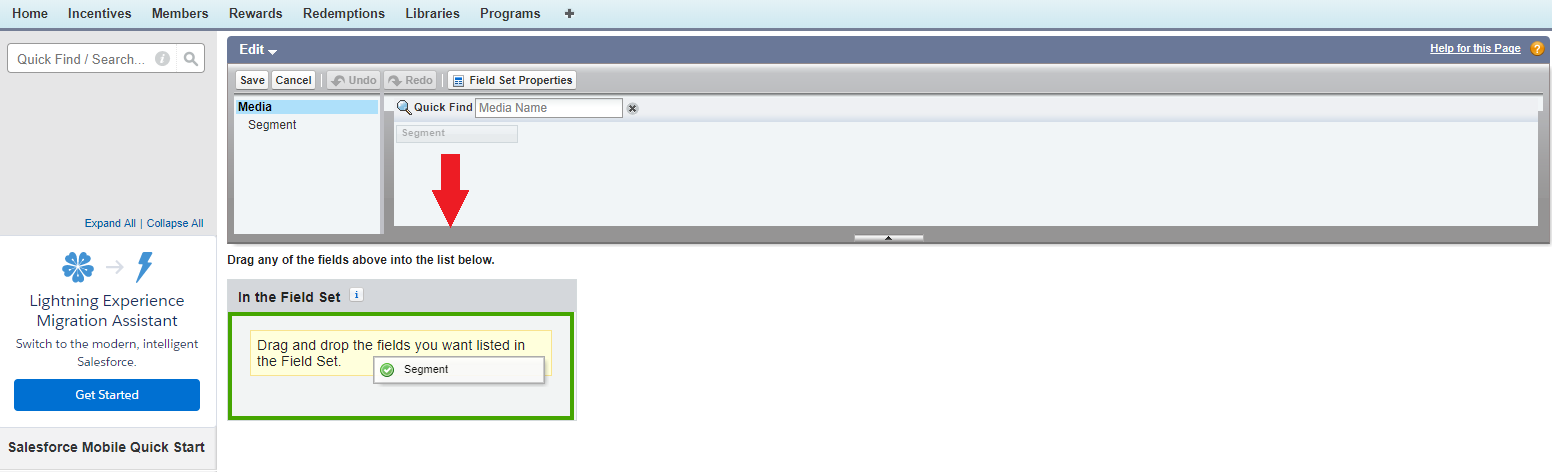
Dragging and dropping Segment field to Media Field Sets
Good work! You've finished installing Platform and CMS!
Alternative configuration for Fielo Member Site and System Administrator Profile.In case Member Site profile permissions need revising, check the following steps.
Complete Configuration of Fielo Member Site Profile.
From Profiles, choose Fielo Member Site.
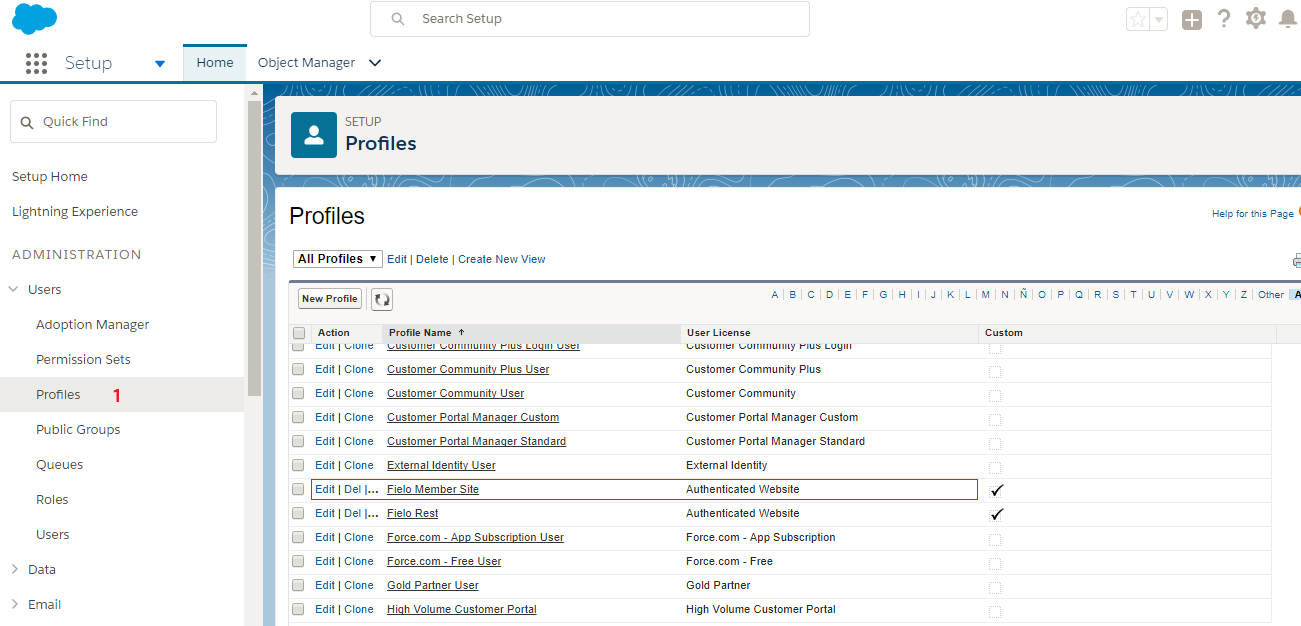
Profile: Fielo Member Site
For each of the objects below, click Edit to enable the following Object Permissions:
| Object | Permission Name |
|---|---|
| Agreement | Read. |
| Categories | Read. |
| Components | Read. |
| Components Library | Read. |
| Layouts | Read. |
| Media | Read. |
| Members | Read, Create, Edit and Delete. |
| Navigations | Read. |
| Pages | Read. |
| Posts | Read. |
| Programs | Read. |
| Redemptions | Read and Create. |
| Redemption Items | Read. |
| Rewards | Read. |
| Reward Items | Read. |
| Sections | Read. |
| Segments | Read. |
| Sites | Read. |
| Tags | Read. |
| Transaction | Read, Create and Edit. |
For Field Permissions, tick all Read Access and Edit Access (if available) checkboxes.
Updated over 1 year ago