
Course Modules
Setting up the modules of your course
You've installated and setup your E-Learning App and you've got your Course up and ready, which means you're raring to go with creating some Modules and generally giving your Course a bit of structure.
Modules are the components of a Course. You can have several Modules in each of your Courses so that Members have to progress through each Module sequentially, before they complete the Course. Once you've created all the different parts of the Module you can play around with it and add new features, media, questions and settings according to your Members' needs. We're here to take you through everything though - so just follow these steps:
Creating a New Module
In the Course details page, go to Modules and click New.
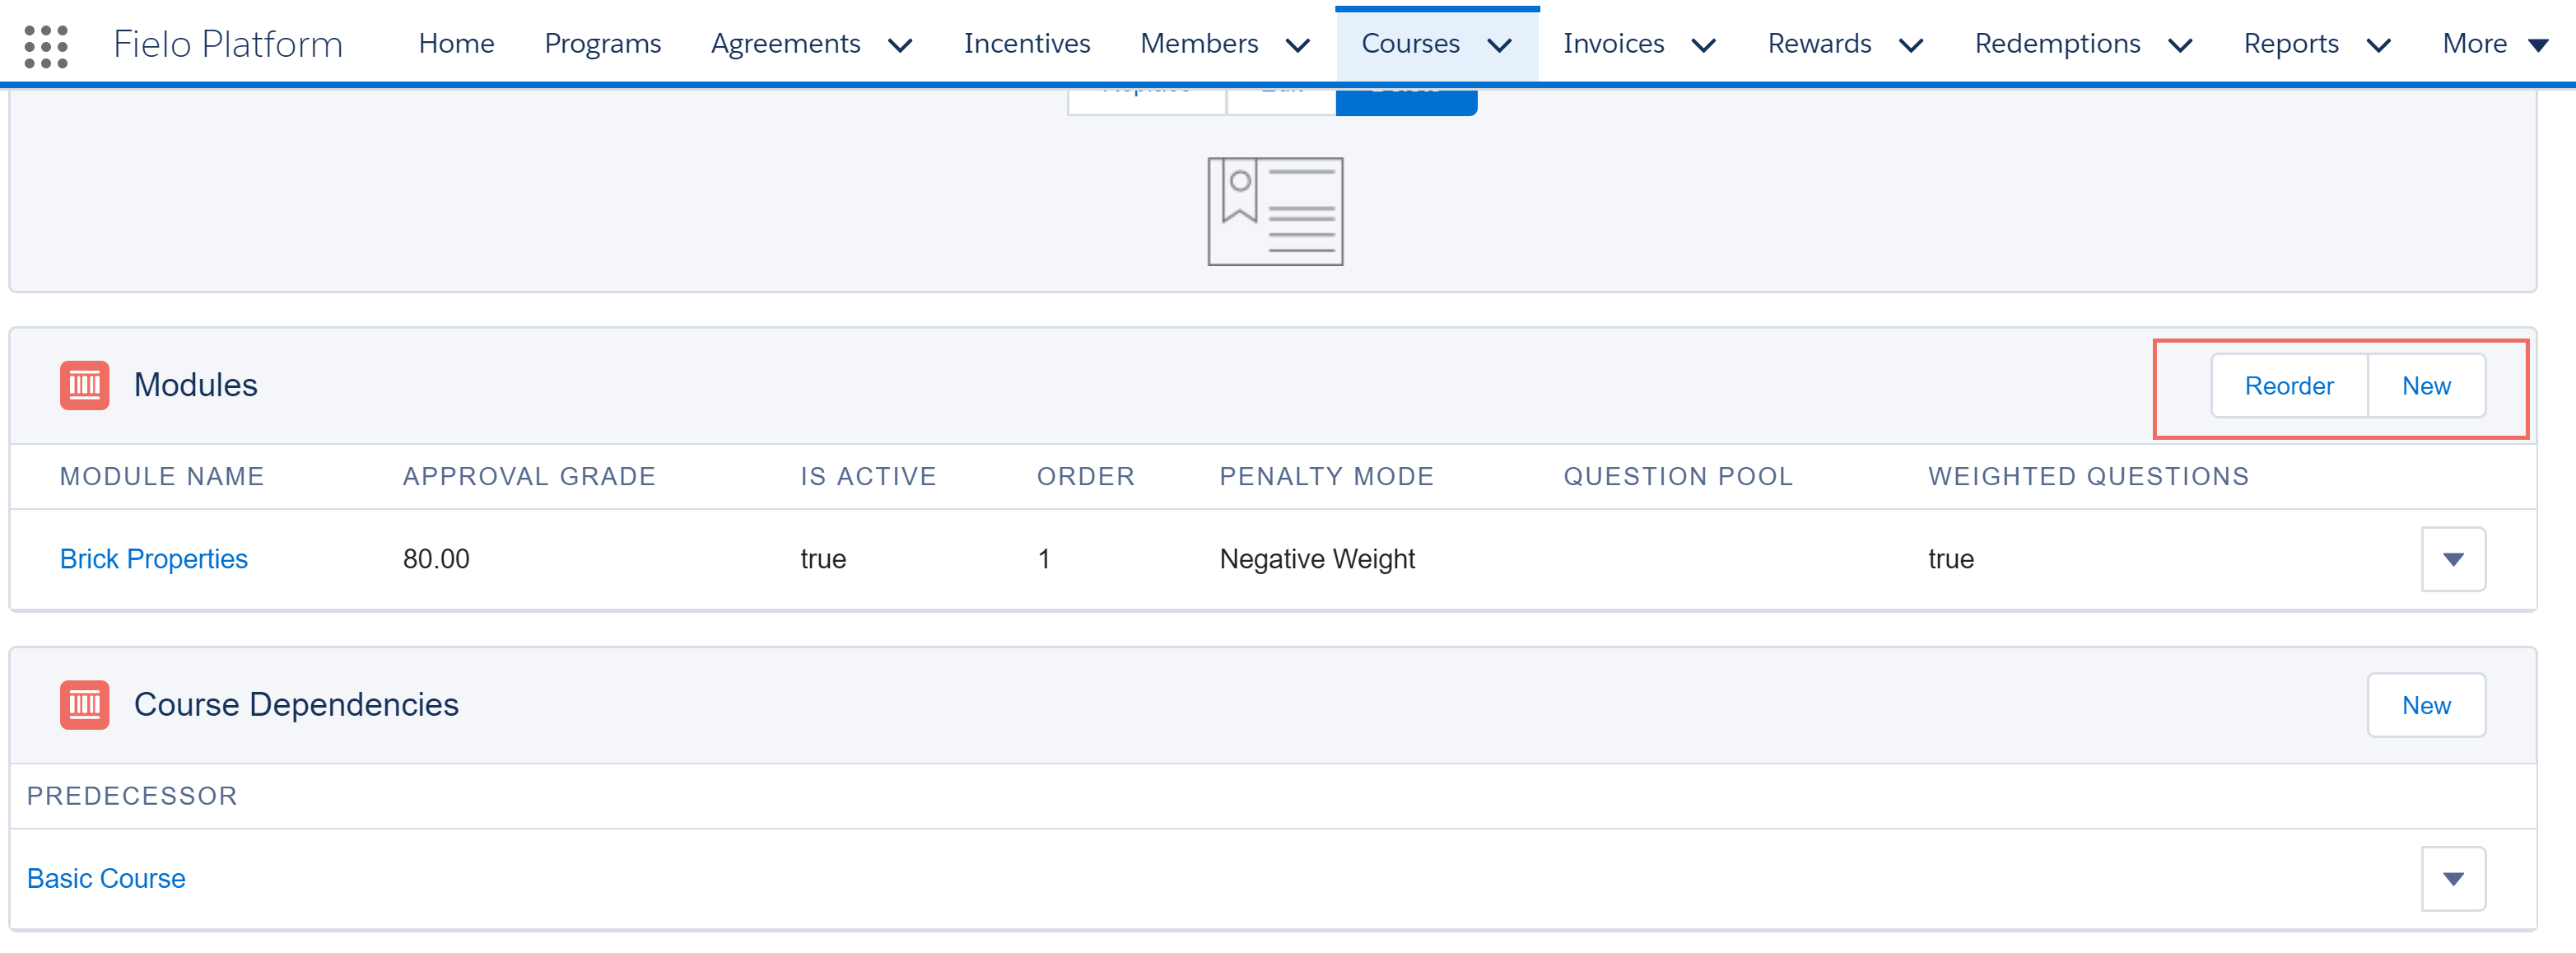
New Module
Fill in the following fields:
- Module Name: Give your module a clear and catchy name which your Members will recognise and understand. This field has an 80 character limit.
- Description: Clearly describe your Module for internal use, so that people in your company know what the aim and intent of it is. This field has a maximum limit of 255 characters.
- External Description: Clearly describe your Module for external use, so that Members know how it works and how it will help them progress. This field has a maximum limit of 255 characters.
DescriptionsHere, the External Description is displayed in the list of Modules and the *Description is diplayed when you select theModule** you desire.
- Approval Grade: This is the minimum percentage your Member needs to get in the Module to progress to the next stage of the course. This value can be anything from 0 to 100.
- Attempts Allowed: This refers to the number of attempts each Member can make of the Module. Let's say the number is 2, if they fail to pass twice, they will no longer be able to take it. If this field is left blank, the Member can take the Module an indefinite number of times, until the course is made inactive or has reached its end date.
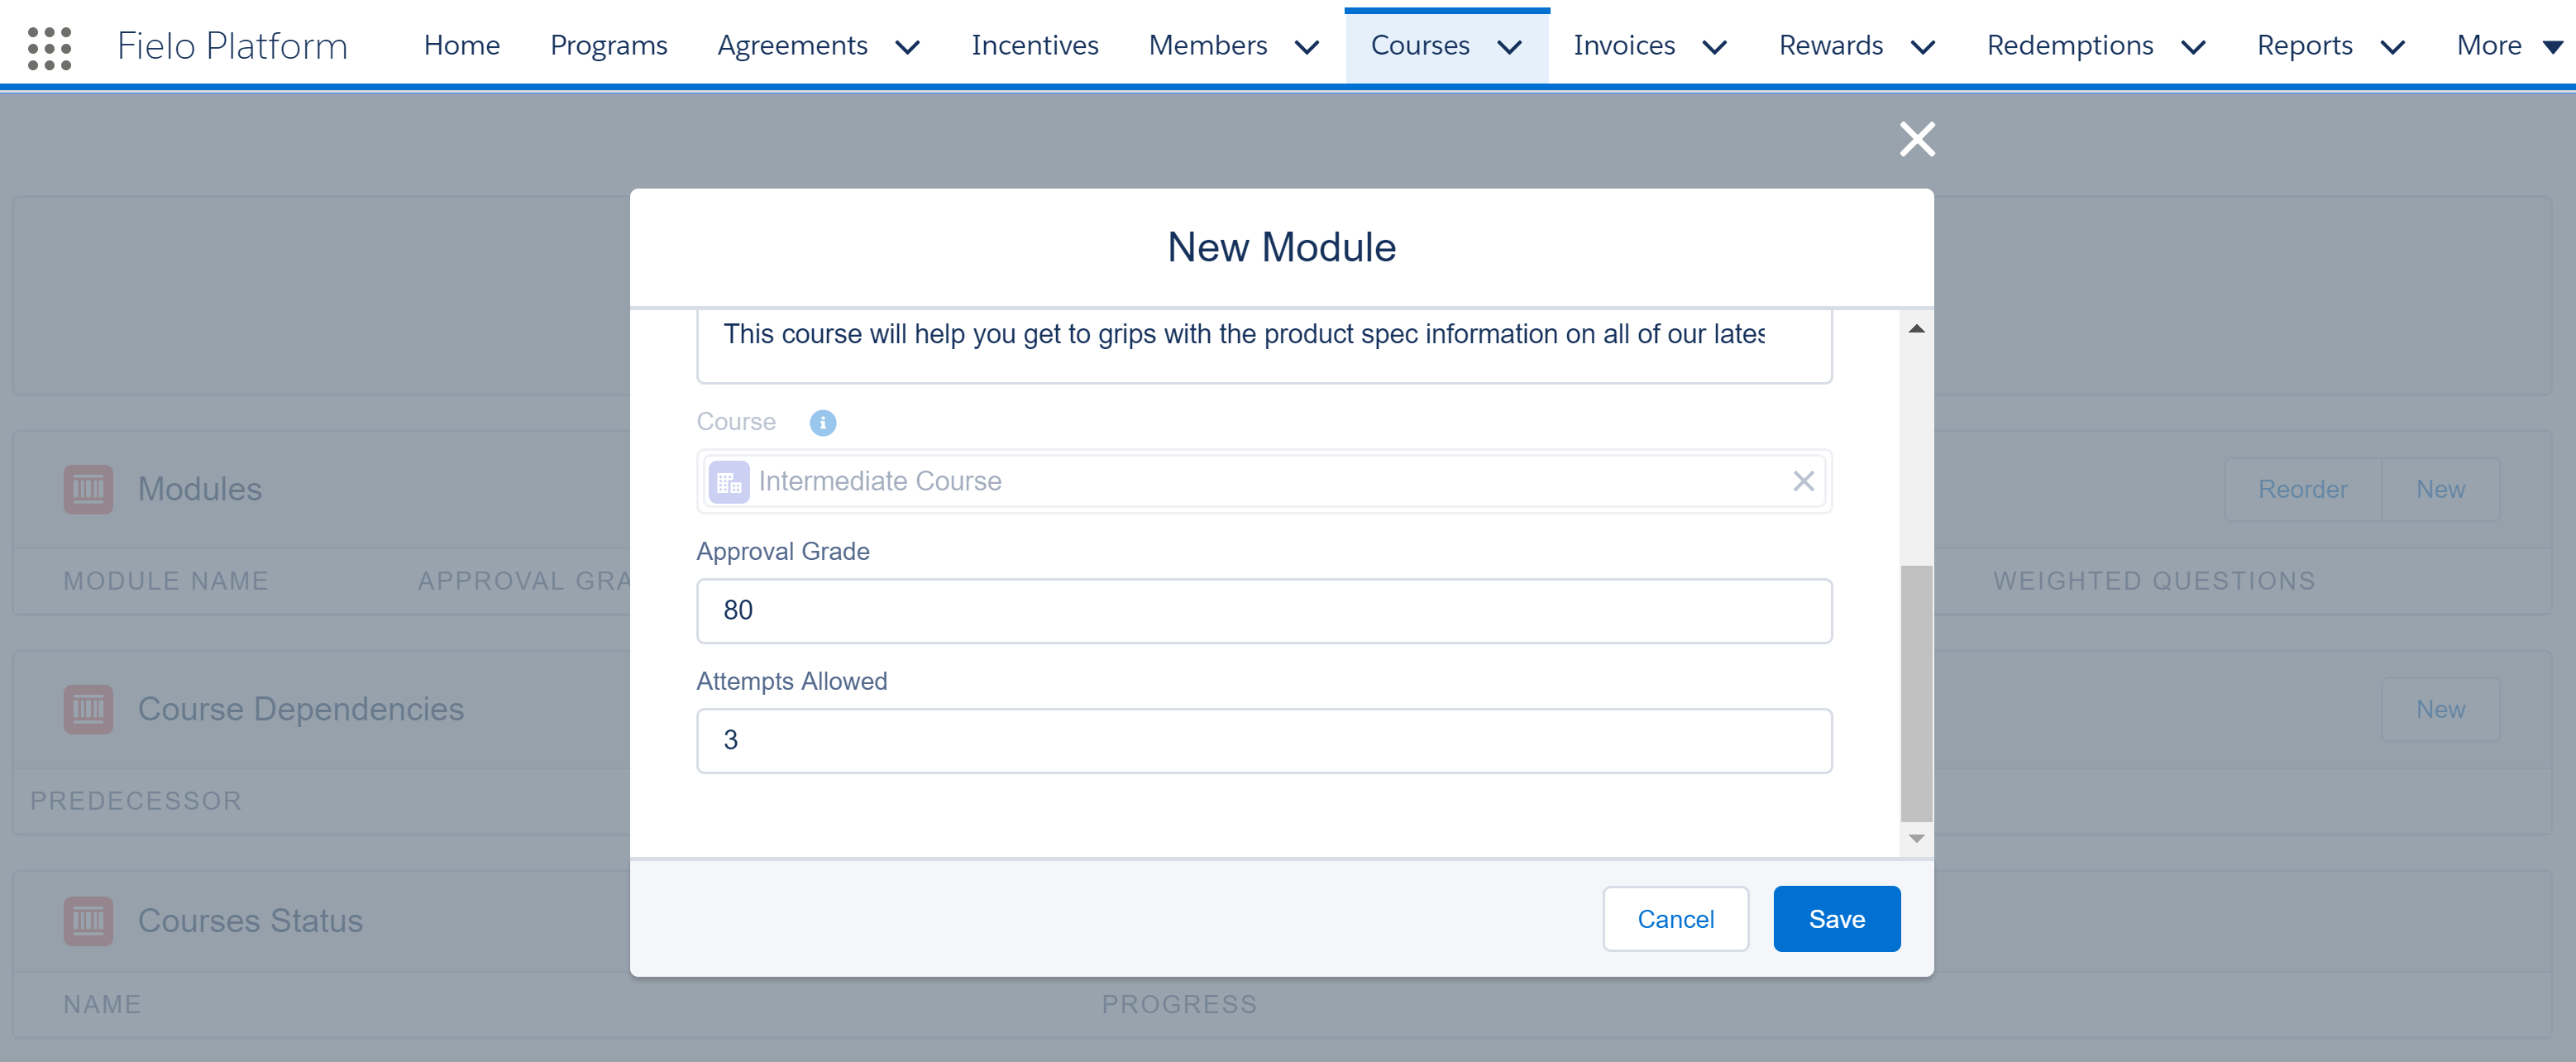
Creating a New Module
After clicking Save, you'll be directed to the Module overview page.
Module Overview
Here you'll see all of the information you inputted above.
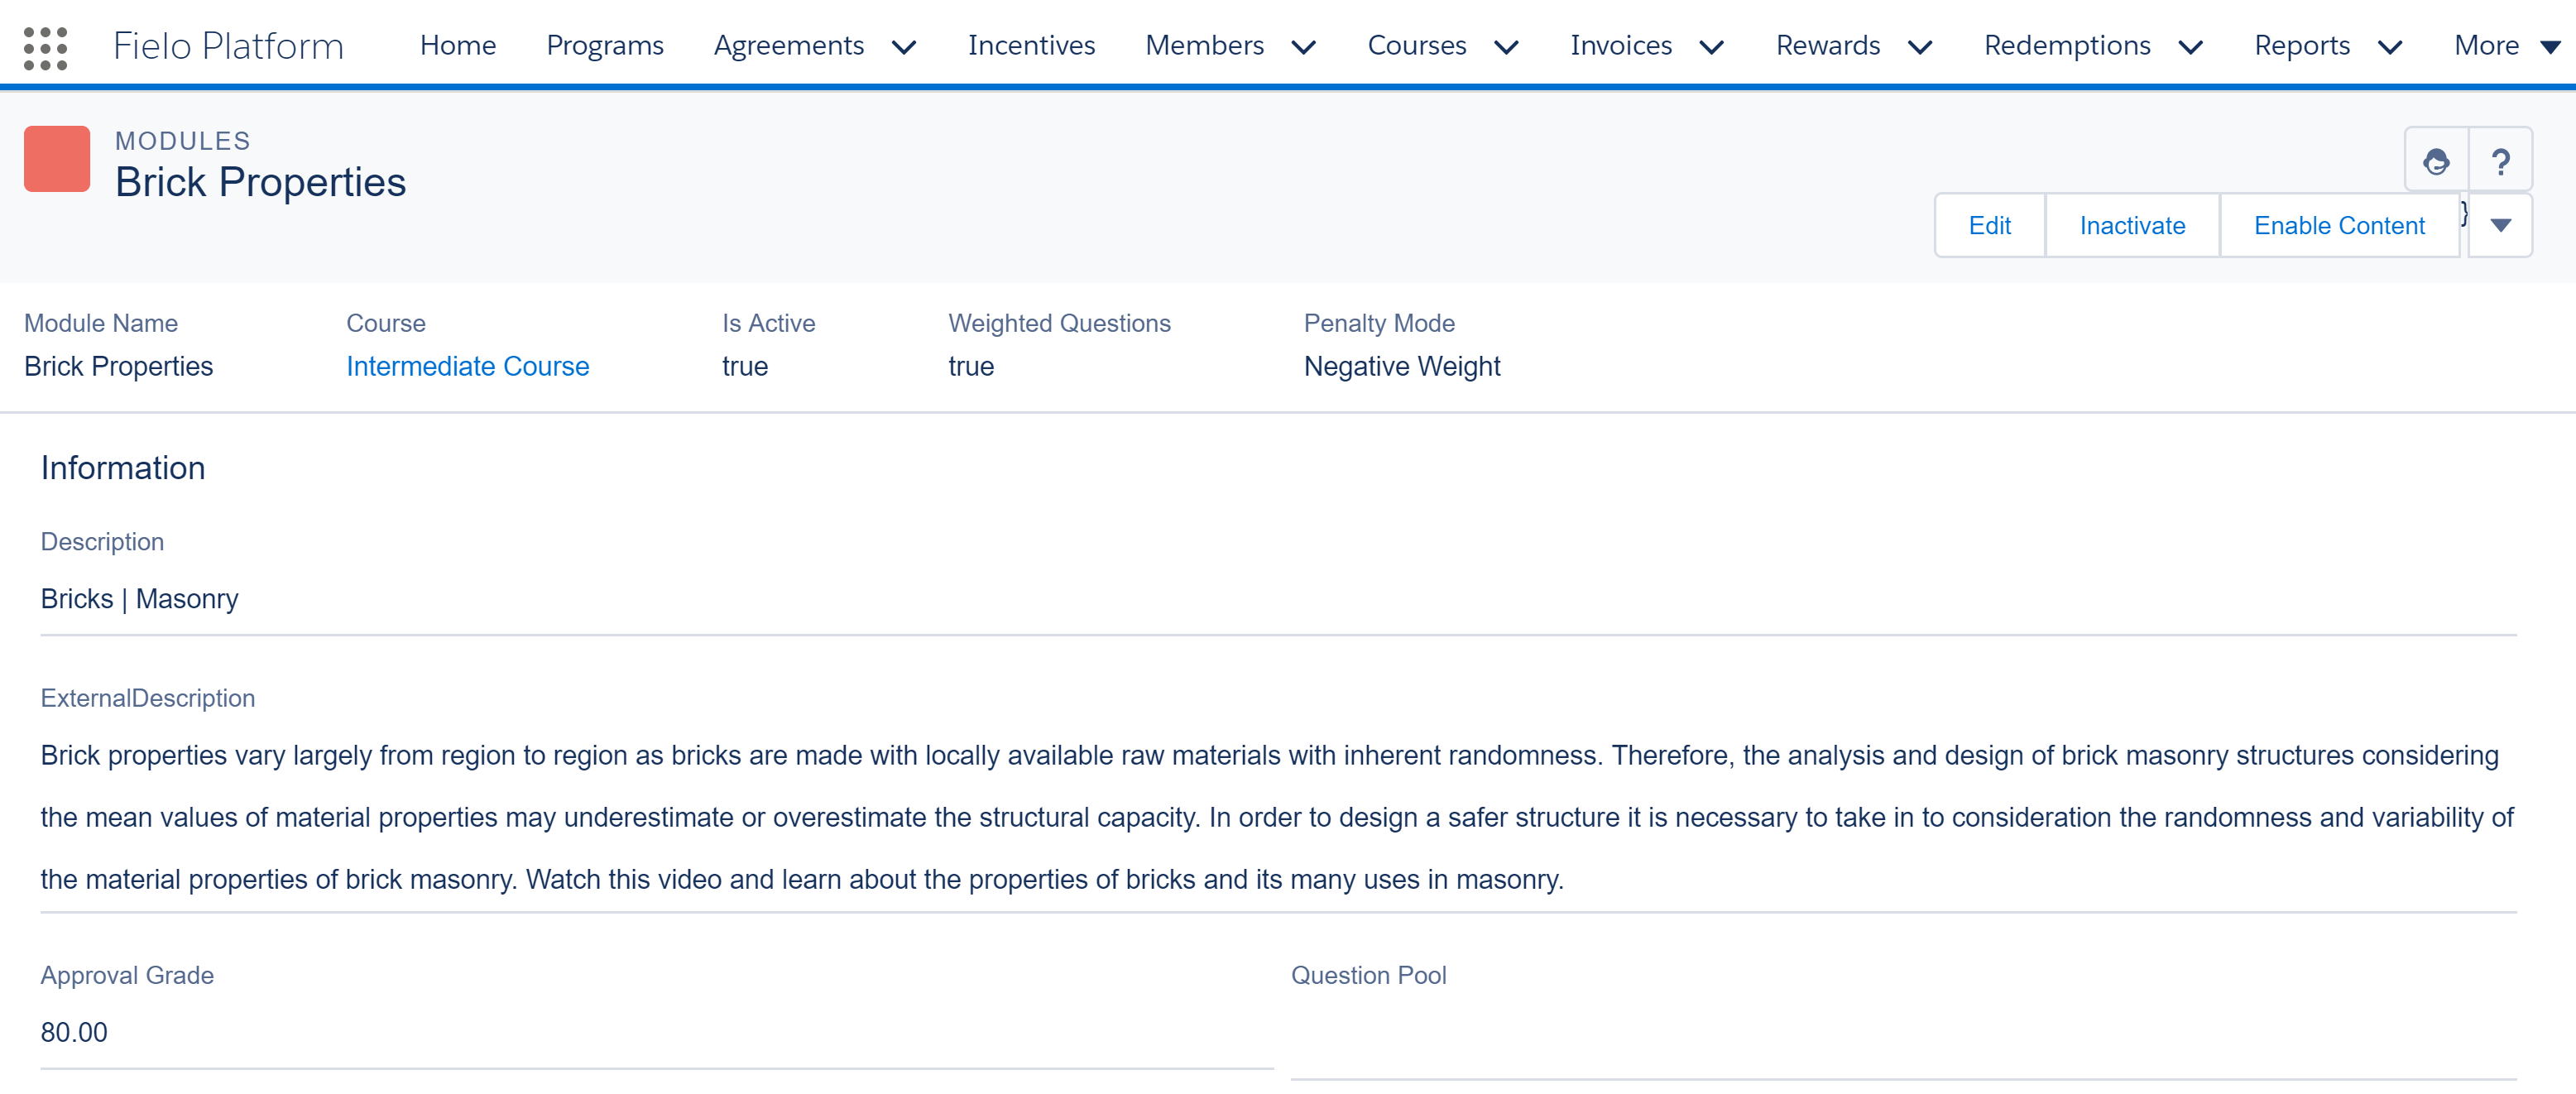
Module Overview
As you scroll down, you will be given the option to upload an Image to accompany the Module - this will be seen from the Member portal.
The next related list will give you the option to add Questions. For detailed instructions on how to go about creating Questions, refer to Create Questions.
Module Dependencies
The Module Dependencies box refers to whether the Member needs to have taken another Module before they can proceed to this one. If you would like this to be the case, select New on the related list and type in the name of the Module you'd like them to take first, in the Predecessors box. Then press Save.
Media (CMS Only)
When using Fielo CMS for your Member portal, the Media box allows you to add videos to your Module. This is so that Members can watch a video before they answer the Questions you've set. For Media to be visible, make sure you've clicked Enable Content at the top-right corner of the Module Record View.
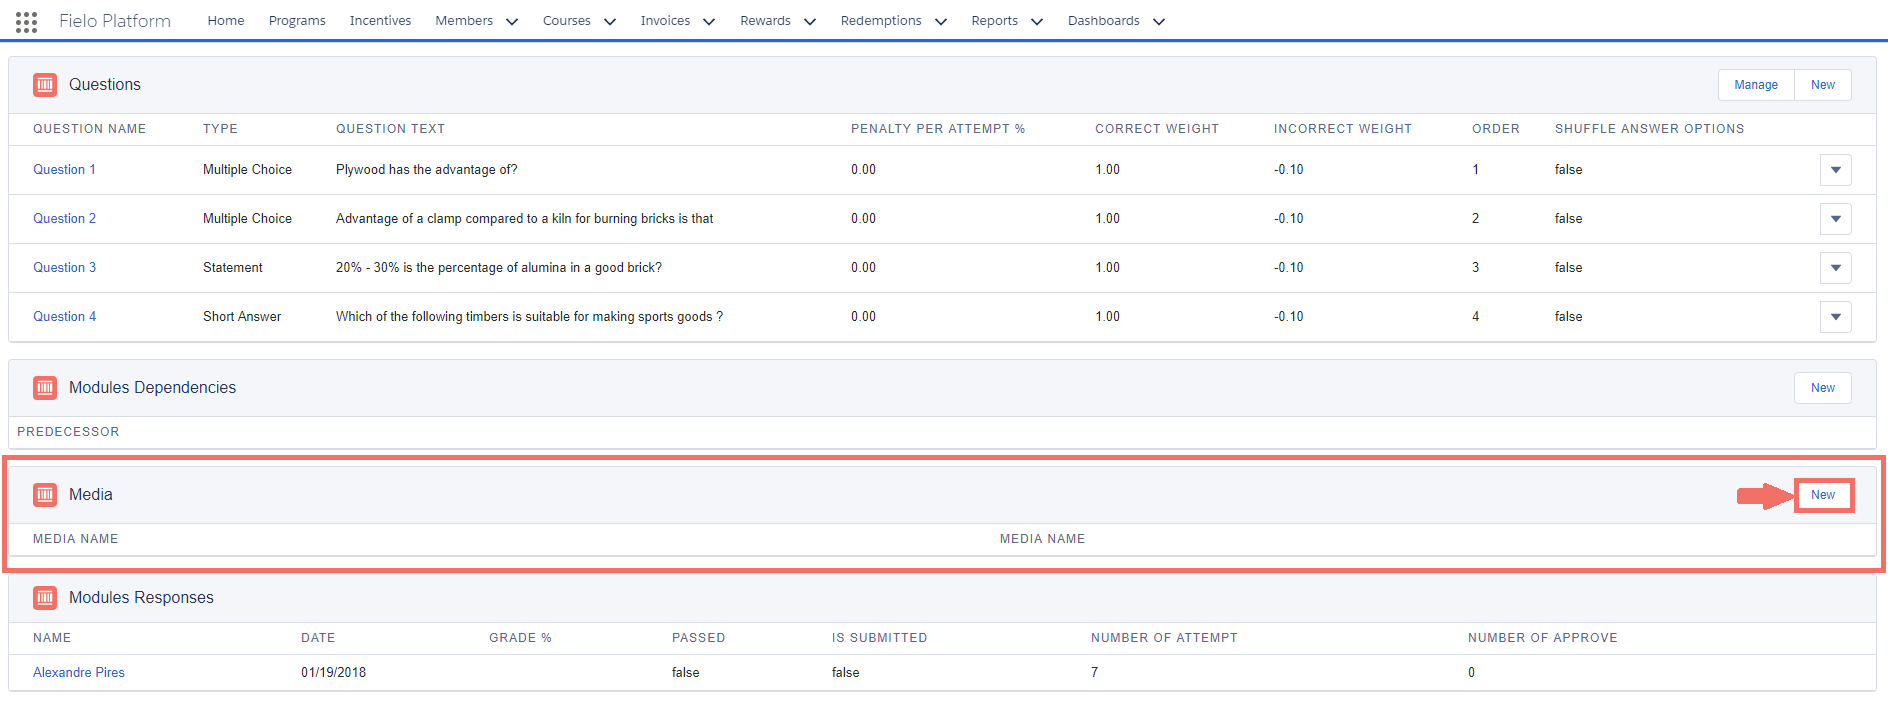
Add Media
Although video is the most common Media option, you can also upload sound files or images. Pick the content type you want to go with and follow the steps to upload your file.
Content (SF Communities Only)
When using Salesforce Communities for your Member portal, you can use the Content and ContentType fields in Module to add content to your course. Members will see this content when accessing Course Modules in the Fielo Courses Lightning Component on their portal. Your content can be in the form of a YouTube video, PDF, image or link.
Before getting started, you will need to be able to view and edit the Content (type: Text) and ContentType (type: Picklist) fields in Module. For details on Page Settings and how to manage them, see our doc.
Once you've added Content and ContentType to your Module Page Settings, you can go ahead and add your content. Go to the detail page of the Module you'd like to edit. Click Edit and scroll to the Content and ContentType fields.
If your content is a PDF, image or web link, enter the URL of the content into the Content field and choose the content type in the ContentType picklist.
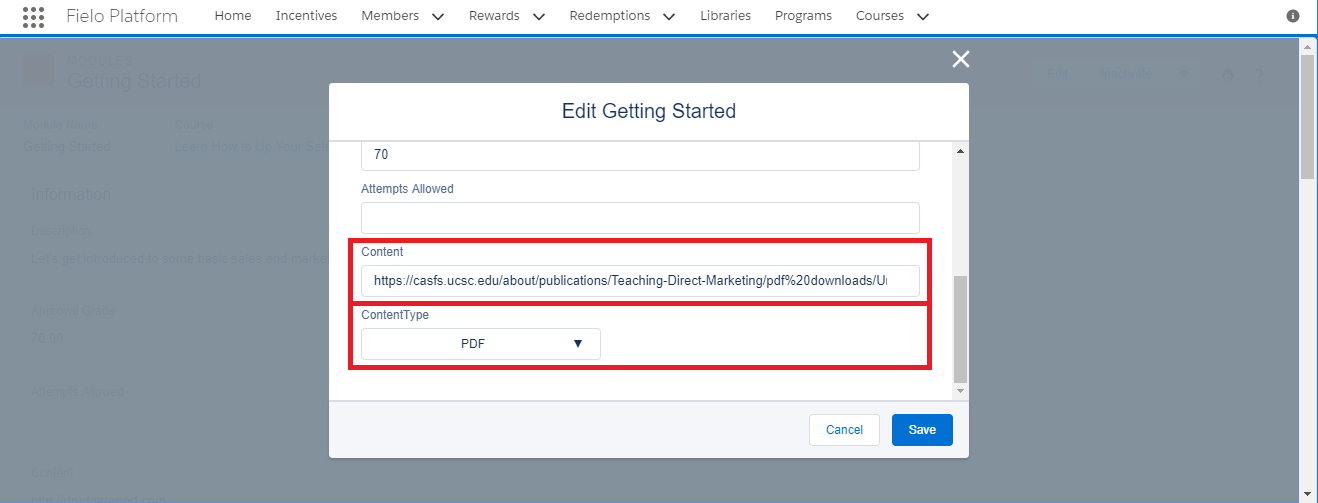
Edit Module - Content and ContentType
If your content is a YouTube video, simply enter the YouTube video ID into the Content field. This ID can be found after watch?v= in the URL of the video. Then, in the ContentType picklist, choose Youtube Video.
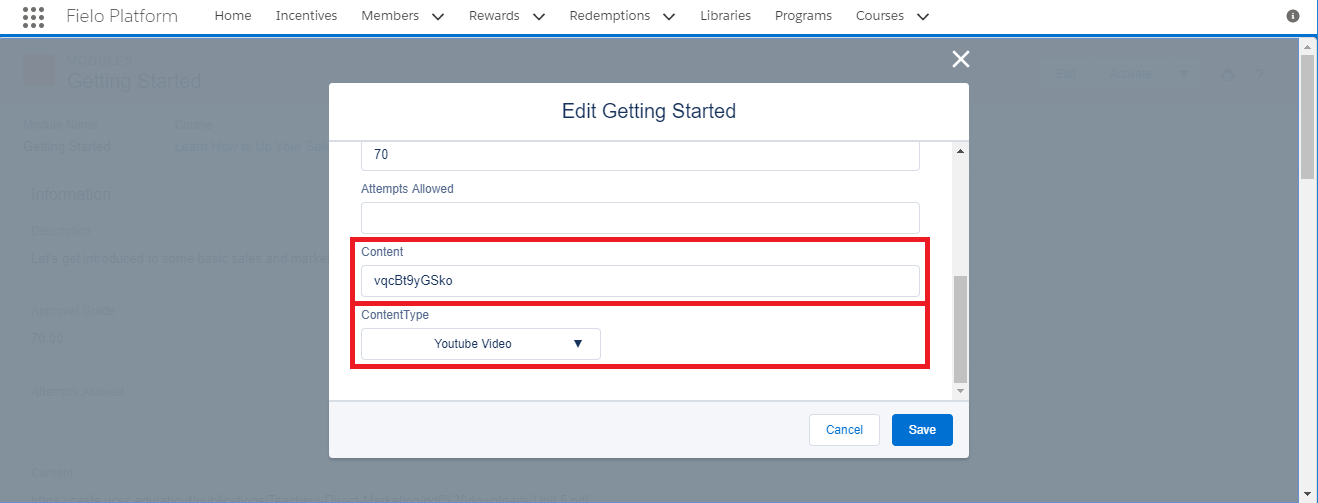
Edit Module - Content and ContentType for a YouTube video
When you're finished, click Save.
Module Responses
The Module Responses field will show all of the Members who have taken or are in the process of taking this Module as well as their current Progress.
Activating and Inactivating your Module
Once you have Created your Questions and you're happy with the structure and setup of the Module, you can activate it. Then, as soon as the Course is enabled, this Module will be available for your Members to take. All active Modules contribute to your Member's progress in the Course.
Example:
An Active Course has four Modules and all of them are Active. When the Member completes the first one, his or her progress in the course will be 25% (1/4).
To enable your Course, click Activate in the upper right corner of the Module overview. Once activation is confirmed, the Activate button will be replaced by an Inactivate button.
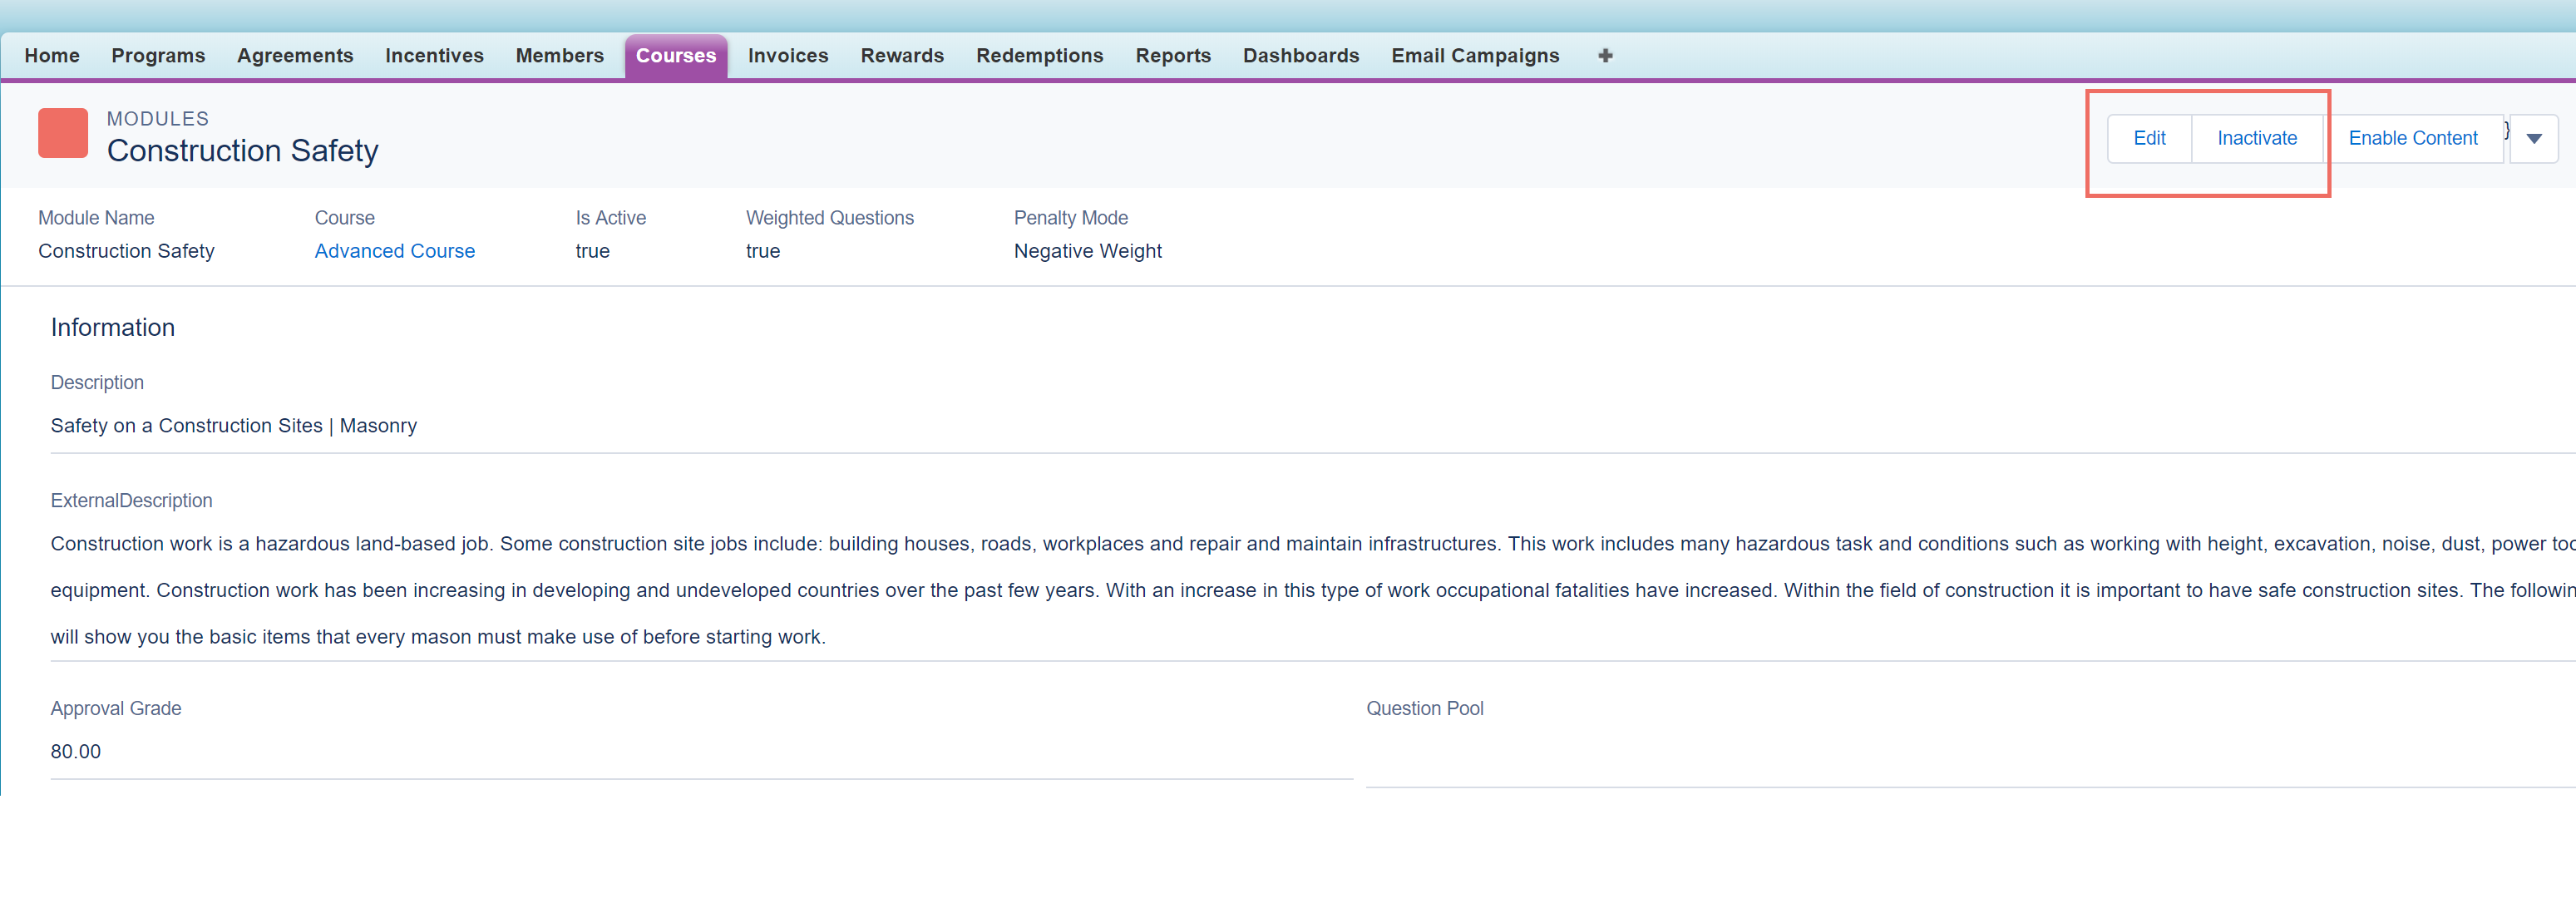
Inactivating a Module
The Module can be disable at any time, even if it has already been taken by any of the Members.
Editing an Inactive ModuleWhen disabling a Module, some fields can be edited, like Module Name and Description, but there are some fields that are fundamental to the course structure and therefore cannot be changed if a Member has already taken the Module. These fields are: Attempts Allowed, Approval Grade, Penalty Mode, Question Pool, Attempts Allowed Per Question and Weighted Questions.
For the same reason, you're not allowed to create new Questions and new Answer options or delete Questions and delete Answer options.
It is possible to edit Questions and Answer options when the Module is Inactive, but not the Correct Weight, Penalty per Attempt and Incorrect Weight.
Reordering Modules
Once all of your Modules have been created, you might want to change the order they have appeared in. In the Course overview Page, in the Modules box, you can find a Reorder button. Once you've pressed this button, by dragging the Modules and dropping them in the desired position, you can define the order that the Modules will appear in during the course.
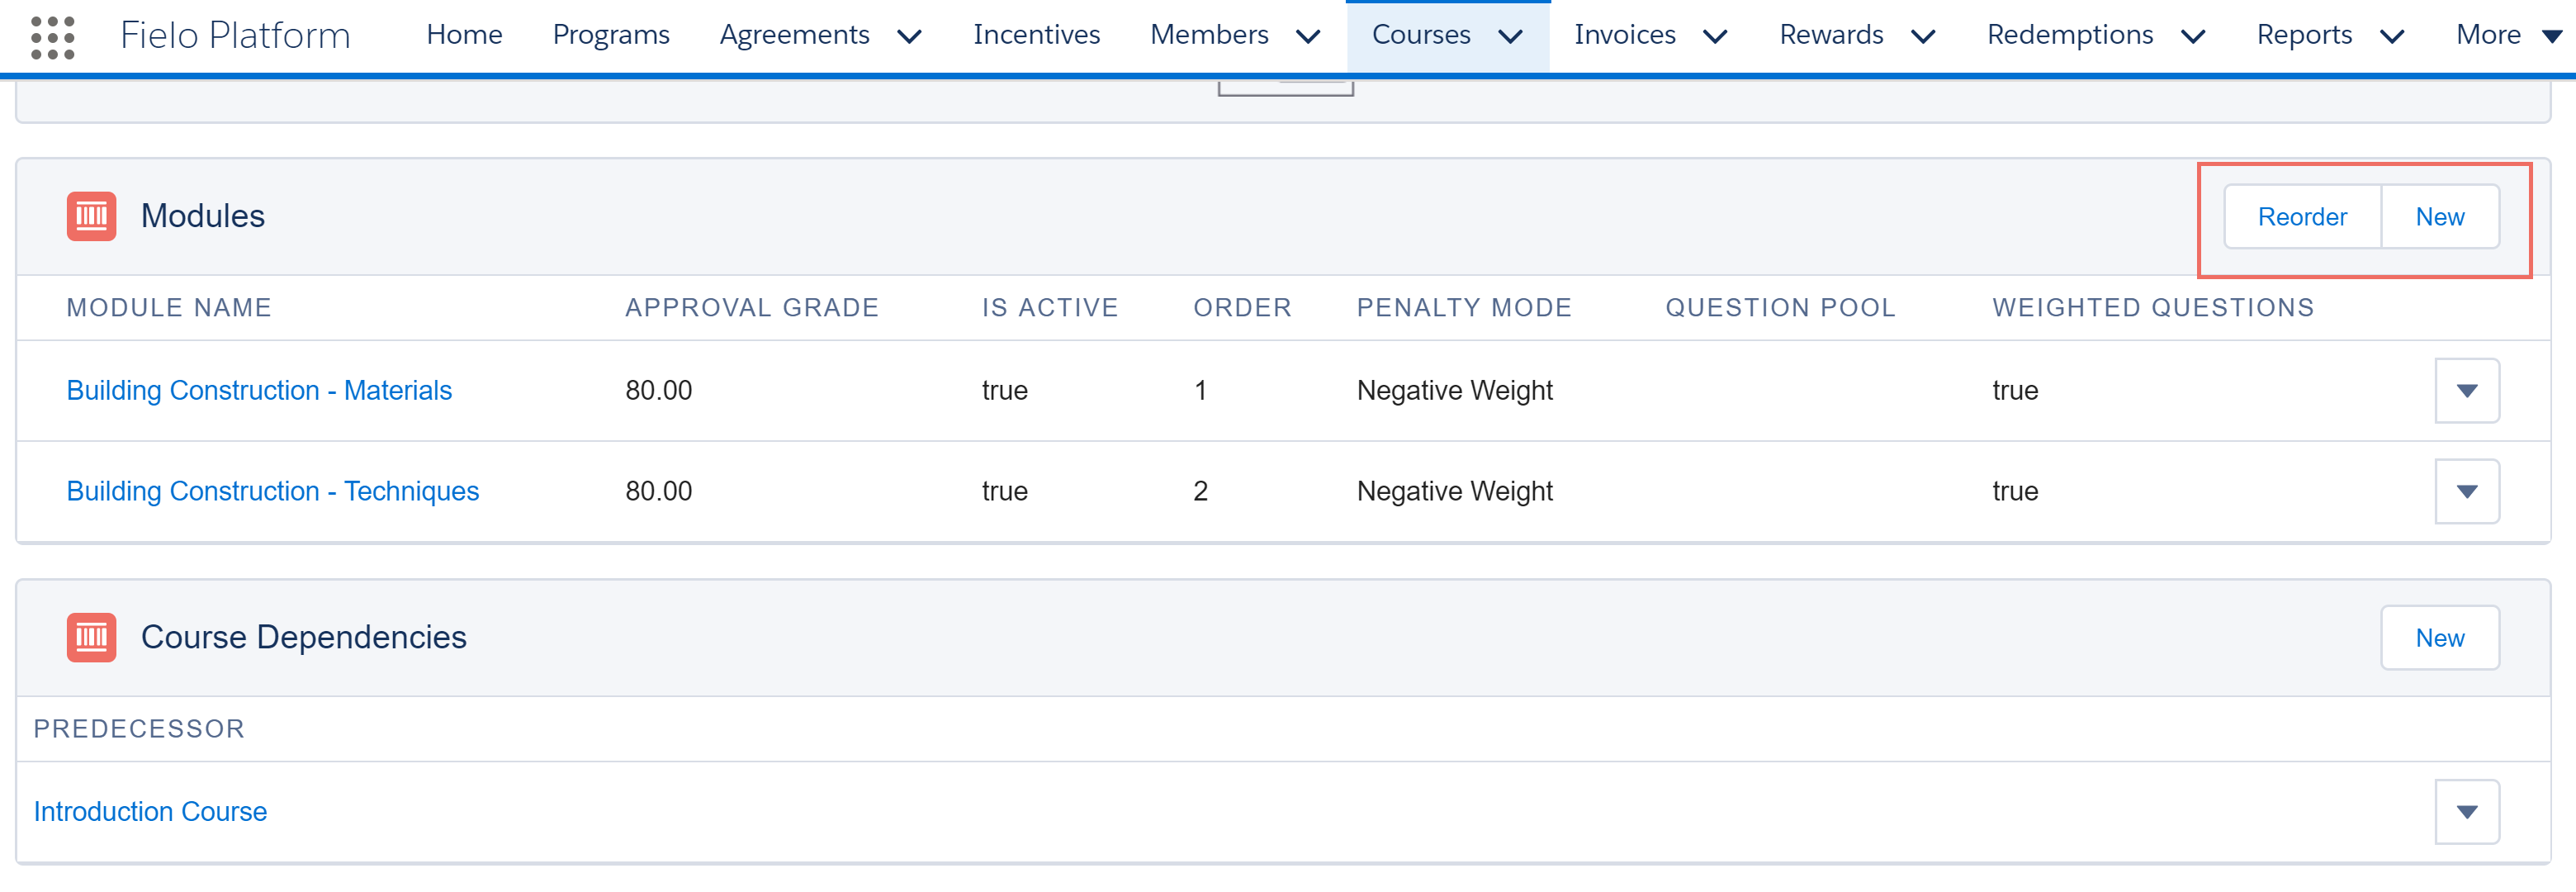
Reordering Modules
Updated over 1 year ago